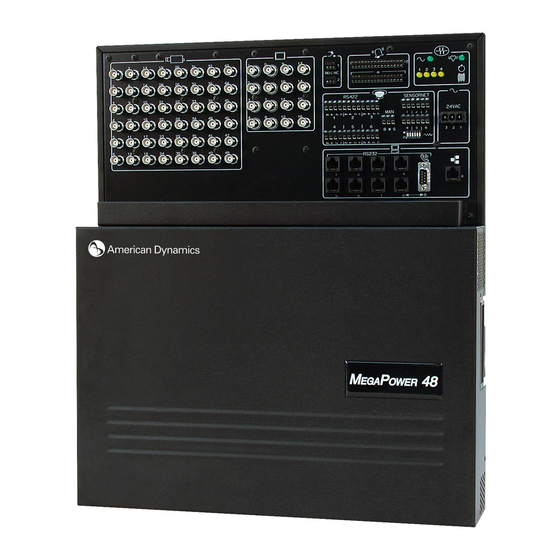
American Dynamics 48 Plus Installation And Operation Manual
For the megapower 48+
Hide thumbs
Also See for 48 Plus:
- Datasheet (4 pages) ,
- Installation manual (64 pages) ,
- Specifications (15 pages)
Table of Contents
Advertisement
Quick Links
Download this manual
See also:
Installation Manual
Advertisement
Table of Contents

Related Manuals for American Dynamics 48 Plus


Summary of Contents for American Dynamics 48 Plus
- Page 1 Easy48 for the MegaPower Installation and Operation Manual...
-
Page 2: Warranty Disclaimer
Easy48 Warranty Disclaimer American Dynamics Video Products Division makes no representation or warranty of the contents of this manual and disclaims any implied warranties of merchantability or fitness. American Dynamics Video Products Division reserves the right to revise this manual and change its content without obligation to notify any person of these revisions. -
Page 3: Table Of Contents
Contents Warranty Disclaimer ... 2 Software License Agreement ... 2 Easy48 for the MegaPower 48+ ... 5 Compatibility ... 5 Related Documents ... 5 Support Services ... 5 Installing Easy48 ... 6 Connecting a PC to the MegaPower 48+ ... 6 Starting Easy48 ... - Page 4 Easy48 Users/Priorities ... 21 Creating Users Profiles ... 21 Creating Keyboard Profiles ... 22 Configuring Priority Levels ... 22 Switching - Tours ... 23 Creating a New Tour ... 23 Deleting a Tour ... 23 Editing Steps in a Tour ... 24 Switching - Salvos ...
-
Page 5: Easy48 For The Megapower 48
A variety of support services are available to help you to obtain optimal performance from your MegaPower 48+ system. If you have a question about system operation and you cannot find the answer in this document, please contact American Dynamics Video Products Division or visit the American Dynamics website at www.americandynamics.net. Installation and Operation Manual... -
Page 6: Installing Easy48
Easy48 Installing Easy48 Easy 48 can be installed on any PC running Windows 98SE, ME, 2000, NT or XP, with a minimum specification for speed performance of 800 Mhz, 256 Mb RAM, 1 Gb of free HDD. It cannot be installed on a PC running Windows 95. To install the software, follow the steps below: 1. -
Page 7: Starting Easy48
Installation and Operation Manual Starting Easy48 When Easy48 is installed, a system access password is created. This password must be entered every time Easy48 is opened. This prevents unauthorised access to the utility. When Easy48 is opened, a password dialog is displayed: Enter the system access password and click the OK button. -
Page 8: Menu Bar
Easy48 Menu Bar The menu bar has four pull-down menus. • The File menu is used to open new and existing site files, save changes that have been made to a site file and to download data to and upload data from the connected MegaPower 48+ units. It is also used to exit end of a session. -
Page 9: Opening An Existing Data File
Installation and Operation Manual Opening an Existing Data File To open an existing data file, either select the Open option from the File menu or click the Open button on the toolbar. An Open dialog is displayed. Browse for the *.sc file (Easy48 Matrix Site Configuration File) that is to be opened and click Open. -
Page 10: Uploading Data
Easy48 To complete this dialog, follow the steps below: 1. Use the Download Task drop down list to select what information is to be downloaded to the MegaPower 48+ system. You can select to download all site data, download all site data with presets, download the licence key or to set time and date only. -
Page 11: System Warnings
System Warnings The Warnings screen displays warnings and important system information. It is important to follow any warnings or advice given on this screen in order to obtain optimal performance from the MegaPower 48+ system. To display the Warnings screen, click the Entire Site node on the left-hand side of the display area. In the resulting screen, click the Warnings tab. -
Page 12: System - Multi Matrix
Easy48 System - Multi Matrix A MegaPower 48+ system can be anything from a single unit (48 video inputs, 16 video outputs) to a system comprising a primary unit with six secondary units (288 video inputs, eight full cross point switched monitor outputs and seven additional monitor outputs on each secondary unit for viewing of video from that secondary unit only). -
Page 13: Secondary Configuration
Secondary Configuration The fields in the Secondary Configuration section of the screen must be completed with details about the secondary units in the MegaPower 48+ system. The first field is Number of Secondaries. This drop down list is populated with options depending on the Operation Mode that has been selected. -
Page 14: System - Time/Date
Easy48 Ports are listed by port reference. In this reference, the first character is the matrix reference (X = primary unit, A-F = secondary units) and the second character is the RS232 port number (1-8) on that matrix. If a port expander has been fitted to a RS232 port, the Device field for that port must be set to Expander. -
Page 15: System - Pager Profile
System - Pager Profile The Pager Profile screen enables the programming of phone numbers and personal identification numbers for up to 64 paging profiles. To display this screen, expand the System node on the left-hand side of the display area and then click the Pager Profile node. -
Page 16: System - Options
Easy48 System - Options The Options screen enables the user to specify a number of system preferences, such as language, whether the system will log alarm and status messages or detect video loss and whether a peripheral interface port (PIP) should be enabled for monitoring of network video recorders. -
Page 17: Cameras - Titles/Psuedos
Cameras - Titles/Pseudos The Titles/Pseudos screen enabled the user to specify the identification number ( pseudo number ) that will be used to select each video input when using a system keyboard. The screen also enables each video input to be given 16 character alphanumeric titles, for the on-screen justification of titles to be specified and video-loss detection to be enabled or disabled. -
Page 18: Cameras - Preset Titles
Easy48 Cameras - Preset Titles The Preset Titles screen permits programming of 16 character alphanumeric titles for use with camera preset scenes. These preset titles are displayed in place of the camera titles in the on-screen display when the associated preset is called. -
Page 19: Cameras - Camera Status
2. Enter the number of the preset title (1-4096) that is to be displayed when the preset is called. The text box at the top of the screen previews the preset title that will be displayed. Ensure this is correct before selecting another field. -
Page 20: Monitors
Easy48 Monitors To display the Monitors screen, click the Monitors node on the left-hand side of the display area. This screen is used to arm monitors for response to alarms. The number of monitors displayed in this screen depend on how the Multi Matrix screen was completed. Monitors are listed by their monitor identification number, with port references shown in brackets. -
Page 21: Monitor Blocks
Monitor Blocks When an arming option with a block display method has been selected, the Block # field is activated. This field is used to add the monitor to a block. A monitor block can consist of any set of connected monitors—the monitors do not need to be contiguous. -
Page 22: Creating Keyboard Profiles
Easy48 Creating Keyboard Profiles If the User IDs checkbox is unticked in the Options screen, use the lower half of the Users/Priorities screen to set a priority level for each system keyboard. The priority level issued defines the system functions that will be able to be performed from the keyboard. -
Page 23: Switching - Tours
Switching - Tours A system tour is a programmable sequence of camera views that can be called for display on a single monitor. Using the Tours screen, 64 system tours can be programmed for callup to any monitor at any time by keyboard operator commands or by automatic timed events. -
Page 24: Editing Steps In A Tour
Easy48 Editing Steps in a Tour The following parameters can be edited for every step in a tour. Steps must be edited one at a time—the next step is not enabled until the previous one has been completed. To edit a field, double-click in it and set as required. Field Description Link... -
Page 25: Switching - Salvos
Switching - Salvos The Salvos screen is displayed by expanding the Switching node on the left-hand side of the display area and then clicking on the Salvos node. This screen enables programming of 64 system salvos. Each salvo is programmed for simultaneous display of up to 16 cameras on a contiguous group of monitors. -
Page 26: Editing Entries In A Salvo
Easy48 Editing Entries in a Salvo The following parameters can be edited for every entry in a salvo. Entries must be edited one at a time—the next entry is not enabled until the previous one has been completed. To edit a field, double-click in it and set as required. Field Description Link... -
Page 27: Calling Monitor/Contact Tables Using Timers
2. To copy the alarm monitor/contact groups and system tours settings from a timer that has already been programmed, highlight the timer that is to be copied in the current timer list and tick the Copy Current Timer checkbox. Otherwise, leave this checkbox unticked. -
Page 28: Partitioning - Keyboard/Monitor
Easy48 Partitioning - Keyboard/Camera The Keyboard - Camera screen is displayed by expanding the Partitioning node on the left-hand side of the display area and then clicking on the Keyboard - Camera node. Use this screen to define which individual cameras each keyboard can call to view on a monitor. -
Page 29: Partitioning - Keyboard/Control
To change keyboard to monitor access rights, follow the steps below: 1. Double-click in the appropriate cell. A drop down list is displayed. For example in the figure above, access to monitor 8 (X08) is being granted to keyboard X08. 2. -
Page 30: Partitioning - Monitor/Camera
Easy48 To change keyboard to camera control rights, follow the steps below: 1. Double-click in the appropriate cell. A drop down list is displayed. For example in the figure on the previous page, control rights to camera A09 (pseudo number 9) are being granted to keyboard X06. 2. -
Page 31: Alarms
Alarms The MegaPower 48+ system has four categories of alarms: 1. Patch Panel Alarms are alarm contacts that are wired directly to the alarms section of a MegaPower 48+ connection panel. There can be up to 16 patch panel alarm inputs per unit (maximum of 112 alarms with six secondary units). 2. -
Page 32: Alarm Configuration - Alarm Messages
Easy48 Alarm Configuration - Alarm Messages The Alarm Messages screen is displayed by expanding the Alarm Configuration node on the left-hand side of the display area and then clicking on the Alarm Messages node. This screen enables programming of alphanumeric messages for display when an alarm contact is received. -
Page 33: Alarm Triggers - Patch Panel
Installation and Operation Manual Alarm Triggers - Patch Panel Patch panel alarms are alarm contacts that are wired directly to the alarms section of a MegaPower 48+ connection panel. There can be up to 16 patch panel alarm inputs per unit (maximum of 112 alarms with six secondary units). The Patch Panel Alarm Setup screen is used to create an alarm response for each connected patch panel alarm. -
Page 34: Alarm Triggers - Serial
Easy48 Alarm Triggers - Serial Serial alarms are alarm contacts routed to a RS232 port on the MegaPower 48+ patch panel via an AD2096A Alarm Interface Unit (AIU). Each connected AD2096A unit can be connected to 48 alarm inputs. A maximum of 512 serial alarm inputs can be connected. - Page 35 Field Description Link This field enables the user to link the video associated with consecutive alarms to form link salvos. If Yes is selected, the next alarm is linked to the previous entry in a link salvo. If No is selected, the next alarm is either not linked to the previous entry, or is the last entry in a link salvo.
-
Page 36: Alarm Associations - Choose Alarm Association Set
Easy48 Alarm Associations - Choose Alarm Association Set The Alarm Associations section of four alarm types (i.e., patch panel, dome, serial and video loss) can have up to ten monitor/alarm contact association tables that can be programmed for different associations appropriate for different times of day. These association tables are linked to times and days through the Timers screen (see page 26). -
Page 37: Alarm Associations - Patch Panel
Alarm Associations - Patch Panel The Associate Patch Panel Alarms screen is displayed by expanding the Alarm Associations node (inside the Alarm Configuration node) on the left-hand side of the display area and then clicking on the Patch Panel node. Use this screen to configure ten monitor/alarm contact association tables which are used to define which individual monitors will display which individual patch panel alarms. -
Page 38: Alarm Associations - Domes
Easy48 Alarm Associations - Domes The Associate Dome Alarms screen is displayed by expanding the Alarm Associations node (inside the Alarm Configuration node) on the left-hand side of the display area and then clicking on the Domes node. Use this screen to configure ten monitor/alarm contact association tables which are used to define which individual monitors will display which individual dome alarms. -
Page 39: Alarm Associations - Serial
Alarm Associations - Serial The Associate Serial Alarms screen is displayed by expanding the Alarm Associations node (inside the Alarm Configuration node) on the left-hand side of the display area and then clicking on the Serial node. Use this screen to configure ten monitor/alarm contact association tables which are used to define which individual monitors will display which individual serial alarms. -
Page 40: Alarm Associations - Video Loss
Easy48 Alarm Associations - Video Loss The Associate Video Loss Alarms screen is displayed by expanding the Alarm Associations node (inside the Alarm Configuration node) on the left-hand side of the display area and then clicking on the Video Loss node. Use this screen to configure ten monitor/alarm contact association tables which are used to define which individual monitors will display which individual video loss alarms. -
Page 41: Appendix A: Software License Agreement
Appendix A: Software License Agreement 1. General. Software is being licensed to the Customer pursuant to the following terms and conditions, which supplement any purchase or lease agreement (the “Equipment Agreement”) between Customer and Sensormatic Electronics Corporation (“SEC”). By accepting receipt of, or by using, such Software, the Customer agrees to be bound by the terms of this Software License Agreement (the “License Agreement”). - Page 42 Easy48 6. Limited Warranty; Limitation of Liability. The provisions of the Equipment Agreement respecting maintenance and warranty will not apply to the Software or the Documentation, unless specifically stated otherwise and agreed to in writing by both parties. SEC’s sole warranties with respect to the Software and Documentation are that (i) SEC has title to the Software and Documentation and/or the right to grant Customer the license set forth in this License Agreement and (ii) the magnetic media on which the Software is recorded is free from defects in materials and workmanship under normal use.
-
Page 43: Appendix B: Software Upgrade And Licensing
Appendix B: Software Upgrade and Licensing It is possible to upgrade existing MegaPower 48 units to MegaPower 48+ units by purchasing a software upgrade from American Dynamics. The software upgrade can then be installed by following the instructions that accompany the software. - Page 44 Please visit our website for more information www.americandynamics.net © 2004 American Dynamics Product specifications subject to change without notice Certain product names mentioned herein may be trade names MP-EASY48-HB-1 and/or registered trademarks of other companies...