
Related Manuals for QuietCool STEALTH PRO-1.5X


Summary of Contents for QuietCool STEALTH PRO-1.5X
- Page 1 OWNER’S GUIDE STEALTH PRO X WHOLE HOUSE FAN DO NOT THROW AWAY! SERIAL NUMBER FOR FAN IS LOCATED ON THE BACK COVER OF THE OWNER’S GUIDE. LEAVE WITH HOMEOWNER...
-
Page 2: Table Of Contents
1. HOW TO USE YOUR QUIETCOOL........3... -
Page 3: How To Use Your Quietcool
The result is an easy installation and quiet operation. Once the air outside is cooler than the indoor air, crack open a few windows, turn your QuietCool on, and enjoy the hot air being sucked out of your home and pushed out of your attic with a nice, cool breeze. -
Page 4: When To Run
The breeze will flow through your home and make its way to each QuietCool you have in operation. As it gets later in the evening, and even cooler outside, you can begin to open windows in other rooms of your home, to prepare for bedtime. -
Page 5: Indoor Air Quality
1.7 USING QUIETCOOL DURING THE WINTER During the winter, you can use the QuietCool to warm up your home during the warmer parts of the day. Usually this occurs mid-day. By running the QuietCool during the warmer parts of the day in the winter, you can heat up the thermal mass in your home so your heater doesn’t have to work as hard. -
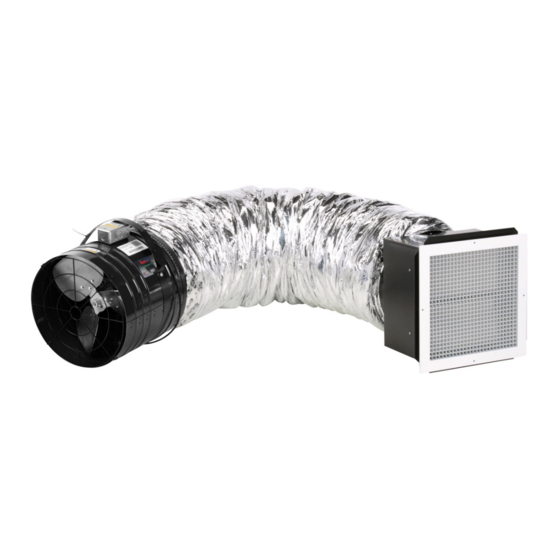
Page 6: System Overview
J. DUCT COLLAR - The adjustable collar that helps seal and secure the Heavy Duty Steel Housing and the Airtight Damper Box with no air leakage. K. ULTRA-ENERGY EFFICIENT ECM MOTOR - The Electronically Commutated Motor is the most energy efficient motor available in a QuietCool Whole House Fan. 1-888-QUIETCOOL... -
Page 7: System Venting Requirements
Venting plays a very significant role in the performace of QuietCool fans. QuietCool recommends a minimum of 1 SQ. FT. of venting for every 750 CFM in the QuietCool system. If an attic has at least 1:750 attic venting, the QuietCool system will operate efficiently and effectively. If an attic has less than 1:750 attic venting, the system may not operate as efficiently, or effectively, as it could with 1:750 attic venting. -
Page 8: Getting Started - Important - Read Before Install
4. FOLLOW INSTRUCTIONS - All installation and operating instructions should be followed. 5. WATER - The QuietCool system should not be used near water. If you live in a very humid climate, be sure to cover your damper box with insulation to reduce condensation. - Page 9 4. DO NOT use any QuietCool ducted whole house fan in a home with all closed windows. 5. TEST your QuietCool unit before installation using the included power cord. If the fan does not work, call us immediately.
-
Page 10: Installation
Installing the QuietCool system is very easy. Simply follow the steps given below: Determine from down below in which areas you would like to install your QuietCool fan. Go up into the attic to mark the exact location for the fan. Make sure you have a minimum of 30” of clearance. Take the cardboard cutout template and a small screwdriver with you. - Page 11 NOTE: Once your QuietCool fan is hung, it’s time to go below and install the damper box and ceiling grille. NOTE: If you are installing the damper box with a vertical adapter, please follow the instructions on page 12. 7. Look through the hole and make sure there are no kinks or twists in the ducting. Pull the damper box down through the hole in the ceiling.
-
Page 12: Installing Vertical Adapter
4. Using the included black sharp screws, attach the vertical adapter to the damper box by screwing them together through the two remaining flanges. 5. The vertical adapter is now installed. Go back to step 8 on page 10 and continue your installation. 1-888-QUIETCOOL... -
Page 13: Wiring
4. WIRING AND CONTROLS NOTE: Wiring Diagrams are for examples ONLY. Wiring should be done by an experienced electrician. NOTE: Your fan came pre-wired to a power cord for testing purposes before installation. If you would like to hard-wire the fan, or it is required by your local building codes, please follow the wiring instructions below. -
Page 14: Two Speed Wiring - Qc Stl Pro-2.5X & 3.3X
7. Begin wiring the your fan by opening up the handy box. Take off the wire nuts within the handy box. Detach the green ground wire from the power cord. Remove the power cord. Re-attach the ground screw and wire to the handy box. Cut your green ground wire in half and strip both sides. (see Figure D) 1-888-QUIETCOOL... - Page 15 Figure 4.2A Power Source Two Speed Wiring Whole House Fans Tie White Common Wires Together Black Wires Tie All Ground & Bare Together Copper Wires Together 8 HOUR High 4 HOUR 2 HOUR 1 HOUR HOLD Red Switch Leg 8. Feed the 2 wire Romex from your timer into the handy box. Feed the 2 wire Romex from your power source into the handy box.
-
Page 16: Three Speed Wiring - Qc Stl Pro-4.8X, 5.5X, 6.0X, & 7.0X
Detach the green ground wire from the power cord. Remove the power cord. Re-attach the ground screw and wire to the handy box. Cut your green ground wire in half and strip both sides. (see Figure 4.3B on page 17) 1-888-QUIETCOOL... - Page 17 7. Feed the 3 wire Romex into the handy box. Tie the blue & black wire together for high speed. Tie the yellow and white taped wire together for medium speed. Tie the red wires together for low speed. 8. Feed the 2 wire Romex from your timer into the handy box. Feed the 2 wire Romex from your power source into the handy box.
-
Page 18: System Operating Instructions
5. SYSTEM OPERATING INSTRUCTIONS OPERATING THE WALL CONTROLS SINGLE SPEED CONTROLS (TIMER ONLY) The 8 Hour Countdown Timer is a convenient way to control your QuietCool fan. • 8 HOUR By clicking the button on the timer, you can cycle through the timer options. -
Page 19: Warranty
QC Manufacturing Inc. extends this warranty to the original purchaser of the following QuietCool Stealth Pro Line Models - QC STL PRO-1.5X, QC STL PRO-2.5X, QC STL PRO-3.3X, QC STL PRO-4.8X, QC STL PRO-5.5X, QC STL PRO-6.0X, and QC STL PRO-7.0X - installed and used in a residence under normal conditions within the United States: A. -
Page 20: Serial Number
Rev. 3/11/21 FAN SERIAL NUMBER INFORMATION RETAIN FOR YOUR RECORDS. SERIAL NUMBER IS REQUIRED FOR WARRANTY PURPOSES. 1-888-QUIETCOOL | WWW.QUIETCOOLSYSTEMS.COM...