Table of Contents
Advertisement
Advertisement
Table of Contents

Related Manuals for Alesis GuitarFX


Summary of Contents for Alesis GuitarFX
- Page 1 User Manual...
-
Page 2: Table Of Contents
Table Of Contents Introduction...3 About the GuitarFX ... 4 GuitarFX Basics... 4 How to Use This Manual ... 6 Important Safety Instructions...7 Important Safety Instructions (English) ... 7 Instructions de Sécurité Importantes (French) ... 9 Lesen Sie bitte die folgende Sicherheitshinweise (German) ... 11 CE Declaration Of Conformity ... -
Page 3: Introduction
Introduction Welcome! Thank you for making the Alesis GuitarFX a part of your setup. Since 1984, we've been designing and building creative tools for the audio community. We believe in our products, because we've heard the results that creative people like you have achieved with them. -
Page 4: About The Guitarfx
Introduction About the GuitarFX The first thing you’ll probably notice about the GuitarFX is its size—it’s not that much larger or smaller than most other guitar effects pedals. But don’t let that fool you. The GuitarFX does much more than most pedals you’ll find on the market today (and for an unbeatable price too). -
Page 5: Effect Modules
Effect Modules If you were to think of the GuitarFX as a series of individual pedals linked together, then each pedal in that series would be considered an effect module. The GuitarFX has nine separate effect modules, as shown below: You can assign one effect to each of these modules and adjust its parameters accordingly. -
Page 6: How To Use This Manual
We’ve included a hookup diagram and some tips on using the GuitarFX. Chapter 4: A Tour of the GuitarFX describes all the controls and features of the unit. This chapter features diagrams of the top and rear panels that are labeled with the name and a brief overview of each function. -
Page 7: Important Safety Instructions
Important Safety Instructions Important Safety Instructions (English) Safety symbols used in this product This symbol alerts the user that there are important operating and maintenance instructions in the literature accompanying this unit. This symbol warns the user of uninsulated voltage within the unit that can cause dangerous electric shocks. - Page 8 Important Safety Instructions 10. Protect the power cord from being walked on or pinched, particularly at plugs, convenience receptacles, and the point where they exit from the apparatus. 11. Use only attachments or accessories specified by the manufacturer. 12. Use only with a cart, stand, bracket, or table designed for use with professional audio or music equipment.
-
Page 9: Instructions De Sécurité Importantes (French)
Instructions de Sécurité Importantes (French) Symboles utilisés dans ce produit Ce symbole alèrte l’utilisateur qu’il existe des instructions de fonctionnement et de maintenance dans la documentation jointe avec ce produit. Ce symbole avertit l’utilisateur de la présence d’une tension non isolée à... - Page 10 Important Safety Instructions 10. Evitez de marcher sur le cordon secteur ou de le pincer, en particulier au niveau de la prise, et aux endroits où il sor de l’appareil. 11. N’utilisez que des accessoires spécifiés par le constructeur. 12. N’utilisez qu’avec un stand, ou table conçus pour l’utilisation d’audio professionnel ou instruments de musique.
-
Page 11: Lesen Sie Bitte Die Folgende Sicherheitshinweise (German)
Lesen Sie bitte die folgende Sicherheitshinweise (German) Sicherheit Symbole verwendet in diesem Produkt Dieses Symbol alarmiert den Benutzer, daß es wichtige Funktionieren und Wartung Anweisungen in der Literatur gibt, die diese Maßeinheit begleitet. Dieses Symbol warnt den Benutzer der nicht isolierten Spannung innerhalb der Maßeinheit, die gefährliche elektrische Schläge verursachen kann. - Page 12 Important Safety Instructions 10. Verlegen Sie das Netzkabel des Gerätes niemals so, daß man darüber stolpern kann oder daß es gequetscht wird. 11. Benutzen Sie nur das vom Hersteller empfohlene Zubehör. 12. Verwenden Sie ausschließlich Wagen, Ständer, oder Tische, die speziell für professionelle Audio- und Musikinstrumente geeignet sind.
-
Page 13: Ce Declaration Of Conformity
Important Safety Instructions CE Declaration Of Conformity See our website at http://www.alesis.com FCC Compliance Statement This device complies with Part 15 of the FCC rules. Operation is subject to the following two conditions: (1) This device may not cause harmful interference and (2) this device must accept any interference received, including interference that may cause undesired operation. -
Page 14: Hookup Diagram
(that’s what we had in mind when we created those great cabinet simulator effects). You may even want to go so far as to use the GuitarFX to add effects to keyboards or other electronic instruments. -
Page 15: A Tour Of The Guitarfx
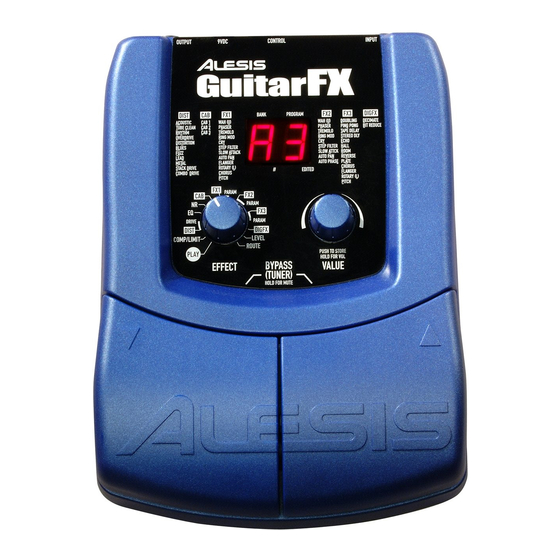
A Tour of the GuitarFX Top Panel Display This LED display is made up of two digits and two decimal points. In PLAY mode the digits indicate the current bank letter and program number. When you turn the EFFECT knob to a module or parameter, the two digits display the setting of the selection. - Page 16 When you hold both foot pedals down for longer then half a second, the GuitarFX goes into mute mode, in which no signal at all leaves the GuitarFX. When you are in bypass or mute mode, the tuner is activated.
-
Page 17: Rear Panel
A Tour of the GuitarFX Rear Panel The rear panel is where you’ll connect the power source, your guitar and amplifier and an optional control pedal. It’s important that you use the right types of plugs in these jacks. Be sure to follow these guidelines. -
Page 18: Selecting Programs
Selecting Programs After you’ve plugged everything in, you’ll probably want to check out the factory presets we programmed into the GuitarFX. This chapter shows you how to do that. To Select Programs Make sure the GuitarFX is hooked up properly and turned on, as outlined in chapter 3. -
Page 19: Editing Programs
Editing Programs To Edit a Selected Program Select a program to edit using the foot pedals or VALUE knob. Turn the EFFECT knob to the effect module or parameter you wish to modify. Turn the VALUE knob to select an effect type or value for the module. -
Page 20: Using The Tuner
(for MUTE). The display will now show tuning information. Make sure your guitar is connected to the GuitarFX, and play the open string you wish to tune. The left digit of the display indicates the pitch nearest that of the open string. - Page 21 C. The possible range of values for this setting is 35 to 45, which represents 435Hz to 445Hz. When you turn the GuitarFX on and off again, the reference pitch is reset to 40. Using the Tuner...
-
Page 22: Storing/Copying Programs
Press the VALUE knob again to store the program in the selected place. The GuitarFX then returns to the mode it was in before you began the store operation, and the destination program becomes the current program. -
Page 23: Deferred Program Change
Here’s how: To Defer Program Change As you turn on the GuitarFX, hold down either foot pedal. Letters will scroll by on the display, spelling the word “deferred.” While in PLAY mode, step on one of the foot pedals or turn the VALUE knob to change the program number. -
Page 24: Effect Knob Settings
EFFECT Knob Settings Following are descriptions of each of the effect modules (and other settings of the EFFECT knob), along with their effect types and parameters. PLAY In this setting the display shows you the current program number. This is the mode in which you should be performing, as it allows you to easily switch programs via the foot pedals. - Page 25 Rhythm A slightly distorted sound; great for rhythm playing. Overdrive Provides more grit than the Rhythm setting, like you’re really pushing those amplifier tubes. Distortion Adds a crunchiness to your sound. Blues A warm yet slightly crunchy sound associated with some of the blues-guitar greats.
- Page 26 EFFECT Knob Settings EQ (Equalizer) This setting gives you a 4-band equalizer that you can use to shape the sound of your audio signal by cutting and boosting certain frequencies. Varying levels of cut and boost for low, middle and high audio frequencies broken down as follows: 01 –...
- Page 27 A single 12” driver cabinet. A 2 x 12” driver cabinet. A 4 x 10” driver cabinet. Turns off CAB. FX1 (Multi-Effect Module 1, Mono to Stereo Effects) This module gives you a choice of mono effects. You assign one effect at a time to this module.
- Page 28 EFFECT Knob Settings Pedal-Controlled Ring Modulation Ring modulation whose depth is controlled by the control pedal. Creates an effect similar to that of a voice box, adding a human-like crying effect to the sound. Higher values result in greater intensity. Pedal-Controlled Cry A cry effect whose intensity is controlled by the control pedal.
- Page 29 Chorus Adds fullness to your sound by emulating a chorus of multiple instruments. Higher values indicate greater modulation depth. Pedal Chorus A Chorus effect whose modulation depth is controlled by the control pedal. Pitch Transpose Transposes the pitch of the signal either up or down. P0 – P4 transpose the pitch down a minor third, a major third, a perfect fourth and a perfect fifth respectively.
- Page 30 EFFECT Knob Settings For Slow Attack, indicates the rate of the attack. For Leslie, indicates the rate of the speaker rotation. For Pedal Pitch Transpose Up and Down, indicates the amount of pitch change in 1/4 semitones (from 1/4 semitone to more than 2 octaves).
- Page 31 FX3 (Multi-Effect Module 3, Delay-Based Effects) This module gives you a choice of delay-based effects. A delay is an echo of the original signal that can occur at varying frequency and time. Doubling Doubles the signal with a slight delay, creating the effect of two instruments playing at once.
- Page 32 EFFECT Knob Settings Hall Reverb Simulates the effect of sound waves bouncing off of the walls of a concert hall. Higher values indicate a wetter mix. Pedal Hall Reverb A Hall Reverb effect whose wet/dry mix is controlled by the control pedal.
- Page 33 Pitch Transpose – same as in FX1. Variable Pitch Transpose Up – same as in FX1. Variable Pitch Transpose Down – same as in FX1. Indicates FX3 is off. PARAM (Direct-Control Parameter for FX3) This direct-control parameter works in a similar fashion as the one for FX1. For Doubling, Ping Pong, Tape Delay and Stereo Delay, indicates the length of the delay, up to one second for Tape Delay and up to half a second for the others.
- Page 34 EFFECT Knob Settings DIGFX (Digital Sampling Effects) This effect module emulates the effect that different variations of digital sampling can have on an audio signal. Sample Rate Decimation Lower values indicate lower decimation frequency (more decimation, more aliasing). Pedal Sample Rate Decimation A sample rate decimator effect controlled by the control pedal.
- Page 35 ROUTE In this position, the display indicates the current signal routing order of the FX modules. This ordering can have a big effect on your sound, as each effect in the configuration feeds into the next. The LEVEL setting always comes last in line. This is the default order.
-
Page 36: Troubleshooting
Master volume or program level set too low. Batteries almost dead. Solution Replace batteries. Use only Alesis P6 or equivalent. On battery power, the GuitarFX will turn on only when a mono 1/4” plug is inserted into the INPUT jack. -
Page 37: Specifications
Output Connector: 1/4" stereo phone jack Max. Output Level: 1.9dBu w/ 10kHOhm or more load impedance CONTROL INPUT Input Connector: POWER AC Adapter (sold separately): Alesis P6 - 9VDC (center Batteries: Battery Life: Dimensions: Weight: 8 banks x 10 Programs = 80 programs,... -
Page 38: Warranty/Contact Alesis
For the most effective service, the purchaser should register the purchase on the ALESIS website at http://www.alesis.com/support/warranty.htm. During the warranty period, ALESIS shall, at its sole and absolute option, either repair or replace free of charge any product that proves to be defective on inspection by ALESIS or its authorized service representative. - Page 39 Website: http://www.alesis.com GuitarFX User Manual Version 1.0 by Edwin Erdmann Version 1.1 by Edwin Erdmann Copyright 2002, Alesis Distribution, LLC. All rights reserved Reproduction in whole or in part is prohibited. Specifications subject to change without notice. 7-51-0133-B 10/16/2002 Warranty/Contact Alesis...
- Page 40 7-51-0133-B...