Table of Contents
Advertisement
Quick Links
Advertisement
Table of Contents

Related Manuals for AIPTEK MPVR


Summary of Contents for AIPTEK MPVR
- Page 1 User's Manual User's Manual English...
-
Page 2: Welcome
Welcome Dear user, thanks for purchasing this product. Much investment in time and effort has gone into its development, and it is our hope that it will give you many years of trouble-free service. Safety Notice 1. Do not drop, puncture or disassemble the camera;... -
Page 3: Table Of Contents
Table of Contents Welcome ... 1 Safety Notice ... 1 Table of Contents ... 2 Getting Started ... 4 Knowing your camera parts ... 4 Installing the battery ... 5 Using the charger ... 6 Inserting a memory card (optional) ... 7 Attaching the carrying strap ... - Page 4 Table of Contents Menu items in MP3 mode ... 28 Menu items in Voice mode ... 28 Menu items in Setting mode ... 29 Copying Files to Your PC ... 32 Installing the driver to your PC ... 32 Connecting the camera to your PC ... 34 Copying files to the PC ...
-
Page 5: Getting Started
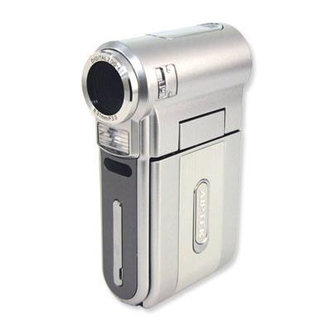
Getting Started Knowing your camera parts Microphone Speaker Battery cover Focus switch LCD monitor Next button/ Fast forward button Play/Pause button Previous button/ Fast backward button Zoom in button Flash button White balance button Zoom out button OK key Lens Flash strobe Front LED indicator Strap hook... -
Page 6: Installing The Battery
Installing the battery Open the battery cover. Slide the battery cover open as indicated. Install the battery. Place the accessory Li-Ion battery into the compartment. Note that the metallic contacts must be aligned with the contacts in the compartment. Replace the cover. After the battery is properly installed, replace the battery cover. -
Page 7: Using The Charger
Using the charger The battery attached is not fully charged. Please charge the battery at least 4 hours for first time use. Connect one end of the supplied AC adapter to the charger stand and the other end to a wall outlet. Place the depleted battery pack into the charger. -
Page 8: Inserting A Memory Card (Optional)
Inserting a memory card (optional) In addition to the built-in flash memory, your camera can store data on a Secure Digital (SD) card or a MultiMedia card (MMC). To insert a memory card, do the followings: (1) Open the battery cover. (2) Gently push the card as indicated until the card reaches the bottom of the slot. -
Page 9: Attaching The Carrying Strap
Attaching the carrying strap Thread one end of the strap into the strap hook. Thread the strap as illustrated on the right. -
Page 10: Basic Operations
Basic Operations Turning on your camera Open the LCD monitor and the camera will be automatically powered on. When the camera is powered off with the LCD monitor open, press and hold down the Power button for 1 second to turn on the camera. -
Page 11: Using The Lcd Monitor
Using the LCD monitor The LCD monitor can be used to compose image settings for shooting, to review recorded files, or to change menu options. The LCD monitor can be rotated to the following positions: Open the LCD monitor. Rotate the LCD monitor. The LCD monitor can be rotated up to 270 degrees as indicated. -
Page 12: Reading Lcd Indicators
Reading LCD indicators Digital Camcorder mode: Flash mode Selftimer Mode icon Video resolution Zoom ratio This icon will change according to the storage medium you are using: : internal memory. : memory card. Playback mode: File type MPEG Mode icon Highlight box Image thumbnail Focus... -
Page 13: Setting Time And Language
Setting time and language When you power on the camera for the first time, you are recommended to adjust the time and language settings. Turn on the camera. Press the Mode button and use the Direction buttons to select the Setting ( key to enter. -
Page 14: Recording A Video Clip
Recording a video clip Adjust the focus. Set the Focus Switch to an appropriate setting. Normally, you should set the focus to ) for most filming conditions. Select ( ) only for close-ups. The focus is adjustable during recording. 70cm ~ (28”... - Page 15 Recording a video clip (continued) Press the Record button to start recording. Timer 00:00:07 0008 Press the Record button again to stop recording.
-
Page 16: Taking A Still Picture
Taking a still picture Adjust the focus. Set the Focus Switch to an appropriate setting. Normally, you should set the focus to ( ) for most filming conditions. Select ( ) for scenery photos. Select ( close-ups. 70cm ~ (28” ~ ) 50cm ~ 70cm (20”... -
Page 17: Recording A Voice Clip
Recording a voice clip Press the Mode button and use the Direction buttons to select the Voice ( key to enter. Press the Record button to start recording. Avoid blocking the microphone Before or during recording, you can move the Direction buttons toward left or right to adjust microphone sensibility, thus setting the sound volume of the recording. -
Page 18: Recording Tv Program Or Dvd
Recording TV program or DVD The advanced MPEG-4 digital video recording technology allowes you to record TV program via AV-IN cable. AV-Mode Video Turn on your TV or DVD player. Connect the AV cable to the AV-Out terminal on the TV or DVD player. (Normally, it’s not necessary to switch the mode, please refer to the User’s Manual of the TV or DVD... -
Page 19: Playing Back Your Recordings
Playing back your recordings Press the Mode button and use the Direction buttons to select the Playback ( ) mode. Then press the OK key to enter. Or press the Play/Pause button ( Operations in playback mode: File type Index mode MPEG 0001/0009 Shift between index... -
Page 20: Playing Mp3 Music
Playing MP3 music Copy MP3 files to the camera Before you can play MP3 music, you need to copy MP3 files to the camera first. Connect the camera to your PC. Turn on the camera, and connect the camera to a PC using the USB cable. For details on connecting the camera to your PC, see page 34. - Page 21 Playing MP3 music (continued) Playing music in MP3 mode Press the Mode button and use the Direction buttons to select the MP3 ( ) mode. Then press the OK key to enter. Operations in MP3 mode: How to... Use the Direction buttons to move up or down. Shift between tracks Or press the Next ( Start playing...
-
Page 22: Connecting The Camera To A Tv
Connecting the camera to a TV Connect your camera and TV via the accessory AV cable for real-time display. You can display your video clips, still pictures, and audio recordings directly on your TV, sharing them with your friends and family. AV-Mode Video Turn on your TV and switch the TV to AV mode. -
Page 23: Advanced Operations
Advanced Operations Menu operation The menu items provide several options for you to fine-tune your camera functions. The following table gives details on menu operations. How to... Bring up the menu Move the highlight bar Enter sub-menu/ Confirm an item Exit menu/Go back to upper menu Menu illustration... -
Page 24: Menu Items In Camera Mode
Menu items in Camera mode Power-on → Press the Menu button. Item Option 6 Mega-pixel Camera Resolution 8 Mega-pixel Camera Date Stamp Stabilizer Description Set picture resolution to 1280x960. Set picture resolution to 2048x1536. Set picture resolution to 2816x2112. Set picture resolution to 2048x1536. Set picture resolution to 2560x1920. - Page 25 Menu items in Camera mode (continued) Item Option Auto Sunny Cloudy Fluorescent Tungsten 1 ~ 10 Photo- Frame Histogram Auto Flash Description The camera automatically adjusts white balance. This setting is suitable for outdoor recording in sunny weather. This setting is suitable for recording in cloudy weather or shady environments.
- Page 26 Menu items in Camera mode (continued) Item Option Normal Effect B&W Classic -2~+2 Exposure Selftimer Icon Video QVGA Description Make recordings in natural color. Make recordings in black and white. Make recordings in sepia-toned color. Manually adjust the exposure to gain better effect when the preview image appears too bright or too dark.
- Page 27 Menu items in Camera mode (continued) Item Option Two-in-One NightShot Description This setting allows you to combine two images taken individually into one photo. Disable the Two-in-One function. This setting allows you to take a photograph with a dark background. Since the shutter speed will slow down when taking photographs at a dark place, we recommend using...
-
Page 28: Menu Items In Playback Mode
Menu items in Playback mode Power-on → Press the Mode button → Enter the Playback mode → Press the Menu button. Item Option Delete current file. Delete all pictures and video/audio files stored in Delete the memory. The camera displays images in sequence. Only JPEG pictures and the first frames of MPEG files will be displayed. -
Page 29: Menu Items In Mp3 Mode
Menu items in MP3 mode Power-on → Press the Mode button → Enter the MP3 mode → Press the Menu button. Item Delete One Delete current track. Cancel Cancel action. Menu items in Voice mode Power-on → Press the Mode button → Enter the Voice mode →... -
Page 30: Menu Items In Setting Mode
Menu items in Setting mode Power-on → Press the Mode button → Enter the Setting mode → Press the Menu button. Item Option Set date and time. Date & Time Enable beep sound. Beep Disable beep sound. Set flicker frequency to 50Hz. For settings reference, see page 42. - Page 31 Menu items in Setting mode (continued) Item Option Disable Auto-off function. The camera automatically shuts down when staying inactive for over 1 minute. 1 min Auto Off The camera automatically shuts down when staying inactive for over 3 minutes. 3 min The camera automatically shuts down when staying inactive for over 5 minutes.
- Page 32 Menu items in Setting mode (continued) To connect the camera to a PictBridge compatible printer, follow these steps: 1) Power on the camera. 2) Set the camera USB mode to Printer (page 30). 3) Open the connector cover and connect one end of the accessory USB cable to the camera.
-
Page 33: Copying Files To Your Pc
Copying Files to Your PC Installing the driver to your PC You need to install the camera driver to ensure that video clips can be played back on your PC. To install the software: Insert the driver CD. Turn on your computer. Then place the accessory CD into the CD-ROM drive. - Page 34 Installing the driver to your PC (continued) Install the driver. The Install Shield Wizard will then appear and automatically install the program. Click on Next and follow the on-screen instructions to complete the installation. Install codecs. After the driver installation is completed, the program will prompt you to install Windows Media Player Codecs.
-
Page 35: Connecting The Camera To Your Pc
Connecting the camera to your PC Connect the USB cable to your computer. Turn on your computer, and then connect the accessory USB cable to the USB port of your computer. Make sure the cable and the port are correctly aligned. Turn on the camera. -
Page 36: Copying Files To The Pc
Copying files to the PC This step varies depending on your operation system: For Windows XP users: After the camera is connected to your computer, a dialogue window will appear automatically. Please select the item Open folder to view files using Windows Explorer and click OK. - Page 37 Copying files to the PC (continued) Double-click on the DCIM file folder. Double-click on the 100MEDIA file folder. Drag the target file into My Documents or the destination folder.
-
Page 38: Viewing/Playing Files On Your Pc
Viewing/Playing files on your PC Double-click on My Documents or any other folder that stores your files. Double-click on the desired file, and the file will be opened by the program matching the file type. -
Page 39: File Location
File location After connecting the camera to your computer, a removable disk will appear in your computer. The removable disk actually represents the storage medium of your camera. In the disk you can find all of your recordings. Refer to the figure below to see where the files are stored. -
Page 40: Appendix:a
Appendix:A Troubleshooting When using the camera: Problem Cause The battery is out of power. The camera can not be powered on normally. The battery is incorrectly installed. If the camera stays The camera is still idle over one minute, powered on, but the the LCD monitor will LCD monitor does automatically shut down... - Page 41 Appendix:A When using the camera: Problem Cause I did not delete the pictures and video The lost recordings are clips, but can not saved in the internal find them in the memory. memory card. If the battery icon indicates low battery, Cannot use the flash the flash strobe may strobe.
- Page 42 Appendix:A When connecting the camera to the computer or TV: Problem Cause I cannot view the Driver or software is video clips on my not installed on the computer. computer. The installation is terminated abnormally. Driver installation failed. The camera has been connected to the PC via the USB cable before installing the driver.
-
Page 43: Flicker Settings
Appendix:A Flicker Settings Country England Germany Setting 50Hz 50Hz Country Portugal America Setting 50Hz 60Hz Note: The flicker setting is based on the frequency standard of your local power supply. System Message Message Recording The camera is recording a file. If you insert a SD card and the card is set to “Protected”, this message Please Unlock SD Card will show up when the camera tries to write data into the card. -
Page 44: Storage Capacity
Appendix:A Storage Capacity Memory Flash memory (16MB for storage) SD/MMC card (128MB) SD/MMC card (256MB) SD/MMC card (512MB) SD/MMC card (1GB) Memory Flash memory (16MB for storage) SD/MMC card (128MB) SD/MMC card (256MB) SD/MMC card (512MB) SD/MMC card (1GB) Note: The actual value of capacity may vary (up to ± 30%) depending on the color saturation and complexity of your subject and surroundings. -
Page 45: Battery Life Indicator
Appendix:A Battery Life Indicator Icon Description Full battery life Moderate battery life Low battery life * If the indicator turns red, (white) flash strobe is disabled. Empty battery life Note: To avoid sudden outage of power supply, you are recommended to replace the battery when the icon indicates low battery life. -
Page 46: Appendix:b
Appendix:B Instruction for ArcSoft MediaConverter™ Introduction ArcSoft MediaConverter is a powerful all-in-one multimedia file converter. This utility quickly and effortlessly converts photo, video, and music files into formats optimized for use on your portable device. Multiple files and file types can be converted at the same time. It’s easy! Three simple steps are all it takes. - Page 47 Appendix:B Supported file formats Video Video files are converted and copied to the selected location as MPEG- 4 encoded AVI files, WMV files or MPEG-4 encoded ASF files (Default). Supported file types for conversion - AVI (Microsoft Video 1 format, Cinepak, Intel Indeo, uncompressed, etc.) - MPEG-1 in MPEG, MPG, MPE - DAT (VCD MPEG1)
- Page 48 Appendix:B Converting files...
- Page 49 Appendix:B Step 1: Select media Adding files for conversion 1 Click the “Select Media” button. 2 An “Open” window will appear. Navigate to the folder that contains the files you’d like to convert. a. Use the “Files of type” pull-down to filter the file types you’d like to display.
- Page 50 Appendix:B Step 2: Select destination Click the “Select Destination” button to select the location where your converted files will be saved. The default save location is “C:\ Documents and Settings\[current user]\My documents”. However, you’ll most likely want to save the files to your portable device. In this case, make sure your device is connected, and then click “Select Destination”...
- Page 51 Appendix:B Optimize for the selected device This is the default setting. The program will automatically set the conversion parameters according to your selected device. Use custom conversion settings If you decide to use this option, you can set the various conversion parameters manually.
- Page 52 Appendix:B Step 3: Convert When you’re ready, select (highlight) the files you’d like to convert from the list, and then click the “Convert” button. A progress bar will display the current status. Various popups may appear asking for specific confirmation. A popup will appear and inform you once all the files have been converted and stored to the location you selected.
- Page 53 Appendix:B Step 2 Save the ASF files converted by MediaConverter on PC to your camera. 1 Copy the converted ASF files. 2 Open Windows Explorer to find a “Removable Disk” appeared in My Computer. 3 Double-click on the icon of Removable Disk. 4 Double-click on the DCIM file folder.
-
Page 54: Appendix:c
Appendix:C Specifications Item Model 8 Mega-pixel camera Image sensor 5 Mega (2560x1920 pixels) Still image: 3M/5M/8M Resolution Movie: 640x480 (VGA) 320x240 (QVGA) Lens 4X digital zoom lens F2.8~F5.3 File format ASF, JPEG WAV, MP3 640x480, up to 30fps; Video frame rate 320x240, up to 30fps Internal memory 32MB flash memory (16MB for storage) -
Page 55: Appendix:d
Appendix:D System Requirements Operating System: Windows 98SE/ME/2000/XP CPU: Pentium III or above System RAM: 128MB or above Graphic Card: 64MB, 24 bit true color CD-ROM speed: 4x or above Software: Direct X 9.0c or above and Windows Media Player Codecs Other: USB connector... - Page 56 82-420-90020v1.0...