
Summary of Contents for Magellan FSMGMC7003
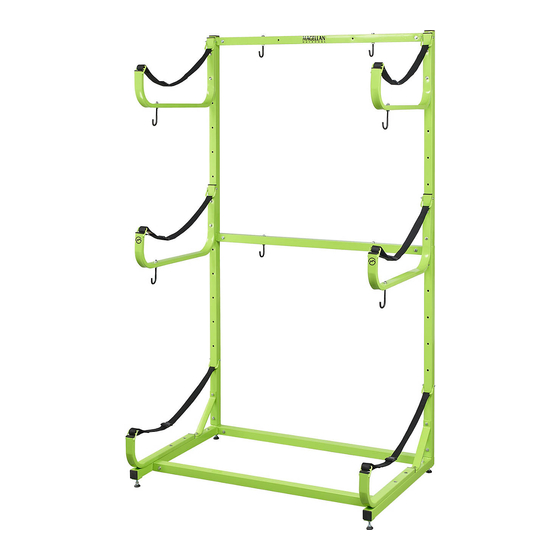
- Page 1 Assembly Instructions & User Manual Three Tier Kayak Rack FSMGMC7003 Please keep this instruction manual for future reference Customer Service: (888) 922-2336 7:00 am to 12:00 am CST (daily) Live Chat at: www.academy.com Email: customerservice@academy.com...
-
Page 2: Table Of Contents
Table of Contents Warnings…………………………………………………………………..2 Tools and Parts…………………………………………………………3-5 Assembly Instructions………………………………………………...6-12 User Instruction ………………………………………………………..13 Care and Maintenance………………………………………………….14 Warranty Information………………………………………....15 Note: Before beginning assembly of product, make sure all parts are present. Compare parts with package content list and hardware contents. If any part is missing or damaged, do not attempt to assemble the unit. -
Page 3: Warnings
Warnings Read carefully and understand all INSTRUCTIONS before operating. Failure to follow the safety rules and other basic safety precautions may result in serious personal injury. It is the user’s responsibility to read and follow all instructions. The warnings, cautions, and instructions discussed in this instruction manual cannot cover all possible conditions or situations that could occur. -
Page 4: Tools And Parts
Parts List Left Leg Frame 1pcs Right Leg Frame 1pcs Cross Support for Leg Frame 2pcs Bottom Upright 2pcs Cross Support for Bottom Upright Top Upright 2pcs Cross Support for Top Upright Bottom Upright Support 2pcs J-Holder 4pcs L-Holder 2pcs U-Clip 6pcs Safety Strap with Buckle... - Page 5 Hardware 6pcs Leveling Foot M8X60 Hex Screw 8pcs Ø8mm Washer 52pcs M8 Nylon Lock Nut 28pcs M8X16 Hex Screw 14pcs M8X75 Round Phillips Screw 12pcs M5X60 Round Phillips Screw 6pcs Ø5mm Washer 6pcs M5 Nylon Lock Nut 6pcs J-Hook 8pcs M8 Hex Nut 8pcs M8X90 S/S Lag Screw...
- Page 6 Marking Indicates where to install screw, washer & nut set. Indicate where to install part to. Indicates the direction of looping the safety strap. Page 5 of 15...
-
Page 7: Assembly Instructions
Assembly Instructions Step 1: FIG.1 Install and fully insert Leveling Foot (1) to Left Leg FIG.1 Frame (A) and Right Leg Frame (B). Align and assemble the Left Leg Frame, Right Leg Frame, and Cross Support for Leg Frame (C). FIG.2 FIG.2 Step 2:... - Page 8 Assembly Instructions Step 3: FIG.5 Align Leg Frame, Bottom Upright, and Bottom Upright Support (H) mounting holes. Align the mounting holes of Bottom Upright(D) and Top Upright (F) . Install and tighten (do not firmly tighten yet) M8X60 Hex Screw (2), Ø8mm FIG.5 Washer (3) and M8 Nylon Lock Nut (4).
- Page 9 Assembly Instructions Step 5: FIG.7 Align the J-Holder (I), Top Upright, and Bottom Upright mounting holes. Install and tighten (do not firmly tighten yet) M8X75 Round Phillips Screw (6), Ø8mm Washer (3), and M8 Nylon Lock Nut (4). FIG.7 There are several mounting holes on Top & Bottom Uprights.
- Page 10 Assembly Instructions Step 6: FIG.10 FIG.9 FIG.9 Un-tie the Safety Strap(L). (a. Male Buckle ; b. Female Buckle ; c. Loop.) Find the loop sew on the strap,and slip it through U-Clip (K). Align the U-Clip and J-Holder mounting holes. Install and firmly tighten M5X60 Round Phillips Screw (7), Ø5mm Washer (8), and M5 Nylon FIG.10...
- Page 11 Assembly Instructions FIG.12 FIG.13 FIG.14 FIG.15 Step 9: Follow the image steps above to install the FIG.16 Safety Straps to all 4 J-Holders & 2 L-Holders. Remove the male buckle from the strap. Slip the strap (male buckle removed) through FIG.12 the hole at bottom.
- Page 12 Assembly Instructions FIG.17 Step 10: Align the J-Hooks (10), J-Holder, & Cross Supports mounting holes. Install and firmly tighten M8 Hex Nut (11). Ø8mm Washer (3), and M8 Nylon Lock Nut (4). FIG.17 * To complete the J-Hook assembly, you will need J Hook x 8pcs, M8 Hex Nut X 8pcs, Ø8mm Washer x 16pcs, and M8 Nylon Nut x 8pcs.
- Page 13 Assembly Instructions FIG.19 Step 12: If free standing is preferred, follow the below directions. Assemble the enclosed Leg Extension (M) to the Kayak Rack. FIG.20 -Install the Leveling Foot (1) to the Leg Extension. FIG.19 -Remove the Leveling Foot from the Leg Frame (assembled at Step 1.) where it connects to Bottom Upright.
-
Page 14: User Instruction
User Instructions To Load Kayak: - Center the kayak onto the support webbing. - Make sure the kayak is set on arms so that it is stable. - Confirm the safety straps can be connected over the top of the kayak. Adjust the strap if more length is needed. -
Page 15: Care And Maintenance
Care and Maintenance TO PREVENT INJURY FROM KAYAK RACK FAILURE: DO NOT use damaged equipment. If Kayak Rack is damaged or if abnormal noise or vibration occurs, have the problem corrected before further use. 1. BEFORE EACH USE, inspect the general condition of the Kayak Rack. -
Page 16: Warranty Information
Warranty Information This product has been manufactured under the highest standards of quality and workmanship. We warrant to the original consumer purchaser that all aspects of this product will be free of defects in material and workmanship for one year from the date of purchase.