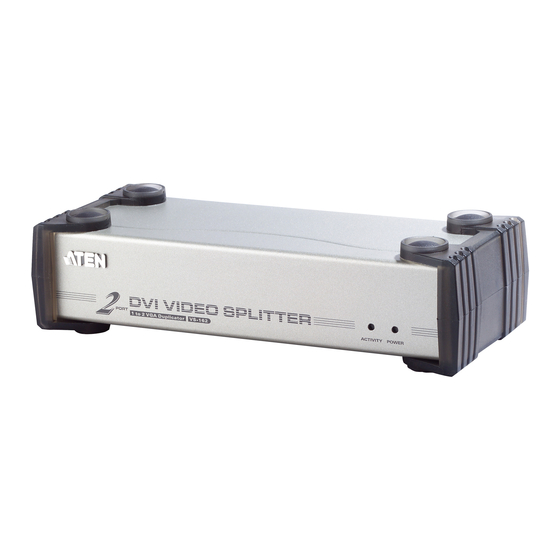
ATEN VS-162 User Manual
Dvi audio/video splitter
Hide thumbs
Also See for VS-162:
- User manual (18 pages) ,
- Specifications (3 pages) ,
- User manual (17 pages)
Table of Contents
Advertisement
Quick Links
Download this manual
See also:
User Manual
User Manual
VS-162 / VS-164
Read this guide thoroughly and follow the installation and operation proce-
dures carefully in order to prevent any damage to the units and/or any de-
vices that connect to them.
This package contains:
M 1 VS-162 or VS-164 DVI Video Switch
M 1 Power Adapter
M 1 User Manual
®
© Copyright 2005 ATEN
International Co., Ltd.
Manual Part No. PAPE - 1258-100
Printed in Taiwan 03/2005
All brand names and trademarks are the registered property of their respective owners.
2005-03-02
Advertisement
Table of Contents

Summary of Contents for ATEN VS-162
-
Page 1: User Manual
Read this guide thoroughly and follow the installation and operation proce- dures carefully in order to prevent any damage to the units and/or any de- vices that connect to them. This package contains: M 1 VS-162 or VS-164 DVI Video Switch M 1 Power Adapter M 1 User Manual ®... - Page 2 Note: This equipment has been tested and found to comply with the limits for a Class B digital device, pursuant to Part 15 of the FCC Rules. These limits are designed to pr ovide r eas onable pr otection against harmful interference in a residential installation.
- Page 3 Overview The 2 port VS-162 and 4 port VS-164 video splitters chart a new direction in multimedia functionality by combining DVI quality video and audio. They take the signals from an audio/video source and replicate them to two (VS-162) or four (VS-164) audio/video outputs.
- Page 4 Features M Fully compliant with the DVI-digital and DVI-analog specification M Speaker enabled M Enhances the video signal for distances up to 1.8m (6’) M Supports DDC2B (Port 1 only) M LED display for easy status monitoring M Easy installation M Small form factor with metal housing - 2 - 2005-03-02...
-
Page 5: Hardware Requirements
DVI input. M Speakers for audio output (optional) Cables Two (VS-162) or four (VS-164) DVI cables are required to properly operate this DVI Switch. Note: 1. Cables are not included in this package. Since the quality of the display is affected by the quality and the length of the cables, we strongly recommend that you purchase high quality cables. - Page 6 VS-162 / VS-164 Front View 1. Link LED Lights to indicate that there is a working DVI connection to the computer. 2. Power LED Lights to indicate that the VS-162 / VS-164 is receiving power and is up and running. - 4 - 2005-03-02...
- Page 7 VS-162 / VS-164 Rear View - 5 - 2005-03-02...
- Page 8 1. Power Jack The power adapter cable plugs in here. 2. Media Input Section The cables from your computer’s DVI video and speaker ports plug in here. Note: If you connect a DDC monitor to Port 1, all other monitors must be able to support the highest resolution that the DDC monitor can provide.
-
Page 9: Installation
1. Use a male to male DVI cable to connect your computer’s DVI port to the VS-162 / VS-164’s Video In port. 2. Use a male to male audio cable to connect your computer’s speaker port to the VS-162 / VS-164’s Audio In port. - Page 10 - 8 - 2005-03-02...
- Page 11 Cascading To provide even more audio/video display, additional units can cascaded from the VS-162 / VS-164’s Media Out ports. Simply use additional male to male DVI and audio cables to connect a Media Out port on the parent splitter to the Media In port of the child splitter.
-
Page 12: Specifications
Specifications Function VS-162 Outputs LEDs Link Power Connectors Video In 1 x DVI port (F) Audio In 1 x Audio jack Video Out 2 x DVI ports (F) Audio Out 2 x Audio jacks Power 1 x DC 5.3V jack Power Adapter DC 5.3V... - Page 13 DVI-I Pin Assignments Signal TMDS Data2- TMDS Data2+ N.C. N.C. DDC Clock DDC Data Analog Vertical Sync. TMDS Data1- TMDS Data1+ N.C. N.C. +5V Power Ground (return for +5V, H Sync., and V Sync.) - 11 - 2005-03-02 Signal Hot Plug Detect TMDS Data0- TMDS Data0+ N.C.
-
Page 14: Troubleshooting
Troubleshooting Symptom Possible Cause Erratic Unit not receiving Use a DC 5.3V power adapter if behavior. enough power. you are not already using one. If you are already using a power adapter, check that it matches the system specifications (DC 5.3V), and that it is plugged in and functioning properly. - Page 15 Limited Warranty IN NO EVENT SHALL THE DIRECT VENDOR’S LIABILITY EXCEED THE PRICE PAID FOR THE PRODUCT FROM THE DIRECT, INDIRECT, SPECIAL, INCIDENTAL OR CONSEQUENTIAL DAMAGES RESULTING FROM THE USE OF THE PRODUCT, DISK OR ITS DOCUMENTATION. The direct vendor makes no warranty or representation, expressed, implied, or statutory with respect to the contents or use of this documentation, and specially disclaims its quality, performance, merchantability, or fitness for any particular purpose.
- Page 16 Notes: - 14 - 2005-03-02...


