Table of Contents
Advertisement
Available languages
Available languages
Quick Links
Advertisement
Table of Contents

Related Manuals for Rotel U797CH2


Summary of Contents for Rotel U797CH2
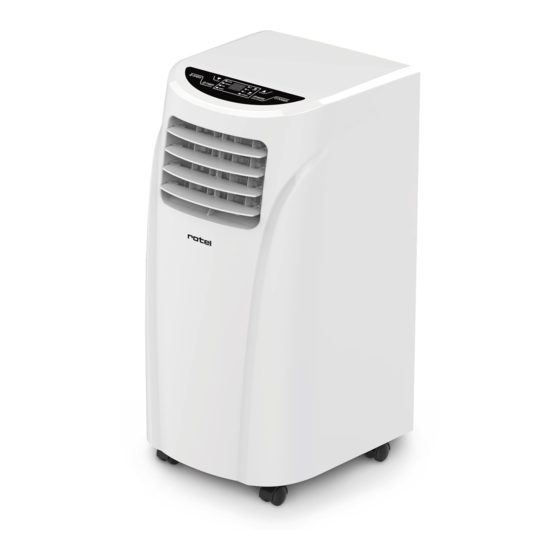
- Page 1 MOBILEAIRCONDITIONER797CH2 U797CH2 • GEBRAUCHSANWEISUNG • MODE D’EMPLOI ISTRUZIONI PER L’USO • INSTRUCTIONS FOR USE • Gebrauchsanweisung ○ Mode d’emploi ○ Istruzioni per l’uso ○ Instructions for use U797CH2_BED_Rev01_2019-11-21...
- Page 2 D / F / I / E • SCHEMATISCHE DARSTELLUNG • Représentation schématique • Diagramma della struttura Schematic representation • Fig. 1 Fig. 2 Deutsch Français Italiano English 1. Luftauslass mit 1. Grille de ventilation 1. Aletta 1. Wind-guide strips Lüftungsklappen 2.
-
Page 3: Table Of Contents
Inhaltsverzeichnis / Table des matières / Indice / Table of contents Deutsch ..............................6 • Sicherheitshinweise ......................... 6 Warnungen ............................9 • Installation ............................. 10 Allgemeine Informationen ......................10 Anleitung ............................10 Dichtungsrahmen im Fenster anbringen ..................11 Montage Abbildung ........................12 •... - Page 4 • Description de la télécommande ....................30 Fonctions du climatiseur mobile ....................31 • Sélection du mode de fonctionnement ..................31 Fonction minuterie ........................32 • Vidange de l’appareil ........................33 Nettoyage et entretien ........................34 • Nettoyage ............................34 Entretien ............................
- Page 5 • Smaltimento ..........................53 English ............................... 54 • Safety instructions ......................... 54 Warnings ............................57 • Unpacking ............................58 Installation ............................. 58 • General information ........................58 Instructions ............................ 58 Installation of window sealplate ....................59 Installation illustration ........................60 •...
-
Page 6: Deutsch
Deutsch • SICHERHEITSHINWEISE Lesen Sie erst alle Hinweise, bevor Sie das Gerät in Betrieb nehmen. o Dieses Gerät kann Personen eingeschränkten physischen, sensorischen oder geistigen Fähigkeiten oder einem Mangel an Erfahrung und/oder Wissen verwendet werden, wenn sie beaufsichtigt werden oder bezüglich des sicheren Gebrauchs des Geräts unterwiesen wurden und die daraus resultierenden Gefahren verstanden haben. - Page 7 Gebäudeinstallation durch eine Fachkraft überprüft und ggf. modifiziert werden. o Das Gerät muss an eine geerdete Steckdose angeschlossen werden. o Bevor das Gerät angeschlossen wird, muss die Übereinstimmung der Netzspannung mit der Kennzeichnung auf dem Typenschild überprüft werden. o Das Gerät darf nicht mit einem beschädigten Kabel oder Stecker, nach einer Fehlfunktion, oder falls es in irgendeiner Weise beschädigt wurde, betrieben werden.
- Page 8 o Sobald das Klimagerät einsatzbereit ist, soll der Netzstecker fest in die Steckdose eingesteckt und das Netzkabel so platziert sein, dass das Stolpern über Kabel oder unbeabsichtigte Herausziehen des Steckers verhindert wird. o Es muss darauf geachtet werden, dass keine Gegenstände in den Lufteinlass oder Luftauslass gelangen und diese auch nicht von Objekten blockiert werden.
-
Page 9: Warnungen
kann elektrische Schläge oder Beschädigung am Gerät verursachen. o Das Gerät darf nicht näher als 50 cm von brennbaren Stoffen (Alkohol usw.), Wärmequellen oder Druckbehältern (z. B. Spraydosen) installiert werden. o Ein Abstand von mindestens 50 cm zu Wänden, Möbeln und Vorhängen ist beim Betrieb stets einzuhalten. -
Page 10: Installation
• INSTALLATION o Dieses Produkt wurde verpackt, um es vor Transportschäden zu schützen. Bitte bewahren Sie das Originalhandbuch, den Verpackungskarton und die Bestandteile zur weiteren Verfügung an einem sicheren Ort. So können Beschädigungen verhindert werden, falls das Gerät erneut transportiert oder an Dritte weitergegeben wird. -
Page 11: Dichtungsrahmen Im Fenster Anbringen
Installation des Abluftschlauchs (Kühlen-Modus) o Ziehen Sie die Enden des Abluftschlauchs auseinander und schliessen Sie ihn an den Abluftadapter an (wie in Abb.4 gezeigt). o Schieben Sie das runde Ende des Abluftschlauchs in Abb. 4 Pfeilrichtung in die Abluftöffnung, die auf der Rückseite des Klimageräts angebracht ist (siehe Abb. -
Page 12: Montage Abbildung
Montage Abbildung Wandmontage Bogenanordnung Abb. 8 Abb. 9 Abb. 10 Falsche Biegung Abb. 11 Gebrauchsanweisung ○ Mode d’emploi ○ Istruzioni per l’uso ○ Instructions for use... -
Page 13: Bedienfeld
• BEDIENFELD Abb. 12 Funktionen und Anzeige POWER (Ein/Aus- Taste): Zum ein- und ausschalten des Gerätes. MODE (Modus): Mit jedem Drücken dieser Taste wird eine Betriebsart gewählt (kühlen, trocknen, lüften). Die Betriebsartanzeige leuchtet unter der jeweiligen Betriebsart auf. UP/DOWN (Auf und Ab): Dienen zum Anpassen (anheben/absenken) der Temperatureinstellung im Kühlen-Modus oder zum Einstellen des Timers. -
Page 14: Fernbedienung
• FERNBEDIENUNG Das Klimagerät reagiert auf alle Signale, die von der Fernbedienung gesendet werden. Zwei AAA-Batterien sind erforderlich, um die Fernbedienung zu verwenden. Richten Sie die Fernbedienung auf das Bedienfeld des Gerätes und drücken Sie die entsprechende Taste. Die rote LED blinkt bei jedem Tastendruck. Hinweis: Die Luftstromrichtung kann nicht mir der Fernbedienung eingestellt werden. -
Page 15: Bedienungsanweisungen
• BEDIENUNGSANWEISUNGEN Betriebsmodus auswählen KÜHLEN-Modus Drücken Sie die Taste MODE bis die Modus-Kontrollleuchte COOL (kühlen) auf dem Display leuchtet. Drücken Sie AUF/AB um die Temperatureinstellung anzupassen, im Bereich von 18 °C bis 30 °C (64 to 86 °F). Bei jedem Tastendruck AUF/AB wird die Temperatur in Schritten zu 1 °C oder 1 °F eingestellt. -
Page 16: Timer-Betrieb
TIMER-Betrieb Timer einschalten Wenn sich das Gerät im Schlafmodus befindet, drücken Sie die TIMER-Taste, um das automatische Einschaltprogramm (von 0.5 bis 24 Stunden) zu aktivieren, die TIMER- Kontrollleuchte geht an. Das Display blinkt. Drücken Sie oder halten Sie die AUF- oder AB-Taste gedrückt, um die automatische Einschaltzeit zu ändern;... - Page 17 o Die Klimaanlage setzt den Normalbetrieb automatisch fort sobald die Alarmursache behoben ist. o Vergewissern Sie sich, dass Sie den Drainagestöpsel wieder einbauen, bevor Sie das Gerät benutzen. Vorsicht: Wenn die WASSERTANK-VOLL-Anzeige aufleuchtet, bewegen Sie die Klimaanlage vorsichtig, andernfalls kann das Wasser von innen überlaufen. Drainagestöpsel Abb.
-
Page 18: Reinigung Und Wartung
• REINIGUNG UND WARTUNG Filterrahmen Filterrahmen Reinigung Einheit 1 Einheit 2 o Wischen Sie das Gerät mit einem leicht feuchten, weichen Tuch ab. Benutzen Sie kein chemisches Lösemittel, wie Gas, Alkohol oder Ähnliches. o Falls das Gerät stark verschmutzt ist, verwenden Sie zusätzlich etwas Neutralreiniger. -
Page 19: Störungsbehebung
• STÖRUNGSBEHEBUNG Bitte beachten Sie die folgenden Hinweise, bevor Sie sich an Ihren Kundendienst wenden. Problem Mögliche Ursache Lösung Kein Strom Stecken Sie den Stecker ein und schalten Sie das Gerät Display zeigt FL Entleeren Wassertank Rückseite des Gerätes Die Umgebungstemperatur ist zu Das Gerät läuft nur bei ℃... -
Page 20: Technische Daten
Vorsicht: Wenn folgenden Fehler auftreten, schalten Sie das Klimagerät aus, ziehen Sie den Stecker heraus und wenden Sie sich an einen Fachmann. Sicherung und Schalter sind oft defekt. Die Netzleitung neigt zur Überhitzung und/oder dessen Kabel sind blank. Das Gerät entwickelt Rauch oder abnormalen Geruch. Automatische Störungserkennung Fehlercode Bedeutung... -
Page 21: Entsorgung
• ENTSORGUNG Für eine sachgerechte Entsorgung ist das Gerät dem Fachhändler, der Servicestelle oder der Firma Rotel AG zurückzugeben. Die Richtlinie 2012/19/EU über Elektro- und Elektronik-Altgeräte (WEEE) legt fest, dass Haushaltsgeräte nicht mit dem normalen Hausmüll entsorgt werden dürfen. Altgeräte sind getrennt zu sammeln, um einerseits Wiederverwertung und Recycling zu optimieren und andererseits potenzielle Gesundheits- und Umweltgefahren zu verhindern. -
Page 22: Français
Français • CONSIGNES DE SECURITE Veuillez lire toutes les instructions avant la mise en service de l’appareil. o Cet appareil peut être utilisé par des personnes aux capacités physiques, sensorielles ou intellectuelles limitées manquant d’expérience connaissance si elles sont sous surveillance ou ont été... - Page 23 o L’appareil doit être branché sur une prise murale équipée d’une prise de terre correctement installée. o Avant de brancher l’appareil, il convient de vérifier que la tension secteur correspond à celle spécifiée sur la plaque signalétique de l’appareil. o Il ne doit en aucun cas être utilisé avec un cordon ou fiche endommagé, à...
- Page 24 o Aucun obstacle ou objet ne doit obstruer l’arrivée et la sortie d’air du climatiseur, ni aucun objet n’y entrer. Cela peut affecter l’appareil qui peut arrêter de fonctionner ou voir ses performances réduites. o L’appareil ne doit être utilisé qu’avec ses filtres. L’absence des filtres à...
-
Page 25: Avertissements
les murs, les meubles, les rideaux ou tout autre objet adjacent. Avertissements o Risque d’incendie. Matériaux inflammables. Il est impératif de se conformer aux réglementations locales en vigueur sur la mise au rebut de l’appareil et de son gaz réfrigérant. o Le circuit de réfrigération doit rester intact. -
Page 26: Instructions De Déballage
• INSTRUCTIONS DE DEBALLAGE o L’emballage de ce produit a été conçu pour éviter les dégâts dûs au transport. Veuillez conserver le manuel de l’utilisateur, le carton et le matériel d’emballage afin de prévenir tout dommage si l’appareil doit être transporté ultérieurement ou remis à... -
Page 27: Installation Du Kit Fenêtre
Montage du flexible d’évacuation (Mode CLIMATISATION) Déployez le tuyau flexible d’évacuation d’air à la longueur souhaitée et fixez-y le manchon de raccordement rond (ill. 4). Raccordez l’extrémité arrondie du flexible dans la sortie d’air ill. 4 du climatiseur, située au dos de l’appareil, comme indiqué dans l’illustration 5. -
Page 28: Illustration De L'installation
Illustration de l’installation Installation fixe au mur Ill. 8 Alignement du flexible Ill. 9 Ill. 10 Angle incorrect Ill. 11 Gebrauchsanweisung ○ Mode d’emploi ○ Istruzioni per l’uso ○ Instructions for use... -
Page 29: Bandeau De Commande
• BANDEAU DE COMMANDE Ill. 12 Affichage et fonctions POWER: appuyer sur la touche marche / arrêt permet d’allumer ou d’éteindre le climatiseur. MODE: appuyer une ou plusieurs fois sur cette touche permet de sélectionner un mode de fonctionnement (climatisation, déshumidification ou ventilation). Le témoin lumineux correspondant au mode sélectionné... -
Page 30: Description De La Télécommande
• DESCRIPTION DE LA TELECOMMANDE La télécommande permet de contrôler à distance toutes les fonctions du climatiseur mobile. Insérez deux piles de types AAA avant d’utiliser la télécommande. Orientez la télécommande vers le bandeau de commande de l’appareil et sélectionnez une fonction: le témoin lumineux de la télécommande s’allume dès qu’une touche est pressée. -
Page 31: Fonctions Du Climatiseur Mobile
• FONCTIONS DU CLIMATISEUR MOBILE Sélection du mode de fonctionnement Mode CLIMATISATION Pressez la touche MODE jusqu’à ce que la fonction COOL (climatisation) s’allume sur le panneau. Appuyez ensuite sur les touches avec les flèches UP (ascendantes) et DOWN (descendantes) afin de régler la température de climatisation requise, entre 18 °C et 30 °C (de 64 à... -
Page 32: Fonction Minuterie
Mode VENTILATION Pressez la touche MODE jusqu’à ce que le symbole s’allume. Appuyez ensuite sur SPEED (vitesse) afin de choisir la vitesse de ventilation souhaitée. La sélection entre vitesse lente et rapide se fait comme suit: rapide > lent > rapide. Ce mode ne permet pas de programmer la température. -
Page 33: Vidange De L'appareil
• VIDANGE DE L’APPAREIL o L’eau de condensation qui se forme pendant la climatisation ou la déshumidification est recueillie dans un réservoir interne. o Lorsque l’appareil est utilisé par temps humide, la quantité de condensat produite augmente. L’alarme WATER FULL (réservoir plein) sera émise si le niveau d’eau du réservoir inférieur atteint un niveau prédéterminé. -
Page 34: Nettoyage Et Entretien
Conseils o Une exposition directe et prolongée au flux d’air froid peut constituer un danger pour la santé. Des précautions particulières sont nécessaires si des enfants, des personnes âgées ou malades se tiennent dans la pièce climatisée. o Ne pas exposer directement et longuement des plantes ou des animaux au flux d’air de l’unité, car ils pourraient en être affectés. -
Page 35: Stockage
• STOCKAGE À la fin de la période de climatisation ou en cas de non-utilisation prolongée, effectuez les quelques manipulations suivantes avant de ranger l’appareil. Vidangez le condensat de l’appareil (l’eau s’écoule naturellement lors de la vidange si l’appareil est légèrement incliné vers l’arrière). Faites fonctionner l’appareil quelques heures en mode VENTILATION uniquement afin qu’il sèche à... -
Page 36: Dépannage
• DEPANNAGE Veuillez consulter le tableau ci-après avant de contacter votre service après-vente. Problème Cause possible Solution L’appareil est éteint Mettez le sous tension après l’avoir branché sur une prise murale Le témoin lumineux FL est allumé Vidangez le condensat La température ambiante est-elle trop Plage température... -
Page 37: Caractéristiques Techniques
Si l’une des anomalies suivantes se produit, éteignez le climatiseur, débranchez-le et contactez un électricien. Les fusibles ou le commutateur sont régulièrement défectueux. La ligne électrique est en surchauffe ou les fils sont dénudés ou endommagés. De la fumée ou une odeur anormale se dégage de l’appareil. Fonction de détection automatique des pannes Code Signification... -
Page 38: Élimination
• ÉLIMINATION Veuillez rapporter l’appareil au détaillant, dans un point de service après-vente ou directement à Rotel AG, pour un recyclage approprié. Selon la directive européenne 2012/19/UE relative aux déchets d’équipements électriques et électroniques (DEEE), les appareils électroménagers ne doivent pas être éliminés avec les déchets solides urbains normaux. -
Page 39: Italiano
Italiano • AVVERTENZE DI SICUREZZA Prima dell’uso leggere tutte le istruzioni. o Questo apparecchio può essere usato da persone con ridotte capacità fisiche, sensoriali o mentali, o con insufficiente esperienza e conoscenza, a condizione che siano sotto sorveglianza o che abbiano ricevuto istruzioni... - Page 40 o Per l'installazione del climatizzatore, seguire le norme di allacciamento alla rete locale e assicurarsi che sia correttamente messo a terra. In caso di dubbi sull'installazione elettrica, seguire le istruzioni del fabbricante e, ove necessario, rivolgersi a un elettricista professionista. o Collocare l'apparecchio su una superficie piana e asciutta, a una distanza minima di 50 cm dalle pareti e da altri oggetti.
- Page 41 o Non smontare, riparare o modificare l'apparecchio arbitrariamente onde evitare di compromettere il funzionamento del dispositivo o di arrecare danno a persone e cose. Per prevenire rischi e pericoli, in caso di guasto dell'apparecchio, affidarne la riparazione al fabbricante o a professionisti del settore.
-
Page 42: Avvertenze
Avvertenze o Rischio di incendio / Materiali infiammabili. L'apparecchio utilizza un gas refrigerante infiammabile. Osservare le normative locali per lo smaltimento del prodotto. o Garantire l'integrità strutturale del circuito di refrigerazione. Gebrauchsanweisung ○ Mode d’emploi ○ Istruzioni per l’uso ○ Instructions for use... -
Page 43: Installazione
• INSTALLAZIONE Informazioni generali Tenere l'apparecchio in posizione verticale durante gli spostamenti. Guida Scelta del luogo di installazione Collocare l'apparecchio su una superficie piana e asciutta, a una distanza minima di 50 cm da qualunque altro oggetto per consentire un'adeguata circolazione dell'aria (prima della connessione del tubo di scarico, v. - Page 44 Figure esplicative Montaggio a muro Fig. 8 Curvatura corretta Fig. 9 Fig. 10 Curvatura sbagliata Fig. 11 Gebrauchsanweisung ○ Mode d’emploi ○ Istruzioni per l’uso ○ Instructions for use...
-
Page 45: Pannello Di Controllo
• PANNELLO DI CONTROLLO Fig. 12 Pulsanti e display POWER: premere per accendere e spegnere l'apparecchio. MODE: premere quando l'apparecchio è acceso o durante l'impostazione del timer per l'accensione automatica per selezionare la modalità operativa (raffrescamento, deumidificazione o ventilazione). La spia luminosa corrispondente alla modalità scelta si accende. -
Page 46: Telecomando
• TELECOMANDO La direzione della corrente d'aria non può essere regolata con il telecomando POWER Premere per accendere e spegnere l'apparecchio. TIMER Premere per impostare il timer. TEMPERATURA Premere per passare da °C a °F. COOL Premere per selezionare la modalità raffrescamento. Premere per selezionare la modalità... -
Page 47: Funzionamento
• FUNZIONAMENTO Impostazione delle modalità operative Modalità raffrescamento Dopo aver acceso l'apparecchio o aver impostato l'accensione automatica, premere il pulsante MODE e selezionare la modalità raffrescamento. Sul display si accende la spia luminosa. Premere le frecce su e giù per impostare una temperatura tra i 18 e i 30 °C (64-86 °F). A ogni pressione dei pulsanti, la temperatura aumenta o cala di 1 °C o 1 °F. -
Page 48: Impostazione Del Timer
Impostazione del timer Spegnimento automatico Con il climatizzatore acceso, premere il pulsante TIMER. La spia corrispondente si accende e l'indicatore sul display lampeggia 5 volte. Premere le frecce su e giù per impostare il timer su un valore compreso tra le 0,5 e le 24 ore. - Page 49 In caso di allarme di serbatoio pieno, è necessario scolare l'acqua. Per comodità, è possibile spostare il climatizzatore in un luogo che permetta lo smaltimento diretto dell'acqua (bagno o fognatura). Svitare il coperchio ed estrarre il tappo del foro di scolo.
-
Page 50: Manutenzione
• MANUTENZIONE Pulizia Filtro 1 Filtro 2 Pulire la superficie dell'apparecchio con un piumino per la polvere o con un panno morbido e umido. Non utilizzare prodotti chimici quali benzene, alcool o benzina. L'uso di prodotti chimici può danneggiare la superficie del climatizzatore o l'apparecchio nel suo complesso. -
Page 51: Risoluzione Dei Problemi
• RISOLUZIONE DEI PROBLEMI Prima di rivolgersi a un professionista, consultare la tabella in basso. Problema Cause Soluzioni Non c'è corrente elettrica. Collegare l'apparecchio a una presa di corrente e accenderlo. Si è attivata la funzione antitrabocco, Svuotare l'acqua contenuta come dimostra la spia accesa. -
Page 52: Carateristiche Tecniche
Attenzione Qualora si verifichino le seguenti anomalie, spegnere l'apparecchio, staccare la spina dalla presa di corrente e contattare un professionista. Il fusibile o l'interruttore si rompono spesso. Il cavo di alimentazione si surriscalda o è spellato. L'apparecchio emette un odore strano. Codici di errore Codice Significato... -
Page 53: Smaltimento
• SMALTIMENTO Per consentire uno smaltimento corretto, restituire l’apparecchio al rivenditore, a un agente di assistenza tecnica o a Rotel AG. La Direttiva UE 2012/19/CE sui rifiuti di apparecchiature elettriche ed elettroniche (WEEE) sancisce che gli elettrodomestici non possono essere smaltiti usando il normale ciclo di rifiuti solidi urbani. -
Page 54: English
English • SAFETY INSTRUCTIONS Please read all instructions before using the device. o This appliance may be used by persons with limited physical, sensory or mental abilities or lack of experience and/or knowledge, if they are supervised by persons responsible for their security or if they have been instructed about the safe use of the appliance and therefore fully understand the hazards involved. - Page 55 be checked and if necessary modified by a qualified electrician. o The appliance must be plugged into an outlet that is properly installed and earthed. o Before plugging into a socket, it shall be ensured that the mains voltage matches the voltage specified on the rating plate of the appliance.
- Page 56 performance reduced stopped completely. o The appliance must always be operated with the air filter mounted. The use of the conditioner without the air filter could cause an excessive accumulation of dust or waste on the inner parts of the device with possible subsequent failures.
-
Page 57: Warnings
Warnings o Risk of fire/flammable materials used. Please according to local regulations regarding disposal of the appliance for its flammable blowing gas and refrigerant. o The refrigerant circuit should not become damaged. Gebrauchsanweisung ○ Mode d’emploi ○ Istruzioni per l’uso ○ Instructions for use... -
Page 58: Unpacking
• UNPACKING o This product has been packaged to protect it against transportation damage. Keep the original manual, packaging carton and materials in a safe place. It will help prevent any damage if the product needs to be transported in the future or handed to others. -
Page 59: Installation Of Window Sealplate
o Make sure the exhaust pipe is firmly attached to the oval connector that fits into the window slide bar. Snap pipe connector into the window slide bar opening. Caution To ensure proper drainage, make sure that the exhaust pipe does not have any sharp bends or sags. -
Page 60: Installation Illustration
Installation illustration Wall mounted Fig. 8 Bow alignment Fig. 9 Fig. 10 Incorrect bending Fig. 11 Gebrauchsanweisung ○ Mode d’emploi ○ Istruzioni per l’uso ○ Instructions for use... -
Page 61: Control Panel
• CONTROL PANEL Fig. 12 Functions and display POWER: press this button to turn on or off the air conditioner. MODE: Press repeatedly to select the desired mode of operation (cooling, dehumidifying or fan). The corresponding indicator lamp to the selected mode is on. UP and DOWN: When the timer is on, pressing UP or DOWN can adjust on/off time;... -
Page 62: Remote Control
• REMOTE CONTROL The air conditioner responds to all signals that are sent by the remote control. Two AAA-batteries are required to use the remote control. Point the remote control towards the control panel of the unit and press the relevant button, the red LED will flash whenever a button is pressed. Note: the air flow direction can not be adjusted with the remote control. -
Page 63: Operating Instructions
• OPERATING INSTRUCTIONS Mode selection COOL mode Press MODE until the COOL indicator lights on the panel. Press UP/DOWN to set the appropriate temperature within a range between 18°C and 30°C (64 to 86℉). When UP or DOWN is pressed once, the temperature will increase or decrease by 1°C or 1℉. -
Page 64: Timer Setting
Timer setting Timer on When the unit is in standby, first press TIMER button to go to delay stop setting (from 0.5h to 24h), until the indicator LED lights. The display will blink. Tap or hold the UP or the DOWN arrow to change delay stop timer at 0.5 hour increments up to 3 hours, then at 1 hour increments up to 24 hours. - Page 65 Caution: when the WATER FULL indicator light turns on, please move the air conditioner steadily, otherwise, the water may overflow from the inside. Fig. 14 Water plug Advice o Never remain exposed directly to the flow of cold air for a long time, as direct and prolonged exposure to cold air from the air conditioner could be dangerous for your health.
-
Page 66: Cleaning And Maintenance
• CLEANING AND MAINTENANCE Strainer Unit 1 Strainer Unit 2 Cleaning o Clean the surface of the air conditioner with duster or semi-wet soft cloth. Do not use chemical solvents such as gasoline and alcohol. o If the machine is indeed very dirty, wipe it with neutral cleaner. -
Page 67: Troubleshooting
• TROUBLESHOOTING Please check the following before contacting your after-sale services. Problem Reasons Solutions There is no electricity Turn it on after connecting it to a socket with electricity. The overflow indicator displays FL Discharge the water inside. Ambient temperature is too low Recommended temperature 17 to 35 ℃... -
Page 68: Technical Specifications
Automatic fault detection functions Detection Codes Meaning Room temperature sensor failure Pipe temperature sensor failure The air conditioner is in water full alarm state Caution When “df” is displayed, the air conditioner runs an anti-freezing or defrosting state, which is a normal phenomenon. •... -
Page 69: Disposal
• DISPOSAL For proper disposal, please return device to a retailer, a service agent or Rotel AG. European Directive 2012/19/EC concerning Waste Electrical and Electronic Equipment (WEEE) states that household appliances should not be disposed of using the normal solid urban waste cycle. Exhausted appliances should be collected separately to optimise the cost of re-using and recycling materials comprising the machine, while preventing potential damage to public health and the environment. -
Page 70: D / F / I / E
Transport costs are to be borne by the purchaser. Remember to specify your address to your sending, as well as a short declaration about the failure, shall the defect not be obvious. Servicestation: Service après-vente: Rotel AG Servizio Assistenza: Parkstrasse 43 Telefon: 062 787 77 00 After-sales service: 5012 Schönenwerd...