Advertisement
Quick Links
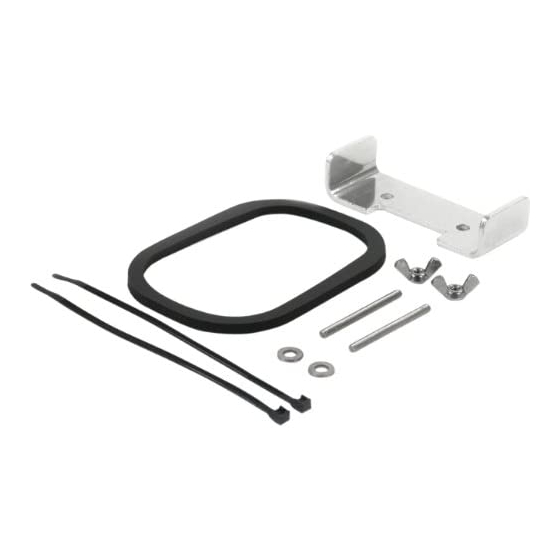
PiranhaMAX™ In-Dash Mounting Kit
Installation Overview
Following are instructions for the in-dash mount installation of the PiranhaMAX control head. We encourage
you to read this guide before starting the installation, so you may understand the installation requirements.
Customer Service: If you find that any items are missing from your installation kit, visit our Web site at
humminbird.com or call Humminbird® Customer Service at 1-800-633-1468.
Supplies: In addition to the hardware supplied with your In-Dash Mounting Kit, you will need a drill and
3/8" drill bit, cutting tool for cutting the dashboard material, safety glasses and dust mask, and masking
tape.
NOTE: Product supplies and features are subject to change without notice.
NOTE: The illustrations in this manual may not look the same as your product, but your unit will function in the same way.
1. Plan the Mounting Location
Start by locating a suitable, flat area of the dashboard for mounting. Consider the following to find the best
mounting location:
• Stability: The mounting area should be protected from waves, shock, vibration, and water.
• Depth: The control head requires a depth of at least 3 inches (76 mm).
• Accessibility: The location should be easily accessible for all cables to reach the ports on the back of
the control head.
NOTE: If a cable is too short for your application, extension cables are available. For assistance, contact Humminbird
Customer Service.
2. Cut the In-Dash Mounting Hole
To in-dash mount the PiranhaMAX control head, start by placing the components on the surfaces where you
intend to install them.
1. Review the instructions, measurements, and cutting options indicated on the In-Dash Mounting
Template.
2. Tape the template to the chosen in-dash mounting location.
3. Using the template, select the cutting method that is best for your boat:
• Drill one entry hole away from the main cut line that is large enough to insert the blade of your
cutting tool.
OR
• Using a 3/8" drill bit, drill the 4 corner holes (inside the main cut line) as shown on the template.
Use one of the corner holes as an entry hole, or drill an additional entry hole away from the main
cut line.
4. Carefully begin cutting toward the cut line, and continue cutting to the inside of the line around the
template.
532463-1_B
Advertisement

Related Manuals for Humminbird PiranhaMAX

Summary of Contents for Humminbird PiranhaMAX
- Page 1 • Accessibility: The location should be easily accessible for all cables to reach the ports on the back of the control head. NOTE: If a cable is too short for your application, extension cables are available. For assistance, contact Humminbird Customer Service.
- Page 2 532463-1_B PiranhaMAX™ In-Dash Mounting Kit 5. Test the Mounting Hole: Install the control head in the mounting hole to test the fit. Make adjustments Inserting the Threaded Rods to the mounting hole as needed. Remove the template when finished. 6. Thoroughly clean and deburr the mounting hole.
- Page 3 This warranty is effective for one year from the date this confidently. We do it because you deserve the best. We will make of original retail purchase. Humminbird products found to be defective every effort to repair your unit within three business days from the and covered by this warranty will be repaired or replaced free of charge receipt of your unit at our factory.
- Page 4 Web site humminbird.com phone or by email, to obtain a Repair Authorization Number for your unit. E-mail service@humminbird.com NOTE: Please do not return your Humminbird to the store for service. Telephone 1-800-633-1468 Direct Shipping Humminbird Please have your product model name and serial number available Service Department before calling the factory.