3Com 3CCFE575CT User Manual
Megahertz 10/100 lan cardbus pc card
Hide thumbs
Also See for 3CCFE575CT:
- Read me first (1 page) ,
- Quick start manual (39 pages) ,
- User manual (52 pages)

Related Manuals for 3Com 3CCFE575CT


Summary of Contents for 3Com 3CCFE575CT
-
Page 1: User Guide
3Com ® 10/100 LAN CardBus PC Card User Guide http://www.3com.com/ http://www.3com.com/productreg Part No. 09-0XXX-00X Published June 2000 Megahertz ® ®... - Page 2 95052-8145 3Com Corporation reserves the right to revise this documentation and to make changes in content from time to time without obligation on the part of 3Com Corporation to provide notification of such revision or change. 3Com Corporation provides this documentation without warranty, term, or condition of any kind, either implied or expressed, including, but not limited to, the implied warranties, terms or conditions of merchantability, satisfactory quality, and fitness for a particular purpose.
-
Page 3: Table Of Contents
ONTENTS PC C NSTALLING THE Introduction User Documentation Connecting the 3CCFE575CT LAN CardBus PC Card Connecting the 3CXFE575CT XJACK LAN CardBus PC Card Connecting the 3C3FE575CT LAN CardBus PC Card Disconnecting the Cables ETUP FOR INDOWS Before You Begin Installation Setup Procedure Confirming Installation... - Page 4 Known Working Configurations Uninstalling the Card ROUBLESHOOTING PC Card LEDs Diagnostics Help Library RODUCT PECIFICATIONS 3CCFE575CT and 3CXFE575CT LAN CardBus PC Cards 3C3FE575CT LAN CardBus PC Card ECHNICAL UPPORT Online Technical Services World Wide Web Site 3Com Support Web Site...
-
Page 5: Installing The Pc Card
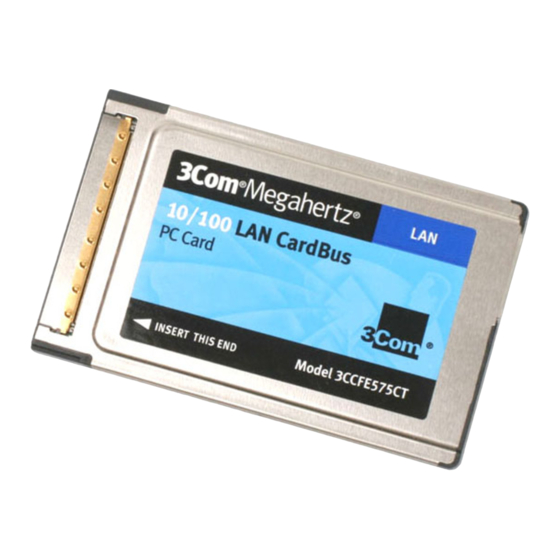
PC C NSTALLING THE Introduction The 3Com 10/100 LAN CardBus PC Cards (models 3CCFE575CT, 3CXFE575CT, and 3C3FE575CT) connect a notebook to an Ethernet or Fast Ethernet network. All PC Card models are shown below. -
Page 6: User Documentation
16-bit PC cards. A suggested 10/100 16-bit PC Card replacement is the 3CCFE574BT PC Card. 3 Connect the PC Card cable to the 3CCFE575CT LAN CardBus PC Card (1). 4 Connect the PC Card cable to the network cable (2). -
Page 7: Connecting The 3Cxfe575Ct Xjack Lan Cardbus Pc Card
5 Connect the network cable to the network port (3). Now you are ready to install the network driver. Go to the chapter for your notebook operating system in this guide. Connecting the 3CXFE575CT XJACK LAN CardBus PC Card 1 Remove all PC Cards from your notebook. 2 With the power off, insert the XJACK and slide it all the way in. -
Page 8: Connecting The 3C3Fe575Ct Lan Cardbus Pc Card
1: I PC C HAPTER NSTALLING THE 3 Connect the network cable to the XJACK connector on the 3CXFE575CT LAN CardBus PC Card (1). 4 Connect the network cable to the network port (2). Now you are ready to install the network driver. Go to the chapter for your operating system in this guide. -
Page 9: Disconnecting The Cables
3 Connect one end of the network cable to the RJ-45 port on the card. This port is indicated on the card with a network icon. 4 Connect the other end to the LAN port. Now you are ready to install the network driver. Go to the chapter for your notebook operating system in this guide. -
Page 11: Setup For Windows 2000
8 Double-click on FE575C-3COM 10/100 LAN CardBus-Fast Ethernet. 9 Choose the Driver tab. 10 Insert the 3Com 10/100 LAN CardBus Installation CD. 11 Click on the Update Driver button. 12 When the Upgrade Device Driver Wizard dialog box appears, click Next. -
Page 12: Confirming Installation
5 Double-click the + sign next to Network Adapters. The PC Card name, FE575C-3Com 10/100 LAN CardBus-Fast Ethernet, appears, confirming successful installation. 6 Double-click on FE575C-3Com 10/100 LAN CardBus-Fast Ethernet to display a description of the PC Card and its current status. The device status should indicate “This device is working properly.”... -
Page 13: Uninstalling The Card
If you are having any of these problems: 1 Open Control Panel/System/Device Manager. 2 Select the FE575C-3Com 10/100 LAN CardBus-Fast Ethernet components and click Remove. 3 Remove the PC Card from the PC Card slot. 4 Reboot and reinstall the PC Card. -
Page 15: Setup For Windows 98 And Windows Millennium Edition
CD, and click Next. After finding the files on the disk, Windows displays the prompt: Windows driver file for the device: FE575C-3Com 10/100 LAN CardBus-Fast Ethernet. 6 Click Next to copy the required files. The Add New Hardware Wizard window states that Windows has finished installing the driver. -
Page 16: Confirming Installation
4 Click the Device Manager tab. A list of devices appears, arranged by type. 5 Click the + sign next to Network Adapters. The PC Card name, FE575C-3Com 10/100 LAN CardBus-Fast Ethernet, appears, confirming successful installation. 6 Double-click FE575C-3Com 10/100 LAN CardBus-Fast Ethernet to display a description of the PC Card and its current status. -
Page 17: Uninstalling The Card
If you are having any of these problems: 1 Open Control Panel/System/Device Manager. 2 Select the FE575C-3Com 10/100 LAN CardBus-Fast Ethernet components and click Remove. 3 Remove the PC Card from the PC Card slot. 4 Reboot and reinstall the PC Card. -
Page 19: Setup For Windows 95
Before You Begin Installation Determining Your Before setting up the PC Card, you must know which version of Windows 95 is Windows 95 Version installed on your notebook. Version A, an early version of Windows 95, is still installed on many notebooks. Most newer notebooks, especially those which come with Windows 95 already installed, run OSR 2 (also called version B or version C). -
Page 20: Etup For Window
OK to copy the PC Card files to your notebook. If you are prompted for the LAN Installation Disk during installation, make sure that a: is the designated path. If during installation, the 3Com driver cannot be found, enter a:\ to point Windows to the LAN Installation Disk. -
Page 21: Confirming Installation
4 Click Finish to accept the driver. If you are prompted for the LAN Installation Disk during installation, make sure that a: is the designated path. If during installation, the 3Com driver cannot be found, enter a:\ to point Windows to the LAN Installation Disk. -
Page 22: Troubleshooting Windows 95 Installations
1. Open My Computer/Control Panel/Network. 2. Double click the FE575C-3Com 10/100 LAN CardBus-Fast Ethernet. 3. Click the Advanced tab. 4. Select Network Link Selection and choose the correct speed. -
Page 23: Uninstalling The Card
If you are having any of these problems: 1 Open Control Panel/System/Device Manager. 2 Select the FE575C-3Com 10/100 LAN CardBus-Fast Ethernet components and click Remove. 3 Remove the PC Card from the PC Card slot. 4 Reboot and reinstall the PC Card. -
Page 25: Setup For Windows Nt
8 Insert the LAN Installation Disk in the floppy drive or the LAN Installation CD in the CD-ROM drive (and enter the path to the drive, for example, d:\) and click OK. 9 Select FE575C-3Com 10/100 LAN CardBus-Fast Ethernet when the Select OEM Option window opens, and click OK. -
Page 26: Windows Nt With Networking Installed
17 Enter the path to the LAN Installation disk (for example, a:\) or the LAN Installation CD (for example, d:\) and click Continue. 18 Accept the default settings in the 3Com network Interface dialog box, and click Continue. The default settings work in most instances. However, you may specify network link settings, auto polarity, and IRQ and I/O values. -
Page 27: Installing With Softex
3Com 10/100 LAN CardBus PC Card using Softex Card Executive. 1 Make sure the driver diskette is removed from the notebook floppy drive. 2 Insert the 3Com 10/100 LAN CardBus PC Card into the PC Card slot. Card Executive will attempt, but fail, to find the diskette. -
Page 28: Confirming Windows Nt Installation
The following procedure can be used to confirm any of the NT installations NT Installation discussed in this chapter. 1 Double-click My Computer, double-click Control Panel, and then double-click Network. 2 Select the Adapters tab. FE575C-3Com 10/100 LAN CardBus -Fast Ethernet appears on the list. Troubleshooting Windows NT 4.0 Symptom Installations Basic... - Page 29 2 Double-click My Computer, double-click Control Panel, and double-click Network. 3 Select the Adapters tab. 4 Select FE575C-3Com 10/100 LAN CardBus-Fast Ethernet and click Remove. 5 Reboot and reinstall the PC Card. This procedure removes the PC Card only. If you choose to remove all networking components, remember to use the setup procedure described in “Setup With No...
-
Page 31: Troubleshooting
Before the PC Card and cable LEDs can be used for troubleshooting, the PC Card must be connected to the network and the driver must be installed. The LEDs and LED status for the models 3CCFE575CT and 3CXFE575CT are shown below. - Page 32 6: T HAPTER ROUBLESHOOTING On the 3CXFE575CT card, the LEDs are on the card.
-
Page 33: Diagnostics Help Library
On the 3C3FE575CT card, the connector lights up to indicate network status. Description Green 10 Mbps Yellow 100 Mbps Diagnostics Help You can find more information in the DOS Diagnostics help library. To run Library diagnostics, insert the LAN Installation Disk in your notebook and at the DOS prompt, enter: a:\dosdiag.exe Steady... -
Page 35: Product Specifications
3CCFE575CT and 3CXFE575CT LAN CardBus PC Cards Network Interface Physical Dimensions Environmental Operating Range Network Cable Specifications Power Requirements Certification 3C3FE575CT LAN CardBus PC Card Network Interface Physical Dimensions Environmental Operating Range Network Cable Specifications Power Requirements Certification RODUCT PECIFICATIONS 3CCFE575CT and Ethernet IEEE 802.3 10BASE-T... -
Page 37: Technical Support
Online Technical 3Com offers worldwide product support 24 hours a day, 7 days a week, through Services the following online systems: World Wide Web Site Access the latest networking information on the 3Com Corporation World Wide Web site by entering the URL into your Internet browser: http://www.3com.com/... -
Page 38: 3Com Ftp Site
Support from 3Com If you are unable to obtain assistance from the 3Com online technical resources or from your network supplier, 3Com offers technical telephone support services. If you contact 3Com for assistance, have the following information ready: Hostname: ftp.3com.com... - Page 39 AT&T +800 666 5065 Brazil 0800 13 3266 Chile 1230 020 0645 Colombia 98012 2127 Mexico 01 800 CARE (01 800 2273) Peru AT&T +800 666 5065 Puerto Rico 800 666 5065 Venezuela AT&T +800 666 5065 North America 1-800-527-8677 Support from 3Com...
-
Page 40: Returning Products For Repair
ECHNICAL UPPORT Returning Products Before returning a product to 3Com for repair, first obtain a Return Materials for Repair Authorization (RMA) number. Products sent to 3Com without RMA numbers will be returned to the sender unopened, at the sender’s expense. -
Page 41: Regulatory
This booklet is available from the U.S. Government Printing Office, Washington, D.C. 20402. Stock No. 004-000-00345-4. NOTE: In order to maintain compliance with the limits of a Class B digital device, 3Com requires that you use quality interface cables when connecting to this device. Changes or modifications not expressly approved by 3Com could void the user’s authority to operate this equipment. - Page 42 This equipment cannot be used on telephone company provided coin service. Connection to party line service is subject to state tariffs. Contact the state public utility commission or public service commission for information. When programming and/or making test calls to emergency numbers: -- Remain on the line and briefly explain to the dispatcher the reason for the call.
- Page 43 EALAND Not all phones connected to the phone port will respond to incoming ringing. Do not report this as a fault unless the same phone will not respond to ringing when connected to a standard phone socket. This equipment shall not be set up to make automatic calls to the Telecom 111 Emergency Services. The grant of a Telepermit for a device in no way indicates Telecom acceptance of responsibility for the correct operation of that device under all operating conditions.