Table of Contents
Advertisement
Quick Links
Advertisement
Table of Contents

Related Manuals for Micromax X220


Summary of Contents for Micromax X220
- Page 1 X220 User Manual...
-
Page 3: Table Of Contents
Contents 1. Legal Information ........1 2. Important Notice ........3 3. Getting Started ........5 3.1. Packing Contents ......5 3.2. Installing SIM, Battery and Attaching other Accessories ........5 SIM Card & Battery Installation (Figure 2) ............5 Connecting Hands-free Kit (Figure 3) .. - Page 4 3.4. Important Phone Icons ..... 10 Signal Strength Icon ......10 Battery Meter Icon ......11 Keypad Lock Icon ....... 11 3.5. Basic Functions ....... 11 Make a Call ........11 Making a Call Using Call history .... 12 Answering a Call ......... 12 Call Options ........
- Page 5 Delete ..Error! Bookmark not defined. Caller groups ........20 Extra numbers ........21 Phonebook settings ......21 4.3. Call logs ......... 22 Call history ........22 Call settings ........22 4.4. Multimedia ........23 Camera ..........24 Image viewer ........24 Video player ........
- Page 6 Calendar ..........30 Tasks ..........31 Alarm ..........31 World clock ........31 4.8. Settings ......... 31 User profiles ........31 Dual SIM settings ....... 33 Phone setup ........33 Network setup ........35 Security setup ........35 Restore factory settings ....... 36 4.9.
-
Page 7: Legal Information
Micromax is prohibited. Micromax operates policy continuous development. Micromax reserves the right to make changes and improvements to any of the products described in this document without prior notice. Under circumstances shall... - Page 8 in the mobile phone. In such a case, the latter shall govern.
-
Page 9: Important Notice
2. Important Notice Important Safety Precautions • Do not use the device while driving. Please see that in some countries, it is illegal to use such devices while driving. • Switch off when refueling. Do not use the device at a refueling point (service station) or near fuels or chemicals. - Page 10 • Use only approved accessories. The use of any other power accessory will violate warranty conditions that apply to the phone. Safe Operation Instructions • Before Installing or operating this product, read this manual carefully. • Do not expose unit to rain or moisture. •...
-
Page 11: Getting Started
3. Getting Started 3.1. Packing Contents Before using Micromax X220 mobile phone, carefully remove the contents from the shipping carton and check for any damages or missing contents. If you find any parts missing, contact your Authorized Distributor or shipping agent immediately. The standard packing contents are as follows: •... -
Page 12: Connecting Hands-Free Kit (Figure 3)
When properly connected, the phone will display a message ‘Earphone plugged in’ with an icon displayed on the screen. NOTE: Only use Micromax specified accessories. -
Page 13: Connecting The Charger/Charging The Battery (Ref Figure 4)
Figure-3 Connecting the charger/Charging the Battery (Ref Figure 4) 1. Plug charger’s transformer into standard AC outlet. 2. Insert the charger’s output plug into the phone’s connecting socket as shown in figure-4. NOTE: It may take up-to 30 minutes before the battery icon/charging icon appears on the screen while charging. -
Page 14: Powering On And Off The Phone
Figure-4 Powering ON and OFF the Phone To Power your phone ON or OFF, press and hold the End key for at least 3 seconds or until the display lights comes up or goes off. Enter the lock code if necessary and select OK to Power ON. -
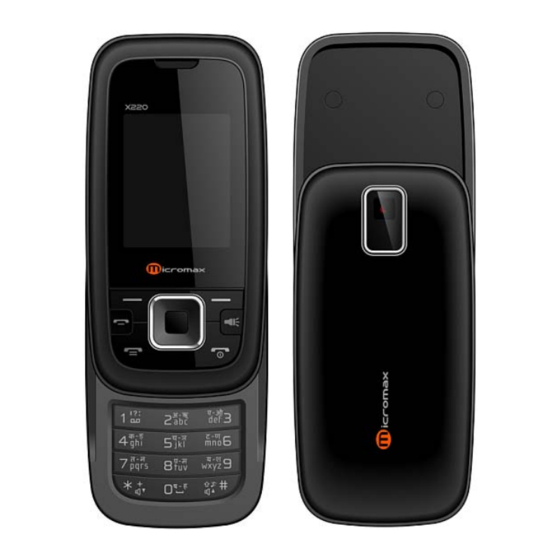
Page 15: Phone Keypad Layout (Figure 5)
3.3. Phone Keypad Layout (Figure 5) Left Soft Key Performs functions in lower left display. In standby mode, press OK key to enter main menu. Right Soft Key Performs functions in lower right display. Dial Key • Make calls • Answer calls •... -
Page 16: Keys
0-9 Keys In standby mode, press number keys to input dialing number. In standby mode, press and hold 2-9 key to directly call the number set before, in the speed dial list, press and hold 1 key to the voicemail server. - Page 17 Battery Meter Icon The Battery Meter Icon is seen on the top rightmost corner of the screen. The icon signifies the battery strength available at that instance. NOTE: At very low battery levels, the phone will prompt ‘Low Battery’ message on the screen. Keypad Lock Icon The Keypad Lock Icon is seen on top of the screen...
- Page 18 If headset is available, user can choose headset keys to answer the call. Call Options The Micromax X220 phone offers multiple functions during a call. During a call, following functions can be actualized if you operate according to the instructions on the screen. Press up and down direction keys to choose the wanted function and press select key to enter.
- Page 19 • Sound recorder: To record a conversation between active members conversation • Silence: Turn on/off the Microphone during an active call. • DTMF (Dual-tone Multi-frequency): You can choose on/off; which is to send dual-tone multi-frequency sound. This can offer dialing the telephone numbers with extensions or systems installed...
- Page 20 4. Menu Layout Messages Chat Voicemail server Broadcast message Phonebook Quick search Search contact Add new contact Mark several Caller groups Extra numbers Phonebook settings Call logs Call history ...
- Page 21 Phone Memory card Organizer Calendar Tasks Alarm World clock Settings User profiles General Meeting Outdoor Indoor Headset Bluetooth Dual SIM settings Dual SIM open Only SIM1 open Only SIM2 open Flight mode Phone setup ...
- Page 22 SIM1 network setup SIM2 network setup Security setup SIM1 security setup SIM2 security setup Phone lock Auto keypad lock Change password Restore factory settings Connectivity Data account Bluetooth 4.1. Messages Your phone supports various messaging services. You can create, send, receive, edit and organize text messages.
- Page 23 according to your wish and also store the messages that you send more often. • SMS settings: SMS settings stores all the different settings responsible for sending and receiving messages. • Profile settings: It contains profiles which include Profile name, Service Centre address, Validity period and Message type.
- Page 24 • MMS settings Chat Chat enables you to enter 2 different user’s default settings (Chat room 1 and Chat room 2) to enable sending and receiving the messages. Chat option enables you to see the complete conversation on a single window. Voicemail server The Voicemail server is an interactive system for storing,...
- Page 25 • Send text message: Selecting this option will enable the user to send a text message on the number selected. • Send multimedia message: Send Number allows user send selected contact’s details to another recipient as a multimedia message. • View: View option gives you the details of the number selected.
-
Page 26: Caller Groups
• Send to blacklist: This option is used to blacklist selected contact. Once blacklisted, your phone will reject all calls from that number before they land on the phone. Search contact Unlike Quick search, Search contact option enables the user to search a contact by entering the key letters or words of the name. -
Page 27: Extra Numbers
Extra numbers It has the following options to edit: • SIM1/SIM2 service dialing number Service dialing numbers are special numbers mapped with particular services given by the network operator. These numbers are pre- fed inside the SIM card by the network provider. -
Page 28: Call Logs
• Caller ringtone • Caller group • My vCard: Edit or send the vCard. 4.3. Call logs Call history You can check all calls related information under Call history menu. Call history menu has details for: • Missed calls • Dialed calls •... -
Page 29: Multimedia
provider. When you change Barring password, you need to input the old password. Line switching - you can switch line 1 or line 2. • Advance settings Black list - Set whether to activate the incoming call filter, and edit the black list numbers. -
Page 30: Camera
The Micromax X220 comes with a host of multimedia applications provide with unlimited entertainment. Camera By pressing the left soft key to select Options, you can go to the Photos, Camera settings, Image settings, White balance, Effect settings, Storage and Restore default. -
Page 31: Video Player
Storage – You can set the photos default storage path to phone or the memory card. Video player The Micromax X220 comes with an inbuilt video player that plays all your favorite videos stored in the micro SD card. NOTE: It supports all AVI format video files, and does not support 3GP/MPEG4 with AAC sound or above, it may appear to be silent. -
Page 32: Audio Player
Audio player The Micromax X220 comes with an inbuilt audio player that plays all your favorite songs stored in the phone or micro SD memory card. It gives you a host of setting options to make your listening experience interesting. -
Page 33: Sound Recorder
Select pause to ‘pause’ the recording and ‘continue’ to resume the recording. FM radio The Micromax X220 comes with an in-built FM radio receiver/Recorder player. Press Options to find: • Channel list: Store all the channels that the FM radio can receive. -
Page 34: Schedule Fm Record
Schedule FM record Micromax X220 comes with a unique feature of FM scheduling. This feature enables you to schedule the radio to power ON itself and record your favorite program. -
Page 35: Calculator
Calculator Use the direction key and number key via the cues on the display screen to make the calculator available. Stopwatch The phone comes with 2 types of Stopwatch. • Typical Stopwatch • nWay stopwatch Now, burn the track while you keep every move traced and counted. -
Page 36: Organizer
• Format Note: Formatting the phone or Memory card will erase all existing data from them. 4.7. Organizer Calendar You can use the calendar to keep track of important meetings. After entering the calendar function menu you can select year, month and date using direction keys. - Page 37 Tasks Edit the task according to the screen prompts. Select task type such as: Date, Call, Anniversary, and set whether to remind via alarm clock. Also, you different reminding manners (once, everyday, custom, weekly, monthly). Alarm The Alarm can be set to ring at a specific time on several days.
- Page 38 Tone setup - Tone setup enables you to set up different music tones to different functionalities of the phone like Incoming call, Power on/off, Cover open/close, Message tone and Keypad tone. Volume - You can vary the volume levels for Ringtone and Keypad tone. Alert type - Alert type lets you choose the way you want to be alerted.
- Page 39 Schedule power on/off: Lets you set a particular time on the phone when the phone should Power on/off itself. • Language: The Micromax X220 currently supports English and Hindi language. • Preferred input methods: This enables you to select the text input methods: They are –...
- Page 40 • Display characteristics: Under Display characteristics, host different characteristics of the phone. Like Wallpaper – your favorite wallpaper on the phone. Screen saver – Lets you set an image as a screen saver. Power on display – Lets you select a pre-defined animation.
- Page 41 • Misc. settings: You can set LCD backlight. Network setup Network setup gives the user the ability to select a desired network and addition of a new network to the network list. The network setup gives you the following options: •...
- Page 42 operator supports it, then you can use the facility in the phone. • Change password: Change password option gives you the options to change PIN, PIN2 password. • Phone lock: Phone lock protects your phone from any unauthorized usage or unauthorized access to information stored in the phone.
- Page 43 various Value Added Services, provided the SIM and the operator support’s this feature. Wireless Application Protocol browser provides all the basic services of a computer based web browser but simplified to operate within the restrictions of a mobile phone. The WAP browser has the following options: •...
- Page 44 Edit account Browser options Service message settings Clear cache Clear cookies Trusted certificates Data account Data account contains two types of account used to establish GSM/GPRS connections for WAP, MMS and WWW browsing. • GSM data • GPRS NOTE: Select the appropriate setting from the list for using a particular feature depending on the availability of the operator services.
- Page 45 • Search new device: You can inquire new device. • Active devices: Locates active Bluetooth devices in the vicinity. • Settings: Set mobile phone Bluetooth. Visibility - Set the Visibility of the Bluetooth. Change device name - Change the Bluetooth device name. Authentication Authentication while Bluetooth connection.