
Related Manuals for Infinity TFLD-7


Summary of Contents for Infinity TFLD-7
- Page 1 USER MANUAL ENGLISH TFLD-7 Floodlight Product code: 200400 Highlite International B.V. – Vestastraat 2 – 6468 EX – Kerkrade – the Netherlands...
- Page 2 TFLD-7 Floodlight Preface Thank you for purchasing this Infinity product. The purpose of this user manual is to provide instructions for the correct and safe use of this product. Keep the user manual for future reference as it is an integral part of the product. The user manual shall be stored at an easily accessible location.
-
Page 3: Table Of Contents
TFLD-7 Floodlight Table of contents Introduction ................................4 Before Using the Product ..........................4 Intended Use ............................... 4 Product Lifespan ..............................4 LEDs Lifespan ............................... 4 Text Conventions ..............................4 Symbols and Signal Words ..........................5 Symbols on the Information Label ........................5 Safety .................................. - Page 4 TFLD-7 Floodlight DMX Channels ..............................29 DMX Channels Overview ..........................29 Dimmer (1 Channel), Basic (5 Channels), Tungsten (6 Channels) ............30 RGB Pro (10 Channels), CMY Pro (10 Channels), HSI Pro (10 Channels) ..........33 RAW (20 Channels) ............................36 Troubleshooting ..............................39 Maintenance ..............................40 Safety Instructions for Maintenance ......................40...
-
Page 5: Introduction
After unpacking, check the contents of the box. If any parts are missing or damaged, contact your Highlite International dealer. Your shipment includes: ● Infinity TFLD-7 Floodlight ● Schuko to Neutrik powerCON cable (1,4 m) ● Beam shaper ●... -
Page 6: Symbols And Signal Words
TFLD-7 Floodlight Symbols and Signal Words Safety notes and warnings are indicated throughout the user manual by safety signs. Always follow the instructions provided in this user manual. Indicates an imminently hazardous situation which, if not avoided, will result in DANGER death or serious injury. -
Page 7: Safety
TFLD-7 Floodlight Safety Important Read and follow the instructions in this user manual before installing, operating or servicing this product. The manufacturer will not accept liability for any resulting damages caused by the non-observance of this manual. Warnings and Safety Instructions... - Page 8 TFLD-7 Floodlight WARNING Risk of burns due to hot surface The surface and the inner parts of the device can become very hot during operation. ● Do not touch the device during operation. ● Allow the device to cool down for at least 15 minutes before handling.
-
Page 9: Requirements For The User
TFLD-7 Floodlight ● If the device is exposed to extreme temperature variations (e.g. after transportation), do not switch it on immediately. Let the device reach room temperature before switching it on, otherwise it may be damaged by the formed condensation. -
Page 10: Description Of The Device
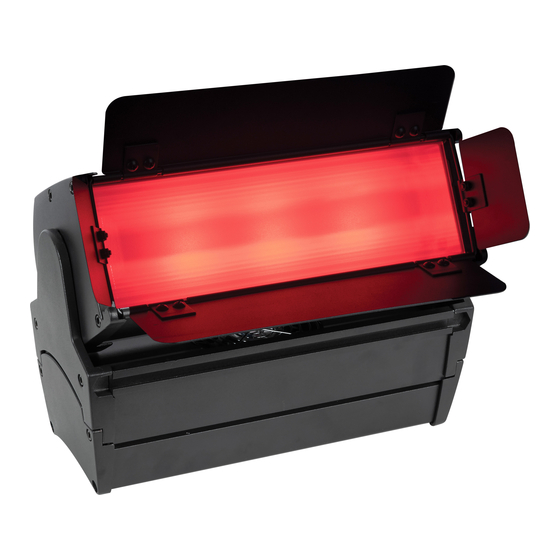
TFLD-7 Floodlight Description of the Device The Infinity TFLD-7 is a compact floodlight suitable for indoor venues. It features a custom-designed 7-color LED array which produces 64 theatrical colors for the perfect floodlight effect. Front View Fig. 02 01) Integrated barndoor... -
Page 11: Product Specifications
TFLD-7 Floodlight Product Specifications Model: TFLD-7 Floodlight Electrical: Input voltage: 100–240 V AC, 50/60 Hz Power consumption: 160 W (max) Fuse: T1,2 A, 250 V AC Power factor: 0,96 Physical: Dimensions: 318 x 136 x 239 mm (L x W x H) -
Page 12: Dimensions
TFLD-7 Floodlight Dimensions Fig. 04 Fig. 05 Fig. 06 Product code: 200400... -
Page 13: Installation
TFLD-7 Floodlight Installation Safety Instructions for Installation WARNING Incorrect installation can cause serious injuries and damage of property. If trussing systems are used, installation must be carried out only by instructed or skilled persons. Follow all applicable European, national and local safety regulations concerning rigging and trussing. - Page 14 TFLD-7 Floodlight To mount the device, follow the steps below: 01) Slide the 3 mounting screws in the mounting groove (03), as shown in Fig. 09. 02) Place the mounting bracket and the safety bracket on the mounting screws, so that the mounting screws fit into the respective openings, as shown in Fig.
-
Page 15: Beam Shaper Installation
TFLD-7 Floodlight Beam Shaper Installation The TFLD-7 Floodlight is delivered with 2 beam shapers (40° and 60°). You can order an additional 90° beam shaper. Contact your Highlite International dealer for more information. To install the beam shaper follow the steps bellow: 01) Press one of the beam shaper locks (05) and at the same time slide the beam shaper out of the device, as shown in Fig. -
Page 16: Connecting To Power Supply
● Do not link more devices on one power link than the maximum recommended number. Maximum recommended number of devices: ● at 100–120 V: 8 devices TFLD-7 Floodlight ● at 200–240 V: 15 devices TFLD-7 Floodlight Product code: 200400... -
Page 17: Setup
Disconnect power supply before connecting or disconnecting data cables. Stand-alone Setup When the TFLD-7 Floodlight is not connected to a DMX controller, it functions as a stand-alone device in manual control mode. For more information about the control modes, refer to 6.2. Control Modes on page 19. -
Page 18: Dmx Cables
TFLD-7 Floodlight DMX Cables Shielded twisted-pair cables with 5-pin XLR connectors must be used for reliable DMX connection. You can purchase DMX cables directly from your Highlite International dealer or make your own cables. If you use XLR audio cables for DMX data transmission, this may lead to signal degradation and unreliable operation of the DMX network. -
Page 19: Dmx Addressing
04) Continue assigning the starting addresses of the remaining devices by adding each time 20 to the previous number. Make sure that you do not have any overlapping channels in order to control each TFLD-7 Floodlight correctly. If two or more devices are addressed similarly, they will work similarly. -
Page 20: Operation
Control Modes The TFLD-7 Floodlight can be operated with a DMX controller and as a stand-alone device. The TFLD-7 Floodlight supports the following control modes: ●... -
Page 21: Control Panel
TFLD-7 Floodlight Control Panel A) LCD display BACK/HOME button C) Control wheel ● UP/DOWN function – turn the control wheel ● ENTER function – press the control wheel D) MENU button Fig. 16 ● Press the BACK/HOME button once to exit the current submenu and to return to the start screen. -
Page 22: Menu Overview
TFLD-7 Floodlight Menu Overview Product code: 200400... - Page 23 TFLD-7 Floodlight Product code: 200400...
-
Page 24: Main Menu Options
TFLD-7 Floodlight Main Menu Options The main menu has the following options: DMX channel mode DMX lost DMX address Fan mode Manual mode PWM frequency Dimmer Curve Calibration Dimmer Speed Display CCT mode Information Tungsten Factory reset Turn the CONTROL wheel to navigate through the main menu. -
Page 25: Manual Mode
TFLD-7 Floodlight Manual Mode In this menu you can control the device manually. 01) Turn the CONTROL wheel to select one of the parameters. There are 3 options available: ● Dimmer: Dimmer adjustment from 0 % to 100 % ●... -
Page 26: Dimmer Curve
TFLD-7 Floodlight Dimmer Curve In this menu you can adjust the dimmer curve settings. 01) Turn the CONTROL wheel to select one of the 4 available options: Linear, G2.0 (Gamma-2.0), G2.2 (Gamma-2.2) and S-Curve. 02) Press the CONTROL wheel to confirm the selection. -
Page 27: Tungsten
TFLD-7 Floodlight 02) Press the CONTROL wheel to confirm the selection. Tungsten In this menu you can select Tungsten simulation at different outputs. 01) Turn the CONTROL wheel to select one of the 4 available options: 575 W, 750 W, 1000 W, 2000 W. -
Page 28: Fan Mode
TFLD-7 Floodlight Fan Mode In this menu you can adjust the speed of the fan. 01) Turn the CONTROL wheel to select one of the following 3 options: Auto, Silent, Full. 02) Press the CONTROL wheel to confirm the selection. -
Page 29: Info
TFLD-7 Floodlight Info In this menu you can view the device’s parameters. 01) Turn the CONTROL wheel to select one of the 7 available options: Total hours of operation of the device Total hours of operation of the LEDs The number of times the device has been powered... -
Page 30: Dmx Channels
TFLD-7 Floodlight DMX Channels DMX Channels Overview Dimmer Basic Tungsten RGB Pro CMY Pro HSI Pro Function 1 CH 5 CH 6 CH 10 CH 10 CH 10 CH 20 CH Dimmer Coarse Dimmer Fine Shutter/Strobe Hue Coarse Hue Fine... -
Page 31: Dimmer (1 Channel), Basic (5 Channels), Tungsten (6 Channels)
TFLD-7 Floodlight Dimmer (1 Channel), Basic (5 Channels), Tungsten (6 Channels) Dimmer Basic Tungsten Function Value Setting 1 CH 5 CH 6 CH Dimmer Coarse 000–255 From low to high intensity (0–100 %) Dimmer Fine 000–255 From low to high intensity (0–100 %) 000–005... - Page 32 TFLD-7 Floodlight Dimmer Basic Tungsten Function Value Setting 1 CH 5 CH 6 CH 107–109 Primary Green L139 110–112 Bright Blue L141 113–115 Apricot L147 116–118 Bright Rose L148 119–121 Pale Gold L152 122–124 Pink L157 125–127 Deep Orange L158 128–130...
- Page 33 TFLD-7 Floodlight Dimmer Basic Tungsten Function Value Setting 1 CH 5 CH 6 CH 144–151 PWM frequency: 1600 Hz 152–159 Calibration disabled 160–167 Calibration enabled 168–175 Fan mode: silent 176–183 Fan mode: auto 184–191 Fan mode: full 192–199 Display: auto off 200–207...
-
Page 34: Rgb Pro (10 Channels), Cmy Pro (10 Channels), Hsi Pro (10 Channels)
TFLD-7 Floodlight RGB Pro (10 Channels), CMY Pro (10 Channels), HSI Pro (10 Channels) RGB Pro CMY Pro HSI Pro Function Value Setting 10 CH 10 CH 10 CH Dimmer Coarse 000–255 From low to high intensity (0–100 %) 000–255... - Page 35 TFLD-7 Floodlight RGB Pro CMY Pro HSI Pro Function Value Setting 10 CH 10 CH 10 CH 077–079 Lee Green L121 080–082 Fern Green L122 083–085 Dark Green L124 086–088 Bright Pink L128 089–091 Medium Blue L132 092–094 Golden Amber L134 095–097...
- Page 36 TFLD-7 Floodlight RGB Pro CMY Pro HSI Pro Function Value Setting 10 CH 10 CH 10 CH 040–071 No function 072–079 Simulation source: Tungsten 575 W 080–087 Simulation source: Tungsten 750 W 088–095 Simulation source: Tungsten 1000 W 096–103 Simulation source: Tungsten 2000 W 104–111...
-
Page 37: Raw (20 Channels)
TFLD-7 Floodlight RAW (20 Channels) Function Value Setting 20 CH Dimmer Coarse 000–255 From low to high intensity (0–100 %) 000–255 Fine adjustment from low to high intensity Dimmer Fine (0–100 %) 000–005 Closed (No light output) Shutter/Strobe 006–249 Strobe, from low to high frequency 250–255... - Page 38 TFLD-7 Floodlight Function Value Setting 20 CH 104–106 Pale Green L138 107–109 Primary Green L139 110–112 Bright Blue L141 113–115 Apricot L147 116–118 Bright Rose L148 119–121 Pale Gold L152 122–124 Pink L157 125–127 Deep Orange L158 128–130 Bastard Amber L162 131–133...
- Page 39 TFLD-7 Floodlight Function Value Setting 20 CH 136–143 PWM frequency: 1500 Hz 144–151 PWM frequency: 1600 Hz 152–159 Calibration disabled 160–167 Calibration enabled 168–175 Fan mode: silent 176–183 Fan mode: auto 184–191 Fan mode: full 192–199 Display: auto off 200–207 Display: on 208–215...
-
Page 40: Troubleshooting
TFLD-7 Floodlight Troubleshooting This troubleshooting guide contains solutions to problems which can be carried out by an ordinary person. The device does not contain user-serviceable parts. Unauthorized modifications to the device will render the warranty void. Such modifications may result in injuries and material damage. -
Page 41: Maintenance
TFLD-7 Floodlight Maintenance Safety Instructions for Maintenance DANGER Electric shock caused by dangerous voltage inside Disconnect power supply before servicing or cleaning. WARNING Risk of burns due to hot surface Allow the device to cool down for at least 15 minutes before servicing or cleaning. -
Page 42: Basic Cleaning Instructions
TFLD-7 Floodlight Basic Cleaning Instructions The external lens of the device must be cleaned periodically in order to optimize the light output. The cleaning schedule depends on the conditions at the site where the device is installed. When smoke or fog machines are used at the site, the device will need more frequent cleaning. -
Page 43: Deinstallation, Transportation And Storage
TFLD-7 Floodlight Deinstallation, Transportation and Storage Instructions for Deinstallation WARNING Incorrect deinstallation can cause serious injuries and damage of property. ● Let the device cool down before dismounting. ● Disconnect power supply before deinstallation. ● Always observe the national and site-specific regulations during deinstallation and derigging of the device. - Page 44 ©2020 Infinity...