Kenwood DM-VH7 Instruction Manual
Dm-vh7 instruction manual
Hide thumbs
Also See for DM-VH7:
- Instruction manual (26 pages) ,
- Instruction manual (26 pages) ,
- Service manual (26 pages)

Related Manuals for Kenwood DM-VH7


Summary of Contents for Kenwood DM-VH7
- Page 1 MD RECORDER DM-VH7 INSTRUCTION MANUAL KENWOOD CORPORATION Before installation, read the section entitled “Installation” for correct installation. B60-4261-00...
-
Page 2: Before Applying Power
There is no danger of hazardous radiation outside the unit. CAUTION: TO REDUCE THE RISK OF ELECTRIC SHOCK, DO NOT REMOVE COVER (OR BACK). NO USER-SERVICEABLE PARTS INSIDE. REFER SERVICING TO QUALIFIED SERVICE PERSONNEL. DM-VH7 (EN) CLASS 1... -
Page 3: Table Of Contents
Erasing a single track during playback (ERASE) ... 42 How to edit titles ... 43 In case of difficulty ... 47 Specifications ... 50 Caution : Read the pages marked Before applying power DM-VH7 (EN) carefully to ensure safe operation. -
Page 4: Important Safeguards
An appliance and cart combination should be moved with care. Quick stops, excessive force, and uneven surfaces may cause the appliance and cart combination to overturn. DM-VH7 (EN) - Page 5 (NEC SECTION 810-21) 1. Item 3 is not required except for grounded or polarized equipment. 2. Item 17 and 18 are not required except for units provided with antenna terminals. 3. Item 17 complies with UL in the U.S.A. DM-VH7 (EN)
-
Page 6: Before Operation
Keep this manual handy for future reference. Accessories Check that the following accessories are present. Audio cord (2) System control cord (1) Remote control unit (1) Batteries (R6/AA) (2) Optical fiber cable (1) Allen wrench (1) Replacement front feet (2) Spacer (1) Before operation DM-VH7 (EN) -
Page 7: Special Feature
Even when the unit is off (STANDBY mode of power), play- back can be started easily by simply pressing the play key on the front panel. The unit incorporates a sampling rate converter to handle different kinds of digital sources (32kHz, 44.1kHz, 48kHz). Before operation DM-VH7 (EN) -
Page 8: Safety Precautions
Return the tab to the original position when you want to record signals on the disc. Disc back side Slide open. (Recording disabled) Before operation DM-VH7 (EN) Write protect tab Slide close. (Recording enabled) -
Page 9: Maintenance
NO DISC In regard to contact cleaner Do not use contact cleaners because it could cause a malfunction. Be specially careful not to use contact cleaners containing oil, for they may deform the plastic component. Before operation DM-VH7 (EN) -
Page 10: Installation
Align the removed front foot with the threaded holes on the rear part of the right side panel, and attach the front foot using the screws removed in step 1. Step DM-VH7 (EN) View of the unit when it is placed vertically... -
Page 11: How To Replace The Front Feet
3 Press the 4 or ¢ key to select “MANUAL”, then press the enter key. 4 Press the 4 or ¢ key to select the desired orientation, then press the enter key. System connections Attach the provided replacement front feet. Attach using two of the 4 screws removed in step 1. Installation DM-VH7 (EN) -
Page 12: System Connections
DIGITAL IN jack (OPTICAL) Remove the protec- tive cap before using the DIGITAL IN jack. Remove cap. ¶ Be careful not to lose the protective caps. ¢∞ §º DM-VH7 (EN) PLAY IN Audio cord DIGITAL IN OPTICAL DIGITAL IN OPTICAL... -
Page 13: System Operation Features
VH7) through a system control cord, timer playback of an MD and timer recording of radio broadcasting are pos- sible. For details, read this instruction manual as well as the Instruction Manual of the RD-VH7. Operations on this unit: Steps 1 to 3 in “General recording.” DM-VH7 (EN) §... -
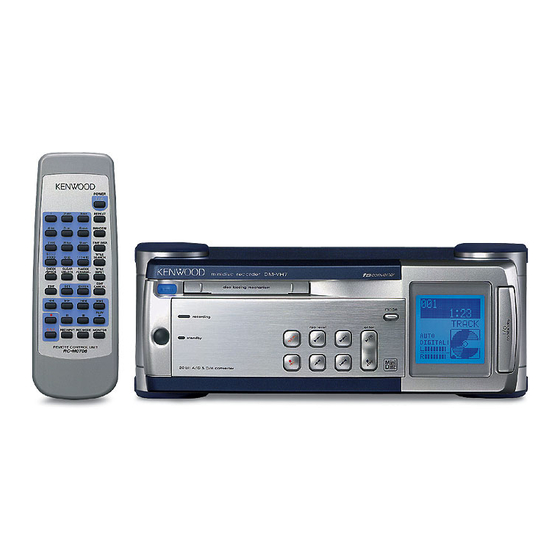
Page 14: Names And Functions Of Parts
Names and functions of parts Display/Main unit minidisc recorder DM-VH7 eject recording standby 20bit A/D D/A converter & 1 recording indicator 2 Eject (0 eject) key/disc indicator Press to unload the Mini Disc. The indicator lights when a MD is present in the unit. -
Page 15: Remote Control Unit
ON/OFF. ¢ MONITOR key : Monitors the audio from an input source. Names and functions of parts DM-VH7 (EN) )) key At the time of editing, the cursor movement and the selected title can be confirmed. ›‚r During editing, this key is used to select track numbers, title and characters. -
Page 16: Operation Of Remote Control Unit
3. If direct sunlight or the light of a high- frequency fluorescent lamp (inverter type, etc.) is incident to the remote sensor, malfunction may occur. In such a case, change the installation position to avoid malfunction. Insert batteries. ¶ Insert two R6 (“AA”-size) batteries following the polarity indications. Remote sensor Reference operating range DM-VH7 (EN) Close the cover. 30° 30°... -
Page 17: Playback Of Mini Disc
¶ “READING” is displayed while the contents of the MD are checked. ¶ If a title has been assigned to the disc, that title will be displayed. 0:00 Track No. being played Elapsed time of track 0:12 being played TITLER TRACK AUTO DINoAUX DM-VH7 (EN) -
Page 18: Playback From Desired Track
To enter track No. 40 : 0, 0, 0, 0, ) ¶ Press the RANDOM key again to cancel random play- back. To select a different title during listening : Press the ¢ key. Playback of Mini Disc DM-VH7 (EN) 0:00 TRACK “TRACK“ indicator... - Page 19 ¶ When the reverse search is started during the program or random mode and the beginning of the current track is attained, the track will be played from the beginning. To stop playback EJECT Mini Disc has been ejected. Playback of Mini Disc DM-VH7 (EN) *¡ NO DISC...
-
Page 20: Searching A Desired Track By Its Title (Title Search)
To larger 002 MUSIC track No. Track played ¶ The track can also be selected using the numeric keys. TITLE 002 MUSIC Playback of Mini Disc DM-VH7 (EN) Characters flow toward the left. TRACK Title Characters flow toward the left. -
Page 21: Programming
¶ When the 4 or ¢ key is pressed during playback, tracks will be skipped in the direction of the pressed key. Programming -0:00T “PGM” indicator Programmed order Selected track DM-VH7 (EN) - Page 22 ¶ Each press displays the next track in the program. (Operate in stopped condition.) The number of the track that has been cleared is displayed. PGM 14 CLEAR (Example when P-14 has been cleared) eject Main unit Programming Programmed order Track No. DM-VH7 (EN)
-
Page 23: Repeated Playback
Each press of the REPEAT key switches the mode as follows. REP. To stop repeated playback Press the REPEAT key to select “OFF”. Programming DM-VH7 (EN) : Plays all tracks in the MD repeatedly. -0:00T “PGM”indicator : Plays all the selected tracks repeatedly. -
Page 24: Systematized Recording Features
DIN CD (digital) and the recording level is automatically set to 0 dB. ¶ It is not possible to change the recording input or recording level during O.T.E. recording. Press the stop (7) key to stop recording in the middle. DM-VH7 (EN) Playback-only... -
Page 25: Synchro Recording With Cd Player
¶ The recording level can also be adjusted using the rec level keys on the main unit. ¶ Press the record (¶) key to enter record-pause mode automatically. ¶ When the CD playback starts, the MD recording starts automatically. Systematized recording features DM-VH7 (EN) Level value TRACK º... -
Page 26: Recording
0 dB for digital input recording. ¶ The recording level can also be adjusted using the rec level keys on the main unit. ¶ Press the record (¶) key to enter record-pause mode automatically. DM-VH7 (EN) Level value TRACK º... - Page 27 While “WRITING” is displayed, do not ap- ply shock or vibration to the unit because Note Note information is being written on the Mini Disc. To stop recording in the middle Recording DM-VH7 (EN) ‚ ª ∞§ ª ∞§ NO DISC ‚w...
-
Page 28: Starting Recording From The Sound Before The Current Sound (Memory Rec)
÷ Step 3 consists of adjusting the setting of the “Setting ENTER adjustment mode” selected in step 2. ÷ To end the setting adjustment, press the REC MODE key again. Recording DM-VH7 (EN) ing method. marking no-sound blank de- tection level setting. - Page 29 As this unit has a built-in sampling rate converter, digital signals with 32 kHz and 48 kHz can be recorded by conversion to the MD sampling frequency (44.1 kHz). Track number increments more easily Recording DM-VH7 (EN)
-
Page 30: Changing The Displayed Contents
¶ When the sampling frequency of the digital input signal is not 48 kHz, 44.1 kHz, or 32 kHz, “UNLOCK” will be displayed and no sound will be heard. ¶ Monitoring is canceled when a MD starts to play. DM-VH7 (EN) -
Page 31: Editing
Dividing a track, combining two tracks Dividing a track during playback ¤ (DIVIDE) › Combining tracks during playback (COMBINE) Erasing several tracks at a time (QUICK ERASE) Editing DM-VH7 (EN) fl ° ‚ ALL ERASE ‚... -
Page 32: Moving The Order Of The Track Being Played In A Disc (Move)
¶ Editing is aborted if no operation has been performed for 8 seconds. EDIT Example for moving between tracks No. 6 and No. 7 To increase MOVE track No. 006/__/007 MOVE 006/–003 Editing DM-VH7 (EN) MOVE Track to be moved –003 Destination track... - Page 33 Note Note about recording and editing is being writ- ten to the Mini Disc. ENTER ok ? Editing DM-VH7 (EN) : Editing : When editing is completed suc- cessfully ‹ EJECT NO DISC Mini Disc has been ejected.
-
Page 34: Reordering Several Tracks At A Time (Quick Move)
¶ Up to 32 tracks can be selected. ¶ Pressing the 1 or ¡ key allows to check the current order of tracks. ¶ Press the CLEAR/DELETE key to clear the last selected track number. Editing DM-VH7 (EN) Q.MOVE Number of selected tracks... - Page 35 Mini Disc. 26 27 28 29 Arrangement in the desired sequence (step 2) 1 2 4 3 23 6 24 26 27 28 29 Editing DM-VH7 (EN) : Editing : When editing is completed suc- cessfully ‹ EJECT NO DISC Mini Disc has been ejected.
-
Page 36: Dividing A Track During Playback (Divide)
¶ The dividing point can be fine-adjusted in 60 ms (6/100 sec.) steps, between -31 and +31 assuming that the point where the EDIT key was pressed is 0 (i.e. in the range covering about 4 seconds). DIVIDE 001<>002 Editing DM-VH7 (EN) - Page 37 Mini Disc. Point selected by fine adjustment of dividing point Playback for 3 sec Place where the EDIT key has been pressed Fine adjustment range Editing DM-VH7 (EN) : Editing : When editing is completed suc- cessfully ‹ EJECT...
-
Page 38: Combining Tracks During Playback (Combine)
¶ Editing is aborted if no operation has been performed for 8 seconds. EDIT COM. 003 TITLE To increase Connecting tracks 2 and 5. track No. COM. 005 ABCDEF COMBINE ok? 002+005 Editing DM-VH7 (EN) COMBINE Present title 002+ Next title 002+... - Page 39 Mini Disc has been being written. ejected. While “WRITING” is displayed, do not im- pact or move the unit because information Note Note about recording and editing is being writ- ten to the Mini Disc. Editing DM-VH7 (EN) ‹ NO DISC...
-
Page 40: Erasing Several Tracks At A Time (Quick Erase)
¶ When the CLEAR/DELETE key is pressed, the last selected track in the list of tracks to be erased will be cleared from the list. Q.ERASE ok? 12 tracks Number of tracks to be deleted Editing DM-VH7 (EN) - Page 41 Mini Disc has been being written. ejected. While “WRITING” is displayed, do not im- Note Note pact or move the unit because information about recording and editing is being writ- ten to the Mini Disc. Editing DM-VH7 (EN) ‹ NO DISC...
-
Page 42: Erasing A Single Track During Playback (Erase)
While “WRITING” is displayed, do not im- pact or move the unit because information Note Note about recording and editing is being writ- ten to the Mini Disc. ERASE ERASE 003 KENWOO EJECT NO DISC Mini Disc has been ejected. Editing DM-VH7 (EN) -
Page 43: How To Edit Titles
ALL ERASE To register the title in the Title Memo : Select one of [1], [2] or [3]. TITLE [1] ÷÷÷÷÷÷ Editing DM-VH7 (EN) TRACK • • • • • (Track title) titles) • • • • • (Title Memo) ÷÷÷÷÷÷... - Page 44 The cursor moves and stands by for the next character input. To advance ¶ Use the 1 or ¡ key to move the input position cursor to the left or right. ¶ To enter a space character, press the CHECK/SPACE key. Editing DM-VH7 (EN) Selected character...
- Page 45 ¶ To enter a space character, press the CHECK/SPACE key. DISC The cursor moves and stands by for the next character input. ¶ The character can be set also by pressing another numeric key, ¡ key or the P.MODE/CHARAC. key. Editing DM-VH7 (EN)
- Page 46 0123456789 Space ! " # $ % & ( ) * + , – . / : ; < = > ` ? @ ^ _ [1] [2] [3] [DISC] ([001]•••••) TOTAL KENWO EJECT NO DISC Mini Disc has been ejected. Editing DM-VH7 (EN)
-
Page 47: In Case Of Difficulty
¶ This is because the monaural recording and stereo re- cording use different formats, and not a malfunction. ¶ As the title recording areas are used on a per-7-character basis, the total number of input characters may be less than 1792. In case of difficulty DM-VH7 (EN) - Page 48 ¶ This is a message for confirming if editing can really be executed. ¶ The write protect tab is open. ¶ A playback-only Mini Disc is loaded. In case of difficulty DM-VH7 (EN) Action ¶ Use analog recording. ∞§ ¶ Connect the optical fiber cable cor- rectly.
- Page 49 ¶ A disc in which distorted sound has been recorded is played. ¶ An external noise is induced. In case of difficulty DM-VH7 (EN) Remedy ¶ Connect the cords in accordance with “System connections”. ¶ Load a disc. &...
-
Page 50: Specifications
(Horizontal installation) ... W : 247 mm (9 - 3 / 4") (Vertical installation) ... W : 96 mm (3 - 3 / 4") Weight (Net) ... 3.1 kg (6.8 lb) 1. KENWOOD follows a policy of continuous advancements in development. For this reason specifications may be changed without notice. Notes Notes 2. - Page 51 In case of difficulty DM-VH7 (EN)
- Page 52 For your records Record the serial number, found on the back of the unit, in the spaces designated on the warranty card, and in the space provided below. Refer to the model and serial numbers whenever you call upon your dealer for information or service on this product.