Table of Contents
Advertisement
Available languages
Available languages
W10162170B
BUILT-IN ELECTRIC
OVEN
Use & Care Guide
For questions about features, operation/performance, parts,
accessories or service, call: 1-800-253-1301 or visit our website
at...www.whirlpool.com
In Canada, call for assistance, installation or service, call:
1-800-807-6777 or visit our website at...
www.whirlpool.ca
FOUR ÉLECTRIQUE
ENCASTRÉ
Guide d'utilisation
et d'entretien
Au Canada, pour assistance, installation ou service, composer le
1-800-807-6777
ou visitez notre site web à
www.whirlpool.ca
Table of Contents/Table des matières ............. 2
Models/Modèles RBD245 RBS245
Advertisement
Table of Contents

Related Manuals for Whirlpool RBD245PRQ


Summary of Contents for Whirlpool RBD245PRQ
- Page 1 BUILT-IN ELECTRIC OVEN Use & Care Guide For questions about features, operation/performance, parts, accessories or service, call: 1-800-253-1301 or visit our website at...www.whirlpool.com In Canada, call for assistance, installation or service, call: 1-800-807-6777 or visit our website at... www.whirlpool.ca FOUR ÉLECTRIQUE ENCASTRÉ...
-
Page 2: Table Of Contents
TABLE OF CONTENTS OVEN SAFETY ...3 PARTS AND FEATURES...4 ELECTRONIC OVEN CONTROL ...5 Display...5 Start ...5 Upper Off/Cancel, Lower Off/Cancel or Off/Cancel...5 Clock ...5 Tones...5 Fahrenheit and Celsius...6 Timer...6 Control Lock...6 Oven Temperature Control ...6 OVEN USE...7 Aluminum Foil...7 Positioning Racks and Bakeware ...7 Bakeware...7 Meat Thermometer...8 Oven Vent...8... -
Page 3: Oven Safety
Your safety and the safety of others are very important. We have provided many important safety messages in this manual and on your appliance. Always read and obey all safety messages. This is the safety alert symbol. This symbol alerts you to potential hazards that can kill or hurt you and others. All safety messages will follow the safety alert symbol and either the word “DANGER”... -
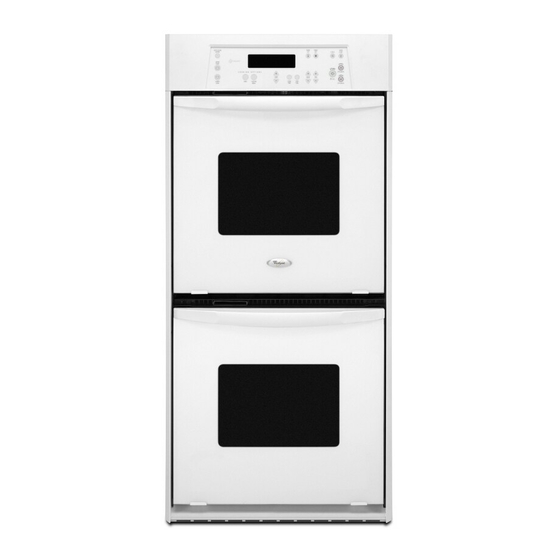
Page 4: Parts And Features
State of California Proposition 65 Warnings: WARNING: This product contains one or more chemicals known to the State of California to cause cancer. WARNING: This product contains one or more chemicals known to the State of California to cause birth defects or other reproductive harm. -
Page 5: Electronic Oven Control
ELECTRONIC OVEN CONTROL A. Auto clean B. Upper oven temperature display C. Electronic display D. Lower oven temperature display E. Timer Display When power is first supplied to the appliance, everything on both displays will light up for 5 seconds. Then, the time of day and “PF”... -
Page 6: Fahrenheit And Celsius
All Tones All of the above tones are preset on, but can be turned off. To Turn Off/On: Press and hold STOP TIME for 5 seconds, and a tone will sound. On double ovens only, “Snd OFF” and “Snd On” will remain in the display. -
Page 7: Oven Use
Odors and smoke are normal when the oven is used the first few times, or when it is heavily soiled. During oven use, the heating elements will not remain on, but will cycle on and off throughout oven operation. IMPORTANT: The health of some birds is extremely sensitive to the fumes given off. -
Page 8: Meat Thermometer
Meat Thermometer On models without a temperature probe, use a meat thermometer to determine whether meat, poultry and fish, are cooked to the desired degree of doneness. The internal temperature, not appearance, should be used to determine doneness. A meat thermometer is not supplied with this appliance. -
Page 9: Timed Cooking
For best results, use a broiler pan and grid. They are designed to drain juices and help avoid spatter and smoke. If you would like to purchase a broiler pan, one may be ordered. See “Assistance or Service” section to order. Ask for Part Number 4396923. -
Page 10: Oven Care
4. Press the HOUR and MIN “+” or “-” keypads to enter the length of time to cook. 5. Press START. The start time, the stop time countdown and “TIMED” will appear on the oven display. On double oven models only, when both upper and lower ovens are being used at the same time, touch UPPER OVEN or LOWER OVEN to display the respective cook time. -
Page 11: General Cleaning
To Self-Clean: Before self-cleaning, make sure the door is closed completely or it will not lock and the cycle will not begin. 1. Press AUTO CLEAN. 2. Press the HOUR “+” or “-” keypads to set a clean time other than 3 hours 30 minutes. -
Page 12: Oven Lights
Oven Lights The oven lights are standard 15-watt appliance bulbs. They will come on when the oven door is opened. On double oven models with self-clean upper and lower ovens, all oven lights will come on when either door is opened. On double oven models with standard-clean lower ovens, the oven lights will not come on when the lower oven door is opened. -
Page 13: Troubleshooting
Try the solutions suggested here first in order to avoid the cost of an unnecessary service call. Nothing will operate Has a household fuse blown, or has a circuit breaker tripped? Replace the fuse or reset the circuit breaker. If the problem continues, call an electrician. -
Page 14: Assistance Or Service
ASSISTANCE OR SERVICE Accessories U.S.A. To order accessories, call the Whirlpool Customer eXperience Center toll free at 1-866-664-2449 and follow the menu prompts. Or visit our website at www.whirlpool.com and click on “Parts & Accessories.” ® replacement parts will fit... -
Page 15: Warranty
Whirlpool Corporation or Whirlpool Canada LP (hereafter “Whirlpool”) will pay for Factory Specified Parts and repair labor to correct defects in materials or workmanship. Service must be provided by a Whirlpool designated service company. This limited warranty is valid only in the United States or Canada and applies only when the major appliance is used in the country in which it was purchased. -
Page 16: Sécurité Du Four
Votre sécurité et celle des autres est très importante. Nous donnons de nombreux messages de sécurité importants dans ce manuel et sur votre appareil ménager. Assurez-vous de toujours lire tous les messages de sécurité et de vous y conformer. Voici le symbole d’alerte de sécurité. Ce symbole d’alerte de sécurité... -
Page 17: Pièces Et Caractéristiques
PIÈCES ET CARACTÉRISTIQUES Ce manuel couvre plusieurs modèles différents. Le four que vous avez acheté peut avoir certaines ou toutes les caractéristiques indiquées. Les emplacements et les apparences des caractéristiques illustrées ici peuvent ne pas correspondre à ceux de votre modèle. -
Page 18: Commande Électronique Du Four
COMMANDE ÉLECTRONIQUE DU FOUR A. Autonettoyage B. Affichage de la température du four supérieur C. Affichage électronique D. Affichage de la température du four inférieur E. Minuterie Affichage Lors de la mise sous tension initiale de l'appareil, tout s'allumera sur les deux affichages pendant 5 secondes. Puis, l'heure et “PF” apparaîtront sur l'affichage électronique du four. -
Page 19: Fahrenheit Et Celsius
Tous les signaux sonores Tous les signaux sonores ci-dessus sont préréglés à marche, mais ils peuvent être désactivés. Désactivation/activation : Appuyer sur STOP TIME pendant 5 secondes, un signal sonore est émis. Sur les fours doubles uniquement, “Snd OFF” et “Snd On” resteront affichés. Pour effacer l'affichage, appuyer sur UPPER OFF/CANCEL, LOWER OFF/CANCEL, ou OFF/CANCEL Signaux sonores de rappel... -
Page 20: Utilisation Du Four
Les odeurs et la fumée sont normales lorsque le four est utilisé pour les premières fois, ou lorsqu’il est très sale. Lors de l'utilisation du four, les éléments chauffants ne resteront pas allumés, mais fonctionneront par intermittence lorsque le four est en marche. IMPORTANT : La santé... -
Page 21: Thermomètre À Viande
Thermomètre à viande Sur les modèles sans sonde thermométrique, se servir d'un thermomètre à viande pour vérifier si la viande, la volaille et le poisson ont atteint le degré de cuisson désiré. C'est la température interne qui indique le degré de cuisson et non l'apparence. -
Page 22: Cuisson Au Gril Et Cuisson Au Gril Personnalisée
A. Élément de cuisson au gril La cuisson au gril utilise une chaleur radiante directe pour cuire les aliments. Durant la cuisson au gril, l’élément de cuisson au gril s’allume et s’éteint par intermittence pour maintenir la température du four. En cas d’ouverture de la porte durant la cuisson au gril, l’élément du gril s’éteint immédiatement et se rallume dès la fermeture de la porte. -
Page 23: Cuisson Minutée
TABLEAU DE CUISSON AU GRIL Pour obtenir les meilleurs résultats, placer l’aliment à au moins 3" (7 cm) de l’élément de cuisson au gril. Les durées de cuisson indiquées sont seulement des recommandations et peuvent être ajustées selon les goûts individuels. Les positions recommandées de la grille sont indiquées de la base (1) jusqu’en haut (5). -
Page 24: Entretien Du Four
Programme d'autonettoyage (sur certains modèles) AVERTISSEMENT Risque de brûlures Ne pas toucher le four au cours du programme d'autonettoyage. Garder les enfants loin du four au cours du programme d'autonettoyage. Le non-respect de ces instructions peut causer des brûlures. IMPORTANT : La santé de certains oiseaux est très sensible aux émanations qui surviennent durant le programme d'autonettoyage. -
Page 25: Nettoyage Général
3. Appuyer sur les touches à flèches HOUR et MIN “plus” (+) ou “moins” (-) pour entrer l’heure d'arrêt. 4. Appuyer sur START (mise en marche). L’heure de mise en marche est automatiquement calculée et affichée. La porte se verrouillera automatiquement et “LOCKED” (porte verrouillée), “DELAY”... -
Page 26: Porte Du Four
Il n'est pas recommandé d'enlever la porte du four pour une utilisation normale. Toutefois, si la dépose est nécessaire, s'assurer que le four est éteint et froid. Puis, suivre ces instructions. La porte du four est lourde. Dépose : 1. Ouvrir la porte du four complètement. 2. -
Page 27: Assistance Ou Service
ASSISTANCE OU SERVICE Pour plus d’assistance Si vous avez besoin de plus d’assistance, vous pouvez soumettre par écrit toute question ou préoccupation à Whirlpool Canada LP à l’adresse suivante : Whirlpool Canada LP Centre pour l'eXpérience de la clientèle 200 - 6750 Century Ave. -
Page 28: Garantie
5. Les défauts apparents, notamment les éraflures, les bosses, fissures ou tout autre dommage au fini du gros appareil ménager, à moins que ces dommages soient dus à des vices de matériaux ou de fabrication et soient signalés à Whirlpool dans les 30 jours suivant la date d’achat.