Table of Contents
Advertisement
Quick Links
These instructions contain information on operating the scanner. Before reading these instructions, please read
the Quick Installation Guide enclosed with this unit.
Keep all documentation in a safe place for future reference.
Current model availability depends on your country/area. Please contact your dealer.
Operating Manual
Document Scanner
KV-S5078Y
Model No.
KV-S5058
Advertisement
Table of Contents

Related Manuals for Panasonic KV-S5078Y


Summary of Contents for Panasonic KV-S5078Y
- Page 1 Operating Manual Document Scanner KV-S5078Y Model No. KV-S5058 These instructions contain information on operating the scanner. Before reading these instructions, please read the Quick Installation Guide enclosed with this unit. Keep all documentation in a safe place for future reference.
- Page 2 Introduction Introduction Thank you for purchasing a Panasonic Document Scanner. Trademarks • Microsoft, Windows, SharePoint and Internet Explorer are either registered trademarks or trademarks of Microsoft Corporation in the United States and/or other countries. • ISIS is a registered trademark or trademark of Open Text Corporation.
- Page 3 Control sheet USB connected scanner or selected scanner by "Network Scanner Select Tool" can communicate. Image Capture Plus is a Panasonic original application for configuring advanced scanning settings. This tool is used when the scanner is connected via USB. KV-S5078Y only.
- Page 4 LAN (10Base-T / 100Base-TX / 1000Base-T) Recommended web Internet Explorer 11 / Mozilla Firefox (latest version) / Google Chrome (latest browser version) KV-S5078Y only. Note • For details about the system requirements, refer to [Read me first] in the Software / Manual CD-ROM. •...
- Page 5 Introduction Copyright and license information Software license for SNMP protocol This product contains Net-SNMP software and uses it based on the following license conditions. ---- Part 1: CMU/UCD copyright notice: (BSD like) ----- Copyright 1989, 1991, 1992 by Carnegie Mellon University Derivative Work - 1996, 1998-2000 Copyright 1996, 1998-2000 The Regents of the University of California All Rights Reserved...
- Page 6 Introduction Redistribution and use in source and binary forms, with or without modification, are permitted provided that the following conditions are met: • Redistributions of source code must retain the above copyright notice, this list of conditions and the following disclaimer. •...
- Page 7 Introduction Software license for SNMP protocol This product also contains software which includes following notices and licenses. Copyright 1988, 1989, 1990 by Carnegie Mellon University Copyright 1989 TGV, Incorporated All Rights Reserved Permission to use, copy, modify, and distribute this software and its documentation for any purpose and without fee is hereby granted, provided that the above copyright notice appear in all copies and that both that copyright notice and this permission notice appear in supporting documentation, and that the name of CMU and TGV not be used in advertising or publicity pertaining to distribution of the software without...
-
Page 8: Table Of Contents
4.3.1 When Using This Unit with a USB Connection ............. 24 4.3.2 When Using This Unit with a Wired LAN Connection (KV-S5078Y) ......25 4.3.2.1 Changing the Scanner Connected over LAN ............. 26 Viewing Operating Manual and Help Installed ............27 4.4.1... - Page 9 11.3 Printing ......................... 115 11.4 Cleaning the Ink Cartridge ..................116 12 Appendix ..................... 117 12.1 Available Functions When Scanning (KV-S5078Y) ..........117 12.2 Perform Network Settings with USB Connection (KV-S5078Y) ......120 12.2.1 Configuring Wired LAN Settings ................. 120...
- Page 10 Table of Contents 12.3 Check the Event Settings for Touch Free Scanning and Single Touch Scanning ..12.4 Server Certificate (KV-S5078Y / LAN Connection) ........... 123 12.4.1 Installing a Server Certificate ..................123 12.4.2 Installing a Self-signed Certificate ................124 12.5...
-
Page 11: Feature Highlights
If the scanning process stops because documents (such as envelopes or receipts attached to documents) are being detected as double fed, the double feed skip (DFS) function can be used to resume scanning. Stapled document detection (KV-S5078Y) • This scanner has a stapled document detection that detects documents that contain staples and stops scanning before any serious damage occurs. -
Page 12: Before You Start
2 Before You Start 2 Before You Start 2.1 Precautions Illegal Duplication It is unlawful to make duplicates of certain documents. Duplicating certain documents may be illegal in your country/area. Penalties of fines and/or imprisonment may be imposed on those found guilty. The following are examples of items that may be illegal to duplicate in your country/area. - Page 13 • For details about the roller cleaning paper, please refer to the Safety Data Sheet (SDS). Please ask your Panasonic sales company about obtaining the Safety Data Sheet. • If the bag is left opened for a long period of time before using it, the alcohol will evaporate. Please use the roller cleaning paper immediately after opening the bag.
-
Page 14: Management Of Documents And Scanned Data
When having your computer or hard disk serviced, or when disposing of your computer or hard disk, completely erase any stored image data. 2.3 Security Notice Panasonic cannot be responsible for following types of damages. • Any damages due to misuse of this unit. -
Page 15: Check The Accessories
2.4 Check the Accessories 2.4 Check the Accessories Check that all accessories are included before installing the unit. In the event that an item is missing, please contact your dealer. Accessory Name Notes Use the power cord appropriate for where you use Power cord the unit. -
Page 16: Optional Accessories
(For 10 licenses) Image Capture Plus Refer to "7 Scan Server (OCR module for network scan) KV-SS094 *1*2 (KV-S5078Y)" (page 74). [10-user license] Extend the maximum number of Image Capture Plus fields for zone OCR in Image Zonal OCR Add-in KV-SS095 Capture Plus from 3 to 10. -
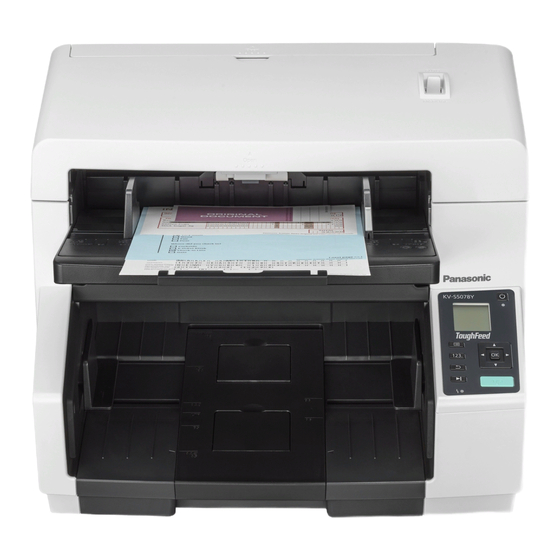
Page 17: Location Of Controls
3 Location of Controls 3 Location of Controls 3.1 Main Unit 3.1.1 Front Document guides ADF door release : Push to open the ADF door. Open Feed extension tray Document guides selector Exit guides Exit tray Exit stopper Exit extension tray ADF door Manual feed selector You can select the document feeding method. -
Page 18: Rear
USB cable Connect the USB cable to the scanner and the other end of the USB cable to the computer. LAN cable (not supplied) (KV-S5078Y) To assure continued emission limit compliance, use only shielded LAN cable. The cable should be a CAT 5 (Category 5) or higher for 10Base-T / 100Base-TX, or CAT 5e (Enhanced Category 5) or higher for 1000Base-T. -
Page 19: Installation
4 Installation 4 Installation 4.1 Required Space Around the Scanner In order to ensure proper operation, install the unit maintaining the proper distances from surrounding objects, as shown in the following illustration. 200 mm (7.9 in.) 200 mm 200 mm (7.9 in.) (7.9 in.) 250 mm... -
Page 20: Installing The Unit
4.2 Installing the Unit 4.2 Installing the Unit Move this unit with two persons. After installation, first install the double feed prevention roller in the unit. Notice • Do not move the unit immediately from a cold place to a warm place. It may cause condensation, which may damage the unit. - Page 21 4.2 Installing the Unit Install the double feed prevention roller. • Align the shaft that is shaped as indicated by with the notch in the roller mount ( ), and then insert the shaft in the notch. Push the shaft on the opposite side ( ) until it clicks into place. Notice After you install the double feed prevention roller, make sure that the shaft is inserted into the tab ( ).
- Page 22 4.2 Installing the Unit Push the double feed prevention roller cover until it clicks into place to close it. Notice • Make sure that the double feed prevention roller cover does not stick up. If the double feed prevention roller cover is closed incompletely, damage or paper jams can occur. Close the ADF door (page 39).
-
Page 23: Installing The Software
• You can change the language used on the LCD. For details, see "6.1.3 Changing the Language Used on the LCD (KV-S5078Y)" (page 38). • When turning on the unit's power for the first time, set the date and time by using the cursor buttons, and then press the OK button. -
Page 24: When Using This Unit With A Usb Connection
Capture Plus will also be installed. Follow the instructions on the screen and complete the installation. • Select [USB] as the connection method for the scanner. (KV-S5078Y) • Restart your computer if you are prompted to do so. Plug in the power cord and connect the USB cable. -
Page 25: When Using This Unit With A Wired Lan Connection (Kv-S5078Y)
4.3.2 When Using This Unit with a Wired LAN Connection (KV-S5078Y) 4.3.2 When Using This Unit with a Wired LAN Connection (KV-S5078Y) For details about network-related settings, consult your network administrator. Insert the Software / Manual CD-ROM into the CD/DVD drive on your computer. -
Page 26: Changing The Scanner Connected Over Lan
4.3.2 When Using This Unit with a Wired LAN Connection (KV-S5078Y) 4.3.2.1 Changing the Scanner Connected over LAN You can change the scanner used with a LAN Connection. Start the Network Scanner Select Tool. Select the check box of the scanner you use. -
Page 27: Viewing Operating Manual And Help Installed
[Scanner Manuals]. Select the manual. • The manual will open. Note • In Windows 8 and Windows 10, select the [Panasonic Document Scanner] section on the Apps screen. 4.4.2 To View the Help For Image Capture Plus Select [All Programs] [Panasonic] [Image Capture Plus] [Image Capture Plus Help]. -
Page 28: Operation Panel
5 Operation Panel 5 Operation Panel KV-S5078Y Power button ( ) For details, refer to "6.1.1 Turning ON/OFF the Unit's Power" (page 38). Selected jobs, error codes, notification messages, and the scanner status are displayed. Menu button ( • Displays the Menu screen (page 35). You can access the Function Setting screen (page 35), the Counter screen (page 36), the Network Setting screen (page 37) and the Maintenance screen (page 37) from the Menu screen. - Page 29 5 Operation Panel Start/Stop button ( • During scanning, pressing this button stops scanning. • If you press this button after a double feed is detected and scanning has been paused in pull scan, scanning will stop without scanning the document. •...
- Page 30 5 Operation Panel KV-S5058 Power button ( ) For details, refer to "6.1.1 Turning ON/OFF the Unit's Power" (page 38). Small/Thin paper mode LED (Green) Lights when feed mode is set to Small/Thin paper mode. For details, refer to "5.1 About LED" (page 31).
-
Page 31: About Led
For details about the notification, check the LCD or User Utility. For details about the network error, refer to "12.10 Error Codes and Error Messages (KV-S5078Y)" (page 132). For details about the error, refer to "12.10 Error Codes and Error Messages (KV-S5078Y)" (page 132). -
Page 32: About Lcd (Kv-S5078Y)
5.2 About LCD (KV-S5078Y) 5.2 About LCD (KV-S5078Y) The status of the unit is displayed on the LCD as follows. Status The scanner is warming up. This is the basic display of the screen in the ready mode. • of the cursor button to select the Small/Thin paper mode (page 52). - Page 33 5.2 About LCD (KV-S5078Y) Status The Scanner status and scanning counter are displayed. • : The following icons are displayed. icon Contents The system counter is displayed. The user counter is displayed. The scan counter is displayed. Clean the rollers.
- Page 34 5.2 About LCD (KV-S5078Y) Examples of displays of scanner statuses are as follows. G: nn Group number (two-digit) and Group name of job. GROUP NAME Push Scan Mode: USB mode J: nn Job number (two-digit) and Job name. JOB NAME...
-
Page 35: Menu Screen
Configuration Web (KV-S5078Y)" (page 76). • Some settings can also be configured using Network Setting Tool. For details, refer to "12.2 Perform Network Settings with USB Connection (KV-S5078Y)" (page 120). Function Setting Configures each function's setting. Use of the cursor button to select items, and change their value. - Page 36 5.2.1 Menu Screen Item Contents Sets whether Count Only Mode (page 59) can be activated by holding the Count Only Mode Shortcut Menu button ( ) for 1 second or more. Key buzzers, error buzzers etc. Counter Select the counter using of the cursor button, and press the OK button to complete your selection.
- Page 37 Display the network authentication type. Maintenance Setting contents Item Contents Cleaning Mode Start Cleaning Mode. For details, see "10.2.5 Cleaning Mode" (page 100). Starts Count Only Mode. For details, see "6.3.6 Using Count Only Mode Count Only Mode (KV-S5078Y)" (page 59).
-
Page 38: Operation
6.1.2 Returning from Sleep Mode Press any button other than the power button ( ) on the operation panel. 6.1.3 Changing the Language Used on the LCD (KV-S5078Y) You can change the language used on the LCD. Press the Menu button ( Press the OK button. -
Page 39: Opening/Closing The Adf Door
6.1.5 Opening/Closing the ADF Door 6.1.5 Opening/Closing the ADF Door Opening the ADF door Press the ADF door release ( ), and open the ADF door ( ). Closing the ADF door Push both sides of the ADF door down slowly until it clicks into place. -
Page 40: Opening/Closing The Imprinter Door
6.1.6 Opening/Closing the Imprinter Door 6.1.6 Opening/Closing the Imprinter Door Opening the imprinter door Closing the imprinter door... -
Page 41: Adjusting The Height Of The Feed Tray
6.1.7 Adjusting the height of the feed tray 6.1.7 Adjusting the height of the feed tray KV-S5078Y of the cursor button to select the position of the feed tray. • 100 sheets / 200 sheets / Maximum KV-S5058 Adjusting the height of the feed tray from User Utility. -
Page 42: Preparing Documents For The Adf
6.2 Preparing Documents for the ADF 6.2 Preparing Documents for the ADF 6.2.1 About Documents for the ADF Notice • Make sure to remove paper clips and staples from documents before scanning. Failing to do so can damage the unit, document, or both. •... - Page 43 6.2.1 About Documents for the ADF Paper weight: Automatic Feeding 20 g/m² – 157 g/m² (5 lb. – 42 lb.) Manual Feeding 20 g/m² – 209 g/m² (5 lb. – 56 lb.) Paper capacity for the feed tray: 330 sheets (80 g/m² (21 lb.), High-quality woodfree paper) 150 sheets (80 g/m²...
-
Page 44: Incompatible Documents
6.2.1 About Documents for the ADF 6.2.1.2 Incompatible Documents Do not scan the following types of paper: • Cloths or metallic sheets • Documents out of specified size, thickness, and weight • Photographs • Thermal or photosensitive paper • Documents containing hard attachments such as metal or plastic (ex. clips or staples) •... -
Page 45: Notes About Documents For Scanning
6.2.1 About Documents for the ADF 6.2.1.3 Notes about Documents for Scanning • Depending on the paper type, scanning results may be poor when you scan incompatible documents, or even documents that should be compatible. If scanned images are skewed, paper jams occur, or double feeding occurs, try scanning again after doing the following: –... -
Page 46: Loading Documents On The Adf
6.2.2 Loading Documents on the ADF 6.2.2 Loading Documents on the ADF Adjust the document guides ( ) slightly larger than the actual size of the documents. Fan the documents. • Documents that have been stapled together or stacked together (as in a file folder) will need to be separated. - Page 47 6.2.2 Loading Documents on the ADF Carefully align the documents. • The documents feed better when the leading edges are aligned slantwise as shown in the illustration. Place the documents on the feed tray ( ) with the side to be scanned facing up. •...
- Page 48 6.2.2 Loading Documents on the ADF When scanning long sheets of paper Pull out the feed extension tray ( ) from the feed tray. If necessary, open the extension bar.
- Page 49 6.2.2 Loading Documents on the ADF Adjust the document guides ( ) to the size of the documents to be scanned. • When scanning documents with pages of different sizes at one time, refer to "6.3.4 When Scanning Documents with Pages of Different Sizes at One Time" (page 53). •...
- Page 50 6.2.2 Loading Documents on the ADF Adjust the exit extension tray ( ) to match the size of the documents. Adjust the exit guides ( ) to be slightly larger than the actual size of the documents. Note • Adjust the exit guides to be larger than the actual size of the documents to avoid paper jams.
-
Page 51: Scanning Documents
You can scan documents by using a scanning application (Image Capture Plus/TWAIN/ISIS) from a computer (pull scan) or by operating the scanner directly (push scan). As for the push scan, refer to "6.4 Using Push Scan (KV-S5078Y)" (page 62) or "6.5 Using Push Scan (KV-S5058)" (page 73). -
Page 52: Using Small/Thin Paper Mode
6.3.3 Using Small/Thin Paper Mode 6.3.3 Using Small/Thin Paper Mode Use Small/Thin paper mode if thin paper or paper whose length is 110 mm (4.33 in.) or less is not scanned correctly. KV-S5078Y of the cursor button to select Small/Thin paper mode. Note •... -
Page 53: When Scanning Documents With Pages Of Different Sizes At One Time
6.3.4 When Scanning Documents with Pages of Different Sizes at One Time 6.3.4 When Scanning Documents with Pages of Different Sizes at One Time When scanning documents with pages of different sizes at one time, please note the following: • Align the document pages along one side. - Page 54 6.3.4 When Scanning Documents with Pages of Different Sizes at One Time Completely spread apart the document guides ( ). Align the documents sheet by sheet at one corner as shown below. Documents that stick together, are not aligned correctly at one corner, or are at an angle cannot be fed correctly.
- Page 55 6.3.4 When Scanning Documents with Pages of Different Sizes at One Time Place the documents on the feed tray ( ) with the scanning side facing up. • Align the document position so that the center of the smallest sheet will be fed to the center of the paper feed roller ( ).
- Page 56 6.3.4 When Scanning Documents with Pages of Different Sizes at One Time Remove the document, and then slide the document guides selector in the direction shown in the illustration until the ◄ ( ) and ● ( ) marks are aligned. Place the document on the feed tray again and adjust the document guide according to the size of the document to be scanned.
- Page 57 6.3.4 When Scanning Documents with Pages of Different Sizes at One Time Adjusting the left and right document guides to their original position Slide the document guides selector in the direction shown in the illustration until the ◄ ( ) and ● ( ) marks are aligned.
-
Page 58: Exit Support Sheet
Attach the included exit support sheet ( ) into the holes ( ) above the exit slot. Note • The Exit Support Sheet can be placed upward when not in use, as shown below (KV-S5078Y Models other than KV-S5078Y may also support this function. -
Page 59: Using Count Only Mode (Kv-S5078Y)
6.3.6 Using Count Only Mode (KV-S5078Y) 6.3.6 Using Count Only Mode (KV-S5078Y) When using Count Only Mode, you can count the number of sheets in a document without scanning images of the document. For details about operation panel, refer to "5 Operation Panel" (page 28). -
Page 60: Using Control Sheets
6.3.7 Using Control Sheets 6.3.7 Using Control Sheets Placing a control sheet in the middle of documents lets you change the scanning conditions for pages scanned after the control sheet. Also, you can change the folder used to save the scan data of documents scanned after the control sheet. -
Page 61: About Printing Control Sheets
6.3.7 Using Control Sheets 6.3.7.1 About Printing Control Sheets • Print the control sheet at the specified size; do not enlarge or reduce the size. • When printing the control sheet, make sure that the pattern is 25 mm (1 in.) from the top of the page and centered horizontally. -
Page 62: Using Push Scan (Kv-S5078Y)
6.4 Using Push Scan (KV-S5078Y) 6.4 Using Push Scan (KV-S5078Y) 6.4.1 Outline of Push Scan This unit has three modes for Push scan. For details about the available functions for image processing, refer to "12.1 Available Functions When Scanning (KV-S5078Y)" (page 117). -
Page 63: Output File
6.4.2 Output File 6.4.2 Output File The output image file name is as follows. Item Item Sequence Prefix Type Code Extension delimiter delimiter 1 to 15 1 character 1 character 1 character 5 characters 1 character 3 characters characters Example Panasonic_ 00001 DOC01... - Page 64 The Sequence ID is a 5 digit ID managed for each output destination. One is added upon each scan, and after "99999" it returns to "00001". The sequence ID can be cleared by "12.8 Factory Reset (KV-S5078Y)" (page 128). Image File Limits...
-
Page 65: Usb Mode
6.4.3 USB Mode 6.4.3 USB Mode Push scan in USB mode is performed by the following procedure. Register a Job Setting List in Image Capture Plus Start Image Capture Plus. • Select [Image Capture Plus Standard] as the application mode. On the [Scan Setting] menu, enable [Job Scan Mode]. - Page 66 6.4.3 USB Mode Select the job mode for push scan • Operate the scanner as follows. Press the menu button ( of the cursor button to select "Function Setting". Press the OK button to complete your selection. of the cursor button to select "Job mode". Press the OK button to complete your selection.
-
Page 67: Network Pc Mode
6.4.4 Network PC Mode 6.4.4 Network PC Mode Push scan in Network PC mode is performed by the following procedure. Configure the network settings You should configure the network settings using the LCD on the unit, Network Setting Tool, and Configuration Web. - Page 68 6.4.4 Network PC Mode Select the job mode for push scan • Operate the scanner as follows. Press the menu button ( of the cursor button to select "Function Setting". Press the OK button to complete your selection. of the cursor button to select "Job mode". Press the OK button to complete your selection.
-
Page 69: Preset Scan Mode
6.4.5 Preset Scan Mode 6.4.5 Preset Scan Mode Push scan in preset scan mode is performed by the following procedure. Configure the network settings You should configure the network settings using the LCD on the unit, Network Setting Tool, or Configuration Web. - Page 70 6.4.5 Preset Scan Mode Open the [Scan Settings] sub menu. • You can register up to 20 settings. Click to register a setting. Set the Scan Settings as needed. For details, refer to "8.5 Scan Tab" (page 82). Click [Submit] to apply the settings, and then click [Back].
- Page 71 6.4.5 Preset Scan Mode Open the [Preset Scan] sub menu. • You can register up to 30 settings in total. (3 groups, 10 settings for each group.) Click to register a setting. Register the scan settings as needed. Output Settings •...
- Page 72 6.4.5 Preset Scan Mode Note • If you need to change the advanced settings, click in [Advanced Settings]. • When [Data Transfer Notification] is [On], a message indicating the scanning process is complete can be displayed on the LCD. Click [Submit] to apply the settings, and then click [Back]. •...
-
Page 73: Using Push Scan (Kv-S5058)
6.5 Using Push Scan (KV-S5058) 6.5 Using Push Scan (KV-S5058) 6.5.1 Starting Up Scanner Applications Automatically You can configure settings so that an application starts up automatically when a document is placed on the unit's feed tray ("Touch Free Scanning") or by "Single Touch Scanning". Select the application to start up Use the Scan Button Setting Tool to set whether an application automatically starts up and under which conditions it starts up. -
Page 74: Scan Server (Kv-S5078Y)
To set up a scan server, you need the option CD-ROM [KV-SS094]. If you use the enclosed Software / Manual CD-ROM without using the option CD-ROM [KV-SS094], some functionality will be restricted. For details, refer to "12.1 Available Functions When Scanning (KV-S5078Y)" (page 117). Note •... -
Page 75: How To Set Up The Scan Server
Select [All Programs] [Panasonic] [Scanner Tools] [Scan Server Setting Tool]. Note In Windows 8 and Windows 10, select the [Panasonic Document Scanner] section on the Apps screen. Set the computer as the scan server. • "License: Installed" is displayed. Set up the computer as the scan server for each scanner. -
Page 76: Using Configuration Web (Kv-S5078Y)
8 Using Configuration Web (KV-S5078Y) 8 Using Configuration Web (KV-S5078Y) Network settings for this unit can be configured using the web browser that was launched from Network Scanner Select Tool. Note • Some settings can also be configured using the LCD on the unit (page 35). -
Page 77: Basic Browser Operations
"SMTP" (page 86), "Shared Folder" [Test] "SMTP" connection test, e-mail has (page 86), "FTP" (page 87) or been sent to the input mail address. "7 Scan Server (KV-S5078Y)" (page 74) . Open the editing screen for the list. Delete the list. Add a list. -
Page 78: Available Characters In Configuration Web
8.2.1 Available Characters in Configuration Web 8.2.1 Available Characters in Configuration Web You can enter the following characters in Configuration Web. Lowercase alphabet a to z Uppercase alphabet A to Z Digits 0 1 2 3 4 5 6 7 8 9 Symbol ! "... -
Page 79: Information Tab
8.3 Information Tab 8.3 Information Tab Display basic status and information of the unit. Scanner • Clicking [Click for C2X Error Details] will display the FAQ site. Network... -
Page 80: Function Tab
8.4 Function Tab 8.4 Function Tab Set the basic functions and maintenance functions of the unit. User Settings Item Contents USB ID Display the scanner's USB serial number. Language Set the language used on the LCD and Configuration Web. Set the time length before the unit enters sleep mode. Sleep (1 to 120 min.) Set the power auto-off function. - Page 81 8.4 Function Tab Counter Item Contents The number of sheets in a document scanned during the scanning Scan process. This counter is cleared each time you start scanning. The number of sheets in a document scanned until the counter is User cleared by the user.
-
Page 82: Scan Tab
8.5 Scan Tab 8.5 Scan Tab Register scanning conditions for Preset Scan (Push scanned data to FTP, Shared Folder, or Email). Scan Settings Item Contents Name (up to 15 characters) / Paper Source / Paper Size / Image Basic Setting Type / Resolution Dynamic Threshold / Automatic Brightness Adjustment / Brightness / Contrast / Deskew / Rotate / Blank Page Removal / Noise... - Page 83 8.5 Scan Tab Preset Scan Item Contents Group name Select group G01 to G03 and edit group name (up to 15 characters). Management Delete all lists in this group. Index Set the name of this preset (up to 15 characters). Sets the Output Method.
-
Page 84: Network Tab
8.6 Network Tab 8.6 Network Tab Register network settings. IP Configuration Item Contents Network Setting MAC Address / Host Name / Location (up to 31 characters) IP Address DHCP / AutoIP / IP Address / Subnet Mask / Default Gateway DNS Server Primary / Secondary WINS Server... - Page 85 8.6 Network Tab SSL/TLS Item Contents Settings Setup / Security Level Installation State / Create CRT Key / Self-signed Certificate / Certificate Certificate Signed Request / Certificate Installation / Content of Certificate...
-
Page 86: Server Tab
8.7 Server Tab 8.7 Server Tab Register SMTP / Shared Folder / FTP / Scan Server settings. SMTP Item Contents Account From Address (up to 63 characters) SMTP Server Address (up to 63 characters) / SSL/TLS / Port Number Email Size (1 to 20 MB) / Encoding Type / Authentication Type SMTP User Name (up to 63 characters) / SMTP Password (up to 31 Configuration characters) / POP Server Domain Name (up to 63 characters) / POP... - Page 87 "FTP", "FTPS (Explicit)" and "SFTP" are supported. When sending data over FTP, there is a risk of leakage of account information, etc. Scan Server Set Computer Name as the Scan Server. For details about the Scan Server, refer to "7 Scan Server (KV-S5078Y)" (page 74).
-
Page 88: Administrator Tab
8.8 Administrator Tab 8.8 Administrator Tab Easy Setup Wizard Item Contents Setup Scan to E-Mail Setup Scan to FTP The screens required for setup will automatically be displayed. You can complete the necessary settings by following the screen. Setup Scan to Shared Folder Setup Scan Settings Information Notification Item... - Page 89 Select item (All Items / Function / Scan Settings / Preset Scan / Item Network / Server / Information Notification). File Setting File Name (up to 255 characters) / Password (0 to 16 characters) For details, refer to "12.5 Import/Export (KV-S5078Y / LAN Connection)" (page 125). Backup/Restore Item Contents Mode Select mode (Backup / Restore).
- Page 90 8.8 Administrator Tab Firmware Update Update the firmware of the scanner displaying the Configuration Web. For details, refer to "12.7 Firmware Update (KV-S5078Y / LAN Connection)" (page 127). Factory Reset Reset the scanner displaying the Configuration Web to the factory setting.
-
Page 91: Clearing Paper Jams
Close the ADF door (page 39). Notice • Close the ADF door after confirming that no documents remain inside the unit. KV-S5078Y • In push scan, a message is displayed on the LCD. Please follow the instructions. Processing can be selected from the following. - Page 92 9 Clearing Paper Jams – Transfer the scanned image and stop scanning. – Transfer the scanned image and continue scanning.
-
Page 93: Care And Maintenance
10 Care and Maintenance 10 Care and Maintenance 10.1 Cleaning the Outside of the Scanner Notice • Before moving the unit, be sure to unplug the power cord, USB cable and LAN cable. • Do not use commercially available cleaners, detergent, thinner, or benzine. (Doing so may cause deformation, discoloration, or damage.) •... -
Page 94: Cleaning The Inside Of The Scanner
10.2 Cleaning the Inside of the Scanner 10.2 Cleaning the Inside of the Scanner Prepare the following cleaning supplies. Soft and dry cloth Used to clean the conveyors, scanning backgrounds and scanning (one that does not easily glasses. generate fibrous dust) Thin cotton swab Used to clean the double feed detectors and the starting sensors. -
Page 95: Cleaning The Conveyors And Scanning Glasses
10.2.1 Cleaning the Conveyors and Scanning Glasses 10.2.1 Cleaning the Conveyors and Scanning Glasses With a soft and dry cloth, wipe off any dirt on the conveyor ( ) and scanning glasses ( ). • If the dirt does not come off, use a soft, slightly damp cloth. Conveyor Scanning glass (front) Scanning glass (back) -
Page 96: Cleaning The Sensors
10.2.2 Cleaning the Sensors 10.2.2 Cleaning the Sensors Remove dust from the sensors ( , ) and reflectors ( ) with a cotton swab. Waiting sensor Double feed detector Slip detect sensor Starting sensor Paper sensor Skew sensor Reflectors Reflectors... -
Page 97: Cleaning The Scanning Backgrounds
10.2.3 Cleaning the Scanning Backgrounds 10.2.3 Cleaning the Scanning Backgrounds Enter cleaning mode (page 100), and wipe off any dirt on the scanning backgrounds ( ) with a soft and dry cloth. • In cleaning mode, the scanning background rollers ( ) rotate a small amount each time the Start/ Stop button ( ) on the unit is pressed. -
Page 98: Cleaning The Rollers
10.2.4 Cleaning the Rollers 10.2.4 Cleaning the Rollers Use the Roller Cleaning Paper (page 13) to wipe the dirt from the surfaces of all rollers. Direction to wipe rollers Double feed prevention roller Other rollers Notice • After removing the double feed prevention roller, gently wipe dirt from the surface of the roller in the direction indicated by the arrows in the illustration. - Page 99 10.2.4 Cleaning the Rollers Conveyor rollers Note • If misfeeding or double feeding occurs after cleaning or replacing the rollers, the rollers may not be installed properly. Confirm the installation conditions again.
-
Page 100: Cleaning Mode
Cleaning mode can be started from User Utility. With KV-S5078Y, cleaning mode can be started from the operation panel too. Notice •... - Page 101 10.2.5 Cleaning Mode Clean the rollers of scanning background ( ) and conveyor rollers ( ). Use the roller cleaning paper (page 13) or a soft, dry cloth to wipe the rollers from end-to-end and around the entire circumference, as shown in the illustration. Press the Start/Stop button ( ) on the scanner to rotate the rollers a small amount.
- Page 102 10.2.5 Cleaning Mode Starting cleaning mode from User Utility Close the ADF door (page 39). Plug in the power cord and connect the USB cable. Turn ON the unit's power (page 38). Start the User Utility. Select Cleaning Mode in User Utility. Open the ADF door (page 39).
-
Page 103: Clearing The Counter After Cleaning The Rollers
After cleaning the rollers, clear After Clean Roller Counter to zero (0) from User Utility. For details, refer to the User Utility help. As for KV-S5078Y, After Clean Roller Counter can be set to zero (0) from the operation panel (page 28) as follows. -
Page 104: Replacing The Rollers
In User Utility, you can check the number of sheets that have been scanned. As for KV-S5078Y, you can check it from the operation panel too. Refer to "Counter" (page 36). - Page 105 10.3 Replacing the Rollers Install the new paper feed roller module. • With the lever ( ) of the paper feed roller module lowered, insert both protrusions ( ) into the grooves ( ), and then slowly raise the lever ( ) in the direction indicated by the arrow until it clicks into place.
- Page 106 10.3 Replacing the Rollers Use the indents ( ) to pull the double feed prevention roller cover towards you to open it. While pulling the tab ( ) in the direction indicated by the arrow, lift the double feed prevention roller ( ) in the direction of the arrow.
- Page 107 10.3 Replacing the Rollers Install the new double feed prevention roller. • Align the shaft that is shaped as indicated by with the notch in the roller mount ( ), and then insert the shaft in the notch. Push the shaft on the opposite side ( ) until it clicks into place. Notice •...
- Page 108 10.3 Replacing the Rollers Push the double feed prevention roller cover until it clicks into place to close it. Notice • Make sure that the double feed prevention roller cover does not stick up. If the double feed prevention roller cover is closed incompletely, damage or paper jams can occur. Close the ADF door (page 39).
-
Page 109: Clearing The Counter After Replacing The Rollers
After replacing the rollers, clear After Replace Roller Counter to zero (0) from User Utility. For details, refer to the User Utility help. For KV-S5078Y, After Replace Roller Counter can be set to zero (0) from the operation panel (page 28) as follows. -
Page 110: Optional Imprinter Unit
11 Optional Imprinter Unit 11 Optional Imprinter Unit 11.1 Installing the Imprinter Unit and Ink Cartridge The imprinter unit can be used to print information such as a name, the date and time, or a serial number on the document after scanning. The printed information will also appear in the scanned image. Notice •... - Page 111 11.1.1 Installing the Imprinter While keeping the direction of the imprinter as shown in the diagram below, insert the pins ( ) on both sides into the guides, and insert the pins ( ) on both sides into the guides until they are locked by the springs ( ).
-
Page 112: Replacing The Ink Cartridge
11.2 Replacing the Ink Cartridge 11.2 Replacing the Ink Cartridge 11.2.1 How to Remove the Ink Cartridge Turn OFF the unit's power (page 38). Open the Imprinter door (page 40). Move the carriage to the ink cartridge exchange position. • For the exchange position, see the label on the imprinter. -
Page 113: How To Install The Ink Cartridge
11.2.2 How to Install the Ink Cartridge Remove the ink cartridge ( ). • For details about installing a new ink cartridge, refer to "11.2.2 How to Install the Ink Cartridge" (page 113). 11.2.2 How to Install the Ink Cartridge Notice •... - Page 114 11.2.2 How to Install the Ink Cartridge Insert the ink cartridge into the carriage. Lock the cartridge adjusting lever.
-
Page 115: Printing
11.3 Printing 11.3 Printing Adjusting the imprinter printing position Open the imprinter door (page 40). Move the carriage to the desired printing position, and align the indicator ( ) with the " " mark ( ). • The " " mark indicates the printing position. Printing is not available in any other position. •... -
Page 116: Cleaning The Ink Cartridge
11.4 Cleaning the Ink Cartridge 11.4 Cleaning the Ink Cartridge If printing becomes faded, perform the following: Cleaning by using the User Utility Click the [Clean Imprinter] button on the User Utility program. This will help remove clogging by ejecting ink from the print head. Cleaning the dirt on the print head Wipe and clean the print head with moistened tissue paper. -
Page 117: Appendix
12 Appendix 12 Appendix 12.1 Available Functions When Scanning (KV-S5078Y) The functions you can use when scanning differ depending on how you are using the scanner. For details, refer to the following table. Note • For details about the function names, refer to the help for Image Capture Plus, TWAIN, or ISIS. - Page 118 12.1 Available Functions When Scanning (KV-S5078Y) Pull scan (Using Image Capture Plus, Push scan TWAIN, or ISIS) • Preset Scan mode (FTP Function name Push scan server, shared folder, e-mail, Cloud, SharePoint) • USB mode • Network PC mode Chroma Available ―...
- Page 119 12.1 Available Functions When Scanning (KV-S5078Y) From the Configuration Web, set "Rotate" of "Scan Settings" to "Auto".
-
Page 120: Perform Network Settings With Usb Connection (Kv-S5078Y)
12.2 Perform Network Settings with USB Connection (KV-S5078Y) 12.2 Perform Network Settings with USB Connection (KV-S5078Y) You can configure the network settings using Network Setting Tool with USB connection. For details about network-related settings, consult your network administrator. 12.2.1 Configuring Wired LAN Settings Start Network Setting Tool. - Page 121 12.2.1 Configuring Wired LAN Settings Notice Check the following if you cannot connect the unit to the network. • If the orange LED on the LAN connector ( ) does not light. – The unit is turned on. – The unit is not in sleep mode. –...
-
Page 122: Check The Event Settings For Touch Free Scanning And Single Touch Scanning
12.3 Check the Event Settings for Touch Free Scanning and Single Touch Scanning 12.3 Check the Event Settings for Touch Free Scanning and Single Touch Scanning Check the following if an application does not start up after being set in Scan Button Setting Tool. Display the scan properties screen. -
Page 123: Server Certificate (Kv-S5078Y / Lan Connection)
12.4 Server Certificate (KV-S5078Y / LAN Connection) 12.4 Server Certificate (KV-S5078Y / LAN Connection) If you use HTTPS to access the scanner, a security alert will appear on the screen. To prevent the security alert from appearing, you must install the server certificate. We recommend using a server certificate that was issued by third-party signing organization (a certificate authority). -
Page 124: Installing A Self-Signed Certificate
12.4.2 Installing a Self-signed Certificate Installing a server certificate Launch Configuration Web. • For details, refer to "8.1 Launch Configuration Web" (page 76). Open the [Network] tab. Click [SSL/TLS]. In "Certificate Installation", click [Edit]. Click [Browse] in "File" and specify the server certificate file following the on-screen instructions. Enabling SSL/TLS Launch Configuration Web. -
Page 125: Import/Export (Kv-S5078Y / Lan Connection)
12.5 Import/Export (KV-S5078Y / LAN Connection) 12.5 Import/Export (KV-S5078Y / LAN Connection) You can export the contents of the scanner's settings to a file. Also, you can import this file to the other scanners. You can set a password for this file. It is used for importing. -
Page 126: Backup/Restore (Kv-S5078Y / Lan Connection)
12.6 Backup/Restore (KV-S5078Y / LAN Connection) 12.6 Backup/Restore (KV-S5078Y / LAN Connection) You can backup all the contents of the scanner's settings to a file. Also, you can restore the settings to the scanner. You can set a password for this file. It is used for restoring. -
Page 127: Firmware Update (Kv-S5078Y / Lan Connection)
12.7 Firmware Update (KV-S5078Y / LAN Connection) 12.7 Firmware Update (KV-S5078Y / LAN Connection) Update the firmware of the scanner displaying the Configuration Web. Download the "Firmware Update Tool" from the following website. • https://panasonic.net/cns/pcc/support/scanner/s5078/fwup.html Launch Configuration Web. • For details, refer to "8.1 Launch Configuration Web" (page 76). -
Page 128: Factory Reset (Kv-S5078Y)
12.8 Factory Reset (KV-S5078Y) 12.8 Factory Reset (KV-S5078Y) This function will erase all of the settings in the scanner and initialize it to the factory default settings. If the unit is connected by USB, use User Utility. If the unit is connected over the LAN, use Configuration Web. -
Page 129: Troubleshooting
12.9 Troubleshooting 12.9 Troubleshooting If a problem occurs while the scanner is being used, check the following items and check the scanner status on the LCD or in User Utility. If the unit still malfunctions, turn it off, unplug the power cord and call for service. - Page 130 12.9 Troubleshooting Symptom Possible Cause Remedy The document is wrinkled. Smooth out the document. The rollers are dirty. Clean the rollers (page 98). The document is not aligned Realign the document (page 46). correctly. Paper jams occur frequently. Remove sheets until the sheets Too many sheets are set on the on the feed tray are under the feed tray.
- Page 131 12.9 Troubleshooting Symptom Possible Cause Remedy The document guides are not Adjust the document guides adjusted to the size of the properly to the size of the document to be scanned, or the document to be scanned (page document to be scanned is set 46).
-
Page 132: Error Codes And Error Messages (Kv-S5078Y)
12.10 Error Codes and Error Messages (KV-S5078Y) 12.10 Error Codes and Error Messages (KV-S5078Y) Error codes corresponding to the scanner status are displayed on the LCD. For details about the error codes and messages, check in User Utility. If you cannot solve the problem by the following instructions, consult your administrator. - Page 133 12.10 Error Codes and Error Messages (KV-S5078Y) Error Code Cause Remedy Check the following configurations depending on the destination. Login name or password of the server is – FTP Server incorrect, or you do not have permission to log in to the server.
- Page 134 12.10 Error Codes and Error Messages (KV-S5078Y) The following error codes relate to "Scan Server" or Network PC mode. Error Code Cause Remedy Check scan server's login status and check the connection with the scan server. If the host name is set as the computer...
-
Page 135: Shading Adjustment
12.11 Shading Adjustment 12.11 Shading Adjustment When shading adjustment is required • Perform shading adjustment when the density and brightness of sections of scanned images are considerably uneven, or when image quality does not improve after cleaning the inside of the scanner. Before proceeding with shading adjustment •... -
Page 136: Uninstalling The Software
In [Control Panel], open [Uninstall a program]. Uninstall the following software programs. – Export Import Tool – IDREngine – Image Capture Plus – KV-S5078Y / S5058 / SL5100 MK2 series ISIS Driver – – OCREngine – Panasonic Scanner Manuals – Panasonic Document Scanner Device Driver –... -
Page 137: Repacking Instructions
12.13 Repacking Instructions 12.13 Repacking Instructions It is highly recommended that you keep the original carton and ALL packing materials. If you need to transport or ship the scanner, please follow these instructions. Note • Improper repacking of the scanner may result in a service charge to repair the scanner. •... - Page 138 12.13 Repacking Instructions Pack the scanner. Joint Power cord USB cable Software / Manual CD-ROM Quick Installation Guide Shading paper Exit support sheet...
-
Page 139: Specifications
The scanning speed is the maximum speed of the scanner hardware. It does not include software processing time, data transfer time, etc. The scanning speed measurement is based on Panasonic's measuring method. This is a standard paper size of 210 mm × 297 mm (8.26 in. × 8.54 in.). - Page 140 12.14 Specifications General Item KV-S5078Y KV-S5058 External dimensions 468 mm × 444 mm × 344 mm (18.5 in. × 17.5 in. × 13.5 in.) (Width × Depth × Height) Weight 17 kg (37.5 lb.) AC 100 – 127 V, 50/60 Hz, 1.5 A Power requirements AC 220 –...
- Page 141 © Panasonic Corporation 2020 PNQX9016XA P0220AG2060...