Table of Contents
Advertisement
Quick Links
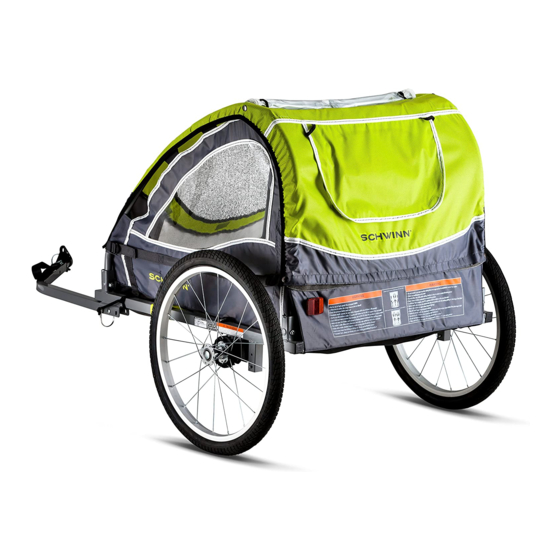
Lumina
TWO SEAT BICYCLE TRAILER
WITH STROLLER ATTACHMENT
Owner's Manual
This manual contains safety, assembly, use and maintenance
instructions. Read these instructions carefully before use and
keep them for future reference. Your child's safety may be
affected if you do not follow these instructions. The Schwinn
Bicycle Trailer must be assembled by an adult who has read and
understands the instructions in this manual. Keep the packaging
away from children and dispose all packaging before use.
Do not return to store. Call toll
free 1-877-758-4741 for assistance
and replacement parts.
Keep instructions for future reference.
Advertisement
Table of Contents

Related Manuals for Schwinn Lumina


Summary of Contents for Schwinn Lumina
- Page 1 Read these instructions carefully before use and keep them for future reference. Your child’s safety may be affected if you do not follow these instructions. The Schwinn Bicycle Trailer must be assembled by an adult who has read and understands the instructions in this manual.
- Page 2 Thank You For purchasing the Schwinn Bicycle Trailer. You will be sure to enjoy hours of pleasurable exercise and family time. If you have any questions or comments our customer service hours are: 8:00 AM - 5:00 PM Monday through Friday CST.
-
Page 3: Table Of Contents
Insert the safety Flag ....... . 12 Schwinn Lumina Trailer... -
Page 4: Safety
• Use caution to avoid pinch points when folding or unfolding • Always use the crotch strap in combination with the waist the trailer. belt. • Never allow children to assemble, fold, or disassemble the trailer. 1 Schwinn Lumina Trailer... -
Page 5: Trailer Use Warnings
• This product may contain a chemical known to the State of • Avoid braking suddenly. California to cause cancer, birth defects, or other reproductive harm. • Check the trailer for damage. Do not use if damaged. continued on next page Schwinn Lumina Trailer... -
Page 6: Recommendations
• Routine bicycle maintenance is recommended to be performed every year. • Do not leave trailer outside after use. Inclement weather and harsh elements may stress the fabric on the trailer. 3 Schwinn Lumina Trailer... -
Page 7: Parts And Features
5 point safety harness system with strap protectors Weather shield (roll up and fastens in elastic bands) Bug screen Front panel Bicycle coupler Parking brake Safety strap Rear wheels (2) Front stroller Tow bar Clear plastic wheel assembly windows Schwinn Lumina Trailer... -
Page 8: Assembly
• Keep children clear when folding or unfolding the trailer. • Ensure that all locking devices are engaged before use. ❶ Lift the right side wall up into a vertical position. Figure 3.1 Figure 3.1 Figure 3.2 5 Schwinn Lumina Trailer... - Page 9 ❸ Rotate the crossbar into the crossbar latch. Figure 3.3 ❹ Check the crossbar is locked into place by pulling up and down on it. Figure 3.4 Release button Crossbar latch Crossbar Figure 3.4 Figure 3.3 Schwinn Lumina Trailer...
-
Page 10: Attach The Parking Brake
❹ Fasten the small hex nut to the end of the long screw. Tighten the screw using a phillips head screwdriver. ❺ Repeat steps one through four on the opposite parking brake bracket. Figure 3.6 Figure 3.5 Figure 3.6 7 Schwinn Lumina Trailer... -
Page 11: Using The Parking Brake
Note: Only use the parking brake while in the stroller mode. ❶ To set the parking brake, using your foot or hand, push down on the brake bar located at the back of the trailer. Figure 3.7 Parking brake Parking brake Figure 3.8 Figure 3.7 Schwinn Lumina Trailer... -
Page 12: Attach The Bumper Guard
❺ Attach the hook and loop fasteners to the canopy to the strips on the front and back of the frame walls. ❻ If you are not using the weather shield roll it up into the bands at the top of the canopy. Figure 3.9 9 Schwinn Lumina Trailer... -
Page 13: Extend And Secure The Tow Bar
❹ Insert the locking pin through both the bracket and tow bar. ❺ Slide the metal safety loop on the end of the locking pin. Check that it is securely in place. Figure 3.10 Figure 3.10 Figure 3.11 Schwinn Lumina Trailer... -
Page 14: Attach The Wheels
Interlock the gear on the wheel with the gear on the rear brake. Figure 3.12 ❷ Push the wheel into the bracket until you hear the axle click into place. Note: shown from underside of the frame. Figure 3.12 Figure 3.13 11 Schwinn Lumina Trailer... -
Page 15: Insert The Safety Flag
❶ Assemble the flag pole sections by sliding the top half of the pole into the opening of the bottom half of the pole. ❷ Insert the flag pole into the sleeve located at the rear corner of the trailer. Figure 3.14 Figure 3.14 Schwinn Lumina Trailer... -
Page 16: Attach The Stroller Wheel
❷ Align the hole on the front wheel bracket with the hole on the tow bar. ❸ Insert the bolt through the front wheel bracket and tow bar. ❹ Insert the washer and the knob on the end of the bolt and tighten the knob. Figure 3.15 13 Schwinn Lumina Trailer... -
Page 17: Attach The Stroller Handlebar
Always check the handlebar is securely in place before use of the trailer as a stroller. ❶ Loosen the knobs on each side of the handlebar Figure 3.16. ❷ Attach the handlebar brackets to each side of the trailer body. Figure 3.16 Figure 3.17 Schwinn Lumina Trailer... -
Page 18: Trailer Attachment
❸ Place the tab washer on the axle. Fit the tab into the slot on the bicycle frame dropout. Note: If your bicycle frame doesn’t Figure 4.2 have a slot in the drop out, rotate the tab to fit into the axle slot. Figure 4.3 Slot washer Figure 4.3 15 Schwinn Lumina Trailer... - Page 19 ❹ Remove the locking pin from the coupler and slide the coupler ❻ Place the hub nut and washer back onto the axle and tighten. off the end of the tow bar. Figure 4.5 Incorrect coupler placement Coupler Washer Hub nut Figure 4.4 Figure 4.5 Schwinn Lumina Trailer...
-
Page 20: Attachment With Quick Release
Important! Ensure the loop of the safety pin is facing away from the wheel to prevent possible friction against the wheel and spokes of the bicycle. Figure 4.6 Inner Skewer Spring Outer Quick spring release lever Quick release lever and spring Figure 4.6 Figure 4.7 17 Schwinn Lumina Trailer... - Page 21 ❻ Rotate the quick release lever up and tighten. When properly tightened, the quick release lever should leave an imprint in your hand. The pressure should be firm but not excessive. Quick release lever and spring Slot washer Figure 4.9 Figure 4.8 Schwinn Lumina Trailer...
- Page 22 This reduces stress on the tow bar. Figure 4.10 from the wheel to prevent possible friction against the wheel and spokes of the bicycle. ❽ Insert the locking pin into the hole on the top of the coupler. Figure 4.10 Figure 4.11 19 Schwinn Lumina Trailer...
-
Page 23: Attach The Safety Strap
Tow bar ring ❶ Wrap the tow bar safety strap around the bicycle frame. Figure 4.12 Bicycle frame Safety strap Safety strap Figure 4.12 Figure 4.13 Schwinn Lumina Trailer... -
Page 24: Using The Safety Harness
❺ Clip the shoulder straps into the lap belt buckle, and adjust the shoulder straps. Figure 5.1 To remove the child from the trailer: Unfasten the clips from the lap buckle. Pull the straps away from the body and remove the child from the trailer. Figure 5.1 21 Schwinn Lumina Trailer... -
Page 25: Adjusting The Shoulder Straps
❹ Pull the strap and anchor all the way through to the back. Make sure the strap is properly anchored on the seat back. Repeat these steps for the opposite strap. Figure 5.2 Figure 5.2 Schwinn Lumina Trailer... -
Page 26: Converting The Safety Harness For One Child
Place the buckle top flap over and fasten with protector face the hook and loop fasteners. down Figure 5.3 Figure 5.4 23 Schwinn Lumina Trailer... - Page 27 ❺ Untwist the strap and re-insert the safety strap anchor through the slit to the back of the seat. Repeat steps 3-5 for the opposite side. Figure 5.5 Center Safety Harness Figure 5.5 Figure 5.6 Schwinn Lumina Trailer...
-
Page 28: Using The Safety Harness With One Child
Tighten as needed. Figure 5.7 To remove the child from the trailer: Unfasten the clips from the lap buckle. Pull the straps away from the body and remove the child from the trailer. Figure 5.7 25 Schwinn Lumina Trailer... -
Page 29: Disassembly And Storage
❷ Unfasten the clip on the safety strap from the tow bar ring, and unwrap it from the bicycle frame. Clip the strap back onto the D-ring of the tow bar. Figure 6.1 Figure 6.1 Figure 6.2 Schwinn Lumina Trailer... -
Page 30: Disassemble The Trailer
❶ Remove the flag pole and separate the flag pole sections. ❷ Remove the wheels by: Figure 6.4 Figure 6.3 a. Pulling the wheel release lever out and hold. b. Remove the wheel. c. Release the lever Figure 6.3 Figure 6.4 27 Schwinn Lumina Trailer... - Page 31 ❺ Place the locking pin back through the tow bar and bracket walls. Remove the canopy from the frame. Figure 6.6 Note: Coupler plate will remain assembled to bike 99% of the time Figure 6.5 Figure 6.6 Schwinn Lumina Trailer...
- Page 32 ❿ Store in a dry place. Important! If the storage area is hot then release the some air from the tires. This will help prevent Crossbar release button excessive expansion or popping. Crossbar latch Crossbar Figure 6.7 Figure 6.8 29 Schwinn Lumina Trailer...
-
Page 33: Warranty
To make a claim under warranty, notification of such defect must be given to Pacific Cycle, Inc. the address stated on the previous page. You will be instructed on how the product or part needing replacement should be shipped postpaid to Pacific Cycle, Inc. Schwinn Lumina Trailer... - Page 34 Madison, WI 53711 ©2017 Pacific Cycle, Inc. Distributed by/Distribué par : Dorel Industries, Inc. dba Pacific Cycle Canada 1255 Greene Avenue Montreal Quebec Canada H3Z 2A4 1-877-758-4741 Schwinn® is a registered trademark of Pacific Cycle, Inc. www.schwinnbikes.com Made in China...