Samsung SP-L200 Owner's Instructions Manual
L200 l series projector sp-l200 user manual
Hide thumbs
Also See for SP-L200:
- Owner's instructions manual (37 pages) ,
- Owner's instructions manual (38 pages) ,
- Owner's instructions manual (33 pages)

Related Manuals for Samsung SP-L200


Summary of Contents for Samsung SP-L200
- Page 2 To avoid injuries or damage to property, please read the following precautions carefully and use the product accordingly. Failure to follow the instructions marked with this symbol may cause personal injury or even fatality. Failure to follow the instructions marked with this symbol may cause personal injury or damage to the product or property.
- Page 3 operable. There is a danger of electric shock or fire. Always unplug the unit by holding the power plug. Pulling the power cable may damage the inside of it. There is a danger of fire. Unplug the power plug before cleaning the product. There is a danger of electric shock or fire.
- Page 4 Do not install on an unstable location, or on a stand smaller than the product. If the product falls it may harm children. Install on a flat and stable location as the front part is heavy. In case of thunder/lightning, disconnect the power cord from the wall outlet.
- Page 5 Do not use or keep the product near flammable sprays or other such substances. There is a danger of fire or explosion. Do not place containers with water, vases, drinks, chemicals, small metal parts or heavy objects on the product. If water enters the product, it may cause electric shock, or fire and when heavy objects fall, they may cause injury.
-
Page 6: Correct Disposal Of This Product (Waste Electrical & Electronic Equipment) - Europe Only
Be sure to contact an authorized product in a location with heavy dust, high or low temperatures, high humidity, chemical substances and where it operates for 24 hours such as the airport, the train station etc. If the product is dropped or the casing is damaged, turn the product off and unplug the power cord. - Page 7 batteries are not properly disposed of, these substances can cause harm to human health or the environment. To protect natural resources and to promote material reuse, please separate batteries from other types of waste and recycle them through your local, free battery return system.
- Page 8 - Utilizes a 3P-LCD panel. - SP-L250 : Provides a bright screen of 2500 lumen. SP-L220 : Provides a bright screen of 2200 lumen. SP-L200 : Provides a bright screen of 2000 lumen. - Compact size, lightweight, and good portability Minimized fan noise - Minimizes the noise generated by the product’s fan by optimizing the internal air flow and the fan...
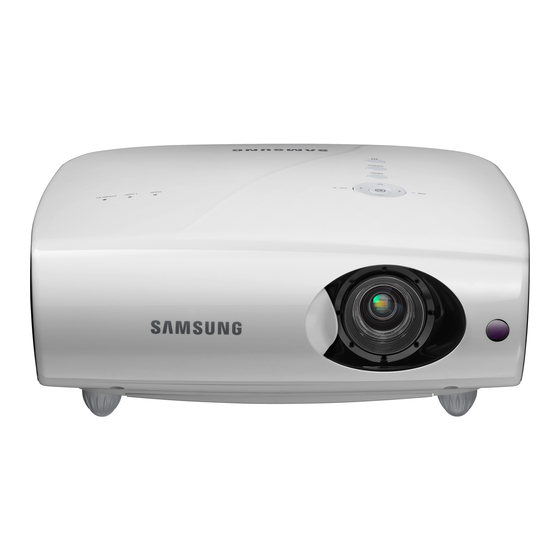
- Page 9 Unpacking Warranty Card/ Registration Card Quick Installation Guide / Safety Guide 5. POWER( ) Button Used to turn the projector on or off. 6. Lens 7. Remote Control Signal Receiver 8. Focus Ring Used for Focus Adjustment. 9. Zoom Knob Used to enlarge or reduce image size.
- Page 10 The POWER button is pressed to turn off the projector, and the cooling system is in operation to cool off the inside of the projector. (Operates for about 30 seconds.) Refer to Action 1 below if the cooling fan inside the projector is not in normal operation condition.
- Page 11 This Projector uses a cooling fan system to keep the unit from overheating. Operation of the cooling fan may cause noise, which does not affect the product performance and is part of normal operation.
- Page 12 Product Features 1. POWER ( Used to turn on the projector. 2. AUTO Adjusts the Picture automatically. (Available in PC Mode Only) 3. MENU ( Used to display Menu Screen. 4. Move (▲ ▼ ◀ ▶)/ ( Used to move to or select each menu item.
- Page 13 17. STILL Used to see still images. Product Features Design and specifications of the product may be modified without prior notice for better performance. Specifications Model SP-L250, SP-L220, SP-L200 Panel 0.63" 3P LCD Resolution XGA (1024 x 768) Aspect ratio...
- Page 14 B emits less electromagnetic waves than class A. The LCD panel used in the LCD projector consists of hundreds of thousands of fine pixels. Like other video display devices, the LCD panel may contain bad pixels which do not operate. When...
- Page 15 For the resolutions presented above, if a signal with a resolution lower or higher than 1024x768 is input, it is converted to 1024x768 by the Scaler chip inside the projector. When the real resolution (1024x768) of the projector and the PC output resolution are the same, the screen quality is optimal.
- Page 16 When installing the screen in bright surroundings, use curtains. You can install the projector in the following locations: Front-Floor / Front-Ceiling / Rear-Floor / Rear-Ceiling. (To view the installation position To view the picture when installing the projector behind the screen, Install a semi-transparent screen.
- Page 17 Screen Size and Projection Distance Install the projector on a flat, even surface and level the projector using the adjustable feet to realize optimal picture quality. If images are not clear, adjust them using the Zoom Knob or Focus Ring, or move the projector forward and backward.
- Page 18 5486.4 5689.6 5892.8 6096.0 This projector is designed to show images optimally on a 80 ~ 120 inch sized screen. A. Screen Z: Throw Distance Y': Distance from Lens Center to Image Bottom Setting up the PC Environment - Check the following items before connecting your PC to your projector.
- Page 19 Projected images may differ from the monitor depending on monitor manufacturer or Windows versions. When connecting the projector to a PC, check that PC setup complies to display settings supported by this projector. If not, there may be signal problems.
- Page 20 Check that your PC and projector are turned off. Connect the [PC IN (1 or 2) PC] terminal at the back of the projector to the D-Sub terminal of your PC using a D-Sub cable. - For the supported input signals, refer to Connect the [PC IN (1 or 2) AUDIO] terminal at the back of the projector to the Audio out terminal of your PC using an audio cable (Not supplied).
- Page 21 First, check that the AV device and your projector are turned off. Connect the [PC IN (1 or 2) PC] terminal at the back of the projector to the D-Sub terminal of your AV device using a D-Sub cable. - For supported input signals, refer to the "AV Timing...
- Page 22 - For supported input signals, refer to the "AV Connect the [AV IN R-AUDIO-L] terminal at the back of the projector and the Audio out terminal of your AV device using an audio cable (Not supplied). Connecting an External Speaker You can hear sound through an external speaker instead of the internal speaker embedded in the projector.
- Page 24 When the power is turned on completely, the LAMP LED indicator remains blue. If the projector is turned on when the lamp is not sufficiently cooled, a temporary loud noise may be heard because the fan speed increases to cool the lamp.
- Page 25 * Click the Play( Screen Adjustment Mode Select a screen state which is customized to your projector or change the screen mode as required. 1) Mode - Standard This picture mode is the most general mode and works well in most situations.
- Page 26 Timing signal. 2) Contrast : Used to adjust the contrast between the object and the background. 3) Brightness : Used to adjust brightness of the entire picture. 4) Sharpness : Used to adjust the sharpness of the picture. ▶ When the input signal is adjusted.
- Page 27 also be shown, though you can view more of the area. In this case, turn Overscan on. Film Mode Using this function, you can set the display mode so it is optimized for playing movies. 1) Off 2) On ▶ Film Mode can only be supported for the [AV], [S-Video], 480i, and 576i of Timing(D-Sub) signals .
- Page 28 2) Screen Size : You can refer to picture format sizes such as 1.33:1 or 1.78:1. Video Type Allows you to set the type of input signal when your projector fails to determine this automatically in PC mode. In [PC] mode, this is only enabled if the input signal is ▶...
- Page 29 Filter check message: "Check the filter, and if necessary, clean or replace it.". ▶ Auto Power On If the power is supplied to the projector, it is turned on automatically without pressing the Power button. 1) Off 2) On )/Stop( ) button in the table below to view the video file.
- Page 30 Sleep Timer If there is no input signal for the specified time, the projector is turned off automatically. (But, for the specified time, there must be no button input from the remote control or the top of the projector) 1) Off...
- Page 31 Check if the remote control battery is empty. Check whether the LED indicator on the top of the projector is turned on. Check if the menu is displayed in gray. A gray-colored menu is unavailable.
- Page 32 Default>from the menu.
- Page 33 Before you turn the projector over to change the lamp, cover the projector with a soft cloth on a flat surface. The projector has been designed so that the projector does not work if the lamp cover is not completely assembled...
- Page 34 Precautions when replacing the projector filter The filter is located at the bottom of the projector. Turn off the power of the projector, and then disconnect the power cord after the heat of the projector is cooled sufficiently. Otherwise, its parts may be damaged due to internal heat.
- Page 35 Ventilating openings The location of the ventilation openings The ventilation openings are located on the right and left sides and at the bottom of the projector. If you have any questions or comments relating to Samsung products, please contact a SAMSUNG customer care center.
- Page 36 022 - 607 - 93 - 33 PORTUGAL 808 20 - SAMSUNG (7267864) SLOVAKIA 0800-SAMSUNG (726-7864) SPAIN 902 - 1 - SAMSUNG (902 172 678) SWEDEN 0771 726 7864 (SAMSUNG) SWITZERLAND 0848 - SAMSUNG(7267864, CHF 0.08/min) 0845 SAMSUNG (7267864) BELARUS...
- Page 37 Reproduction in any manner whatsoever without the written permission of Samsung Electronics Co., Ltd. is strictly forbidden. Samsung Electronics Co., Ltd. shall not be liable for errors contained herein or for incidental or consequential damages in connection with the furnishing, performance, or use of this material.