Advertisement
Quick Links
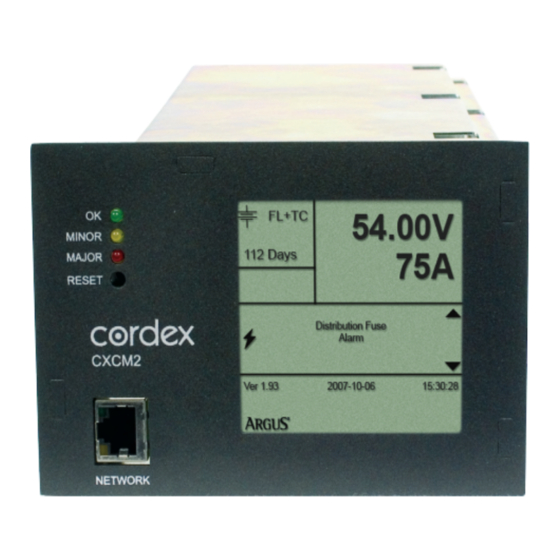
CXCM2 Cordex Controller Replacement Procedure
Summary
This procedure describes the process of removing and replacing the CXCM2 modular controller from the
1.8kW shelf after inhibiting the low voltage disconnect and preserving any custom settings.
Note: Any system software changes made on site would need to be transferred, by backing up the
configuration as shown in step 1 and 2. The replacement CXCM2 unit will ship with with the factory original
configuration specified for your setup.
Tools/Information Required
• Voltmeter
• Ethernet crossover cable
• Philips screw driver
Preparing for Removal of CXCM2
1. Save CXC configuration file if necessary (see software manual).
Advertisement

Related Manuals for Argus Cordex CXCM2

Summary of Contents for Argus Cordex CXCM2
- Page 1 CXCM2 Cordex Controller Replacement Procedure Summary This procedure describes the process of removing and replacing the CXCM2 modular controller from the 1.8kW shelf after inhibiting the low voltage disconnect and preserving any custom settings. Note: Any system software changes made on site would need to be transferred, by backing up the configuration as shown in step 1 and 2.
- Page 2 2. Save CXC text file if necessary. Bypass system LVD by setting override switch CAUTION: If the LVD is not bypassed, the DC loads will be shut down when the wiring to the controller is removed. Remove the DB connectors from I/O Terminal Block 3.
- Page 3 300A UDC Connections: Bypass system LVD by setting override switch on UDC to OVERRIDE. Remove DB Connectors from the I/O Board. Removal of CXCM2 4. Remove signal wires (via DB connectors) from CXC.
- Page 4 8. Upload original configuration file to restore setup. 9. Use a meter to verify calibration of the system voltage, temperature and current shunt. Recalibrate if needed following attached calibration procedure. 10. Remove LVD bypass. Thank you for choosing Argus Technologies...