Table of Contents
Advertisement
Advertisement
Table of Contents

Related Manuals for Zanussi ZBB 7294


Summary of Contents for Zanussi ZBB 7294
- Page 1 REFRIGERATOR- FREEZER ZBB 7294 INSTRUCTION BOOKLET 2223 167-55...
-
Page 2: Important Safety Information
IMPORTANT SAFETY INFORMATION It is most important that this instruction book should be retained with the appliance for future reference. Should the appliance be sold or transferred to another owner, or should you move house and leave the appliance, always ensure that the book is left with the appliance in order that the new owner can get to know the functioning of the appliance and the relevant safety information. -
Page 3: Table Of Contents
At the end of the Appliance Life • When disposing of your appliance, use an authorised disposal site. • Remove the plug and ensure that any locks or catches are removed, to prevent young children being trapped inside. CONTENTS Instructions for the User Important Safety Information Operation Before use... -
Page 4: Operation
OPERATION Before using Remove all securing tapes. Wash inside the appliance with lukewarm water and bicarbonate of soda (5 ml to 0.5 litre of water). Do not use soap or detergent as the smell may linger. Dry thoroughly. Setting the temperature The temperature inside the refrigerator and the freezer is regulated by a single thermostat with 6 temperature positions and an “OFF”... -
Page 5: Thawing
Thawing Frozen food, prior to being used, can be thawed in the fridge or at room temperature depending on the time available. Small food items may even be cooked from frozen; in this case cooking will take longer. Any frozen food which is allowed to thaw accidentally should either be eaten as soon as possible or thrown away. -
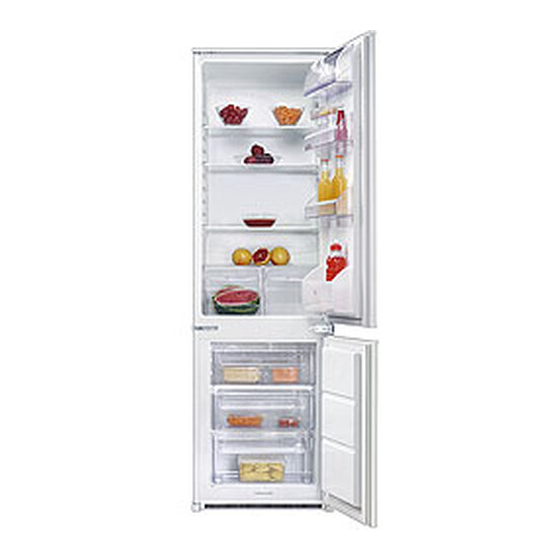
Page 6: Movable Shelves
Movable shelves The walls of the refrigerator have runners so that the shelves can be positioned as desired . For better use of space, the front half-shelves can lie over the rear ones. Positioning the door shelves To permit storage of food packages of various sizes, the door shelves can be adjusted in height. -
Page 7: Hints And Tips
HINTS AND TIPS Food Storage • To obtain the best results from your appliance, neither hot foods nor liquids which may evaporate, should be placed in the larder compartment. • Keep the time between buying chilled food and placing it in your fridge as short as possible. •... -
Page 8: Maintenance And Cleaning
MAINTENANCE AND CLEANING Before any maintenance or cleaning work is carried out, DISCONNECT the appliance from the ELECTRICITY supply. Internal cleaning Clean the inside and accessories with warm water and bicarbonate of soda (5ml to 0.5 litre of water). Rinse and dry thoroughly. NEVER USE DETERGENTS, ABRASIVE POWDERS, HIGHLY PERFUMED CLEANING PRODUCTS OR WAX... - Page 9 Remember to wash the defrost cleaner in hot soapy water at regular intervals. Dry throughly before replacing. Freezer When the frost has reached a thickness of up to 4mm it can be removed using the ice scraper provided with the appliance. During this operation it is not necessary to disconnect the appliance from the mains and remove the food.
-
Page 10: Something Not Working
SOMETHING NOT WORKING Important: If you call out an engineer to a fault listed below, or to repair a fault caused by incorrect use or installation a charge will be made, even if the appliance is under guarantee. Before contacting your local Service Force Centre, check the following points: Symptom No power to the appliance The light does not come on... -
Page 11: Service And Spare Parts
Please note that a valid purchase receipt or guarantee documentation is required for in-guarantee service calls. CUSTOMER CARE DEPARTMENT For general enquiries concerning your Zanussi appliance or for further information on Zanussi products, please contact our Customer Care Department by letter or telephone at the address below or visit our website at www.zanussi.co.uk... -
Page 12: Guarantee Conditions
Standard guarantee conditions We, Zanussi, undertake that if within 12 months of the date of the purchase this Zanussi appliance or any part thereof is proved to be defective by reason only of faulty workmanship or materials, we will, at our option repair or replace the same FREE OF CHARGE for labour, materials or carriage on condition that: The appliance has been correctly installed and used only on the electricity supply stated on the rating plate. -
Page 13: Technical Specification
TECHNICAL SPECIFICATIONS POWER SUPPLY VOLTAGE AND FREQUENCY TOTAL POWER ABSORBED AVERAGE DAILY UNITS ELECTRICITY * GROSS CAPACITY NET CAPACITY STAR RATING This figure is based on standard test results in accordance with European Standard EN 153. Actual consumption will depend on how the appliance is used and where it is located. 230-240 V / 50 Hz 120 W 0.87 kWh... -
Page 14: Installation
INSTALLATION Warning IF YOU ARE DISCARDING AN OLD APPLIANCE THAT HAS A LOCK OR CATCH ON THE DOOR, YOU MUST ENSURE THAT IT IS MADE UNUSABLE TO PREVENT YOUNG CHILDREN BEING TRAPPED INSIDE. Depending upon the position which you choose for your appliance, you may wish to reverse the way in which the door opens. -
Page 15: Electrical Connection
The cover/carrier is indicated by the coloured insert at the base of the plug. A replacement cover/carrier must be obtained from your local Zanussi Service Force Centre. This appliance complies with the E.E.C. Directive No. 87/308 of 2.6.87 relative to radio interference suppression. -
Page 16: Door Reversal
Instructions for totally built-in appliances Door reversal The appliance is supplied with the right or left door opening. To change the opening direction of the door proceed as in the following instructions before installing it. 1. Unscrew the upper pin and remove the spacer. 2. - Page 17 Make sure that a distance of 44 mm is maintained in the lower part between the kitchen furniture and the border of the appliance. The lower hinge cover inserted in the accessories bag, is useful to guarantee the exact position of the kitchen furniture and the appliance.
- Page 18 Separate parts Ha, Hb, Hc, Hd as shown in the figure. Place guide (Ha) on the inside part of the furniture door, up and down as shown in the figure and mark the position of external holes. After having drilled holes, fix the guide with the screws supplied.
- Page 19 Place the small square on the guide again and fix it with the screws supplied. Should the lining up of the furniture door be necessary, use the clearance of slots. At the end of operations, it is necessary to check if the door of the furniture closes properly.
- Page 20 © Electrolux plc 2007...