Table of Contents
Advertisement
Advertisement
Table of Contents

Related Manuals for Zanussi ZKG6020


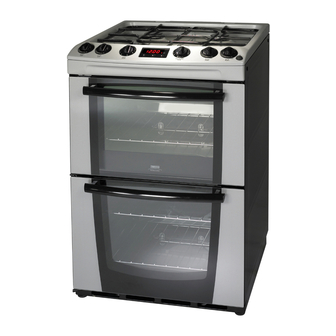
Summary of Contents for Zanussi ZKG6020
-
Page 2: Table Of Contents
The following symbols are used in this user manual: Important information concerning your personal safety and information on how to avoid damaging the appliance. General information and tips Environmental information Contents Important safety instructions Product description Controls and their functions Before first use Grill and oven furniture The electronic minute minder... -
Page 3: Important Safety Instructions
Important safety instructions These warnings are provided in the interests of your safety. Ensure that you understand them all before installing or using the appliance. Your safety is of paramount importance. If you are unsure about any of the meanings of these warnings please contact customer care. -
Page 4: Cleaning And Maintenance
• Always use oven gloves to remove and replace the grill pan handle when grilling. • Always support the grill pan when it is in the withdrawn or partially withdrawn position. • Always use oven gloves to remove and place food in the oven. •... -
Page 5: Product Description
Product description Controls and their functions Hob controls temperature control Control panel Top oven / Grill Main oven Top oven / Grill Electronic Main oven minute temperature control minder Ignition Hob controls switch... -
Page 6: Before First Use
Before using the appliance Rating plate • This is usually situated on the front frame of the appliance and can be seen upon opening either the main or top oven door. Alternatively the rating plate may also be found on the back or top of some models (where applicable). -
Page 7: Grill And Oven Furniture
Grill and oven furniture • The following items of grill and oven furniture have been supplied with the appliance. If you require replacements of any of the items listed below please contact your local service force centre. 1 grill pan 1 grill pan handle 1 grill pan grid 1 straight shelf... -
Page 8: The Electronic Minute Minder
The electronic minute minder This oven has a 24-hour clock. To set the time of day When the electricity is Press the increase first switched on, the button until the correct display will show time is showing. 12.00 and the time indicator neon will flash. - Page 9 This must be completed within 5 seconds of first pressing the selector control button If necessary press the During the operation decrease button to of the countdown the achieve the correct remaining time period time interval. will show in the display To cancel the countdown Press the decrease...
-
Page 10: The Hob
The hob The gas hob has different burner sizes to suit different types of cooking. To ensure maximum burner efficiency only use pots and pans with flat bases appropriate to the burner size used. To light the hob burners The hob ignition works by means of an electric spark system Press the ignition Push in and turn the button immediately. -
Page 11: Things To Note
When lighting any burner, ensure that it is lit before you leave the appliance. When turning off a burner, ensure the flame has gone out before leaving the appliance. Things to note If you are having any difficulty lighting a hob burner turn all the hob controls off and make sure the burner parts have been replaced correctly. -
Page 12: The Grill
The grill Accessible parts may be hot when the grill is in use. Young children should be kept away. Using the grill Fully open the door before lighting the grill. Press the ignition Push in and turn the button immediately. control knob to the highest setting. -
Page 13: The Grill Pan And Handle
The grill pan and handle The grill pan has a removable handle. Attach and remove as described below To attach. Press the Slide the handle button on the handle towards the left and with the thumb and release the button. insert the lip into the widest part of the bracket. -
Page 14: Grilling Chart
Hints and tips • Most foods should be placed on the grid in the grill pan to allow maximum circulation of air to lift the food out of the fats and juices. • Adjust the grid and grill pan runner position to allow for different thicknesses of food. -
Page 15: The Top Oven
The top oven The top oven is the smaller of the two ovens. It is designed for cooking smaller quantities of food. Place single dishes on the centre of the shelf The top oven is also ideal for use as warming compartment to warm dishes and keep food hot. -
Page 16: To Fit The Top Oven Shelf
Things to note • The cooling fan for the controls may operate after a time. Do not place dishes, tins and trays directly on the oven base as it becomes very hot and damage will occur. To fit the top oven shelf Only use the shelf with the large solid metal plate at the rear of the shelf in the top oven. -
Page 17: The Main Oven
The main oven Heat zones There are zones of heat within the oven. The temperature in the middle is the gas mark you have chosen. The top of the oven is slightly hotter and the lower shelf slightly cooler. The base of the oven is quite a lot cooler. - Page 18 To turn the main oven off Turn the control knob to the off position. This is shown by a 0. Things to note • The oven light will illuminate. • If there is an electrical power failure you cannot use the main oven. •...
-
Page 19: Oven Cooking Chart
Oven cooking chart The oven temperatures are intended as a guide only. It may be necessary to increase or decrease the temperatures by to suit individual preferences and requirements. Food Biscuits Bread Bread rolls/buns Small / Queen Cakes Sponges Victoria Sandwich Madeira Cake Rich Fruit Cake Christmas Cake... - Page 20 Oven cooking chart continued Food Choux Pastry Éclairs / Profiteroles Flaky Pastry Mince Pies Pasta Lasagne etc. Meat Pies Quiche, Tarts, Flans Shepherd’s Pie Soufflés Fish Fish Pie Beef Casserole Lamb Casserole Convenience Foods Baked Potatoes Roast Potatoes Large Yorkshire Puddings: Individual Yorkshire Puddings Note: Shelf positions are counted from the top of the oven downwards.
-
Page 21: Roasting Chart
Roasting chart Meat Beef/ Beef boned Mutton/Lamb Pork/Veal/Ham Chicken Turkey/Goose Duck Pheasant Rabbit INTERNAL TEMPERATURES – Rare: 50-60°C; Medium: 60-70°C; Well done: 70-80°C The roasting temperatures and times given in the chart should be adequate for most joints, but slight adjustments may be required to allow for personal requirements and the shape and texture of the meat. -
Page 22: Slow Cook
Slow cook The slow cook setting gives a very low heat in the oven. It is particularly useful when you are cooking soups, stews and casseroles because the long slow cooking will make cheaper, tougher cuts of meat more tender. Using slow cook You need to cook food at gas mark 6 for 30 minutes before you turn the oven down to the slow cook setting. -
Page 23: Food Preparation - Slow Cooking
Food preparation – slow cooking Joints of meat and poultry • Do not cook meat joints over 2.7kg (6lb). • Do not cook poultry over 2 kg (4lb 8oz). • Cook on the middle shelf of the oven or above. •... -
Page 24: Care And Cleaning
Care and cleaning Before cleaning always allow the appliance to cool down before switching off at the electricity supply. Cleaning materials • Before using any cleaning materials on your appliance, check that they are suitable and that their use is recommended by the manufacturer. -
Page 25: Cleaning The Grill
Cleaning the grill and oven furniture All removable parts, except the grill pan handle can be washed in the dishwasher. The grill pan, grill pan grid and oven shelves may be cleaned using a soap impregnated steel wool pad. Soaking first in hot soapy water will make cleaning easier. -
Page 26: To Remove The Inner Glass
To remove the inner glass Open the oven door to gain access to the top of the oven door. Top Oven: • Carefully push the trim towards the oven and lift off. • Hold the door glass securely in place with one hand before sliding the glass out with the other hand. -
Page 27: Replacing An Oven Light Bulb
Replacing an oven light bulb • The type of bulb required is a 300°C 25 watt small Edison Screw. Disconnect the appliance from the electricity supply before replacing the bulb. • Make sure the appliance is cool before replacing the bulb. •... -
Page 28: Troubleshooting
Troubleshooting • Maintenance must only be carried out by a competent/qualified person. Do not try to alter/modify the appliance yourself, as this could be dangerous. • We recommend that your appliance has an annual gas safety check carried out by our approved service organisation. - Page 29 PROBLEM The hob burners will not light. The flame colour is orange/yellow. The burner is not igniting or only partially lighting. The burner sounds noisy. The burner is emitting a popping sound. Noise. POSSIBLE SOLUTION Ensure the burner parts have been placed correctly.
-
Page 30: Technical Details
Technical data Dimensions Height: Width: Depth: Weight: Space for fixing at hotplate level Space for fixing above hotplate level Minimum space above hotplate level Minimum distance from rear wall Connections Gas connection Electrical connection This appliance complies with: European Council Directives Low voltage Directive 73/23/EEC, Gas Directive 90/396/EEC EMC Directive 89/336/EEC, CE Marking Directive 93/68/EEC. - Page 31 Technical data Hotplate Natural Gas R.H.F. Heat input 1.0kW (3412 Btu/h) Injector marking Grill Natural Gas Heat Input 2.7kW (9212 Btu/h) Injector marking Top oven Natural Gas Heat Input 1.9kW (6483 Btu/h) Injector marking Dual control bypass Main oven Natural Gas Heat Input 1.9kW (6483 Btu/h) Injector marking...
-
Page 32: Installation Instructions
Installation instructions Important – safety requirements • Natural Gas versions of this appliance are available. • Check that this model is suitable for the type of supply available. This appliance must be installed and/or serviced by a competent person in accordance with the Gas Safety (Installation and Use) Regulations Current Editions and the I.E.E. -
Page 33: Moving Your Appliance
Moving your appliance • You may damage some soft or badly fitted floor coverings when you move the appliance. The floor covering under the appliance should be securely fixed so it does not ruck up when you move the appliance across it. -
Page 34: Connecting To Electricity Supply
• Curtains must not be fitted immediately behind the appliance or within 150mm of the sides of the hob. If fitted next to or between two base units a minimum space of 2mm must be left between each unit and the sides of the appliance. -
Page 35: Connecting To Gas Supply
• The wire, which is coloured blue, must be connected to the terminal, which is marked with the letter N or coloured black. • The wire, which is coloured brown, must be connected to the terminal, which is marked with the letter L or coloured red. •... -
Page 36: Pressure Testing
The stability chain anchor point on the appliance is shown below. Pressure testing The Rapid injector is used as a pressure test point. Connect the pressure gauge to the Rapid injector. Check the supply pressure by turning the Rapid burner on and one other hotplate burner full on and light the appropriate burner. -
Page 37: Environment
6. Turn off the control and check that the oven flames go out. Checking the main oven light • Turn the main oven thermostat knob full on and check that the main oven light is operative. Turn off the thermostat. To set the time of day •... -
Page 38: Guarantee / Custormer Care
Guarantee / Customer care Standard guarantee conditions We, Electrolux, undertake that if within 12 months of the date of the purchase this Electrolux appliance or any part thereof is proved to be defective by reason only of faulty workmanship or materials, we will, at our option repair or replace the same FREE OF CHARGE for labour, materials or carriage on condition that:... - Page 39 Notes...