Table of Contents
Advertisement
Advertisement
Table of Contents

Related Manuals for Zanussi ZBS 773

Summary of Contents for Zanussi ZBS 773
- Page 1 BUILT-IN OVEN INBYGGNADSUGN ZBS 773 INSTRUCTION BOOKLET BRUKSANVISNING...
-
Page 2: Important Safety Information
Important Safety Information You MUST read these warnings carefully before installing or using the oven. If you need assistance, contact our Customer Care Department on 01635 521313 Installation • This oven must be installed by qualified personnel to the relevant British Standards. •... -
Page 3: Table Of Contents
Contents For the User Important Safety Information Description of the Oven Control Panel How to set the Time of Day How to select a Cooking Function and Temperature "Fast Heat Up" Function Defrost Function Before the First Use Using the Oven Telescopic runners Programming the Oven Safety and Energy... -
Page 4: Description Of The Oven
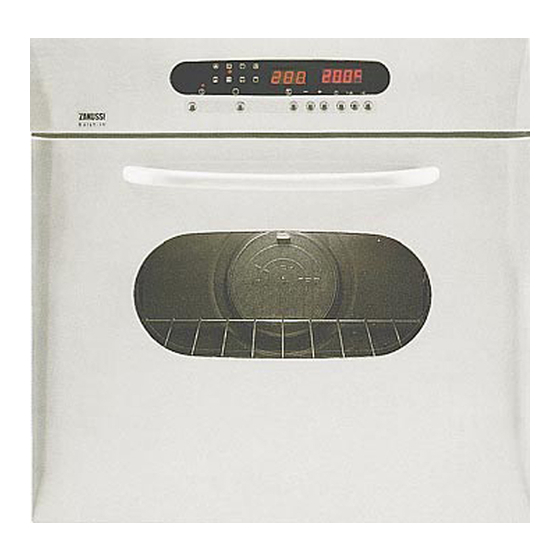
Description of the Oven Grill Element Rating Plate Grill/roasting Removable handles Control Panel Oven Light Telescopic Shelf Supports Grease Filter Grill trivet Anti-tip shelf (x 2) -
Page 5: Control Panel
Control Panel Cooking Function Display Push Buttons 1. ON / OFF 2. Oven Function Control 3. Fast Heat Up / Defrost Function 4. Temperature Control / Current Temperature 5. Decreasing Control (Time or Temperature) 6. Increasing Control (Time or Temperature) 7. -
Page 6: How To Set The Time Of Day
"On/Off" Push Button The oven must be switched on before setting any cooking function or programme. When button pressed, the pilot light above will come on, and the oven light will switch on. To switch off the oven, you can press button any time. -
Page 7: How To Select A Cooking Function And Temperature
How to select a Cooking Function and Temperature The oven has 8 different cooking functions. For each of them, a pre-set temperature will be automatically selected. 1) Switch on the oven by pressing the "ON" button. 2) Press button to select the required oven function. -
Page 8: Fast Heat Up" Function
"Fast Heat Up" function After a cooking function has been selected and the temperature has been adjusted, the cavity will gradually heat up until the selected temperature is reached. This will take from 10 to 15 minutes, depending on selected function and temperature. If it is necessary to reach the required temperature in a shorter time, the "Fast Heat Up"... -
Page 9: Before The First Use
Before the First Use Remove all packaging, both inside and outside the oven, before using the oven. Before first use, the oven should be heated without food. During this time, an unpleasant odour may be emitted. This is quite normal. 1. -
Page 10: Telescopic Runners
Hints and Tips Condensation and steam When food is heated it produces steam in the same way as a boiling kettle. The oven vents allow some of this steam to escape. However, always stand back from the oven when opening the oven door to allow any build up of steam or heat to release. -
Page 11: Programming The Oven
Programming the Oven How to set the minute minder 1) Press button to select the Minute Minder Function. The relevant pilot light will flash and the control panel will display 0.00. 2) Press button to select the required time (up to 19 hours 59 minutes). - Page 12 To programme the Oven to switch on and off 1) Carry out the cooking duration setting as described in “To programme the Oven to switch off”. 2) Press button . The "End of Cooking" function will be selected, and the relevant pilot lamp will flash.
-
Page 13: Safety And Energy Saving Functions
Safety and Energy Saving Functions Safety Cut-Off Function If no changes are made to the oven settings, the oven will switch off automatically according to the following table: If temperature setting is: the oven will switch off: 250 C or more after 1 from 120 up to 250 C after 5 hours... -
Page 14: The Fan Oven
The Fan Oven The air inside the oven is heated by the element around the fan situated behind the back panel. The fan circulates hot air to maintain an even temperature inside the oven. The advantages of cooking with this function are: Faster Preheating As the fan oven quickly reaches temperature, it is not usually necessary to preheat the oven... - Page 15 Hints and Tips Runner positions are not critical, but make sure the shelves are evenly spaced. When cooking more than one dish in the fan oven, place dishes centrally on the shelves rather than several dishes on one shelf. When the oven is full, you may need to allow a slightly longer cooking time.
-
Page 16: The Conventional Oven
The Conventional Oven When using this setting, heat comes from both the top and bottom elements. This allows you to cook on a single level and is particularly suitable for dishes which require extra base browning such as quiches and flans. Gratins, lasagnes and hotpots which require extra top browning also cook well in the conventional oven. -
Page 17: Cooking Chart - Fan And Conventional Oven
Cooking Chart - Fan and Conventional Oven The oven temperatures are intended as a guide only. It may be necessary to increase or decrease the temperatures by 10 C to suit individual preferences and requirements. NOTE: Shelf positions are counted from bottom of the oven. Food Biscuits Bread... -
Page 18: Defrosting
Defrosting The oven fan operates without heat and circulates the air, at room temperature, inside the oven. This increases the speed of defrosting. However, please note that the temperature of the kitchen will influence the speed of defrosting. This function is particularly suitable for defrosting delicate food which could be damaged by heat, e.g. -
Page 19: Grilling
Grilling Grilling must be carried out with the oven door closed. The grill pan handles must be removed from the pan. How to Use the Grill 1. Switch the oven ON. 2. Press the Cooking Function Control Button until the pilot light to the left of comes on. - Page 20 How to Use the Inner Grill Element The inner grill provides quick direct heat to the central area of the grill pan. Use the inner grill element for cooking small quantities, it can help to save energy. 1. Switch the oven ON. 2.
- Page 21 Hints and Tips Prepare foods in the same way as for conventional grilling. Brush lean meats and fish lightly with little oil or butter to keep them moist during cooking. If thermally grilling on more than one level, it may be necessary to interchange the food on the shelves during cooking.
-
Page 22: Pizza Oven
Pizza Oven The bottom element provides direct heat to the base of pizzas, quiches or pies, while the fan ensures air is circulated to cook the pizza toppings or pie fillings. To obtain the best results use the lower shelf levels. 1. -
Page 23: Cleaning The Oven
Cleaning the Oven Before cleaning always allow the cooling fan to cool the oven down before switching off at the electricity supply. The oven should be kept clean at all times. A build-up of fats or other foodstuffs could result in a fire, especially in the grill pan. Cleaning materials Before using any cleaning materials on your oven, check that they are suitable and that their use is... -
Page 24: Oven Cavity
Oven Cavity The enamelled oven cavity is best cleaned whilst the oven is still warm. Wipe the oven over with a soft cloth soaked in warm soapy water after each use. From time to time it will be necessary to do a more thorough cleaning, using a proprietary oven cleaner. -
Page 25: Replacing The Oven Light
- Electric rate: 230-240 V (50 Hz), - Resistant to temperatures of 300 C, - Connection type: E14. These bulbs are available from your local Zanussi Force Service Centre. To replace the faulty bulb: 1. Ensure the oven is isolated from the electrical supply. -
Page 26: If Something Goes Wrong
If something goes wrong If the oven is not working correctly, please carry out the following checks, before contacting your local Zanussi Service Force Centre. IMPORTANT: If you call out an engineer to a fault listed below, or to repair a fault caused by incorrect use or installation, a charge will be made even if the appliance is under guarantee. -
Page 27: Peace Of Mind For 24 Months
Customer Care Booklet. Peace of Mind for 24 Months ZANUSSI GUARANTEE CONDITIONS We, Zanussi, undertake that if, within 24 months of the date of the purchase, this Zanussi appliance or any part thereof is proved to be defective by any... -
Page 28: Installation
Installation The oven must be installed according to the instructions supplied. Technical Data DIMENSIONS Height OF RECESS Width Depth DIMENSIONS Height OF THE Width OVEN CAVITY Depth Oven capacity Electrical Connection The oven is designed to be connected to 230-240V (50Hz) electricity supply. -
Page 29: Building In
Building In Please ensure that when the oven is installed it is easily accessible for the engineer in the event of a breakdown. The surround or cabinet into which the oven will be built must comply with these specifications: the dimensions must be as shown in the relevant diagrams;...