Advertisement
Quick Links
Advertisement

Related Manuals for Bresser Junior Galilean

Summary of Contents for Bresser Junior Galilean
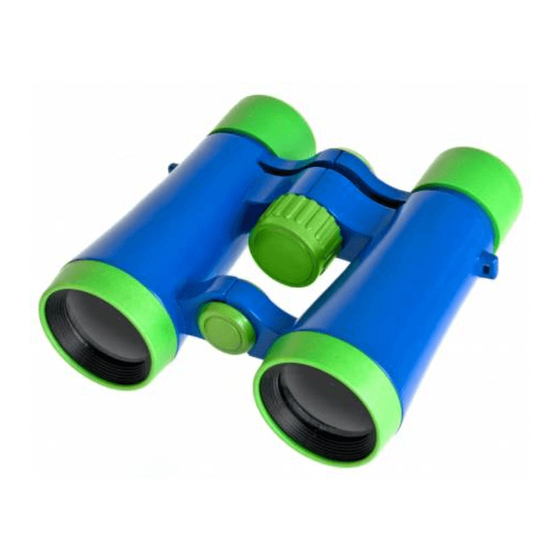
- Page 1 Fernglas Binoculars Galilean Porro Roof...
- Page 2 INSTRUCTION MANUAL DOWNLOAD: Besuchen Sie unsere Desidera ricevere Website über den folgenden QR informazioni esaustive su Code oder Weblink um weitere questo prodotto in una lingua Informationen zu diesem specifica? Venga a visitare il Produkt oder die verfügbaren nostro sito Web al seguente Übersetzungen dieser Anleitung link (codice QR Code) zu finden.
-
Page 3: Manual Download
länk (QR-kod) för tillgängliga Ønsker du en udførlig versioner. vejledning til dette produkt på et bestemt sprog? Så besøg Haluatko tuotteen vores website ved hjælp af täydellisen ohjeen tietyllä følgende link (QR-kode) for kielellä? Käy silloin tilgængelige versioner. sivustossamme, jossa ovat saatavilla olevat versiot. -
Page 4: Table Of Contents
INHALT/INDEX: Manual Download ....... 2-3 (DE) Bedienungsanleitung ..14-17 Galilean ........6-7 (EN) Instruction Manual ...18-20 Roof........... 8-9 Garantie/Warranty ....21-22 Porro ........10-11 Service ........23 SERVICE AND WARRANTY: www.bresser.de/warranty_terms BINOCULARS GUIDE: www.bresser.de/guide BINOCULARS FAQ: www.bresser.de/faq... - Page 5 (DE) WARNUNG: Schauen Sie mit diesem Gerät niemals direkt in die Sonne oder in die Nähe der Sonne. Es besteht ERBLINDUNGSGEFAHR! (EN) WARNING: Never use this device to look directly at the sun or in the direct proximity of the sun. Doing so may result in a risk of blindness.
-
Page 6: Galilean
GALILEAN Teileübersicht Parts overview 1. Scharfstellknopf 1. Central focusing wheel (Mitteltrieb) 2. Eyepiece lens 2. Einblick-Linse (Okularlinse) 3. Objective lens 3. Ausblick-Linse 4. Centre axle (Objektivlinse) 4. Fernglasachse zum Knicken... - Page 7 Vue d’ensemble des pièces Resumen 1. Bouton de mise au point 1. Botão de ajuste da nitidez 2. Lentille côté œil (accionamento central) 3. Lentille côté vue (lentille 2. Lente de visualização de l’objectif) (lente ocular) 4. Axe des jumelles à plier 3.
-
Page 8: Roof
ROOF Teileübersicht Parts overview 1. Scharfstellknopf 1. Central focusing wheel (Mitteltrieb) 2. Eyepiece lens 2. Einblick-Linse (Okularlinse) 3. Objective lens 3. Ausblick-Linse (Objektivlinse) 4. Centre axle 4. Fernglasachse zum Knicken 5. Dioptre adjustment 5. Augenausgleichring (Dioptrienring) - Page 9 Vue d’ensemble des pièces Resumen 1. Bouton de mise au point 1. Botão de ajuste da nitidez 2. Lentille côté œil (accionamento central) 3. Lentille côté vue (lentille de 2. Lente de visualização (lente l’objectif) ocular) 4. Axe des jumelles à plier 3.
-
Page 10: Porro
PORRO Teileübersicht Parts overview 1. Scharfstellknopf 1. Central focusing wheel (Mitteltrieb) 2. Eyepiece lens 2. Einblick-Linse (Okularlinse) 3. Objective lens 3. Ausblick-Linse (Objektivlinse) 4. Centre axle 4. Fernglasachse zum Knicken 5. Dioptre adjustment 5. Augenausgleichring (Dioptrienring) - Page 11 Vue d’ensemble des pièces Resumen 1. Bouton de mise au point 1. Botão de ajuste da nitidez 2. Lentille côté œil (accionamento central) 3. Lentille côté vue (lentille de 2. Lente de visualização (lente l’objectif) ocular) 4. Axe des jumelles à plier 3.
- Page 12 Fig. 1 Fig. 2 Fig. 3...
- Page 13 Diopter setting (Roof): Diopter setting (Porro): Fig. 4a Fig. 4b Rubber eyecups: TwistUp eyecups: Fig. 5a Fig. 5b Tripod Mount Adapter (not included) Remove front cap and attach as shown Fig. 6...
- Page 14 ALLGEMEINE WARNHINWEISE • ERBLINDUNGSGEFAHR! Schauen Sie mit diesem Gerät niemals direkt in die Sonne oder in die Nähe der Sonne. Es besteht ERBLINDUNGSGEFAHR! • ERSTICKUNGSGEFAHR! Kinder sollten das Gerät nur unter Aufsicht benutzen. Verpackungsmaterialien (Plastiktüten, Gummibänder, etc.) von Kindern fernhalten! Es besteht ERSTICKUNGSGEFAHR! •...
- Page 15 Galilean/Roof/Porro: Der Augenabstand Der Abstand zwischen den beiden Augen ist bei jedem Kind anders. Deshalb muss der richtige Augenabstand bei deinem Fernglas zuerst für dich eingestellt werden. Nimm dazu das Fernglas in beide Hände (Fig. 1) und halte es vor die Augen.
- Page 16 Falls du eine Brille trägst Vorne an den Einblick-Linsen befinden sich umklappbare Augenschützer. Als Brillenträger solltest du diese umstülpen, um schärfer sehen zu können (Fig. 5). Fernglas auf ein Stativ montieren Wenn dein Fernglas mit einem Stativanschlussgewinde (Fig. 6) ausgestattet ist: Der dazu erforderliche Stativadapter ist als optionales Zubehör im Handel erhältlich (Art.-Nr.
- Page 17 ENTSORGUNG • Entsorgen Sie die Verpackungsmaterialien sortenrein. In- formationen zur ordnungsgemäßen Entsorgung erhalten Sie beim kommunalen Entsorgungsdienstleister oder Um- weltamt.
- Page 18 • The device is intended only for private use. Please heed the privacy of other people. Do not use this device to look into apartments, for example. Galilean/Roof/Porro: Eye distance The distance between one’s eyes varies from person to person, so it is essential that you adjust your binoculars...
- Page 19 (Fig. 1) and hold them to your eyes. Fold them so that you see a single circle when looking through them with both eyes (Fig. 2). Adjusting the focus Find an object over ten metres away. Close your right eye, or hold a finger over it.
- Page 20 NOTES ON CLEANING • Clean the eyepieces and lenses only with a soft, lint-free cloth like a microfibre cloth. To avoid scratching the lenses, use only gentle pressure with the cleaning cloth. • To remove more stubborn dirt, moisten the cleaning cloth with an eyeglass-cleaning solution and wipe the lenses gently.
-
Page 21: Www.bresser.de/Warranty_Terms
GARANTIE & SERVICE: Die reguläre Garantiezeit beträgt 5 Jahre und beginnt am Tag des Kaufs. Die vollständigen Garantiebedingungen sowie Infor- mationen zu Garantiezeitverlängerung und Serviceleistungen können Sie unter: www.bresser.de/garantiebedingungen einsehen. WARRANTY & SERVICE: The regular guarantee period is 5 years and begins on the day of purchase. You can consult the full guarantee terms as well as information on extend- ing the guarantee period and details of our services at www.bresser.de/ warranty_terms. - Page 22 GARANTÍA Y SERVICIO: El período regular de garantía es 5 anos iniciándose en el día de la com- pra. Las condiciones de garantía completas así como informaciones rela- tivas a la ampliación de la garantía y los servicios pueden encontrarse en www.bresser.de/warranty_terms.
- Page 23 SERVICE CENTER: DE AT CH BE uw telefoon provider; gesprekken vanuit het buitenland zullen hogere kosten met zich meebrengen. E-Mail: service@bresser.de Telefon*: +49 28 72 80 74 210 FR BE BRESSER GmbH E-Mail: sav@bresser.fr Kundenservice Téléphone*: 00 800 6343 7000 Gutenbergstr.
- Page 24 Contact Bresser GmbH Gutenbergstraße 2 46414 Rhede · Germany www.bresser.de @BresserEurope �� ...