Table of Contents
Advertisement
Advertisement
Table of Contents

Related Manuals for Yamaha PortaTone PSR-36


Summary of Contents for Yamaha PortaTone PSR-36
- Page 1 Owner's Guide Spielanleitung Mode d'emploi Manual del Propietario YAMAHA...
-
Page 2: Table Of Contents
Congratulations! Thank you for purchasing a Yamaha PortaTone PSR-36. This PortaTone is an ultra-modern keyboard with a design based on the latest digital electronics technology. To be sure you get maximum satis- faction, we suggest you follow the steps in this manual carefully while actually playing the instrument. -
Page 3: Before Playing
Before playing Inserting Batteries Remove the battery compartment cover on the bottom of the instrument and insert six 1.5V SUM-1 "D" size, R-20, or equivalent alkaline batteries (sold separately), making sure that the polarities are placed as directed inside the compartment. Replace the cover, ensuring that it locks securely in place. -
Page 4: Nomenclature
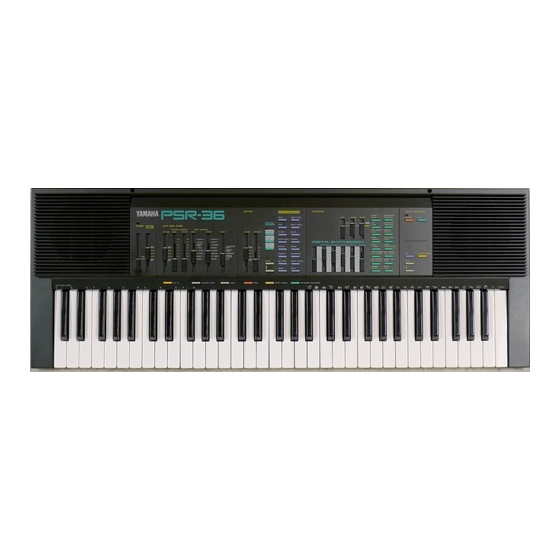
Nomenclature Power Switch Master Volume Control Auto Bass Chord Volume Control Bass & Chord Variation Selectors Bass & Chord Voice Selectors Auto Bass Chord Mode Selector Auto Bass Chord Key Section Rhythm Volume Control Rhythm Variation Selector Custom Drummer Function Selectors Custom Drummer Key Section Tempo Controls Rhythm Selectors... -
Page 5: Playing Back The Demonstration
Playing back the Demonstration Music First, try listening to the Demonstration Music. To hear this music, do the following: 1 . Switch on Slide the POWER switch to the ON position. The power-on light will then illuminate. 2. Adjust the volume Slide the MASTER VOLUME control about three-quarters of the way towards Max. -
Page 6: Starting To Play (Orchestra Section)
To stop the music, press the STOP button or the DEMONSTRATION button again. You can change the programmed voice, rhythm and tempo as you like. However, you shouldn’t select a 3-Beat rhythm, since it would not match the demonstration piece. Starting to play Orchestra section First, try the sounds in the Orchestra... -
Page 7: Pitch Control
Notes: 1. Vibrato is automatically applied to voices which benefit from application of this effect. 2. Be sure to set the Auto Bass Chord MODE selector to the OFF position. When the selector is set to the SINGLE FINGER or FINGERED position. -
Page 8: Voice Editing
Voice Editing DIGITAL SYNTHESIZER As one of the PSR-36’s special features, the Digital Synthesizer function allows you to expand the 32 orchestra voices to total of 100,000 different voices. Let’s create various voices using DIGITAL SYNTHESIZER. 1. Select the desired voice by pressing... -
Page 9: Using The Built-In Drummer (Pcm/Stereo Rhythm Section)
DETUNE Increasing the DETUNE setting produces a “thicker” multi-instrument type sound. Now, let’s play some notes. By comparing the same voice in both the ON and OFF settings of the Digital Synthesizer Selector you can distinguish the difference in timbre. The degree to which a voice changes varies with the selected voice. - Page 10 2. Start the rhythm After selecting a rhythm, press the START selector Synchro Start Use the SYNCHRO START button If you want the rhythm to begin from the moment you first press a key. Any of the 19 keys (up to F ) beginning at the left of the keyboard (Auto Bass Chord key section...
- Page 11 5. Adding fill-ins If you tap the FILL-IN button rhythm being played will be replaced with a 1-bar drum solo. If you press the FILL-IN button before starting to play, the rhythm will start after a 1-bar drum solo. 6. Using the INTRO./ENDING button for your musical finale If you press the INTRO./ENDING button when the rhythm is on, the rhythm...
-
Page 12: Creating Original Rhythm Patterns (Custom Drummer)
Creating original rhythm patterns Custom Drummer The PSR-36 has 80 preset rhythm patterns (including variations). Apart from the preset patterns, you can also create original ones of your own using Custom Drummer Programming a rhythm pattern Create your own version of the 8 Beat rhythm. - Page 13 4. Input the bass drum pattern by tapp- ing the key indicated by the figure. 5. The same procedure is required for inputting snare drum, closed hi-hat, and open hi-hat. You can add an accent (slightly higher volume level) to the timing you want by tapping the >...
-
Page 14: Adding Accompaniment (Auto Bass Chord Section)
Adding accompaniment Auto Bass Chord section The Auto Bass Chord section is an automatic accompaniment feature. if the MODE selector is set to OFF, the Auto Bass Chord system does not function. With the SINGLE FINGER position selected, you can play chords plus bass notes with just one finger when you press any of the keys in the Auto Bass Chord key section... - Page 15 You will hear the corresponding chord with bass and rhythm accompaniment. For instance, when you press “C,” you’ll obtain a C major chord that plays along with the bass and rhythm. 4. Set the volume Adjust the volume to suit the overall level using the Auto Bass Chord VOLUME control 5.
- Page 16 Obtaining minor, seventh, and minor seventh chords in Single Finger mode. • To get a C minor chord depress the C key together with the next black key to the left. • To get a C seventh chord depress the C key together with the next white key to the left.
-
Page 17: Chord Sequence Programming
Advanced course 1: Manual Bass accompaniment 1. Siide the MODE selector to the MANUAL BASS position. 2. Play your own bass line using the keys in the Auto Bass Chord key section Note: You can play only one note at a time in the Auto Bass Chord key section when using this function. - Page 18 Note: When the power is OFF, the data that you input will be erased automatically. A. Chord recording 1. Depress the RECORD button in the CHORD SEQUENCER section. 2. Try storing the accompaniment for “Greensleeves”. First, select WALTZ in the Rhythm section, and then play the following chord sequence together with the rhythm (using the Auto Bass Chord key section...
-
Page 19: External Jacks
1. Press the PLAY button of the CHORD SEQUENCER. 2. Start playback by pressing the START button or any key on the keyboard. 3. Try playing the melody of “Green- sleeves” to the accompaniment playback (see below). 4. Playback can be stopped at an time by pressing the STOP button Melody Capacity of Chord Sequencer... - Page 20 A. External power source jack (DC 9-12V IN) AC power Connect the optional AC Power Adaptor PA-4/PA-40 to the DC 9-12V IN jack. Car battery The Car Battery Adaptor CA-1 plugs into the DC 9-12V IN jack and a cigarette lighter socket. B.
-
Page 21: Optional Accessories
Instrument Digital Interface, which is a standard interface for communication between keyboards and other music devices. The Porta Tone PSR-36 is equipped with MIDI jacks (IN and OUT), enabling connection of the Porta Tone to another keyboard equipped with MIDI jacks or an expander module, for synchronized performances. - Page 22 • Key ON/OFF • Orchestra voice change • Orchestra sustain MIDI Functions The PSR-36 is equipped with 6 MIDI functions. These functions are selected by pressing the Orchestra Voice Selector shown in the table below while pressing the MIDI button...
- Page 23 6. Local Off This is used to cancel the melody sounds of the PSR-36. (Rhythm and Auto Bass Chord cannot be turned off. The Rhythm and Auto Bass Chord sounds can be eliminated by setting their volumes to...
-
Page 24: Taking Care Of Your Portatone
Taking care of your PortaTone Your PortaTone will remain in excellent playing condition if care is taken concern- ing the following. 1. When you use AC power, be sure to use the optional AC Power PA-4/ PA-40 adaptor. Before use, read the adaptor instructions carefully. -
Page 25: Specifications
Specifications Keyboard 61 keys (C —C Orchestra Voices (Upper Bank/Lower Bank) Brass 1/Brass 2, Sax/Horn, Wah Brass/ Flute, Oboe/Clarinet, Cello/Strings, Synth Organ/Jazz Organ, Pipe Organ 1/Pipe Organ 2, Fantasy/Cosmic, Bluessynth/ Popsynth, Slapsynth/Funksynth, Percus 1/ Percus 2, Elec. Piano/Piano, Banjo/ Harpsichord, Elec. Guitar/Jazz Guitar, Music Box/Vibes, Koto/Bells Effects Duet, Sustain (1, 2) - Page 26 PortaTone PSR-36 off and on. If the interference continues when your PortaTone PSR-36 is off, PortaTone PSR-36 is not the source of the interference. If your PortaTone PSR-36 does appear to be the source of the interference, you should...
- Page 27 M o d e l P S R - 3 6 M I D I I m p l e m e n t a t i o n C h a r t F u n c t i o n B a s i c D e f a u l t C h a n n e I...
- Page 28 You should note this serial number in the space provided below and retain this manual as a permanent record of your purchase to aid identification in the event of theft. PSR-36 Model No. Serial No. Concerning Warranty...