Table of Contents
Advertisement
Quick Links
Advertisement
Table of Contents

Related Manuals for Yamaha PortaTone PSR-225GM


Summary of Contents for Yamaha PortaTone PSR-225GM
-
Page 2: Special Message Section
This product should be used only with the components supplied or; a cart, rack, or stand that is recommended by Yamaha. If a cart, etc., is used, please observe all safety markings and instructions that accompany the accessory product. - Page 3 If you remove the batteries and disconnect the adaptor, the data will be lost. Save important data to external media such as the Yamaha MDF3 MIDI data filer. Keep the power adaptor connected while you replace the batteries to prevent loss of data.
-
Page 4: Main Features
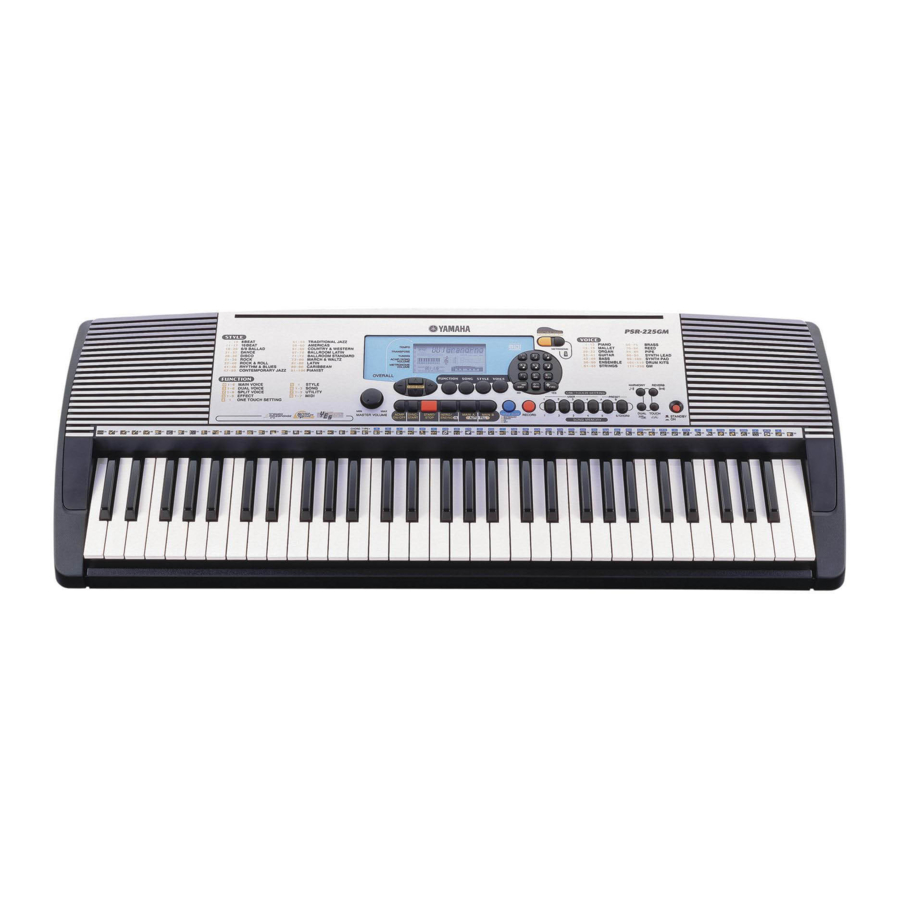
Congratulations on your purchase of the Yamaha You now own a portable keyboard that combines advanced func- tions, great sound and exceptional ease-of-use in a highly compact package. Its outstanding features also make it a remarkably ex- Read this Owner’s Manual carefully while playing your new PortaTone in order to take full advantage of its various features. -
Page 5: Table Of Contents
PANEL CONTROLS AND TERMINALS • Front Panel ... 6 • Rear Panel ... 7 SETTING UP @@@@ POWER REQUIREMENTS ... 8 TURNING ON THE POWER ... 8 ACCESSORY JACKS ... 9 @@@@ Quick Guide — How to Use Your New PSR-225 PortaTone Step 1 Voices ... -
Page 6: Panel Controls And Terminals
PANEL CONTROLS AND TERMINALS Front Panel MASTER VOLUME dial This determines the overall volume of the PortaTone. OVERALL, DEMO START buttons (L, M, +, -) These are for selecting the various “overall” functions and setting their values. (See pages 22, 24.) They are also used to play the Demo songs. -
Page 7: Rear Panel
INTRO/ENDING button When the Style mode is selected, this is used to control the Intro and Ending functions. (See pages 49, 51.) MAIN A/B (AUTO FILL) buttons When the Style mode is selected, these are used to change auto accompaniment sections and control the Auto Fill function. -
Page 8: Setting Up
PortaTone, and the other end to a suitable electrical outlet. • Use ONLY a Yamaha PA-3B AC Power Adaptor (or other adaptor specifically recommended by Yamaha) to power your instrument from the AC mains. The use of other adaptors may result in irreparable damage to both the adaptor and the PSR- 225. -
Page 9: Accessory Jacks
I Using a Footswitch This feature lets you use an optional footswitch (Yamaha FC4 or FC5) to sustain the sound of the voices, or control a variety of other functions. (See page 91.) When this is used for sustain, the footswitch functions the same way as a damper pedal on an acoustic piano —... -
Page 10: Portatone
Quick Guide — How to Quick Guide — How to Use Your New PSR-225 Use Your New PSR-225 PortaTone PortaTone This brief, easy-to-follow section shows you how to use the basic features and functions of your new PSR-225 PortaTone. If you’ve never touched an electronic keyboard before, reading and going through the steps in this section will make you familiar with the PortaTone in a very short time. -
Page 11: Changing The Metronome Volume
Playing along with the Metronome Press the METRONOME button. Changing the time signature of the Metronome Simultaneously hold down the METRONOME button and one of the number buttons (1 - 9) on the numeric keypad. Normally, the Metronome is set to play in 4/4 time. -
Page 12: Step 2 Auto Accompaniment
Step 2 Auto Accompaniment Using the auto accompaniment The PSR-225 has powerful and easy-to-use auto accompaniment features. All you have to do is play chords with your left hand — and the PortaTone automatically produces appropriate bass, chord, and rhythm backing for your perfor- mance. -
Page 13: Auto Accompaniment
Selecting a complete music style with ideal voice and other settings — One Touch Setting The PortaTone features 100 different styles in various music genres. With the One Touch Setting function, you can call up voice and other settings that best match the selected style. Each style has been programmed with two Preset One Touch Settings. -
Page 14: Step 3 Chord Guide
Step 3 Chord Guide Using the Chord Guide function Learning how to play specific chords Here, you’ll learn how to use the Chord Guide functions to show the individual notes of chords. Enter the Style mode, then press the CHORD GUIDE button until “Dict.” is shown in the display. - Page 15 Playing chord progressions (songs) with just one finger The EZ Chord function gives you an exceptionally easy way to play the chords of a song. Simply press single keys in succession, and the PortaTone automatically plays the proper chords for you! Enter the Style mode, then press the CHORD GUIDE button until “EZ.
-
Page 16: Step 4 Songs
Step 4 Songs Playing a song Playing back all three songs The PSR-225 has three Demo songs that show- case the authentic voices and dynamic accom- paniment of the instrument. Simultaneously press both OVERALL L/M buttons. SONG 001 111 MEASURE TEMPO Stop the song. - Page 17 Recording your own song The PSR-225 lets you record your own songs by using two different methods — Realtime and Step. Try out both of these recording methods yourself... Realtime recording Select the desired recording mode by This method is much like using a pressing the RECORD conventional tape recorder, letting button.
-
Page 18: Step 5 Function Parameters
Step 5 Function Parameters Using the Function parameters The PSR-225 has a variety of settings in the Function parameters. These give you detailed control over many of the PSR-225’s features. Press the FUNCTION button. Select a Function number. For a list of functions, see page 19. STYLE FUNCTION The Function number can be selected... - Page 19 Function Parameters List Function Main Voice Volume Main Voice Octave Main Voice Pan Main Voice Reverb Send Level Main Voice Chorus Send Level Main Voice DSP Effect Send Level Dual Voice Volume Dual Voice Octave Dual Voice Pan Dual Voice Reverb Send Level Dual Voice Chorus Send Level Dual Voice DSP Effect Send Level Dual Voice...
-
Page 20: Step 6 Midi
Step 6 MIDI Using MIDI The PSR-225 also features rear panel MIDI terminals (MIDI IN and MIDI OUT) as well as a comprehensive set of MIDI functions, that let you use the instrument in a variety of record- ing and performance applications. Sending original song and One Touch Setting data to another PSR-225. - Page 21 Controlling the PSR-225 with a MIDI keyboard controller (not having a tone generator) (Auto accompaniment can also be used in this setup.) PSR-225 MIDI IN ➔ See page 97. G In this setup you can record your PSR-225 performance, including the auto accompani- ment, to a connected computer or sequencer.
-
Page 22: Panel Display Indications
PANEL DISPLAY INDICATIONS The PortaTone features a large multi-function display that shows all important settings for the instrument. The section below briefly explains the various icons and indications in the display. Overall functions bar indicator Accompaniment On indicator Keyboard Mode indicators These indicate the currently selected mode —... -
Page 23: Music Stand
Measure and Tempo These show the current measure during play- back of a song or style, and the currently set Tempo value for the song or style. Beat indicators These dark bars (one large, three small) flash in sequence and in time with the song or style. The large bar indicates the first beat of the measure. -
Page 24: Portable Grand
PORTABLE GRAND This convenient function lets you automatically exit from any other mode or function and instantly call up the Grand Piano voice. PLAYING THE PORTABLE GRAND Press the PORTABLE GRAND button. Doing this automatically cancels any other mode or function, and resets the entire instrument for playing the special “Stereo Sampled Piano”... -
Page 25: Setting The Metronome Time Signature
Change the value. Use the OVERALL +/- buttons to increase or decrease the Tempo value. Holding down either button continuously increases or decreases the value. Decreases Tempo value Turn on the Metronome. Press the METRONOME button. To turn the Metronome off, press the METRONOME button again. Setting the Metronome Time Signature The time signature of the Metronome can be set to various quarter-note based meters. -
Page 26: Adjusting The Metronome Volume
PORTABLE GRAND Adjusting the Metronome Volume You can adjust the volume of the Metronome sound independently of the other PortaTone sounds. The volume range is 000 - 127. Select the Metronome Volume function in the Overall menu. Press one of the OVERALL L/M buttons, repeatedly if necessary, until “MtrVol” appears in the display. -
Page 27: Playing Voices - The Voice Mode
The Voice mode features 228 authentic voices (including 128 General MIDI voices), plus 10 special drum kits — all of which have been created with Yamaha’s sophisticated AWM (Advanced Wave Memory) tone generation system. The Voice mode gives you many powerful and versatile tools for playing and enhancing these Voices. - Page 28 PLAYING VOICES — THE VOICE MODE Select the desired voice number. Use the numeric keypad. The basic categories of voices and their numbers are shown at the right side of the panel. A complete list of the available voices is given on page 109. There are three ways to select voices: 1) directly entering the voice number with the numeric keypad, 2) using the +/- keys to step up and down through the voices, or 3) pressing the VOICE button to advance through...
-
Page 29: About Panel Voices And Gm Voices
Using the +/- keys Press the + key to select the next voice number, and press the - key to select the previous voice. Holding down either key continuously scrolls up or down through the numbers. The +/- keys have a “wrap around” fea- ture. -
Page 30: Drum Kit Voice Chart (Voices 101 - 110)
PLAYING VOICES — THE VOICE MODE Drum Kit Voice Chart (voices 101 - 110) When one of the 10 panel Drum Kit voices are selected you can play different drums and percussion instruments on the keyboard. The drums and percussion instruments played by the various keys are marked by symbols above the keys. - Page 31 Change the parameter setting or value. After the “FUNCTION” indication stops flashing, use the numeric keypad or +/- buttons to change the value or setting. (The value/ setting is shown to the left of the parameter name.) STYLE FUNCTION Set other parameters as needed. To select and set other parameters, repeat steps 1 - 3 above.
-
Page 32: Transpose And Tuning
PLAYING VOICES — THE VOICE MODE TRANSPOSE AND TUNING You can also adjust the tuning and change the transposition (key) of the entire PortaTone sound with the Transpose and Tuning functions. Transpose Transpose determines the key of both the main voice and the bass/chord accompaniment of the selected style. -
Page 33: Tuning
Tuning Tuning determines the fine pitch setting of both the main voice and the bass/chord accompaniment of the selected style. It also determines the pitch of the songs. This allows you to accurately match the tuning with that of other instruments. The Tuning settings can be adjusted over a range of ±... -
Page 34: Playing Two Voices - Dual Voice
PLAYING VOICES — THE VOICE MODE PLAYING TWO VOICES — DUAL VOICE The Dual Voice mode lets you create richly textured sounds by “layering” two different voices together — one voice being the Main voice selected in the normal way (page 27), and the other a Dual voice selected as described below. -
Page 35: Function Parameters - Dual Voice
Change the parameter setting or value. After the “FUNCTION” indication stops flashing, use the numeric keypad to change the value or setting. For on/off settings, use the +/- buttons. STYLE FUNCTION Restoring the Default Value If you’ve changed the parameter setting, you can instantly restore the default setting by pressing both +/- buttons simultaneously. -
Page 36: Playing Two Voices - Split Voice
PLAYING VOICES — THE VOICE MODE PLAYING TWO VOICES — SPLIT VOICE In the Split Voice mode, you can assign two different Voices to opposite sections of the keyboard, and play one Voice with your left hand while your right plays another. For example, you could play bass with the left hand and play piano with the right. -
Page 37: Function Parameters - Split Voice
Exit the Function mode. Once you’ve made all desired settings, press one of the other mode but- tons (SONG, STYLE, or VOICE). Function Parameters — Split Voice The Function parameters provide all settings for the Split voice. Like the similar settings in the Main Voice mode, these settings let you change or enhance the sound of the Split voice separate from the Main voice. -
Page 38: Additional Voice Functions - Voice Set And Touch Sensitivity
PLAYING VOICES — THE VOICE MODE ADDITIONAL VOICE FUNCTIONS — VOICE SET AND TOUCH SENSITIVITY Voice Set and Touch Sensitivity are two important voice-related parameters, and are found in the Utility section of the Function parameters. When Voice Set (described in greater detail below) is set to on, you can automatically call up a variety of voice-related settings that best suit the selected voice. -
Page 39: Function Parameters - Voice Set And Touch Sensitivity
Function Parameters — Voice Set and Touch Sensitivity Function Parameters No. Parameter Name Display Name F72 Voice Set VoiceSet F73 Touch Sensitivity TouchSns PLAYING VOICES — THE VOICE MODE Range/Settings Description oFF, on When this is set to on, selecting a voice also automati- cally calls up special voice-related parameters and values that best suit the voice. -
Page 40: Effects
EFFECTS The PortaTone is equipped with a wide variety of effects that can be used to enhance the sound of the voices. Four general categories of effects are provided — Reverb, Chorus, DSP, and Harmony — and each category has many effect types to choose from. -
Page 41: Chorus
Exit the Function mode. Once you’ve made all desired settings, press one of the other mode but- tons (SONG, STYLE, or VOICE). CHORUS The Chorus effect lets you enhance the sound of a voice with through the use of pitch modulation. Two basic types are provided: Chorus and Flanger. -
Page 42: Dsp
EFFECTS The DSP effect section provides many reverb and chorus effects, plus a wealth of other useful and dynamic effects for enhancing and changing the sound of the voices. Included among these miscellaneous effects are reverse gate reverb, phaser, rotary speaker, tremolo, echo, delay, distortion, equalization, and wah. -
Page 43: Harmony
HARMONY The Harmony section features a variety of performance effects that enhance the melodies you play when using the accompaniment styles of the PortaTone. A total of twenty-six Harmony types are available. Tremolo, Trill and Echo effects can be used even if accompaniment is off. There are five different Harmony Types that automatically create harmony parts (for notes played in the upper section of the keyboard) to match the accompaniment chords. -
Page 44: Function Parameters - Effects
EFFECTS Exit the Function mode. Once you’ve made all desired settings, press one of the other mode but- tons (SONG, STYLE, or VOICE). Function Parameters — Effects The Effect Function parameters provide all effect-related settings (with the exception of the Send parameters in the Main, Dual, and Split sections). -
Page 45: Effect Types
I Effect Types Reverb Types No. Reverb Display Description Type Name Hall 1 Hall1 Concert hall reverb. Hall 2 Hall2 Room 1 Room1 Small room reverb. Room 2 Room2 Stage 1 Stage1 Reverb for solo instruments. Stage 2 Stage2 Plate 1 Plate1 Simulated steel plate reverb. - Page 46 EFFECTS Harmony Types No. Harmony Type Display Name Duet Duet Trio Trio Block Block Country Country Octave Octave Trill 1/4 note Tril1/4 Trill 1/6 note Tril1/6 Trill 1/8 note Tril1/8 Trill 1/12 note Tril1/12 Trill 1/16 note Tril1/16 Trill 1/24 note Tril1/24 Trill 1/32 note Tril1/32...
-
Page 47: Auto Accompaniment - The Style Mode
AUTO ACCOMPANIMENT — THE STYLE MODE The Style mode provides dynamic rhythm/accompaniment patterns — as well as voice settings appropriate for each pattern — for various popular music styles. A total of 100 different styles are available, in several different categories. Each style is made up of separate “sections”... - Page 48 AUTO ACCOMPANIMENT — THE STYLE MODE Style numbers can be selected in the same way as with the voices (see page 28). You can use the numeric keypad to directly enter the style number, use the +/- keys to step up and down through the styles, or press the STYLE button to advance through the style numbers.
- Page 49 Starting with an Intro section Each style has its own two- or four-measure Intro section. When used with the auto accompaniment, many of the Intro sections also in- clude special chord changes and embellishments to enhance your performance. To start with an Intro section: 1) Press the MAIN A or MAIN B button —...
- Page 50 AUTO ACCOMPANIMENT — THE STYLE MODE 2) Press the INTRO button. MEASURE 3) Press the SYNC-START button to enable Sync-Start, and start the Intro section and accompaniment by playing any key on the keyboard. (When auto accompaniment is on, play a key or chord in the auto accompaniment section of the keyboard.) Auto accompaniment section...
- Page 51 About the Beat Display The dark bars underneath the style name in the display flash in time with the current tempo during playback (or Sync-Start standby) of the accompaniment. The flashing bars provide a visual indication of both the tempo and time signature of the accompaniment.
-
Page 52: Accompaniment Controls
AUTO ACCOMPANIMENT — THE STYLE MODE ACCOMPANIMENT CONTROLS When the Style mode is active, the panel buttons below the display function as accompaniment controls. Pressing this button alternately enables and cancels the bass and chord accompa- niment. (See below.) Pressing this button alternately enables and cancels the Sync-... -
Page 53: Changing The Tempo
Change chords using the auto ac- companiment feature. Try playing a few successive single notes with your left hand, and notice how the bass and chord accompaniment change with each key you play. You can also play full chords to control the auto accompaniment. -
Page 54: Accompaniment Sections (Main A, Main Band Fill-Ins)
AUTO ACCOMPANIMENT — THE STYLE MODE ACCOMPANIMENT SECTIONS (MAIN A, MAIN B AND FILL-INS) While the accompaniment is playing, you can add variation in the rhythm/ accompaniment by pressing the MAIN/AUTO FILL A or B button. This automatically plays one of four Fill-in sections, and smoothly leads into the next section —... -
Page 55: Adjusting The Accompaniment Volume
ADJUSTING THE ACCOMPANIMENT VOLUME The playback volume of the accompaniment can be adjusted. This volume control affects only the accompaniment volume. The volume range is 000 - 127. Select the Accompaniment Volume function in the Overall menu. Press one of the OVERALL L/M buttons, repeatedly if necessary, until “AcmpVol”... -
Page 56: Using Auto Accompaniment - Multi Fingering
AUTO ACCOMPANIMENT — THE STYLE MODE USING AUTO ACCOMPANIMENT — MULTI FINGERING When it is set to on (page 52), the auto accompaniment function automati- cally generates bass and chord accompaniment for you to play along with, by using Multi Fingering operation. You can change the chords of the accompaniment by playing keys in the auto accompaniment section of the keyboard using either the “Single Finger”... - Page 57 Chord Name/[Abbreviation] Major [M] Add ninth [(9)] Sixth [6] Sixth ninth [6(9)] Major seventh [M7] Major seventh ninth [M7(9)] Major seventh add sharp eleventh [M7(#11)] Flatted fifth [(b5)] Major seventh flatted fifth [M7b5] Suspended fourth [sus4] Augmented [aug] Major seventh augmented [M7aug] Minor [m] Minor add ninth [m(9)] Minor sixth [m6]...
-
Page 58: Setting The Accompaniment Split Point
AUTO ACCOMPANIMENT — THE STYLE MODE SETTING THE ACCOMPANIMENT SPLIT POINT The Accompaniment Split Point determines the highest key for the accom- paniment section. The accompaniment can be played with the keys up to and including the Accompaniment Split Point key. This parameter can be set lower (but not higher) than the Split Point in the Split mode. -
Page 59: Function Parameter - Accompaniment Split Point
Change the parameter setting or value. After the “FUNCTION” indication stops flashing, use the numeric keypad to change the value or setting. STYLE FUNCTION The value can also be set directly by pressing the desired key while this parameter is selected. After setting this, make sure to select a different parameter or exit the Function mode before playing the keyboard. -
Page 60: What Is A Chord
AUTO ACCOMPANIMENT — THE STYLE MODE WHAT IS A CHORD? The simple answer: Three or more notes played simultaneously is a chord. (Two notes played together is an “interval” — an interval being the distance between two different notes. This is also referred to as a “harmony.”) Depending on the intervals between the three or more notes, a chord can sound beautiful or muddy and dissonant. -
Page 61: Writing Chord Names
WRITING CHORD NAMES Knowing how to read and write chord names is an easy yet invaluable skill. Chords are often written in a kind of shorthand that makes them instantly recognizable (and gives you the free- dom to play them with the voicing or inversion that you prefer). Once you understand the basic principles of harmony and chords, it’s very simple to use this shorthand to write out the chords of a song. -
Page 62: Chord Guide
AUTO ACCOMPANIMENT — THE STYLE MODE CHORD GUIDE The Chord Guide functions of the PortaTone provide powerful, easy-to-use tools for learning chords and chord relationships. Chord Guide features three different types of operation: Dictionary, Smart, and EZ Chord. • Pressing the CHORD GUIDE button automatically turns on the auto accompaniment. •... - Page 63 Specify the type of the chord (major, minor, seventh, etc.). Press the key on the keyboard that corresponds to the desired chord type (as printed on the panel). CHORD TYPE Pressing this key selects the major seventh chord type (M7). The display shows the name of the chord, and the individual notes —...
-
Page 64: Smart
AUTO ACCOMPANIMENT — THE STYLE MODE Smart The Smart type allows you to set the basic key for the chord accompani- ment. Once this is set, you can simply press single keys in the scale and have harmonically appropriate chords played automatically. For example, with the key set to C, playing an D will result in an D minor chord (rather than a harmonically inappropriate D major). -
Page 65: Smart Chord List
For example, to play the following music score, select number 15 so that the key is set to b=1 (F, or Dm). Key of F STYLE Play the accompaniment, and play single note chords (root notes) in the auto accompaniment section. -
Page 66: Ez Chord
AUTO ACCOMPANIMENT — THE STYLE MODE EZ Chord The EZ Chord function is an exceptionally flexible and easy way to program semi-automatic backing for your performances. It lets you record all necessary chord changes for an entire song, and then allows you to “play” each chord in the sequence you programmed by simply pressing a single key in the auto accompaniment section of the keyboard. -
Page 67: Bank Chain
Select the desired EZ Chord bank. Use the numeric keypad. Buttons 1 - 8 select EZ Chord banks #1 - #8, respectively. Button 9 selects the bank chain “A-1” bank (see box below). Start the accompaniment. Use any one of the methods described on page 48 to start the ac- companiment. -
Page 68: Ez Chord - Recording
AUTO ACCOMPANIMENT — THE STYLE MODE EZ Chord — Recording Enable recording. Press the RECORD button, repeatedly if necessary, until EZ Chord recording is selected. (“EZ” appears in the display and the “RECORD” indication flashes for a couple of seconds.) RECORD indication flashes briefly. -
Page 69: Recording A Space
3) Press the + button in the numeric keypad. This actually records the chord to the selected block and automati- cally moves to the next block. This step is necessary; the chord is not actually recorded until you press the + button. (Pressing the - button will select the previous block without recording the chord.) To record a sequence of chords, repeat steps 2) and 3) above (play a chord, select the next step, play a different chord, select the next... -
Page 70: Hint - Using Spaces
AUTO ACCOMPANIMENT — THE STYLE MODE HINT — Using Spaces If your chord progressions are not long and the maximum memory space for chords isn’t very important to you, you can use the spaces between recorded blocks to good advantage. (Keep in mind that spaces have no effect during playback;... -
Page 71: Clearing An Ez Chord Bank
Clearing an EZ Chord Bank This operation lets you erase (clear) all recorded chords for the se- lected EZ Chord bank. Enable the EZ Chord Record mode. Press the RECORD button, repeatedly if necessary, until EZ Chord recording is selected. (“EZ” appears in the display and the “RECORD”... -
Page 72: One Touch Setting (Ots)
ONE TOUCH SETTING (OTS) One Touch Setting is a powerful and convenient Style mode function that lets you instantly reconfigure virtually all settings of the PortaTone — with the touch of a single button. Two types of One Touch Settings are available: User and Preset. -
Page 73: Recalling A User One Touch Setting
Select the desired User number. Press the corresponding USER ONE TOUCH SETTING button (1 - 4). Doing this records the settings to the selected button. MEASURE TEMPO Exit from the Record mode. Press the RECORD button. Recalling a User One Touch Setting Once you’ve recorded your settings to a User button, you can in- stantly recall those settings any time you want. -
Page 74: One Touch Setting - Preset
ONE TOUCH SETTING (OTS) ONE TOUCH SETTING — PRESET Preset One Touch Settings are used in a slightly different way than the User settings. First, select a style, then select a Preset OTS. The Preset A and B settings have been specially programmed at the factory to match the selected style. -
Page 75: Selecting And Playing Songs - The Song Mode
SELECTING AND PLAYING SONGS — THE SONG MODE The Song mode features six songs — three demo songs that have been created using the rich and dynamic sounds of the PortaTone, and three User songs to which you can record your own performance. The demo songs are generally for your listening enjoyment;... -
Page 76: Changing The Tempo
SELECTING AND PLAYING SONGS — THE SONG MODE Select the desired song number. Use the numeric keypad. Song numbers can be selected in the same way as with the voices (see page 28). You can use the numeric keypad to directly enter the song number, use the +/- keys to step up and down through the songs, or press the SONG button to advance through the song numbers. -
Page 77: About The Beat Display
Change the value. Use the OVERALL +/- buttons to increase or decrease the Tempo value. Holding down either button continuously increases or decreases the value. Decreases Tempo value Restoring the Default Tempo Value Each song and style has been given a default or standard tempo. If you’ve changed the tempo, you can restore the original default setting by pressing both OVERALL +/- buttons simultaneously (when Tempo is selected in the Overall menu). -
Page 78: Adjusting The Song Volume
SELECTING AND PLAYING SONGS — THE SONG MODE ADJUSTING THE SONG VOLUME The playback volume of the song can be adjusted. This volume control affects only the song volume. The volume range is 000 - 127. Select the Song Volume function in the Overall menu. -
Page 79: Song Recording
SONG RECORDING The PortaTone features powerful and easy-to-use song recording features that let you record your keyboard performances — using up to six separate tracks — and create your own complete, fully orchestrated compositions. Up to three User songs can be recorded and saved. There are two record modes: Realtime and Step. -
Page 80: Recording A User Song - Realtime Recording
SONG RECORDING RECORDING A USER SONG — REALTIME RECORDING In brief, the basic operation for recording is: 1) Make all desired PortaTone settings. 2) Select the Realtime Record mode. 3) Select a User song for recording. 4) Select a track number. 5) Start recording. -
Page 81: Using The Metronome
Using the Metronome You can use the Metronome instead of a style if desired. This allows you to keep your performance “in time,” even when recording without rhythmic accompani- ment. To do this, press the METRONOME button before recording in step #5 below. After the song is completely recorded, simply play back the song with the Metro- nome turned off. -
Page 82: Stop Recording
SONG RECORDING Recording to the Chord Track A special Chord track is provided for recording accompaniment data. This is automatically recorded to the Chord track (track 6). To select the Chord track and turn on the accompaniment, press the ACMP ON/OFF button. -
Page 83: Additional Operations
Listen to your new recording. To play back the song from the beginning, simply press the START/STOP button again. Playback stops automatically at the end of the song, or when the START/STOP button is pressed again. Record to other tracks as desired. To do this, simply repeat steps #4 - #7 above. -
Page 84: Recording A User Song - Step Recording
SONG RECORDING RECORDING A USER SONG — STEP RECORDING The basic steps for Step recording are similar to those for Realtime recording. In brief, the basic operation is: 1) Make all desired PortaTone settings. 2) Select the Step Record mode. 3) Select a User song for recording. -
Page 85: Recording Notes
Select a User song for recording. This operation is the same as that of Realtime recording (page 81). Select a track number. Press the SONG MEMORY button corresponding to the desired track. Recording to the Chord Track A special Chord track is provided for recording accompaniment data. This is automatically recorded to the Chord track (track 6). - Page 86 SONG RECORDING 3) Select the note (time) value with the numeric keypad. (The note value is shown as an icon in the display.) For example, play middle C (C3), then press the “4” button (1/8 note). SONG 001 201 MEASURE Measure number (96 Clicks) Beat...
-
Page 87: Additional Operations
I Additional Operations Recording Chords and Sections to the Chord Track: 1) Play a chord in the accompaniment section of the keyboard. (“Chord“ and the chord name appears in the display.) RECORD ACMP ON Chords can be entered manually (with the Dictionary function), or played with Multi Fingering. -
Page 88: Replacing A Note Or Rest
SONG RECORDING Listen to your new recording. You can listen to the entire step recorded track at any time by pressing the START/STOP button. The track you are working on plays back (until stopped), and returns to Step recording at the next position. Keep in mind that this only plays the selected track. -
Page 89: Entering Velocity Curves
Entering Velocity Curves In Step recording, all notes are recorded at the same velocity or volume. To make a Step-recorded track sound more natural or to create some dynamic changes in the track, use the Velocity Curve function. 1) Select the first note to be affected by the Velocity Curve (by using the +/- buttons of the numeric keypad). -
Page 90: Clearing A Song
SONG RECORDING CLEARING A SONG The Song Clear operation (of the Function parameters) completely erases all recorded data on all tracks of a selected User song. Use this operation only when you’re sure you want to erase a song and record a new one. Select the Function mode. -
Page 91: Footswitch
FOOTSWITCH The PortaTone has a footswitch feature that can be used to control a variety of functions and operations. By using your foot to conveniently control these func- tions, you free your hands to concentrate on your performance. Normally, this is used as a damper pedal, producing pedal-controlled sustain for piano and other instrument sounds that have a natural decay. -
Page 92: Footswitch Assign Functions
FOOTSWITCH Footswitch Assign Functions Function Name Sustain EZ Chord Increment Start/Stop Intro/Ending Main A Main B Harmony On/Off Dual On/Off Split On/Off Reverb On/Off Chorus On/Off DSP On/Off Exit the Function mode. Once you’ve made the desired setting, press one of the other mode but- tons (SONG, STYLE, or VOICE). -
Page 93: Midi Functions
MIDI FUNCTIONS The PortaTone is MIDI-compatible, featuring MIDI IN and MIDI OUT terminals and providing a variety of MIDI-related controls. By using the MIDI functions you can expand your musical possibilities. This section explains what MIDI is, and what it can do, as well as how you can use MIDI on your PSR-225. WHAT IS MIDI? No doubt you have heard the terms “acoustic instrument”... -
Page 94: Channel Messages
MIDI FUNCTIONS MIDI is an acronym that stands for Musical Instrument Digital Interface, which allows electronic musical instruments to communicate with each other, by sending and receiving compatible Note, Control Change, Program Change and various other types of MIDI data, or messages. The PSR-225 can control a MIDI device by transmitting note related data and various types of control- ler data. -
Page 95: Connecting To A Personal Computer
CONNECTING TO A PERSONAL COMPUTER By connecting your PSR-225’s MIDI terminals to a personal computer, you can have access to a wide variety of music software. When using a MIDI interface device installed in the personal computer, connect the MIDI terminals of the personal computer and the PSR-225. Use only special MIDI cables when connecting MIDI devices. -
Page 96: Function Parameters - Midi
MIDI FUNCTIONS FUNCTION PARAMETERS — MIDI The Function parameters provide additional, more detailed MIDI settings for the PortaTone. These settings include: • Remote Channel • Keyboard Out • Accompaniment Out • Local Control Call up the Function mode. Press the FUNCTION button. Select the desired Function parameter. - Page 97 Function Parameters No. Parameter Name Display Name Remote Channel RemoteCh This determines how the PortaTone is controlled by a “remote” (external) MIDI keyboard. Set this to one of the 16 channels (01 - 16) for using an external keyboard to remotely control the PortaTone functions over the selected channel.
- Page 98 8), which you can then reload any time you need. For example, you can save data to floppy disk on a computer or a MIDI data filer (such as the Yamaha MDF3), and have unlimited storage capability for your valuable PortaTone data. (For detailed instructions, see the section “USING BULK DUMP SEND TO SAVE DATA”...
-
Page 99: Using Bulk Dump Send To Save Data
First, set up the connected MIDI device for re- cording the data. The actual procedure may differ depending on your particular equip- ment and software. For example, if you are using the Yamaha MDF3 MIDI Data Filer: 1) Make the appropriate MIDI connections. - Page 100 MIDI FUNCTIONS At the “Sure?” prompt, start sending the data. Press the + button to actually start transmitting the data, or press the - button to cancel the operation and return to step 3. STYLE FUNCTION As the data is being sent, the display indicates the various stages of data transmission until the operation is complete: STYLE FUNCTION...
-
Page 101: Loading Bulk Data
Set up the connected MIDI device for sending the appropriate data. The actual procedure may differ depending on your particular equip- ment and software. For example, if you are using the Yamaha MDF3 MIDI Data Filer: 1) Make the appropriate MIDI connections. -
Page 102: Using Initial Setup Send With A Sequencer
MIDI FUNCTIONS When the operation is completed, the following display briefly ap- pears (before returning to the original operation). STYLE FUNCTION USING INITIAL SETUP SEND WITH A SEQUENCER The most common use for the Initial Setup Send function is in recording a song on a sequencer that is intended for playback with the PortaTone. - Page 103 At the “InitSnd?” prompt above, set the opera- tion to standby. Press the + button. Sure? STYLE FUNCTION Start recording on the sequencer, then send the Initial Setup data. Start recording on the sequencer in the normal way, then — with as little delay as possible —...
-
Page 104: Troubleshooting
TROUBLESHOOTING Problem When the PortaTone is turned on or off, a popping sound is temporarily produced. There is no sound even when the keyboard is played or when a song is being played back. The selected voice does not sound properly, or is too low in volume. -
Page 105: Data Backup & Initialization
Problem A strange “flanging” or “doubling” sound occurs when using the PortaTone with a sequencer. (This may also sound like a “dual” layered sound of two voices, even when Dual is turned off.) The footswitch seems to produce the opposite effect. -
Page 106: Index
INDEX Misc. +/- keys ... 29 AC adaptor ... 8 accessory jacks ... 9 accompaniment controls ... 52 accompaniment sections ... 54 Accompaniment Split Point ... 58, 59 Accompaniment Volume ... 55 accompaniment, playing ... 47 amplifier/stereo system, using an external .. 9 auto accompaniment ... -
Page 107: Song Scores (Ez Chord Banks 1, 2)
SONG SCORES (EZ Chord banks 1, 2) EZ Chord Bank 1 EZ Chord Bank 2 Menuet The Entertainer... -
Page 108: Voice List
VOICE LIST I Maximum Polyphony The PSR-225 has 32-note maximum polyphony. This means that it can play a maximum of up to 32 notes at once, regardless of what functions are used. Auto Accompaniment uses a number of the available notes, so when Auto Accompani- ment is used the total number of available notes for playing on the keyboard is correspondingly reduced. - Page 109 Panel Voice List MIDI Bank Select Voice Program Number Change# PIANO Grand Piano Bright Piano Honky-tonk Piano Funky Electric Piano DX Electric Piano MIDI Grand Piano CP 80 Hyper Electric Piano Bell Electric Piano Harpsichord Clavi Celesta MALLET Vibraphone Marimba Xylophone Tubular Bells Timpani...
- Page 110 VOICE LIST GM Voice List MIDI Bank Select Voice Program Number Change# PIANO CHROMATIC ORGAN GUITAR BASS STRINGS ENSEMBLE Voice Voice Name Number Acoustic Grand Piano Bright Acoustic Piano Electric Grand Piano Honky-tonk Piano Electric Piano 1 Electric Piano 2 Harpsichord Clavi Celesta...
-
Page 111: Style List
MIDI Bank Select Voice Program Number Change# PERCUSSIVE STYLE LIST Style Style Name Number 8BEAT 8Beat Pop 1 8Beat Pop 2 8Beat Uptempo 8Beat Standard Folkrock Pop Rock 8Beat Medium 8Beat Ballad Epic Ballad Piano Ballad 16BEAT 16Beat Shuffle 1 16Beat Shuffle 2 16Beat Pop Funk 1... -
Page 112: Drum Kit List
DRUM KIT LIST • “<——” indicates that the drum sound is the same as “Standard Kit 1”. • Each percussion voice uses one note. • The MIDI Note # and Note are actually one octave lower than listed. For example, in “101: Standard Kit 1”, the “Seq Click H”... - Page 113 Voice# Bank MSB# Bank LSB# Program Change# Keyboard MIDI Key Alternate Note# Note Note# Note Assign <—— <—— <—— <—— <—— <—— <—— <—— <—— <—— <—— <—— <—— <—— <—— Reverse Cymbal <—— Hi Q SD Elec H2 <—— Bass Drum H <——...
-
Page 114: Midi Implementation Chart
MIDI IMPLEMENTATION CHART [Portable Keyboard] Model: PSR-225GM Function Basic Default 1 - 16 Channel Changed 1 - 16 Default Mode Messages Altered ************** Note 0 - 127 Number : True voice ************** Velocity Note ON O 9nH, v=1 - 127... - Page 115 NOTE: *1 By default (factory settings) the PSR-225 ordinarily functions as a 16- channel multi-timbral tone generator, and incoming data does not affect the panel voices or panel settings. However, the MIDI messages listed below do affect the panel voices, auto accompaniment, and songs. •...
-
Page 116: Effect Map
MIDI IMPLEMENTATION CHART I Effect map * If the received value does not contain an effect type in the TYPE LSB, the LSB will be directed to TYPE 0. * Panel Effects are based on the “(Number) Effect Name”. * By using an external sequencer, which is capable of editing and transmitting the system exclusive messages and parameter changes, you can select the Reverb, Chorus and DSP effect types which are not accessible from the PSR-225 panel itself. -
Page 117: Specifications
Yamaha Corp. reserves the right to change or modify products or specifications at any time without prior notice. Since specifications, equipment or options may not be the same in every locale, please check with your Yamaha dealer. -
Page 118: Limited Warranty
If during the first 90 days that immediately follows the purchase date, your new Yamaha product covered by this warranty is found to have a defect in material and/or workmanship, Yamaha and/or its authorized representative will repair such defect without charge for parts or labor. - Page 119 Compliance with FCC This applies only to products distributed by YAMAHA CORPORATION OF AMERICA. Entsorgung leerer Batterien (nur innerhalb Deutschlands) Leisten Sie einen Beitrag zum Umweltschutz. Verbrauchte Batterien oder Akkumulatoren dürfen nicht in den Hausmüll.
- Page 120 For details of products, please contact your nearest Yamaha or the authorized distributor listed below. Pour plus de détails sur les produits, veuillez-vous adresser à Yamaha ou au distributeur le plus proche de vous figurant dans la liste suivante. NORTH AMERICA CANADA Yamaha Canada Music Ltd.
- Page 121 Yamaha PK CLUB (Portable Keyboard Home Page, English only) http://www.yamahaPKclub.com/ Yamaha Manual Library (English versions only) http://www2.yamaha.co.jp/manual/english/ M.D.G., Pro Audio & Digital Musical Instrument Division, Yamaha Corporation © 2001 Yamaha Corporation V799500 10?PO???.?-01A0 Printed in China...