Table of Contents
Advertisement
Quick Links
Advertisement
Chapters
Table of Contents

Related Manuals for Yamaha CP300


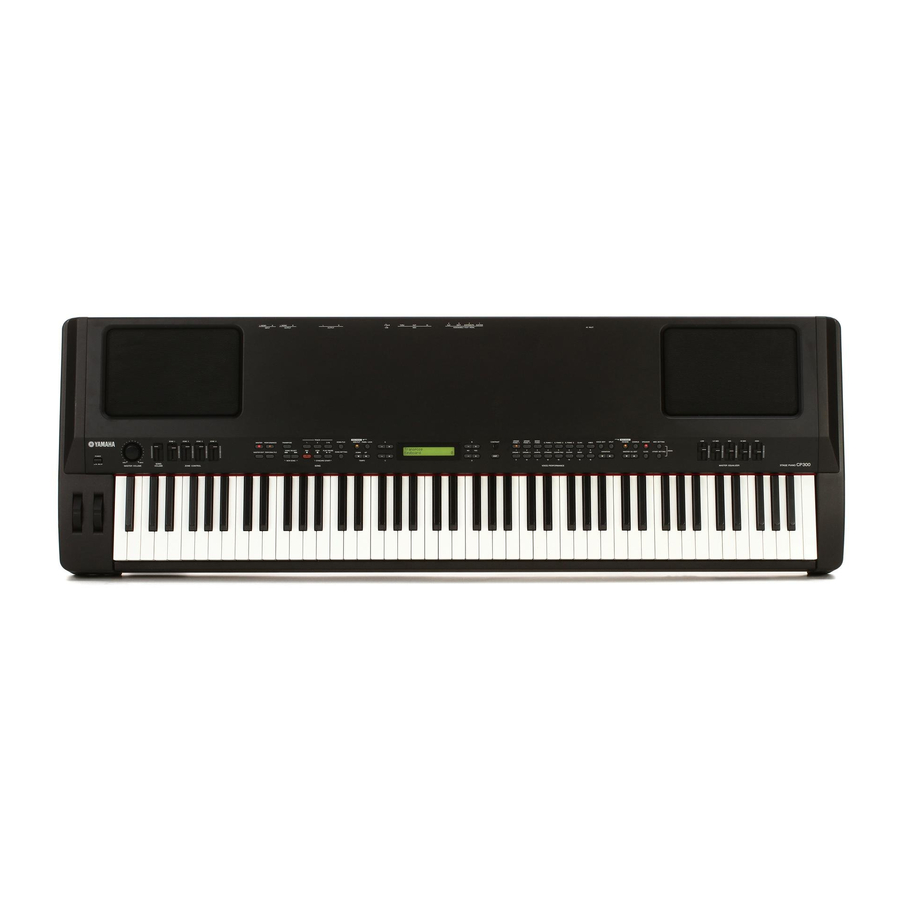
Summary of Contents for Yamaha CP300
- Page 1 OWNER’S MANUAL STAGE PIANO...
-
Page 2: Special Message Section
SPECIFICATIONS SUBJECT TO CHANGE: The infor- mation contained in this manual is believed to be correct at the time of printing. However, Yamaha reserves the right to change or modify any of the specifications without notice or obligation to update existing units. -
Page 3: Important Safety Instructions
Please make sure that benches are stable and any optional fixtures (where applicable) are well secured BEFORE using. Benches supplied by Yamaha are designed for seating only. No other uses are recommended. CP300 Owner’s Manual... - Page 4 The instrument contains no user-serviceable parts. If it should appear to be malfunctioning, discontinue use immediately and have it inspected by qualified Yamaha service personnel. CAUTION Always follow the basic precautions listed below to avoid the possibility of physical injury to you or others, or damage to the instrument or other property.
-
Page 5: Saving Data
Saved data may be lost due to malfunction or incorrect operation. Save important data to external device such as a computer. Yamaha cannot be held responsible for damage caused by improper use or modifications to the instrument, or data that is lost or destroyed. -
Page 6: Introduction
We recommend that you read this manual carefully so that you can fully take advantage of the advanced and convenient functions of the CP300. We also recommend that you keep this manual in a safe and handy place for future reference. -
Page 7: Supplied Accessories
• Four pedal connectors for maximum expressive capabilities—especially ideal for live performance—and built-in high-quality stereo speakers. • A powerful, versatile Performance function, which lets you store and instantly recall your custom CP300 settings, including Dual/Split configurations, Voice and effect parameters, MIDI transmit/receive channel values and Master Edit settings. -
Page 8: Table Of Contents
Before Using the CP300 ........ - Page 9 MIDI Settings—Basic Operation ........64 Miscellaneous CP300 Settings—Other Settings ....67 Other Settings—Basic Operation.
-
Page 10: Application Index
• Returning to the main display ..... . “Display Settings—Basic Operation” on page 15 • Resetting the default settings ..“Restoring the Factory-programmed Settings of the CP300” on page 16 •... -
Page 11: Before Using The Cp300
Connect the supplied power cord to the [AC INLET] jack (page 22) on the instrument’s rear panel. Connect the other end of the power cord to an AC outlet. Make sure your CP300 meets the voltage requirement for the country or region in which it is being used. -
Page 12: Using Headphones
Turning the Power On Make sure the volume setting of the CP300 and external devices are turned down to the minimum. Press the [POWER] switch to turn the power on. The display located in the center of the front panel lights up. -
Page 13: Adjusting The Brightness Of The Display
Terminology Master Volume: The volume level of the entire keyboard sound. n The [MASTER VOLUME] dial also controls the volume of the headphones. Grand Piano 1 The level increases. MASTER VOLUME Before Using the CP300 CONTRAST EXIT CP300 Owner’s Manual... -
Page 14: Playing The Keyboard
Playing the keyboard Playing the Sounds Try playing some of the realistic and dynamic CP300 sounds from the keyboard now. When you turn the power on following the directions in “Power Supply Connections” (pages 11 and 12), the display below appears. -
Page 15: Basic Operation
Basic Operation In this section you’ll learn about the fundamental operations of the CP300—the use of the panel buttons and controls and how to restore the CP300’s memory to the factory default settings. Display Settings—Basic Operation Each function may have many items or parameters from which you can choose. To select an item or parameter, press one of the A [–][+] –... -
Page 16: Restoring The Factory-Programmed Settings Of The Cp300
Refer to “Factory Setting List” on page 101. There are two ways you can restore the CP300’s memory to the factory default settings: 1) Set the “Factory Set” parameter in the Other Settings menu, or 2) Turn the power off and turn the power on again while holding the C7 key (rightmost key on the keyboard). - Page 17 In this case, the Memory files saved in the storage memory are not erased. POWER If you wish to erase Memory files at this time, simultaneously hold down the rightmost white key (C7) and black key (Bb6) together and press the [POWER] switch to turn on the power to the CP300. POWER Terminology Storage memory: This memory area enables you to save Performance files and recorded Songs.
-
Page 18: Basic Instructions
Try searching through the Voices to find your favorites. • Selecting a Voice (page 25) Terminology Preset: Refers to data loaded to the internal memory of the CP300 before being shipped from the factory. GRAND GRAND... -
Page 19: Using The Performance Functions
• Handling Song Files (page 81) • Playing Back Songs (page 49) Terminology On the CP300, performance data is called a “Song.” This includes demonstration tunes and piano preset tunes. Using the Performance Functions The useful Performance functions enable you to store and recall the entire CP300 settings all together. -
Page 20: Control Names And Functions
(page 34) function assigned to the [ZONE CONTROL] sliders. 8 [MASTER] button (page 12) Turning on the [MASTER] button switches the CP300 to function as a Master keyboard. 9 [MASTER EDIT] button (page 12) Enables selection of the settings for the Master mode. - Page 21 Switches panel lock on/off. Turning on the button disables the panel operations. ¡ TEMPO [UP]/[DOWN] buttons (page 42) Adjusts the tempo. (page 49) Control Names and Functions fl HI-MID HIGH MASTER EQUALIZER (page 81) (page 85) (page 51) (page 51) (page 38) CP300 Owner’s Manual...
-
Page 22: Rear Panel
External audio signals can be input via these phone jacks (1/4" mono phone plug). The sound of an external instrument can be reproduced via the CP300’s speakers. Use 1/4" mono phone plugs. For stereo input from an audio device, connect to both the L/MONO and R jacks. -
Page 23: Quick Guide
Voice groups. Listen to some of these Demo Songs now and hear the wide-ranging capabilities of the CP300. n Make sure the CP300 is ready for playback. Details are given in the section “Before Using the CP300” on page 11. - Page 24 GRAND PIANO 2 MONO PIANO E. PIANO 1 E. PIANO 2 E. PIANO 3 CLAVI. VIBES ORGAN 1 ORGAN 2 HARPSI. CP300 Owner’s Manual PianoDemo SelectVoiceButton GRAND GRAND MONO PIANO 1 PIANO 2 PIANO E. PIANO 1 E. PIANO 2 E.
-
Page 25: Playing Voices
Pipe Organ Tutti Pipe Organ Flute Harpsichord 8' Harpsichord 8'+4' Strings Synth Strings Slow Strings Choir Slow Choir Scat Synth Pad 1 Synth Pad 2 Nylon Guitar Steel Guitar Wood Bass Bass&Cymbal Electric Bass Fretless Bass XG Voice CP300 Owner’s Manual... - Page 26 The XG Voice selection display can also be called up by pressing both the VARIATION [ ][ ] buttons simultaneously, after pressing the [XG] button. Use the A [–][+] buttons to select a Voice group. Use the C [–][+] buttons to select a specific Voice. Play the keyboard. CP300 Owner’s Manual GRAND GRAND MONO PIANO 1...
-
Page 27: Playing Different Voices Simultaneously
Playing Different Voices Simultaneously The advanced features of the CP300 allow you to do things and perform in ways that are simply not possible on an acoustic instrument. For example, you can play several different Voices together in a layer, or play one Voice (or even two) layered Voices with your left hand while you play a different Voice (or two) layered Voices with your right. -
Page 28: Changing The Volume For Each Part (Zone Control)
[ZONE 2], [ZONE 3] and [ZONE 4] sliders have no effect on the volume. Turning on the [MASTER] button switches the function assigned to the [ZONE CONTROL] sliders. Refer to the “Using the Master Mode” on page 39. CP300 Owner’s Manual Left part ZONE 1... -
Page 29: Combining Voices—Dual
SPEAKER MIDI SETTING PIANO E. PIANO 1 E. PIANO 2 E. PIANO 3 CLAVI. VIBES DEMO VARIATION MASTER EQ EDIT CLICK OTHER SETTING HARPSI. STRINGS CHOIR/PAD GUITAR BASS VOICE/PERFORMANCE Dual Split + Dual for the Main parts CP300 Owner’s Manual... - Page 30 Use the B [– (NO)][+ (YES)] buttons to select another Voice in the same Voice group. To use identical Voices, press the B [– (NO)][+ (YES)] buttons once. To use different Voices within the same Voice group, press the B [– (NO)][+ (YES)] buttons repeatedly. CP300 Owner’s Manual Main part Layer part...
-
Page 31: Playing Different Voices With The Left And Right Hands—Split
E. PIANO 1 E. PIANO 2 E. PIANO 3 VIBES DEMO VARIATION MASTER EQ EDIT CLICK OTHER SETTING STRINGS CHOIR/PAD GUITAR BASS VOICE/PERFORMANCE Split Split + Dual for the Main parts Split + Dual for the Left parts CP300 Owner’s Manual... - Page 32 The Main part and Layer part of the split point are specified simultaneously. If you wish to independently change Release the [SPLIT] button to return to the main display. Press the [SPLIT] button to exit Split and return to normal play. CP300 Owner’s Manual F # 2 Center “C” (C3) SplitPoint the split point for each part, you can call up the Other Settings menu and use the “Split Point”...
-
Page 33: Using The Pedals
This AUX Pedal can be assigned to control a variety of parameters on the instrument. Refer to the “Pedal 4" parameter in the Voice Edit menu (page 62). AC INLET ASSIGNABLE FOOT PEDAL MIDI OUTPUT OUTPUT INPUT THRU L/MONO L/MONO SUSTAIN SOSTENUTO SOFT ASSIGNABLE FOOT PEDAL SUSTAIN SOSTENUTO SOFT FC3/FC4/FC5 Quick Guide CP300 Owner’s Manual... -
Page 34: Bending Notes—Pitch Bend Wheel
Edit menu (page 62). n To avoid accidentally applying Modulation or other effects to the current Voice, make sure the Modulation Wheel is set to minimum before you start playing. CP300 Owner’s Manual Raises the pitch Lowers the pitch Pitch Bend wheel... -
Page 35: Enhancing The Sound With Reverb And Chorus
“Dry/Wet Balance” parameter (pages 59, 60). The CP300 also has a Variation effect that can be used as either a System effect or Insertion effect. Refer to “Effect Type List” on page 114 for more information on the types of effects you can use. The Variation effect can be controlled only by the use of MIDI messages. -
Page 36: Equalizer (Eq)
However, the last gain setting by the slider or Master EQ Edit menu will remain in effect. n While the “Equalizer Lock” parameter (page 71) in the Other Settings menu is turned on, the Master Equalizer values will not be affected by Performance recall, incoming MIDI data and Song playback. CP300 Owner’s Manual Gain Low Gain Low Freq. -
Page 37: Key Transposition—Transpose
Press the [EXIT] button to exit the Transpose setting. n The edited Transpose settings will be erased after you turn off the power to the CP300. If you set the Memory Backup’s Transpose setting to On in the Other Settings menu, the current Transpose setting will remain in effect when you turn the power off and back on again (page 71). -
Page 38: Using The Click
You can change the time signature, volume, and bell on/off settings using the Song Setting menu (page 87). n The click will not start after the Song is stopped. If you wish to start the click, press the [CLICK] button again. n The click will stop when Song playback is paused. CP300 Owner’s Manual CONTRAST DOWN... -
Page 39: Using The Master Mode
Voices of an external tone generator over several different channels, in addition to the internal Voices of the CP300 itself. Press the [MASTER] button to turn the Master mode on. -
Page 40: Selecting A Performance
Selecting a Performance All settings of the entire CP300 can be saved together in a group, referred to as a “Performance.” A Performance includes Dual/Split settings, Voice and effect parameters, MIDI transmit/receive channel settings and Master Edit settings. For details on Performance settings, refer to page 73. -
Page 41: Recording Your Performance
Since the CP300 lets you record up to sixteen tracks separately, you can build up a complete, multi-instrument Song by recording each part one-by-one. -
Page 42: Recording Your Performance
SONG 1 3 4,6 n The Performance mode is automatically turned off if the CP300 is set to recording or recording standby while Performance mode is on. Press the SONG SELECT [N] button and [O] button at the same time. - Page 43 Changed Save?” message appears in the display. Press the B [+ (YES)] button to save the file. If you want to cancel the Save operation, press the B [– (NO)] button. For details about saving Song files, refer to page 82. SongChanged Save? Recording Your Performance Bar 001 CP300 Owner’s Manual...
-
Page 44: Re-Recording Parts Of A Song
Punch Out: Existing data following the point at which you stopped recording will remain. Select a recording track, then start recording. After this, follow the procedure beginning with Step 3 on page 42. CP300 Owner’s Manual Indicates the current measure. (The words “bar” and “measure” are used interchangeably.) - Page 45 You can change the time signature at the beginning of the Song, or at a specific position in the Song, by using the B [– (NO)][+ (YES)] buttons while the Song is stopped. n When you record in the Dual or Split mode, the CP300 records each Voice onto a separate track. For details, refer to page 48.
-
Page 46: Other Recording Techniques
[PLAY/PAUSE] button to locate a point slightly prior to the beginning of the part you wish to re-record. If the playback display does not appear, press one of the SONG SELECT [N][O] buttons once. CP300 Owner’s Manual MemorySong Bar 001... -
Page 47: Adjusting The Volume Balance Between The Song And The Keyboard
Turning off the [MASTER] button lets you adjust the volume for the keyboard performance by using the [ZONE CONTROL] sliders. Move the sliders to make adjustments in the sound. ZONE 1 ZONE 2 ZONE 3 ZONE 4 SONG VOLUME ZONE CONTROL Recording Your Performance CP300 Owner’s Manual... -
Page 48: Recording In Dual Or Split Mode
Recording Your Performance Recording in Dual or Split Mode When you record in Dual or Split mode, the CP300 records each Voice onto a separate track. The following table shows how tracks are assigned to each Voice. CAUTION When you record multiple parts into tracks one-by-one, or when you record new data over an existing Song (page 46), the existing data will be erased. -
Page 49: Song Playback
Song Playback Songs you’ve recorded using the Record function (page 41) as well as Preset Songs can be played back on the CP300. You can also play the keyboard along with Song playback. Playing Back a Song TRACK SONG FILE... -
Page 50: Turning Part Playback On And Off
Turning Part Playback On and Off While the CP300 is playing or stopped, pressing these track buttons turn off the indicators, and the data on those parts will not be played. Pressing the part buttons toggles part playback on and off. Turning a playback part off lets you play that part yourself while the other parts play back. -
Page 51: Convenient Functions
Pitch bend wheel, and the pedals. MIDI Transmission On/Off This parameter specifies whether the CP300 transmits MIDI data to an external MIDI device (On) or not (Off ). Pressing the [MIDI OUT] button alternates between On and Off. MIDI messages can be transmitted if the button lamp is lit. -
Page 52: Midi Panic Control
Depth Off, Pitch Bend Center, Channel Pressure Off Built-in Speakers On/Off This parameter specifies whether the CP300’s built-in speakers produce sound (On) or not (Off ). Pressing the [SPEAKER] button alternates between On and Off. The built-in speakers produce sound if the lamp is lit, and do not sound if the lamp is off. -
Page 53: Reference Section
[MASTER] button is turned on. n This setting is retained even after you turn off the power to the CP300. If you set the Memory Backup’s Master Setting to Off in the Other Settings menu, the Master Settings will return to the default (initial) values when you turn on the power next time (page 71). - Page 54 Default setting: Volume n If you select After Touch or control numbers 001 – 031, 033 – 095, the slider affects only connected MIDI instruments and not the CP300 itself. Bank Select MSB Settings for MIDI Transmission to an External Tone Generator You can select specific Voices or programs on a connected...
- Page 55 Setting targets: Zone 1, Zone 2, Zone 3, Zone 4 Settings: On/Off Default setting: On MIDI Transmission Channel for Master Mode Specifies the channels over which the CP300 transmits MIDI data from each zone. MidiOutChannel Zone 1 Setting targets: Zone 1, Zone 2, Zone 3, Zone 4 Setting range: Ch 1 –...
-
Page 56: Detailed Settings For The Voices—Voice Edit
Layer part and Left Layer part can be changed via the “Split Point 2” parameter in the Other Settings menu (page 69). For information about the parameters and their values, refer to “Parameters” on page 58. CP300 Owner’s Manual Display The Main part Voice can be set. - Page 57 Octave n This setting will be retained even if you turn off the power to the CP300. The previous settings will be restored when you turn on the power next time and the same Voice or part you selected before turning the power off will automatically be selected.
- Page 58 field, left or right. Main Setting range: L64 (hard left) – C (center) – R63 (hard right) CP300 Owner’s Manual Detune (Dual mode only) This allows you to finely tune the pitches of the two Voices selected in Dual mode away from each other. Used especially with similar sounding Voices, this creates a warmer, richer sound.
- Page 59 This is displayed only if “Vibe Rotor” is selected for the “Ins. Type” parameter. It enables you to set the speed of vibrato when you select the Vibraphone Voice and use the Modulation wheel. Main VibeRotorSpeed Setting range: 1 – 10 Set?--> SoundBoard Set?--> CP300 Owner’s Manual...
- Page 60 D63>W (outputs only the original sound with almost no effect applied) D=W (dry/wet balance is even) D<W63 (outputs only the sound processed by the effect) CP300 Owner’s Manual Brightness* This allows you to set the brightness of the sound. Setting range: -64 – +63 Set?-->...
- Page 61 This allows you to assign a specific function to the pedal connected to the [3 SOFT] jack. Main Pedal 3 Setting range: same as “Pedal 1” (above) Detailed Settings for the Voices—Voice Edit Set?--> SustainCont Set?--> Sostenuto Set?--> Soft CP300 Owner’s Manual...
- Page 62 Ctrl #0 – #119 Adds accents by controllers #0 – 119 to notes being played (MIDI transmit only). No function is assigned. CP300 Owner’s Manual Assigning the Modulation Wheel Function This allows you to specify the parameter controlled by the modulation wheel.
-
Page 63: Detailed Settings For Midi Operations—Midi Settings
CP300 with other MIDI devices. n These settings will be retained even if you turn off the power to the CP300. If you set the Memory Backup’s MIDI Setting to Off in the Other Settings menu, the MIDI Settings will return to the default (initial) values when you turn on the power next time (page 71). -
Page 64: Midi Settings—Basic Operation
“Completed” message appears briefly, then returns to the previous display. To cancel the operation, press the B [– (NO)] button instead of the B [+ (YES)] button. Press the [EXIT] button to exit the MIDI Settings menu. CP300 Owner’s Manual CONTRAST DOWN... - Page 65 Ch 1 – Ch 16 Song Local Control On/Off “Local Control On” is a state in which the CP300 produces the sound from its tone generator when you play the keyboard. In “Local Control Off ” state, the keyboard and the tone generator are cut off from each other.
- Page 66 This is useful when you record performance data to a sequencer, since it lets you take a “snapshot” of the CP300 settings you want to use at the beginning of a recorded Song and have those settings automatically called up for you when you play back the Song.
-
Page 67: Miscellaneous Cp300 Settings—Other Settings
These include detailed settings for touch response, tuning, pedal operation, and more. n The edited Other Settings will be erased after you turn off the power to the CP300. If you set the Memory Backup’s Other Setting to On in the Other Settings menu, the current Other Settings’ values will remain in effect when you turn the power off and back on again (page 71). - Page 68 Miscellaneous CP300 Settings—Other Settings Parameters Touch Response This allows you to specify the touch response of the CP300’s keyboard, or change how the sound responds to the way you play the keys. TouchResponse Settings: Light A soft playing touch results in a relatively loud sound.
- Page 69 Setting range: A-1 – C7 Default setting: F#2 Transpose The CP300’s Transpose function makes it possible to shift the pitch of the entire keyboard up or down in semitone intervals to facilitate playing in difficult key signatures, and to let you easily match the pitch of the keyboard to the range of a singer or other instruments.
- Page 70 [SUSTAIN] pedal jack, [SOSTENUTO] pedal jack, [SOFT] pedal jack and [AUX] pedal jack. If you are using a Yamaha-recommended pedal (such as the FC4 or FC5), the Pedal Type need not be changed. However, if you are using a pedal of a different manufacturer, the polarity may be opposite and the effect produced by operating the pedal (on/off, dynamics, etc.)
- Page 71 OtherSetting parameters are set to Off. Other parameters are set to On. Miscellaneous CP300 Settings—Other Settings Factory Set This allows you to reset the CP300 to its default settings. • The “Character Code” parameter setting does not change (page 84). • The “Memory Backup” parameter setting (On/Off ) is reset to the default setting (left column).
-
Page 72: Master Equalizer Settings
This section explains how to set the Master Equalizer using the Master EQ Edit menu. n This setting is retained even after you turn off the power to the CP300. If you set the Memory Backup’s Equalizer setting to Off in the Other Settings menu, the Master Equalizer settings will return to the default (initial) values when you turn on the power the next time (page 71). -
Page 73: Using The Performance Functions
Performance B Performance A GRAND GRAND MONO PIANO 1 PIANO 2 PIANO E. PIANO 1 E. PIANO 2 E. PIANO 3 CLAVI. VIBES ORGAN 1 ORGAN 2 HARPSI. STRINGS CHOIR/PAD GUITAR BASS Performance file = 64 Performances CP300 Owner’s Manual... -
Page 74: Performance Parameters
Using the Performance Functions Performance Parameters The useful Performance function enables you to store and recall all settings of the entire CP300 together, including Dual/Split settings, Voice and effect parameters, MIDI transmit/receive channel settings and Master Edit settings. Settings that can be edited and stored to a Performance are called “Performance parameters.”... - Page 75 Using the Performance Functions Contents Parameter name LowQ LowMidQ MidQ HighMidQ HighQ MidiOutChannel MidiInChannel LocalControl MidiOutSelect TouchResponse PianoTuningCurve Scale SplitPoint (Main) SplitPoint2 (Layer) Transpose SoftPedalDepth StringResonanceDepth SustainSamplingDepth KeyOffSamplingDepth VibraphonePedalMode PedalPlay/Pause HalfPedalPoint PitchBendRange Slider SendBankMsb SendBankLsb SendPG# Octave InterITG MidiOutChannel Page CP300 Owner’s Manual...
-
Page 76: Handling Performance Files
Use the B [– (NO)][+ (YES)] to D [–][+] buttons to change the value. For details about each operation, refer to pages 77 – 80. Press the [EXIT] button to exit from the Performance File settings. CP300 Owner’s Manual Setting MIDI OUT PANEL LOCK... - Page 77 GRAND GRAND MONO PIANO 1 PIANO 2 PIANO E. PIANO 1 E. PIANO 2 E. PIANO 3 Save ORGAN 1 ORGAN 2 HARPSI. STRINGS CHOIR/PAD GUITAR Performance file = 64 Performances Handling Performance Files CLAVI. VIBES BASS CP300 Owner’s Manual...
- Page 78 CAUTION Never attempt to turn the [POWER] switch OFF while the “Executing” message is shown in the display. Turning the power off in this state may cause the Performance file to be deleted. CP300 Owner’s Manual Perf.Name Set?--> A01.Piano+Pad...
- Page 79 To cancel the operation, press the B [– (NO)] button instead of the B [+ (YES)] button. If storage memory contains one or more Performance files, and you save a Performance file, the CP300 automatically sorts the Songs alphabetically and renumbers them.
- Page 80 Handling Performance Files Deleting a Performance File—Delete File This allows you to delete a Performance file from the CP300’s storage memory. It is not possible to delete a Preset Performance file and current Performance file. For basic operation instructions, refer to page 76.
-
Page 81: Handling Song Files
Changing the type of characters in display Terminology Song file: On the CP300, a Song file includes both Song data and a Song number. Song File—Basic Operation A message (information or confirmation prompt) sometimes appears on the display to facilitate operation. - Page 82 Saving Recorded Songs to the CP300’s Storage Memory—Save To Memory This allows you to save recorded Songs to the CP300’s storage memory. Keep in mind that when you turn off the power to the CP300, your recorded Song data will be lost. To permanently save the recorded Song, you must save it to the CP300’s storage memory.
- Page 83 Deleting a Song from the CP300’s Storage Memory—Delete Song This allows you to delete a Song from the CP300’s storage memory. It is not possible to delete a Preset Song. For basic operation instructions, refer to page 85. The following steps are detailed instructions for Step 4 (in the Basic Operation above).
- Page 84 File names using the characters shown in gray above will not display correctly if the Character Code setting has been changed. n The Character Code setting is also reflected in the display for the Performance and Performance file names. CP300 Owner’s Manual CharacterCode International...
-
Page 85: Settings For Song Recording And Playback—Song Settings
Quantize Execute?--> MONO VOICE EDIT SPLIT REVERB CHORUS SPEAKER MIDI SETTING PIANO E. PIANO 1 E. PIANO 2 E. PIANO 3 CLAVI. VIBES DEMO VARIATION MASTER EQ EDIT CLICK OTHER SETTING HARPSI. STRINGS CHOIR/PAD GUITAR BASS VOICE/PERFORMANCE CP300 Owner’s Manual... - Page 86 Swing rate = 67%: The timing of even beat notes is moved to the third beat of the triplets. Default setting: Off CP300 Owner’s Manual Quick Play This allows you to specify whether a Song that starts at a point other than the first beat of the first measure should be played from the first actual note or from the beginning of...
- Page 87 This allows you to repeatedly play back all Songs or a single Song selected from storage memory. When you start playback, the CP300 plays the Song you selected from the front panel, then starts repeat playback of the specified Songs until you press the [STOP] button.
-
Page 88: Connecting To A Computer And Other Midi Devices
(first audio devices, then MIDI). Connecting to External Audio Equipment The CP300 has built-in speakers. You can also monitor the sound of the instrument by using external equipment. Connect a set of headphones, powered speakers, or other playback equipment as required. -
Page 89: Connecting To External Equipment
Connecting to External Equipment The CP300 also features a set of INPUT jacks. The stereo outputs from another instrument can be connected to these jacks, allowing you to play the sound of an external instrument through the CP300’s speakers. -
Page 90: Connecting To External Midi Equipment
For details about MIDI data compatibility, refer to page 100. n In order to have an external MIDI device control separate parts of the CP300’s internal tone generator, you’ll need to change the “MIDI In Channel” parameter in the MIDI Setting menu. For details, refer to page 65. - Page 91 CP300. Use this connection to play the sounds of the connected instrument in a layer with the CP300, or use the sophisticated Zone functions (page 39) to set up splits in the sounds.
-
Page 92: Using A Usb Cable
Using a USB Cable MIDI messages can be transferred between the sequencer software and CP300 using the USB cable. However, audio data cannot be transmitted or received via USB on the CP300. When the USB connector is connected, the MIDI connectors cannot be used. -
Page 93: Local On/Off When Connected To Computer
When connecting the CP300 to a computer, the keyboard performance data is generally sent to the computer, and then returned from the computer to play the tone generator block on the CP300. If the Local Control parameter in the MIDI Settings menu is set to “on,” a “double” sound may result, since the CP300 tone generator is receiving performance data from both the keyboard directly and the computer. -
Page 94: Appendix
MemoryFileExcluded FactorySet Completed MemoryFileIncluded CP300 Owner’s Manual Description Bulk data reception has been completed. This is shown following the “Bulk Data Receiving Voice” message. This indicates that the instrument finished receiving bulk data, and that you can go on to the next step. - Page 95 The instrument’s flash memory (storage memory) has expired. FlashMemoryLifeTime Consult your Yamaha dealer. If this message appears, the instrument will not be able to back Exit--> up the Songs, Performance files and settings in memory. Press the [EXIT] button to return to the original display.
- Page 96 Sure?--> Transmitting Transmitting Completed CP300 Owner’s Manual Description Do you want to overwrite the data? This message prompts you to select whether you wish to overwrite the existing data with new data. Press the B [+ (YES)] button to allow overwriting. Press the B [– (NO)] button to cancel.
- Page 97 2. This message will appear if a different “Character Code” (page 84) is selected than was when you assigned the Song name or Performance file name. In this case, switch the “Character Code,” re-select the Song or Performance file. Message List Description CP300 Owner’s Manual...
-
Page 98: Troubleshooting
Voices in certain ranges do not sound right. Mechanical noise is heard during Performance. The buttons do not respond. CP300 Owner’s Manual Possible causes The instrument has not been plugged in properly. This is normal when electrical current is being applied to the instrument. - Page 99 Use the “Character Code” parameter (page 84) in the [SONG FILE] button to change the setting. Make sure that the “Character Code” parameter is set to the same one as set when the Performance file was named. Troubleshooting Solution CP300 Owner’s Manual...
-
Page 100: Midi Data Compatibility
System Level 1. Most commercially available music data is created as Format 0 “GM System Level 1.” XG is a major enhancement of the GM System Level 1 format, and was developed by Yamaha specifically to provide more Voices and variations, as well as greater expressive control over Voices and effects, and to ensure compatibility of data well into the future. -
Page 101: Factory Setting List
All data: On — Current Settings Medium A3 = 440.0 Hz Stretch Equal Keyboard = 0 Song = 0 PianoLike All pedals: Off Pedal 1, Pedal 2, Pedal 3: Make; Pedal 4: Break Value Page Value Page CP300 Owner’s Manual... - Page 102 Specifying the range and playing back repeatedly SongRepeat Playing back a Song/all Songs repeatedly TimeSignature Setting the Click time signature ClickVolume Setting the Click volume level ClickType Setting the Click bell sound CP300 Owner’s Manual Settings Transpose, Main/Left Layer, OtherSetting: Off, Others: On MemoryFileExcluded Settings VOLUME...
-
Page 103: Voice List
– An electric piano sound with a vintage character, and reverb as the only effect. Ø Ø – – The sound of an electric piano distorted by an amp simulator effect. Ideal for rock music. Voice description CP300 Owner’s Manual... - Page 104 Pipe Organ Tutti Pipe Organ Flute Harpsichord Harpsichord 8 Harpsichord 8'+4 Strings Strings Synth Strings Slow Strings Choir/Pad. Choir Slow Choir Scat Synth Pad 1 CP300 Owner’s Manual Stereo Touch Dynamic Key-off String Sense sampling samples resonance – Ø – Ø...
-
Page 105: Mono Piano
Pipe Organ Flute Harpsichord 8' Harpsichord 8'+4' Strings Synth Strings Slow Strings Choir Slow Choir Scat Synth Pad 1 Synth Pad 2 Nylon Guitar Steel Guitar Wood Bass Bass&Cymbal Electric Bass Fretless Bass 480 Voices – – – CP300 Owner’s Manual... -
Page 106: Piano+E.piano
Dual WoodBass/ Split GrandPiano WoodBass/ Split NylonGuitar WoodBass/ Split VibraPhone Bass+Cym/ Split JazzOrgan E.Bass/PhaserE.P. Split Bass+Cym/Scat Split CP300 Owner’s Manual Voices used Main Layer Left GrandPiano1 WarmPad GrandPiano1 ChorusE.P. GrandPiano1 DX E.Piano1 GrandPiano2 DX E.Piano2 GrandPiano2 S.SlwStr GrandPiano1 GrandPiano1 AutoPanE.P. - Page 107 Rich sound that lets you play muted guitar and bass in the left hand, and piano and pad in the right. The CP300 provides high- quality drum sounds as well as piano sounds. Try out your drumming skills! CP300 Owner’s Manual...
-
Page 108: Piano
Telephone Ring Telphone Helicopter Helicptr Applause Applause Gunshot Gunshot : Same as Bank 0 : No sound E: Element number CP300 Owner’s Manual Stereo Single Slow Fast Decay Double Attack Bank 1 Bank 3 Bank 6 Bank 8 Bank 12... -
Page 109: Organ
DX Phase 2 DrawOrg2 2 60sDrOr3 2 Even Bar 16+2"2/3 PercOrg2 NotreDam Puff Org Nyln&Stl FunkGtr1 FeedbkGt JazzRthm Ba&DstEG TechnoBa ModulrBa Susp.Str YangChin Orchestr Warm Str ChoirStr SyVoice2 HornOrch BrssSec2 SynBrss4 Sax Sect BrthTnSx PulseSaw GlockChi Nylon EP CP300 Owner’s Manual... -
Page 110: Vibes
Telephone Ring Telphone Helicopter Helicptr Applause Applause Gunshot Gunshot : Same as Bank 0 : No sound E: Element number CP300 Owner’s Manual Velo-Switch Velo-Xfade other wave Bank 41 Bank 42 Bank 43 Bank 45 Bank 64 Bank 65 VX El.P1 2 60sEl.P1... - Page 111 Stream Bubble Feed Horse Tweet 2 Ghost Maou PhonCall DoorSqek Door Slam ScratchC ScratchS WindChim Telphon2 CarEIgnt CarTSqel Car Pass CarCrash Siren Train JetPlane Starship Burst Coaster Submarin Laugh Scream Punch Heart Footstep MchinGun LaserGun Xplosion Firework CP300 Owner’s Manual...
-
Page 112: Xg Drum Kit List
Wood Block H Wood Block L Cuica Mute Cuica Open Triangle Mute Triangle Open Shaker Jingle Bells Bell Tree CP300 Owner’s Manual Standard Kit2 Room Kit Rock Kit Snare Soft 2 Snare Noisy Open Rim Shot H Short Kick 2 Kick Short... - Page 113 Hand Cymbal 2 Short Starship Burst Roller Coaster Submarine Shower Laugh Thunder Scream Wind Punch Stream Heart Beat Bubble Foot Steps Feed Machine Gun Horse Laser Gun Bird Tweet 2 Explosion Firework Ghost Maou XG Drum Kit List CP300 Owner’s Manual...
-
Page 114: Effect Type List
GM Flanger Flanger 3 Symphonic 1 Symphonic 2 Phaser 1 Phaser 2 Phaser 3 Ens Detune CP300 Owner’s Manual Variation/Insertion Variation/insertion types that can be selected by panel operation Type MSB Type LSB Effect Name Display DelayL,C,R 2 Delay L,C,R... -
Page 115: Effect Parameter List
0 – 44 table #6 0 – 10 0 – 127 table #5 1 – 127 0 – 52 table #3 34 – 60 table #3 1 – 127 0 – 10 0 – 3 1 – 10 CP300 Owner’s Manual... - Page 116 14 EQ Low Gain -12 – +12dB 15 EQ High Frequency 500Hz – 16.0kHz 16 EQ High Gain -12 – +12dB CP300 Owner’s Manual TEMPO CROSS (Variation, Insertion block) Parameter Value See Table Control Delay Time L>R 0 – 1 Delay Time R>L...
- Page 117 0 – 127 table #1 0 – 127 0 – 127 1 – 127 4 – 40 table #3 52 – 76 28 – 58 table #3 52 – 76 1 – 127 3 – 6 4 – 124 CP300 Owner’s Manual...
- Page 118 1.0k – Thru Output Level 0 – 127 10 Dry/Wet D63>W – D=W – D<W63 11 Edge (Clip Curve) 0 – 127 CP300 Owner’s Manual STEREO AMP SIMULATOR (Variation, Insertion block) Parameter Value See Table Control Drive 0 – 127 AMP Type 4 –...
- Page 119 0 – 15 table #9 79 – 121 0 – 7 table #10 0 – 127 Display Value See Table Control 0 – 19 table #8 0 – 15 table #9 55 – 97 0 – 127 CP300 Owner’s Manual...
- Page 120 13 AMP Type Off, Stack, Combo, Tube (AMPSIM only) 14 Drive 15 LPF Cuttoff 1kHz – Thru 16 Output Level CP300 Owner’s Manual ENSEMBLE DETUNE (Chorus, Variation, Insertion block) Value See Table Control Parameter Detune Lch Init Delay Rch Init Delay 10 Dry/Wet 0 –...
- Page 121 1 – 127 0 – 127 0 – 127 0 – 127 52 – 76 52 – 76 1 – 127 1 – 127 1 – 127 0 – 19 0 – 15 79 – 121 0 – 7 CP300 Owner’s Manual...
- Page 122 16 Vibrate SW OFF, ON NO EFFECT (Reverb, Chorus, Variation) THRU (Insertion block) Parameter Display * Parameter 10 Dry/Wet only affects insertion type effects. CP300 Owner’s Manual Value See Table Control 0 – 19 table #14 1 – 127 0 – 127 0 –...
-
Page 123: Effect Data Assign Table
171.7 72.5 173.2 74.1 174.8 75.7 176.4 77.2 178.0 78.8 179.5 80.4 181.1 81.9 182.7 83.5 184.3 85.1 185.8 86.7 187.4 88.2 189.0 89.8 190.6 91.4 192.1 93.0 193.7 94.5 195.3 96.1 196.9 97.7 198.4 99.3 200.0 CP300 Owner’s Manual... - Page 124 182.7 19.4 185.9 19.5 189.0 19.7 192.2 19.8 195.3 10.0 20.0 198.5 Table #8 Compressor Attack Time Data Value CP300 Owner’s Manual Table #9 Compressor Release Time Data Value Data Value Data Value 201.6 204.8 207.9 211.1 214.2 217.4 220.5 223.7...
-
Page 125: Midi Data Format
0111 0110 0101 0111 0111 0111 0101 1000 0111 1000 0101 1001 0111 1001 0101 1010 0111 1010 0101 1011 0111 1011 0101 1100 0111 1100 0101 1101 0111 1101 0101 1110 0111 1110 0101 1111 0111 1111 CP300 Owner’s Manual... - Page 126 Mode Message (7CH) (7DH) (7EH) (7FH) Program (n: Channel (00H... Change Number) 7FH) CP300 Owner’s Manual 2nd Data byte MIDI Reception (respond/ignore) Parameter Data (HEX) Parameter Song Key no. (0 – 127) Velocity (0 – 127) Ø Key On: Key no. (0 – 127) vv=1 –...
- Page 127 ˛ Ø ˛ ˛ MIDI Transmission (generated data) Panel Recorded (main generation Song Midi from method) panel Ø Ø ˛ Ø (Other Setting) Ø Ø ˛ Ø (VOICE EDIT) ˛ Ø ˛ ˛ ˛ Ø ˛ ˛ CP300 Owner’s Manual...
- Page 128 00-7F REVERB PARAMETER 11 00-7F REVERB PARAMETER 12 00-7F REVERB PARAMETER 13 00-7F REVERB PARAMETER 14 00-7F REVERB PARAMETER 15 00-7F REVERB PARAMETER 16 TOTAL SIZE CP300 Owner’s Manual MIDI Reception (respond/ignore) XG Default Description Song -102.4...0...+102.3 [cent] 1st bit 3-0...
- Page 129 ˛ ˛ Ø ˛ Ø ˛ ˛ Ø ˛ Ø ˛ ˛ Ø ˛ Ø ˛ ˛ Ø ˛ Ø ˛ ˛ Ø ˛ Ø ˛ ˛ Ø ˛ Ø ˛ ˛ Ø ˛ Ø ˛ ˛ CP300 Owner’s Manual...
- Page 130 00-7F INSERTION EFFECT PARAMETER 7 MSB 00-7F INSERTION EFFECT PARAMETER 7 LSB 00-7F INSERTION EFFECT PARAMETER 8 MSB 00-7F INSERTION EFFECT PARAMETER 8 LSB CP300 Owner’s Manual MIDI Reception (respond/ignore) Main Description Layer Song Left Left Layer flat, jazz, pops, rock, classic -12...0...+12 [dB]...
- Page 131 ˛ ˛ Ø ˛ ˛ ˛ ˛ Ø ˛ ˛ ˛ ˛ Ø ˛ ˛ ˛ ˛ Ø ˛ ˛ ˛ ˛ Ø ˛ ˛ ˛ ˛ Ø ˛ ˛ Ø ˛ Ø ˛ Ø (Other Setting) CP300 Owner’s Manual...
- Page 132 • BANK SELECT LSB • MONO/POLY MODE • SCALE TUNING • PORTAMENTO • PITCH EG • FILTER MODULATION DEPTH (FMOD DEPTH) • AMPLITUDE MODULATION DEPTH (AMOD DEPTH) CP300 Owner’s Manual MIDI Reception (respond/ignore) Main XG Default Description Layer Song Left Left Layer -63...0...+63 [cent]...
- Page 133 (generated data) Panel (main Recorded generation Song Midi from method) panel ˛ ˛ (Output as XG ˛ ˛ Master Volume) MIDI Transmission (generated data) Panel (main Recorded generation Song Midi from method) panel ˛ Ø ˛ Ø CP300 Owner’s Manual...
- Page 134 0hhhhhhh = Address Mid 0mmmmmmm = Address Low 0lllllll 11110111 = End of Exclusive CP300 Owner’s Manual (effective or not for each part) Data Format Song *Refer to Parameter Change *Refer to Parameter Change *Refer to Parameter Change *Refer to Parameter Change...
- Page 135 Ø ˛ (Other Setting) (Other Setting) Ø Ø ˛ Ø ˛ (Other Setting) (Other Setting) MIDI Transmission (generated data) MIDI Reception (affecting the Panel (main Keyboard panel) generation Song Midi method) Ø ˛ Ø ˛ (Other Setting) CP300 Owner’s Manual...
- Page 136 0hhhhhhh Dump Request = Address Mid 0mmmmmmm = Address Low 0lllllll Function Address High Current, Performance, Voice Setting CP300 Owner’s Manual MIDI Reception (effective or not for each part) Main Layer Song Keyboard Left Left Layer Address Mid Address Low –...
-
Page 137: Midi Implementation Chart
MIDI Implementation Chart YAMAHA [ Stage Piano ] CP300 MIDI Implementation Chart Function... Basic Default 1 - 16 Channel Changed 1 - 16 Mode Default Messages ˛ Altered ************** Note 0 - 127 Number : True voice ************** Velocity Note ON Ø... - Page 138 AC Power Cord, Foot Pedal FC3, Owner’s Manual Specifications and descriptions in this owner’s manual are for information purposes only. Yamaha Corp. reserves the right to change or modify products or specifications at any time without prior notice. Since specifications, equipment or options may not be the same in every locale, please check with your Yamaha dealer.
-
Page 139: Index
MASTER EQ EDIT [ ][ ] buttons ... 72 Master Equalizer settings ... 72 [MASTER EQUALIZER] sliders ... 36 Master mode ... 39 Master settings ... 53 Master Volume ... 13 [MASTER VOLUME] dial ... 13 Memory ... 49 Memory Backup ... 71 CP300 Owner’s Manual... -
Page 140: Specifications
Preset ... 18, 49 Preset Performance file ... 40 Preset Performance List ... 106 Program Change List ... 105 Quantize ... 86 CP300 Owner’s Manual [REC] button ... 42 Recording Dual mode ... 48 live performance ... 41, 42 Split mode ... 48 Recording Techniques adding data ... - Page 141 Master Volume ... 13, 23 adjusting Song Volume ... 23, 47 XG ... 100 XG Drum Kit List ... 112 XG Voice ... 26 XG Voice List ... 108 Zone Control ... 28, 39 [ZONE CONTROL] sliders ... 28, 39 Index CP300 Owner’s Manual...
- Page 142 Compliance with FCC regulations does * This applies only to products distributed by YAMAHA CORPORATION OF AMERICA. IMPORTANT NOTICE FOR THE UNITED KINGDOM Connecting the Plug and Cord IMPORTANT.
- Page 143 For details of products, please contact your nearest Yamaha representative or the authorized distributor listed below. Pour plus de détails sur les produits, veuillez-vous adresser à Yamaha ou au distributeur le plus proche de vous figurant dans la liste suivante.
- Page 144 Yamaha Web Site (English only) http://www.yamahasynth.com/ Yamaha Manual Library http://www.yamaha.co.jp/manual/ U.R.G., Pro Audio & Digital Musical Instrument Division, Yamaha Corporation © 2006 Yamaha Corporation WG78300 602MWDH24.2-01A0 This document is printed on chlorine free (ECF) paper with soy ink. Printed in Japan...