Fusion Signature Series Installation Instructions
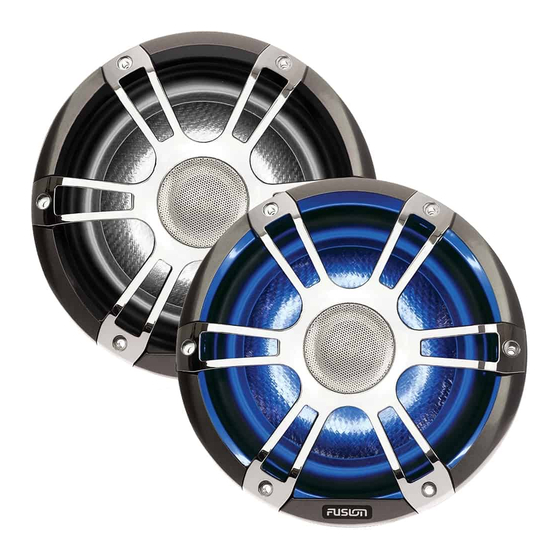
Wake tower speakers
Hide thumbs
Also See for Signature Series:
- Installation instructions manual (56 pages) ,
- Installation instructions (4 pages) ,
- Installation instructions manual (6 pages)
Advertisement
Quick Links
Signature Series Wake Tower
Speakers Installation Instructions
Important Safety Information
See the Important Safety and Product Information guide in the
product box for product warnings and other important
information.
This device must be installed according to these instructions.
Disconnect the vehicle's or vessel's power supply before
beginning to install this device.
Continuous exposure to sound pressure levels over 100 dBA
may cause permanent hearing loss. The volume is typically too
loud if you cannot hear people speaking around you. Limit the
amount of time you listen at high volume. If you experience
ringing in your ears or muffled speech, stop listening and have
your hearing checked.
To avoid possible personal injury, always wear safety goggles,
ear protection, and a dust mask when drilling, cutting, or
sanding.
When drilling or cutting, always check what is on the opposite
side of the surface to avoid damaging the vessel.
It is strongly recommended that you have your audio system
installed by a professional installer to ensure optimum
performance.
You must read all installation instructions before beginning the
installation. If you experience difficulty during the installation, go
to
www.fusionentertainment.com
Materials and Tools Needed
2
• 16 AWG (1.31 mm
) or 12 AWG (3.31 mm
(Speaker Wire Gauge Guide, page
2
• 20 AWG (0.5 mm
) wire (LEDs)
• 3 A in-line fuse (LEDs)
• Speaker mounting bracket (sold separately)
1
• Drill and 12 mm (
/
in.) drill bit
2
• Wire strippers
• Solder and dual-wall heat-shrink tubing for wire connections
NOTE: For customized installations, additional tools and
materials may be needed.
Mounting the Speakers
You must purchase mounting brackets for the FUSION Wake
Tower speakers separately. Each type of mounting bracket
contains specific installation instructions.
1
If necessary, mark the locations on the wake tower or the
deck where you plan to mount the speakers.
2
If necessary, drill a 12 mm (
the wake tower or deck.
1
Various brackets are available for mounting these speakers on a wake tower bar
or on a deck. See your FUSION
®
dealer for more information.
June 2020
®
WARNING
WARNING
CAUTION
NOTICE
for product support.
2
) wire (speakers)
1)
1
1
/
in.) cable pass-through hole in
2
3
Route the speaker and LED power wires (not included) to the
mounting locations.
4
Using the installation instructions provided with the mounting
bracket, connect the bracket to the speakers and to the wake
tower or the deck.
5
Connect the speaker wires
6
If necessary, connect the LED power wires
page
1).
7
If speakers were installed at an angle, rotate the front of the
speaker and the endcap so the FUSION logo appears level
(Adjusting the Angle of the FUSION Logos, page
Speaker Wiring
When connecting the speakers to your stereo, observe these
considerations.
• Speaker wire is not included with the speakers. You should
use the recommended speaker wire to connect the speakers
to the stereo or amplifier
page
1).
• You should make all wiring connections using solder and
heat-shrink tubing (not included). You should not use crimp
connectors because of the small hole needed to route the
speaker and RGB wires.
• You can use this table to identify the polarity of the leads on
the speaker.
Lead color
White
White with a black stripe
Speaker Wire Gauge Guide
You should use 16 AWG (1.31 mm
installations. You can use this table to determine if you need to
use a larger gauge of wire. This table accounts for terminal
connection resistance.
NOTE: If you are using aluminum or tinned wire, you should use
a wire two gauges larger than the gauge listed below to
compensate for a potential voltage drop due to the wire material.
4 Ohm Load (1 Speaker)
Distance between the
amplifier and speaker
From 0 to 28 ft. (from 0 to
8.5 m)
From 28 to 69 ft. (from 8.5 to
21 m)
2 Ohm Load (2 Speakers in Parallel)
Distance between the
amplifier and speaker
From 0 to 14 ft. (from 0 to
4 m)
From 14 to 35 ft. (from 4 to
10.5 m)
LED Wiring
It is recommended to install a FUSION CRGBW Wireless
Remote Control with these speakers to turn the LEDs on and
off, change the colors, and create lighting effects. See your
FUSION dealer or
www.fusionentertainment.com
information.
2
Fusion speaker cable is sold in various lengths. See your FUSION dealer for
more information.
GUID-48A07D5E-2695-4BF7-A18D-1673FAFC2097 v1
(Speaker Wiring, page
1).
(LED Wiring,
2).
(Speaker Wire Gauge Guide,
Polarity
Positive (+)
Negative (-)
2
) speaker wire for most
Wire gauge
Recommended
cable
16 AWG
010-12899-00
2
(1.31 mm
)
12 AWG
010-12898-00
2
(3.31 mm
)
Wire gauge
Recommended
cable
16 AWG
010-12899-00
2
(1.31 mm
)
12 AWG
010-12898-00
2
(3.31 mm
)
for more
2
Advertisement

Related Manuals for Fusion Signature Series


Summary of Contents for Fusion Signature Series
- Page 1 Various brackets are available for mounting these speakers on a wake tower bar Fusion speaker cable is sold in various lengths. See your FUSION dealer for or on a deck. See your FUSION ®...
- Page 2 LED Wire Color stains. Troubleshooting Green Green Blue Blue Before you contact your FUSION dealer or service center, you should perform a few simple troubleshooting steps to help Yellow Red and green diagnose the problem. Magenta Red and blue If the FUSION speaker has been installed by a professional...
- Page 3 LED Supply Voltage (Sports Model From 10.8 to 16 Vdc Garmin , the Garmin logo, FUSION , and the Fusion logo, are trademarks of Garmin Ltd. ® ® Speakers only) or its subsidiaries, registered in the USA and other countries. These trademarks may not LED Load Current at 14.4 Vdc...
- Page 4 © 2020 Garmin Ltd. or its subsidiaries www.fusionentertainment.com...