Nvidia Mellanox ConnectX-6 Dx Series User Manual
Pcie hhhl ethernet adapter cards
Hide thumbs
Also See for Mellanox ConnectX-6 Dx Series:
- User manual (107 pages) ,
- Manual (88 pages) ,
- User manual (72 pages)

Related Manuals for Nvidia Mellanox ConnectX-6 Dx Series


Summary of Contents for Nvidia Mellanox ConnectX-6 Dx Series
- Page 1 NVIDIA Mellanox ConnectX-6 Dx PCIe HHHL Ethernet Adapter Cards User Manual Exported on Oct/22/2020 06:45 PM https://docs.mellanox.com/x/esV-AQ...
-
Page 2: Table Of Contents
Table of Contents Table of Contents .......................2 Introduction........................9 Product Overview ........................9 Features and Benefits......................11 Operating Systems/Distributions ..................13 Connectivity ........................... 13 Manageability ........................14 Interfaces .........................15 ConnectX-6 Dx IC Interface ....................16 Encryption......................... 16 PCI Express Interface ......................16 Networking Ports LEDs Interface .................. - Page 3 Driver Installation ....................28 Linux Driver Installation......................28 Prerequisites ........................28 Downloading Mellanox OFED ..................28 Installing Mellanox OFED ....................29 Installation Script ......................29 Installation Procedure ....................30 Installation Results ..................... 32 Installation Logs......................33 openibd Script......................33 Driver Load Upon System Boot .................. 33 mlnxofedinstall Return Codes ..................
- Page 4 Unattended Installation....................47 Installation Results ..................... 48 Uninstalling Mellanox WinOF-2 Driver................48 Attended Uninstallation ....................48 Unattended Uninstallation ..................48 Extracting Files Without Running Installation ..............49 Firmware Upgrade ......................51 VMware Driver Installation ....................51 Hardware and Software Requirements................51 Installing Mellanox NATIVE ESXi Driver for VMware vSphere........
- Page 5 Short Bracket ......................66 Tall Bracket ......................... 66 Dual-Port QSFP56 Adapter Card..................67 Short Bracket ......................67 Tall Bracket ......................... 67 Finding the MAC on the Adapter Card..............68 Document Revision History ..................71...
- Page 6 About This Manual This User Manual describes NVIDIA® Mellanox® ConnectX®-6 Dx Ethernet adapter cards. It provides details as to the interfaces of the board, specifications, required software and firmware for operating the board, and relevant documentation. Ordering Part Numbers The table below provides the ordering part numbers (OPN) for the available ConnectX-6 Dx Ethernet adapter cards.
- Page 7 Configuration Marketing Description 200GbE OPNs MCX623105AC- ConnectX®-6 Dx EN adapter card, 200GbE, Single-port QSFP56, PCIe VDAT 4.0 x16, Crypto and Secure Boot, Tall Bracket MCX623105AN- ConnectX®-6 Dx EN adapter card, 200GbE , Single-port QSFP56, PCIe VDAT 4.0 x16, No Crypto, Tall Bracket MCX623105AS- ConnectX®-6 Dx EN adapter card, 200GbE, Single-port QSFP56, PCIe VDAT...
- Page 8 IEEE Ethernet specification at http://standards.ieee.org/ IEEE Std 802.3 Specification Industry Standard PCI Express Base and Card Electromechanical Specifications at PCI Express https://pcisig.com/specifications Specifications Mellanox LinkX Ethernet cables and transceivers are designed to maximize the Mellanox LinkX performance of High-Performance Computing networks, requiring high- Interconnect bandwidth, low-latency connections between compute nodes and switch nodes.
-
Page 9: Introduction
Introduction Product Overview This is the User Manual for Mellanox Technologies Ethernet adapter cards based on the ConnectX®-6 Dx integrated circuit device. As the world's most advanced cloud SmartNIC, ConnectX-6 Dx provides up to two ports of 25, 50 or 100Gb/s or a single-port of 200Gb/s Ethernet connectivity, powered by 50Gb/s PAM4 SerDes technology and PCIe Gen 4.0 host connectivity. ConnectX-6 Dx continues among Mellanox's innovation path in scalable cloud fabrics, delivering unparalleled performance and efficiency at every scale. - Page 10 Crypto √ √ Secure Boot √ √ Adapter IC Part Number MT28928A0-CCCF-CE MT28928A0- MT28928A0-NCCF-CE MT28928A0-NCCF-CE CCCF-CE RoHS RoHS Compliant Mellanox ConnectX-6 Dx 100GbE Adapter Cards Part Number MCX623105A MCX623105A MCX623106A MCX623106A MCX623106A MCX623106A N-CDAT E-CDAT E-CDAT C-CDAT N-CDAT S-CDAT Form Factor/ 5.59in.
-
Page 11: Features And Benefits
Mellanox ConnectX-6 Dx 200GbE Adapter Cards Part Number MCX623105AC- MCX623105AE- MCX623105AN- MCX623105AS- VDAT VDAT VDAT VDAT Form Factor/ 5.59in. x 2.71in (142.00mm x 68.90mm) Dimensions Data Transmission Ethernet: 1/10/25/40/50/100/200 Gb/s Rate Network Connector Single-port QSFP56 Type PCIe Interface PCIe Gen 4.0 SERDES @ 16.0GT/s x16 Crypto √... - Page 12 Feature Description Mellanox adapters comply with the following IEEE 802.3 standards: 200GbE / 100GbE / 50GbE / 40GbE / 25GbE / 10GbE / 1GbE – IEEE 802.3bj, 802.3bm 100 Gigabit Ethernet – IEEE 802.3by, Ethernet Consortium25, 50 Gigabit Ethernet, supporting all FEC modes –...
-
Page 13: Operating Systems/Distributions
Feature Description Storage A consolidated compute and storage network achieves significant cost-performance advantages Acceleratio over multi-fabric networks. Standard block and file access protocols can leverage • RDMA for high-performance storage access • NVMe over Fabric offloads for target machine • Erasure Coding •... -
Page 14: Manageability
Manageability Mellanox ConnectX-6 Dx technology maintains support for manageability through a BMC. Mellanox ConnectX-6 Dx PCIe stand-up adapter can be connected to a BMC using MCTP over SMBus or MCTP over PCIe protocols as if it is a standard Mellanox PCIe stand-up adapter. For configuring the adapter for the specific manageability solution in use by the server, please contact Mellanox Support. -
Page 15: Interfaces
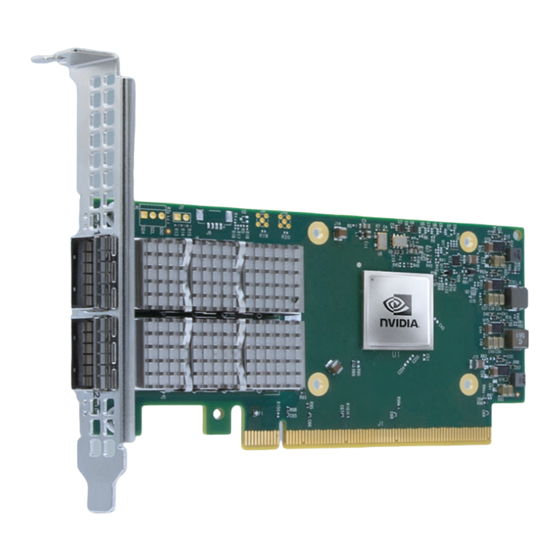
Interfaces The below figures show the component side of the Mellanox ConnectX-6 Dx adapter card. Each numbered interface that is referenced in the figures is described in the following table with a link to detailed information. The below figures are for illustration purposes only and might not reflect the current revision of the adapter card. -
Page 16: Connectx-6 Dx Ic Interface
ConnectX-6 Dx IC Interface The ConnectX®-6 Dx EN family of adapter IC devices delivers two ports of 10/25/40/50/100Gb/s or a single-port of 200Gb/s Ethernet connectivity paired with best-in-class hardware capabilities that accelerate and secure cloud and data-center workloads. Encryption Applies to Crypto OPNs only. ConnectX-6 Dx brings security to every end-point, including: •... -
Page 17: Scheme 1: One Bi-Color Led
LEDs Scheme MCX621102AC-ADAT, MCX621102AN-ADAT, Scheme 1: One Bi-Color LED MCX621102AE-ADAT MCX623102A[C/N]-ADAT, MCX623102A[C/N]- Scheme 3: One Bi-Color LED and one Single Color GDAT, MCX623102A[S/E/N/C]-GDAT MCX623105A[N/E]-CDAT, MCX623106A[C/N/S/E]- CDAT, MCX623106P[C/N/E]-CDAT, MCX623105A[C/N/S/E]-VDAT Scheme 1: One Bi-Color LED There is one bicolor (Yellow and Green) I/O LED per port to indicate speed and link status. Physical and Logical Link Indications State Bi-Color LED (Yellow/Green) -
Page 18: Voltage Regulators
State Bi-Color LED (Yellow/Green) Single Color LED (Green) Physical link speed Logical link/activity Physical Activity • A constant Green indicates a physical Blinking link with the maximum networking speed. • A constant Yellow indicates a physical link with less than the maximum networking speed. -
Page 19: Hardware Installation
Hardware Installation Installation and initialization of ConnectX-6 Dx adapter cards require attention to the mechanical attributes, power specification, and precautions for electronic equipment. Safety Warnings Safety warnings are provided here in the English language. For safety warnings in other languages, refer to the Adapter Installation Safety Instructions document available on... -
Page 20: System Requirements
System Requirements Hardware Requirements Unless otherwise specified, Mellanox products are designed to work in an environmentally controlled data center with low levels of gaseous and dust (particulate) contamination. The operation environment should meet severity level G1 as per ISA 71.04 for gaseous contamination and ISO 14644-1 class 8 for cleanliness level. -
Page 21: Unpacking The Package
Unpacking the Package Check against the package contents list that all the parts have been sent. Check the parts for visible damage that may have occurred during shipping. Please note that the cards must be placed on an antistatic surface. Category Qty. -
Page 22: Bracket Replacement Instructions
Bracket Replacement Instructions The ConnectX-6 Dx card is usually shipped with an assembled high-profile bracket. If this form factor is suitable for your requirements, you can skip the remainder of this section and move to Installation Instructions. If you need to replace the high-profile bracket with the short bracket that is included in the shipping box, please follow the instructions in this section. - Page 23 Step 2: Applying even pressure at both corners of the card, insert the adapter card in a PCI Express slot until firmly seated. Do not use excessive force when seating the card, as this may damage the chassis. Secure the adapter card to the chassis. Step 1: Secure the bracket to the chassis with the bracket screw.
-
Page 24: Uninstalling The Card
Uninstalling the Card Safety Precautions The adapter is installed in a system that operates with voltages that can be lethal. Before uninstalling the adapter card, please observe the following precautions to avoid injury and prevent damage to system components. Remove any metallic objects from your hands and wrists. It is strongly recommended to use an ESD strap or other antistatic devices. -
Page 25: Cables And Modules
To uninstall the adapter card, see Uninstalling the Card. Cables and Modules To obtain the list of supported Mellanox cables for your adapter, please refer to the Cables Reference Table at http://www.mellanox.com/products/interconnect/cables-configurator.php. Cable Installation All cables can be inserted or removed with the unit powered on. To insert a cable, press the connector into the port receptacle until the connector is firmly seated. -
Page 26: Uninstalling The Card
On Windows Open Device Manager on the server. Click Start => Run, and then enter devmgmt.msc. Expand System Devices and locate your Mellanox ConnectX-6 Dx adapter card. Right click the mouse on your adapter's row and select Properties to display the adapter card properties window. Click the Details tab and select Hardware Ids (Windows 2012/R2/2016) from the Property pull- down menu. - Page 27 Remove any metallic objects from your hands and wrists. It is strongly recommended to use an ESD strap or other antistatic devices. Turn off the system and disconnect the power cord from the server. Card Removal Please note that the following images are for illustration purposes only. Verify that the system is powered off and unplugged.
-
Page 28: Driver Installation
Driver Installation Please use the relevant driver installation section. • Linux Driver Installation • Windows Driver Installation • VMware Driver Installation Linux Driver Installation This section describes how to install and test the Mellanox OFED for Linux package on a single server with a Mellanox ConnectX-5 adapter card installed. -
Page 29: Installing Mellanox Ofed
Scroll down to the Download wizard, and click the Download tab. Choose your relevant package depending on your host operating system. Click the desired ISO/tgzpackage. To obtain the download link, accept the End User License Agreement (EULA). Use the md5sum utility to confirm the file integrity of your ISO image. Run the following command and compare the result to the value provided on the download page. -
Page 30: Installation Procedure
The “mlnx_add_kernel_support.sh” script can be executed directly from the mlnxofedinstall script. For further information, please see '--add-kernel-support' option below. On Ubuntu and Debian distributions drivers installation use Dynamic Kernel Module Support (DKMS) framework. Thus, the drivers' compilation will take place on the host during MLNX_OFED installation. - Page 31 /mnt/mlnxofedinstall Logs dir: /tmp/MLNX_OFED_LINUX-x.x-x.logs This program will install the MLNX_OFED_LINUX package on your machine. Note that all other Mellanox, OEM, OFED, RDMA or Distribution IB packages will be removed. Those packages are removed due to conflicts with MLNX_OFED_LINUX, do not reinstall them. Starting MLNX_OFED_LINUX-x.x.x installation ...
-
Page 32: Installation Results
In case that your machine has an unsupported network adapter device, no firmware update will occur and one of the following error messages below will be printed. Please contact your hardware vendor for help on firmware updates. Error message 1: Device #1: ---------- Device Type:... -
Page 33: Installation Logs
Firmware • The firmware of existing network adapter devices will be updated if the following two conditions are fulfilled: • The installation script is run in default mode; that is, without the option ‘--without-fw-update’ • The firmware version of the adapter device is older than the firmware version included with the Mellanox OFED ISO image Note: If an adapter’s flash was originally programmed with an Expansion ROM image, the automatic firmware update will also... -
Page 34: Mlnxofedinstall Return Codes
blacklist mlx4_core blacklist mlx4_en blacklist mlx5_core blacklist mlx5_ib Set “ONBOOT=no” in the "/etc/infiniband/openib.conf" file. If the modules exist in the initramfs file, they can automatically be loaded by the kernel. To prevent this behavior, update the initramfs using the operating systems’ standard tools. Note: The process of updating the initramfs will add the blacklists from step 1, and will prevent the kernel from loading the modules automatically. -
Page 35: Installing Mlnx_Ofed Using The Yum Tool
# wget http://www.mellanox.com/downloads/ofed/RPM-GPG-KEY-Mellanox --2014-04-20 13:52:30-- http://www.mellanox.com/downloads/ofed/RPM-GPG-KEY-Mellanox Resolving www.mellanox.com... 72.3.194.0 Connecting to www.mellanox.com|72.3.194.0|:80... connected. HTTP request sent, awaiting response... 200 OK Length: 1354 (1.3K) [text/plain] Saving to: ?RPM-GPG-KEY-Mellanox? 100%[=================================================>] 1,354 --.-K/s in 0s 2014-04-20 13:52:30 (247 MB/s) - ?RPM-GPG-KEY-Mellanox? saved [1354/1354] Install the key. -
Page 36: Uninstalling Mlnx_Ofed Using The Yum Tool
mlnx-ofed-all Installs all available packages in MLNX_OFED. mlnx-ofed-basic Installs basic packages required running Mellanox cards. mlnx-ofed-guest Installs packages required by guest OS. mlnx-ofed-hpc Installs packages required HPC. mlnx-ofed-hypervisor Installs packages required by hypervisor OS. mlnx-ofed-vma Installs packages required by VMA. mlnx-ofed-vma-eth Installs packages required by VMA to work over Ethernet. -
Page 37: Setting Up Mlnx_Ofed Apt-Get Repository
Setting up MLNX_OFED apt-get Repository Log into the installation machine as root. Extract the MLNX_OFED pacakge on a shared location in your network. You can download it from http://www.mellanox.com > Products > Software> Ethernet Drivers. Create an apt-get repository configuration file called "/etc/apt/sources.list.d/mlnx_ofed.list" with the following content: # deb file:/<path to extracted MLNX_OFED package>/DEBS ./ Download and install Mellanox Technologies GPG-KEY. -
Page 38: Uninstalling Mlnx_Ofed Using The Apt-Get Tool
Installing MLNX_OFED using the “apt-get” tool does not automatically update the firmware. To update the firmware to the version included in MLNX_OFED package, run: # apt-get install mlnx-fw-updater Or, update the firmware to the latest version available on Mellanox Technologies’ Web site as described in Updating Adapter Firmware. -
Page 39: Updating The Device Firmware Automatically Upon System Boot
mlxfwmanager_pci | grep PSID PSID: MT_1210110019 Download the firmware BIN file from the Mellanox website or the OEM website. Burn the firmware. mlxfwmanager_pci -i <fw_file.bin> Reboot your machine after the firmware burning is completed. Updating the Device Firmware Automatically upon System Boot As of MLNX_OFED v3.1-x.x.x, firmware can be automatically updated upon system boot. The firmware update package (mlnx-fw-updater) is installed in the “/opt/mellanox/mlnx-fw-updater”... -
Page 40: Removing Signature From Kernel Modules
# wget http://www.mellanox.com/downloads/ofed/mlnx_signing_key_pub.der Add the public key to the MOK list using the mokutil utility. # mokutil --import mlnx_signing_key_pub.der Reboot the system. The pending MOK key enrollment request will be noticed by shim.efi and it will launch MokManager.efi to allow you to complete the enrollment from the UEFI console. You will need to enter the password you previously associated with this request and confirm the enrollment. -
Page 41: Performance Tuning
Performance Tuning Depending on the application of the user's system, it may be necessary to modify the default configuration of network adapters based on the ConnectX® adapters. In case that tuning is required, please refer to the Performance Tuning Guide for Mellanox Network Adapters at https:// community.mellanox.com/docs/DOC-2489. -
Page 42: Installing Mellanox Winof-2 Driver
Go to the Mellanox WinOF-2 web page at http://www.mellanox.com > Products > Ethernet Drivers > Windows SW/Drivers. Download the exe image according to the architecture of your machine (see Step 1). The name of the .exe is in the following format: MLNX_WinOF2-<version>_x<arch>.exe. Installing the incorrect exe file is prohibited. If you do so, an error message will be displayed. For example, if you try to install a 64-bit executable file on a 32-bit machine, the wizard will display the following (or a similar) error message: “The installation package is not supported by this processor type. - Page 43 Click Next in the Welcome screen. Read and accept the license agreement and click Next. Select the target folder for the installation.
- Page 44 The firmware upgrade screen will be displayed in the following cases: • If the user has an OEM card. In this case, the firmware will not be displayed. • If the user has a standard Mellanox card with an older firmware version, the firmware will be updated accordingly.
- Page 45 Select a Complete or Custom installation, follow Step a onward. Select the desired feature to install: • Performances tools - install the performance tools that are used to measure performance in user environment • Documentation - contains the User Manual and Release Notes • Management tools - installation tools used for management, such as mlxstat •...
- Page 46 9. Click Install to start the installation. 10. In case firmware upgrade option was checked in Step 7, you will be notified if a firmware upgrade is required (see ). 11. Click Finish to complete the installation.
-
Page 47: Unattended Installation
Unattended Installation If no reboot options are specified, the installer restarts the computer whenever necessary without displaying any prompt or warning to the user. To control the reboots, use the /norestart or /forcerestart standard command-line options. The following is an example of an unattended installation session. -
Page 48: Installation Results
Installation Results Upon installation completion, you can verify the successful addition of the network card(s) through the Device Manager. The inf files can be located at: %ProgramFiles%\Mellanox\MLNX_WinOF2\Drivers\ To see the Mellanox network adapters, display the Device Manager and pull down the “Network adapters”... -
Page 49: Extracting Files Without Running Installation
Open a CMD console. (Click Task Manager > File > Run new task, and enter CMD.) To uninstall the driver, run: MLNX_WinOF2-2_0_All_x64.exe /S /x /v"/qn" Extracting Files Without Running Installation To extract the files without running installation, perform the following steps: Open a CMD console-> Click Start-> Task Manager-> File-> Run new task-> and enter CMD. Extract the driver and the tools: MLNX_WinOF2-2_0_<revision_version>_All_x64 /a To extract only the driver file... - Page 50 Click Install to extract this folder, or click Change to install to a different folder. ...
-
Page 51: Firmware Upgrade
To complete the extraction, click Finish. Firmware Upgrade If the machine has a standard Mellanox card with an older firmware version, the firmware will be automatically updated as part of the WinOF-2 package installation. For information on how to upgrade firmware manually, please refer to the MFT User Manual at www.m ellanox.com >Products >... -
Page 52: Installing Mellanox Native Esxi Driver For Vmware Vsphere
Requirement Description Installer Privileges The installation requires administrator privileges on the target machine. Installing Mellanox NATIVE ESXi Driver for VMware vSphere Please uninstall all previous Mellanox driver packages prior to installing the new version. See Removing Earlier Mellanox Drivers for further information. -
Page 53: Firmware Programming
Log into the ESXi server with root permissions. List all the existing NATIVE ESXi driver modules. (See Step 4 in Installing Mellanox NATIVE ESXi Driver for VMware vSphere.) Remove each module: #> esxcli software vib remove -n nmlx5-rdma #> esxcli software vib remove -n nmlx5-core ... -
Page 54: Updating Adapter Firmware
Updating Adapter Firmware Each adapter card is shipped with the latest version of qualified firmware at the time of manufacturing. However, Mellanox issues firmware updates occasionally that provide new features and bug fixes. To check that your card is programmed with the latest available firmware version, download the mlxup firmware update and query utility. -
Page 55: Troubleshooting
Troubleshooting General Troubleshooting Server unable to find the adapter • Ensure that the adapter is placed correctly • Make sure the adapter slot and the adapter are compatible Install the adapter in a different PCI Express slot • Use the drivers that came with the adapter or download the latest •... -
Page 56: Windows Troubleshooting
Mellanox Firmware Tool (MFT) Download and install MFT: http://www.mellanox.com/ content/pages.php?pg=management_tools&menu_section=34 Refer to the User Manual for installation instructions. Once installed, run: mst start mst status flint -d <mst_device> q Ports Information ibstat ibv_devinfo Firmware Version Upgrade To download the latest firmware version refer to http:// www.mellanox.com/supportdownloader Collect Log File... -
Page 57: Specifications
Specifications MCX621102A[C/E/N]-ADAT Specifications Physical Size: 5.59in. x 2.71in (142.00mm x 68.90mm) Connector: Dual SFP28 Ethernet (copper and optical) Protocol Data Rate: Ethernet 1/10/25 Gb/s Support Ethernet: 25GBASE-R, 20GBASE-KR2, 10GBASE-LR,10GBASE-ER, 10GBASE-CX4, 10GBASE-CR, 10GBASE-KR, SGMII, 1000BASE-CX, 1000BASE-KX, 10GBASE-SR PCI Express Gen 3.0/4.0: SERDES @ 16.0GT/s, 8 lanes (2.0 and 1.1 compatible) Voltage: 12V Power Cable... -
Page 58: Mcx623102A[C/N]-Adat Specifications
MCX623102A[C/N]-ADAT Specifications Physical Size: 5.59in. x 2.71in (142.00mm x 68.90mm) Connector: Dual SFP56 Ethernet (copper and optical) Data Rate: Ethernet 1/10/25 Gb/s Protocol Ethernet: 25GBASE-R, 20GBASE-KR2, 10GBASE-LR,10GBASE-ER, 10GBASE-CX4, 10GBASE- Support CR, 10GBASE-KR, SGMII, 1000BASE-CX, 1000BASE-KX, 10GBASE-SR PCI Express Gen 3.0/4.0: SERDES @ 16.0GT/s, 16 lanes (2.0 and 1.1 compatible) Voltage: 12V Power Cable Type... -
Page 59: Mcx623102A[C/N/S/E]-Gdat Specifications
MCX623102A[C/N/S/E]-GDAT Specifications Physical Size: 5.59in. x 2.71in (142.00mm x 68.90mm) Connector: Dual SFP56 Ethernet (copper and optical) Data Rate: Ethernet 1/10/25/40/50 Gb/s Protocol Support Ethernet: 50GBASE-R2, 50GBASE-R4, 40GBASE-CR4, 40GBASE-KR4, 40GBASE-SR4, 40GBASE-LR4, 40GBASE-ER4, 40GBASE-R2, 25GBASE-R, 20GBASE-KR2, 10GBASE-LR, 10GBASE-ER, 10GBASE-CX4, 10GBASE-CR, 10GBASE-KR, SGMII, 1000BASE-CX, 1000BASE-KX, 10GBASE-SR PCI Express Gen 3.0/4.0: SERDES @ 16.0GT/s, 16 lanes (2.0 and 1.1 compatible) Voltage: 12V... -
Page 60: Mcx623106A[C/N/S/E]-Cdat Specifications
MCX623106A[C/N/S/E]-CDAT Specifications Physical Size: 5.59in. x 2.71in (142.00mm x 68.90mm) Connector: Dual QSFP56 Ethernet (copper and optical) Data Rate: Ethernet 1/10/25/40/50/100 Gb/s Protocol Ethernet: 100GBASE-CR4, 100GBASE-KR4, 100GBASE-SR4, 50GBASE-R2, 50GBASE-R4, 40GBASE- Support CR4, 40GBASE-KR4, 40GBASE-SR4, 40GBASE-LR4, 40GBASE-ER4, 40GBASE-R2, 25GBASE-R, 20GBASE-KR2, 10GBASE-LR,10GBASE-ER, 10GBASE-CX4, 10GBASE-CR, 10GBASE-KR, SGMII, 1000BASE-CX, 1000BASE-KX, 10GBASE-SR PCI Express Gen 3.0/4.0: SERDES @ 16.0GT/s, 16 lanes (2.0 and 1.1 compatible) Voltage: 12V... -
Page 61: Mcx623106P[C/N/E]-Cdat Specifications
MCX623106P[C/N/E]-CDAT Specifications Physical Size: 5.59in. x 2.71in (142.00mm x 68.90mm) Connector: Dual QSFP56 Ethernet (copper and optical) Data Rate: Ethernet 1/10/25/40/50/100 Gb/s Protocol Ethernet: 100GBASE-CR4, 100GBASE-KR4, 100GBASE-SR4, 50GBASE-R2, 50GBASE-R4, 40GBASE- Support CR4, 40GBASE-KR4, 40GBASE-SR4, 40GBASE-LR4, 40GBASE-ER4, 40GBASE-R2, 25GBASE-R, 20GBASE-KR2, 10GBASE-LR,10GBASE-ER, 10GBASE-CX4, 10GBASE-CR, 10GBASE-KR, SGMII, 1000BASE-CX, 1000BASE-KX, 10GBASE-SR PCI Express Gen 3.0/4.0: SERDES @ 16.0GT/s, 16 lanes (2.0 and 1.1 compatible) Voltage: 12V... -
Page 62: Mcx623105A[N/E]-Cdat Specifications
MCX623105A[N/E]-CDAT Specifications Physical Size: 5.59in. x 2.71in (142.00mm x 68.90mm) Connector: Single QSFP56 Ethernet (copper and optical) Data Rate: Ethernet 1/10/25/40/50/100 Gb/s Protocol Ethernet: 100GBASE-CR4, 100GBASE-KR4, 100GBASE-SR4, 50GBASE-R2, 50GBASE-R4, 40GBASE- Support CR4, 40GBASE-KR4, 40GBASE-SR4, 40GBASE-LR4, 40GBASE-ER4, 40GBASE-R2, 25GBASE-R, 20GBASE-KR2, 10GBASE-LR,10GBASE-ER, 10GBASE-CX4, 10GBASE-CR, 10GBASE-KR, SGMII, 1000BASE-CX, 1000BASE-KX, 10GBASE-SR PCI Express Gen 3.0/4.0: SERDES @ 16.0GT/s, 16 lanes (2.0 and 1.1 compatible) Voltage: 12V... -
Page 63: Mcx623105A[C/N/S/E]-Vdat Specifications
MCX623105A[C/N/S/E]-VDAT Specifications Physical Size: 5.59in. x 2.71in (142.00mm x 68.90mm) Connector: Single QSFP56 Ethernet (copper and optical) Data Rate: Ethernet 1/10/25/40/50/100/200 Gb/s Protocol Ethernet: 200GBASE-CR4, 200GBASE-KR4, 200GBASE-SR4, 100GBASE-CR4, 100GBASE- Support KR4, 100GBASE-SR4, 50GBASE-R2, 50GBASE-R4, 40GBASE-CR4, 40GBASE-KR4, 40GBASE- SR4, 40GBASE-LR4, 40GBASE-ER4, 40GBASE-R2, 25GBASE-R, 20GBASE-KR2, 10GBASE-LR, 10GBASE-ER, 10GBASE-CX4, 10GBASE-CR, 10GBASE-KR, SGMII, 1000BASE-CX, 1000BASE- KX, 10GBASE-SR PCI Express Gen 3.0/4.0: SERDES @ 16.0GT/s, 16 lanes (2.0 and 1.1 compatible) -
Page 64: Dual-Port Sfp28/Sfp56 X8 Adapter Cards Mechanical Drawing
For the 3D Model of the card, please refer to 3D Models at http://www.mellanox.com/page/ 3d_models. All dimensions are in millimeters. All the mechanical tolerances are +/- 0.1mm. Dual-Port SFP28/SFP56 x8 Adapter Cards Mechanical Drawing Dual-Port SFP28/SFP56 x16 Adapter Cards Mechanical Drawing ... -
Page 65: Single-Port Qsfp56 X16 Adapter Cards Mechanical Drawing
Single-Port QSFP56 x16 Adapter Cards Mechanical Drawing Dual-Port QSFP56 x16 Adapter Cards Mechanical Drawing Bracket Mechanical Drawing All dimensions are in millimeters. All the mechanical tolerances are +/- 0.1mm. -
Page 66: Dual-Port Sfp28/Sfp56 Adapter Card
Dual-Port SFP28/SFP56 Adapter Card Short Bracket Tall Bracket Single-Port QSFP56 Adapter Card Short Bracket Tall Bracket... -
Page 67: Dual-Port Qsfp56 Adapter Card
Dual-Port QSFP56 Adapter Card Short Bracket Tall Bracket... -
Page 68: Finding The Mac On The Adapter Card
Finding the MAC on the Adapter Card Each Mellanox adapter card has a different identifier printed on the label: serial number and the card MAC for the Ethernet protocol. The product revisions indicated on the labels in the following figures do not necessarily represent the latest revisions of the cards. - Page 69 MCX623102AS-GDAT Board Label Example MCX623106AS-CDAT Board Label Example MCX623106AC-CDAT Board Label Example MCX623106AN-CDAT Board Label Example MCX623105AC-VDAT Board Label Example MCX623105AN-VDAT Board Label Example...
- Page 70 MCX623105AS-VDAT Board Label Example ...
-
Page 71: Document Revision History
Document Revision History Date Revision Description of Changes Sep. 2020 Updated power numbers in "Specifications". Aug. 2020 Updated power numbers in "Specifications". Aug. 2020 Updated LED specifications in "Interfaces". Jul. 2020 Updated power numbers in "Specifications". Jul. 2020 Updated power numbers in "Specifications". Jun. - Page 72 NVIDIA accepts no liability related to any default, damage, costs, or problem which may be based on or attributable to: (i) the use of the NVIDIA product in any manner that is contrary to this document or (ii) customer product designs.
- Page 73 NVIDIA, the NVIDIA logo, and Mellanox are trademarks and/or registered trademarks of Mellanox Technologies Ltd. and/or NVIDIA Corporation in the U.S. and in other countries. Other company and product names may be trademarks of the respective companies with which they are associated.