Table of Contents
Advertisement
Quick Links
Advertisement
Table of Contents

Related Manuals for Whistler 1675


Summary of Contents for Whistler 1675
- Page 1 OWNER’S MANUAL 1675 LASER/RADAR DETECTOR...
- Page 2 If you have questions concerning the operation of this Whistler product please call consumer relations: 1-800-531-0004 Hours: Monday - Friday 8:00 am - 5:00 pm CST Please keep the receipt in a safe place. If the unit is returned without a dated proof of purchase an out of warranty service charge applies.
- Page 3 System™ keeping you informed of road hazards and adverse weather. Plus, Whistler’s unique Stay Alert™ feature tests dri- ver’s alertness on long solo trips. Whistler’s 1675 also offers a digital display with safety messages to keep you informed while you drive and a compass features that shows your direction of travel.
-
Page 4: Table Of Contents
TABLE OF CONTENTS Topic Page Model Features Summary ...3 - 5 Installation ...6 - 9 • Mounting Guidelines • Dash/Visor/Windshield Mounting • Power Connection And Fuse Replacement • Compass Calibration Set-up Operation ...10 - 18 • Power On And Self-Test •... -
Page 5: Model Features Summary
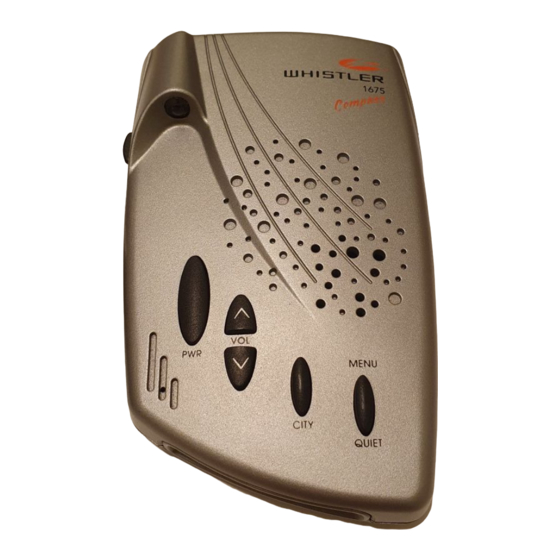
WHISTLER FEATURES Whistler 1675 Whistler’s ergonomic and user-friendly design provides a new level of operating convenience. Special features include: 1. Bracket Release Button – Provides quick and easy release of the mounting bracket. 2. Power Jack – Provides connection for the power cord. - Page 6 WHISTLER FEATURES 6. High Visibility Display – Provides distinct visual confir- mation of signals detected, signal strength, and indicates engaged modes of operation. 7. Quiet/Menu Button - Pressing QUIET before a signal is detected engages Auto Quiet Mode which automatically reduces the audio level after the initial warning to a low audio level setting.
- Page 7 WHISTLER FEATURES Accessories Accessories included are highly functional and easy to use. Power Cord - Connects to the unit’s power jack and your vehicle’s lighter socket. Windshield Bracket - Allows installation of unit on your vehicle’s windshield. Hook & Loop Fasteners - Designed to secure the unit on...
-
Page 8: Installation
INSTALLATION Mounting Guidelines • Mount the unit as low and level as possible near the center of the windshield. Unit must be level for compass to function properly. • Do not mount your unit behind wipers, ornaments, mirrored sunscreens, etc. These obstructions have metal surfaces which can affect radar and laser signals and reduce critical warning time. - Page 9 INSTALLATION shield bracket. Press the bracket release button and remove the detector before bending. Dash Mounting • Make sure the mounting location you have chosen is relatively level and is clean and dry. Clean with isopropyl alcohol if necessary to remove any waxes or polishes. •...
- Page 10 INSTALLATION Visor Mounting (optional accessory) • Slide the visor bracket into the bracket mounting slot. • Clip the visor bracket onto the visor making sure it is relatively level and has a clear view of the road. Slide on view Insert into bracket mounting slot.
-
Page 11: Compass Calibration Set-Up
INSTALLATION Compass Calibration Set-up The unit will need to be calibrated in order for the com- pass to provide accurate readings. To calibrate the unit, perform the following procedure: 1. Mount the unit level in the center of the vehicle’s wind- shield in which it will be used. -
Page 12: Operation
OPERATION Power On And Self-Test Each time your Whistler detector is turned on, an auto- matic self-test sequence confirms that the speaker and visual displays are functional. • Press (Power) or apply Power. Display reads: WHISTLER LASER SR ON VG2 OFF... -
Page 13: Compass Mode
No Audio Level Highest Level 7 Compass Mode The 1675 is programmed from the factory in “Combo Mode”. Combo mode means that the unit provides both compass readings as well as detecting laser/radar signals. Through the “Option Select Mode”, either laser/radar or compass features can be turned off meaning, Radar equals detection of all police bands and laser;... - Page 14 OPERATION Auto Quiet Mode Auto Quiet reduces the selected audio level to level (1) approximately 5 seconds after a radar or safety radar sig- nal is detected. The alert for any new signal within 20 sec- onds will resume at level (1). Auto Quiet does not affect VG-2 or laser alerts.
- Page 15 OPERATION City/City 1/City 2 Mode Whistler’s Three Stage City Mode is designed to reduce the annoyance of automatic door openers, intrusion alarms and other devices which share frequencies with police radar. • Press City to engage City. Display reads: CITY •...
-
Page 16: Dim/Dark Mode
OPERATION Dim/Dark Mode Dim/Dark Mode reduces the illumination of the display. • Press and hold (Power) for 2 seconds to reduce illumi- nation to a Dim setting. Display reads: • Pressing and holding for 2 seconds a second time engages Dark Mode. Display reads: DARK Dim or dark can be engaged during an alert. -
Page 17: Stay Alert
OPERATION Stay Alert Feature The Stay Alert Feature is designed to test a driver’s alert- ness. To engage (when unit is not alarming): • Press and hold City for approximately 2 seconds. Release button during or immediately after the alert is given. -
Page 18: Option Select Mode
OPERATION Option Select Mode Entering Option Select Mode allows you to customize options such as Tone Select, Compass Select, Abbreviated Power Up Sequence and VG-2 Mode. When selecting options, the must be pressed within 20 seconds or options mode will automatically be exited. To enter: Press *Display To Change,... -
Page 19: Teach/Tutorial Mode
OPERATION Teach/Tutorial Mode Provides simulated alerts for each type of signal. • Press City and (Quiet) simultaneously and release. Display reads: TEACH Quiet mode can also be accessed while Teach/Tutorial mode is engaged. • Press (Power) to exit. -
Page 20: Vehicle Battery Saver Mode
OPERATION Vehicle Battery Saver Mode The Vehicle Battery Saver Mode automatically shuts off your detector within 3 hours if you forget to turn it off. The timer is reset if the detector is turned off, unplugged or any button is pressed before the 3 hours have expired. The detector will alert you with an audible and visual warning before it shuts off. -
Page 21: Radar, Laser And Vg-2 Alerts
RADAR ALERTS Speed Radar Audio/Visual Alerts When X, K or Ka is detected the band ID and signal strength is displayed. The audio alert is continuous and has a geiger counter-like pattern. The faster the beep the closer or stronger the radar source. Example: Ka Band Detected Display... - Page 22 SAFETY RADAR ALERTS In communities where transmitters are located, the Safety Warning System displays over 60 text messages. When Safety Radar is detected the audio alert is geiger counter- like. Safety Warning System Text Example: Poor Road Surface: CAUTION POOR ROAD SURFACE Note: Not all areas have Safety Warning System transmitters.
-
Page 23: Laser Audio/Visual Alerts
LASER/VG-2 ALERTS Laser Audio/Visual Alerts When a laser signal is detected the word “Laser” and sig- nal strength is displayed, the audio alert is continuous for a minimum of 3 seconds. Example: LASER The more “|||” the closer the laser source. VG-2 Audio/Visual Alerts Note: You must turn this feature on in option select mode before it will detect VG-2. -
Page 24: Reset Features
RESET FEATURES Reset Features All user features can be reset to factory settings. • Unplug Power Cord from unit. • Press and hold (Power) and • Plug Power Cord into unit. • Wait for 2 beeps. • Release . Unit is now reset. Audio to level (4). -
Page 25: Care And Maintenance
CARE & MAINTENANCE Care And Maintenance During the summer months, avoid prolonged exposure to direct sunlight by removing your unit from the dash when your vehicle is parked for an extended period of time. Do not spray water, cleaners or polishes directly onto the unit. -
Page 26: Troubleshooting Guide
PROBLEM: No display or audio. • Check fuse in Whistler plug; replace if necessary with a 2 amp 3AG type. • Check fuse for lighter socket; replace if necessary. -
Page 27: Are Detectors Legal
ARE DETECTORS LEGAL? In Most States YES! Laser detectors are completely legal in every state when used in automobiles or light trucks (under 10,000 lbs.). Similarly, when used in automobiles or light trucks, radar detectors are legal in almost every state. Exceptions are Virginia and Washington, D.C., which have local regulations restricting the use of radar receivers in any vehicle. -
Page 28: Speed Monitoring Technologies
For best protection, keep these points in mind: • Because your vehicle’s license plate or headlights are the laser gun’s primary targets, mounting your Whistler detector on the dashboard can improve laser detection at short range. • Do not follow closely behind any vehicle you cannot see through. If you can’t see past a vehicle ahead of you, chances are your detector won’t... -
Page 29: Other Speed Detection Systems
SPEED MONITORING TECHNOLOGIES Other Speed Detection Systems Several techniques other than radar or laser are used to measure vehicle speeds. When these methods are being used, no detector can provide a warning. These techniques include: • Pacing - A patrol car drives behind you and matches your driving speed. -
Page 30: Warranty Information
All express or implied warranties for this product are limited to one year. Whistler is not liable for damages arising from the use, misuse, or operation of this product. - Page 31 WARRANTY INFORMATION IMPORTANT: Whistler will not assume responsibility for loss or damage incurred in shipping. Therefore, please ship your unit insured with return receipt requested. 2. Include with your unit the following information, clearly printed: • Your name and street address (for shipping via UPS), and a daytime telephone number.
-
Page 32: Warranty Information
• The unit has been abused, modified, installed improper- ly, or had its housing removed. The minimum out of warranty service fee for your Whistler detector is $55.00 (U.S.). If you require out of warranty serv- ice, please return your unit as outlined in the section “Service Under Warranty”... -
Page 33: Specifications
SPECIFICATIONS • Dimensions: 1.6"H x 2.9"W x 4.5"L • Weight: 7.5 oz. • Laser Wavelength: 905 ± 50 nanometers (nm) • Radar Frequencies: 10.500 - 10.550 GHz (X Band) 24.050 - 24.250 GHz (K Band ) 33.400 - 36.000 GHz (Ka Superwideband) •... -
Page 34: Accessories
ACCESSORIES The following accessories can be ordered directly from Whistler by calling 1-800-531-0004. Order Description Code 202138 Visor Bracket 202140 Windshield Bracket Kit 206294 *Modular Lighter Plug (Requires 206550 or 206551) 206550 *Modular Straight Power Cord (5') (Requires 206294) 206551... - Page 35 NOTES...
- Page 36 TEL (501) 273-6012 FX (501) 273-2927 PRODUCT DEVELOPMENT CENTER 25 Industrial Ave. Chelmsford, MA 01824 TEL (978) 244-1400 FX (978) 244-1492 CUSTOMER RETURN CENTER 1201 N. Dixieland Rd. Rogers, AR 72756 Consumer Relations Tel (800) 531-0004 P/N 1675MAN, © WHISTLER 2000...