Electrolux EVE616 Series Quick Start Manual
Hide thumbs
Also See for EVE616 Series:
- User manual (72 pages) ,
- Installation manual (2 pages) ,
- User manual (68 pages)
Advertisement
Quick Links
Dear Customer,
Thank you for purchasing an Electrolux oven. You've chosen a product that brings with it
decades of professional experience and innovation. Intuitive and seamless, it has been
designed with you in mind. We want to give you the tools to make great tasting food and
to enrich your home life.
Welcome to Electrolux.
Ready
Before you start, please make sure:
O Your oven has been correctly installed
by a qualified person.
O Your oven has power and is switched on.
O You've removed all relevant packaging.
Set
Now let's get your oven ready to use:
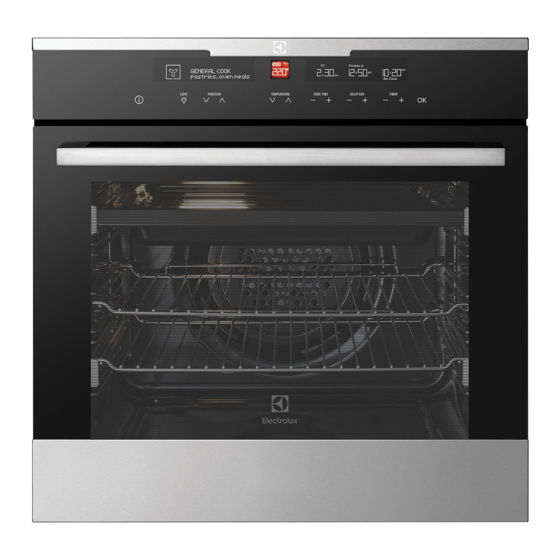
Get to know your oven control panel:
ON/OFF
1
Upper/Lower level selector
2
(EVE626, EVE636 only)
Light on/off
3
Cooking function selector
4
Steam on/off
5
Temperature control
6
This is a Quick Start Guide. Please refer to user manual online
for detailed information and installation.
To access your detailed user manual online, simply scan the QR code on
your smart phone.
For more detailed information and installations guide refer to user manuals
at electrolux.com.au/support/manuals/
11
12
1
2
3
4
5
Cook time control
7
Delay end control
8
Set clock and timer control
9
Instant confirm
10
Cooking function icon
11
Cooking function display
12
EVE616, EVEP616, EVEP618, EVE626,
EVEP626, EVE636 Series
Most of the packaging materials
can be recycled. Please dispose of
them at your local recycling centre
or in your own recycling bin.
13
14
15
6
7
8
13
14
15
16
17
Quick Start Guide
16
17
9
10
Temperature display
Cook time display
Delay end display
Clock/Timer display
Water drawer
(EVEP618 only)
Advertisement

Related Manuals for Electrolux EVE616 Series


Summary of Contents for Electrolux EVE616 Series
- Page 1 EVEP626, EVE636 Series Dear Customer, Thank you for purchasing an Electrolux oven. You’ve chosen a product that brings with it decades of professional experience and innovation. Intuitive and seamless, it has been designed with you in mind. We want to give you the tools to make great tasting food and to enrich your home life.
- Page 2 Set! Installing the oven accessories Install telescopic slides to the side racks. Refer to installation guide supplied with oven slides. 2. Insert side racks 1. Insert the rear peg into the rear access hole, ensuring peg is fully inserted. 2. Then insert the front peg into the front access hole and push in firmly.
- Page 3 You’re ready to use your new Electrolux appliance. A few tips from us: Remember to pre-heat each time For best cooking results pre-heat the oven. Pre-heating allows the oven to reach the required temperature quickly and efficiently as well as cook food at the correct temperature for the entire cook time. Recommended pre-heat time is 30 mins for baking and 3 minutes for grilling.
- Page 4 EXAMPLE 00000000000 00000000000 Step 3 Text image to 0488 446 622 (AUS only) or upload at electrolux.com.au/photoregister Need more help? To access your detailed user manual online, simply scan the QR code on your smart phone. Contact us if you need more help...