Advertisement
Quick Links
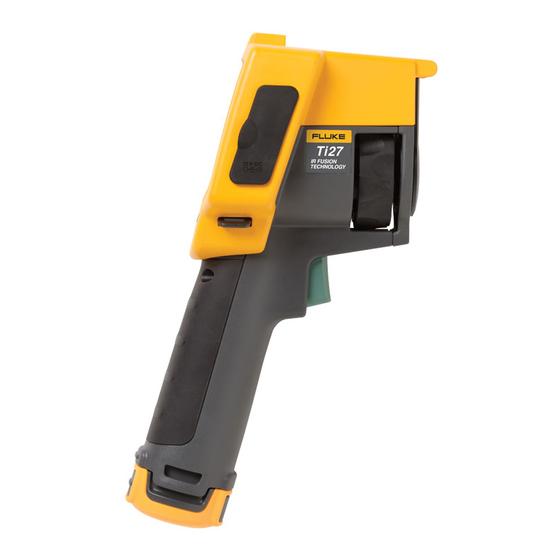
QuickStart:
Battery Life
Indicator
F1
F2
(On/Off)
1. MEMORY:
Insert SD memory card into the slot under the rubber cover on the side of the camera.
2. POWER:
Insert a fully charged battery in to the base of the hand grip. The battery life is indicated in the upper
left corner of the LCD display. You can also press and hold the battery symbol on the side of the battery.
3. START:
Press and hold the F2 button for 1-2 seconds until you hear an audible tone signaling camera startup.
Swing the attached lens cover up and lock in the open position on the top of the camera.
The LCD display will turn on and you will see the default start up screen (as above) showing a live
infrared image.
To turn the camera off hold the F2 button until an audible tone signals it is powering down.
4. AUTO ADJUST:
the last use. "Auto" or "Manual" will be displayed in the upper right corner of the LCD screen.
If not on "Auto" mode push F2 until "Range" shows
above the F3 button, then press the F3 [Range]
button.
Press F3 [Auto] to enter Continues Auto Mode.
NOTE:
Fast Auto/Manual Toggle:
5. FOCUS:
Focus by slowly rotating the manually focusing ring on the infrared camera lens. You may need to
readjust Level and Span after focusing.
© 2011 The Snell Group / 322 N. Main St. / Suite 8 / Barre, VT 05641 / 800.636.9820
FLUKE Ti27, TiR27, Ti29, TiR29 Ti32, TiR32
Speaker
Microphone
Backlight
Auto/Manual
Mode Indicator
Range/Span/Level
F3
(Level and Span) The default start-up mode is the mode in which the power was shut off after
See MANUAL ADJUST below.
Memory Card Slot
Power/Charge
Indicator
Trigger
(Pause image)
Battery
1
Page
Lens Cover
(Swing up and lock)
Visual
Camera
IR Focusing Ring
/
www.thesnellgroup.com
Advertisement

Related Manuals for Fluke Ti27


Summary of Contents for Fluke Ti27
- Page 1 QuickStart: FLUKE Ti27, TiR27, Ti29, TiR29 Ti32, TiR32 Speaker Lens Cover Memory Card Slot Microphone (Swing up and lock) Power/Charge Battery Life Backlight Indicator Auto/Manual Mode Indicator Range/Span/Level Indicator Visual Camera Trigger IR Focusing Ring (Pause image) (On/Off) Battery 1. MEMORY: Insert SD memory card into the slot under the rubber cover on the side of the camera.
- Page 2 QuickStart: FLUKE Ti27, TiR27, Ti29, TiR29 Ti32, TiR32 6. MANUAL ADJUST: (Level and Span) Method #1 Select Auto/Level mode: From the default start-up screen push F2 until “Range” shows above the F3 button, then press the F3 [Range] button.