Advertisement
Quick Links
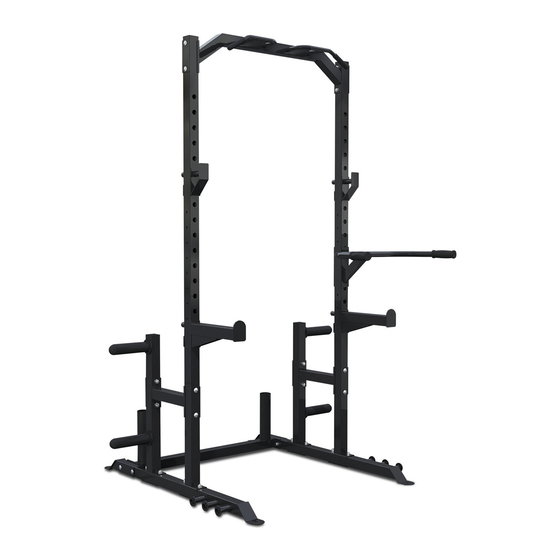
PR-2 HALF RACK
USER MANUAL
Product may vary slightly from the item pictured due to model upgrades.
Read all instructions carefully before using this product.
Retain this owner's manual for future reference.
NOTE:
This manual may be subject to updates or changes. Up to date manuals are available through our
website at www.lifespanfitness.com.au
Advertisement

Summary of Contents for Cortex PR-2
- Page 1 PR-2 HALF RACK USER MANUAL Product may vary slightly from the item pictured due to model upgrades. Read all instructions carefully before using this product. Retain this owner’s manual for future reference. NOTE: This manual may be subject to updates or changes. Up to date manuals are available through our...
- Page 3 TABLE OF CONTENTS Important Safety Instructions ....... . 05 II. Parts List ............06 III.
-
Page 5: Important Safety Instructions
I. IMPORTANT SAFETY INSTRUCTIONS WARNING: Read all instructions before using this machine. • Install the product on a flat level surface • Place your unit on a solid, level surface when in use. • Never allow children on or near the machine. •... -
Page 6: Parts List
II. PARTS LIST Part No. Item No. Name N.W. PR2-1 Main Base Frame 4.948 PR2-2 Right Base Frame 4.489 PR2-3 Left Base Frame 4.489 PR2-4 Tall Vertical Frame 6.611x2 PR2-5 Short Vertical Frame 2.827x2 PR2-6 Lat Support 4.033 PR2-7 Center Cross Support 1.498x2 PR2-8 Plate Support... - Page 7 Ø25x2.0 Ø60x1.5 Ø25x2.0 Ø25x2.0 25x50x2.0 Ø32x2. 0 Ø25x2.0 Ø25x50x2.0 Ø25x2.0 Ø25x2.0 Ø25x2.0 Ø25x2.0 Ø25x2.0 PARTS LIST |...
-
Page 8: Assembly Instructions
III. ASSEMBLY INSTRUCTIONS STEP 1 1. Attach the Tall Vertical Frame (4#) and Short Vertical Frame (5#) to the Right Base Frame (2#). Secure it with: - 2x Strengthen Board (10#) - 4x Carriage Bolt M10*70mm (16#) - 4x Washer 10 (14#) - 4x M10mm Aircraft Nut (15#) 2. - Page 9 STEP 2 1. Attach the Tall Vertical Frame (4#) and Short Vertical Frame (5#) to the Left Base Frame (3#). Secure it with: -2x Strengthen Board (10#) -4x Carriage Bolt M10*70mm (16#) -4x Washer Ø10 (14#) -4x M10mm Aircraft Nut (15#) 2.
- Page 10 STEP 3 1. Attach P and Q to the Main Base Frame (1#). Secure it with: - 2x Strengthen Board (10#) - 4x Carriage Bolt M10*70mm (16#) - 4x Washer Ø10 (14#) - 4x M10mm Aircraft Nut (15#) 2. Tighten all the bolts and nuts. | ASSEMBLY INSTRUCTIONS...
- Page 11 STEP 4 1. Plug the Dip Frame (9#) into the Tall Vertical Frame (4#). You can choose the left side or right side. Push the Ball Pin (25#) into the holes on Tall Vertical Frame (4#). ASSEMBLY INSTRUCTIONS |...
- Page 12 STEP 5 1. Attach the Lat Support (6#) to the left and right Tall Vertical Frame (4#). Secure it with: - 2x Strengthen Board (10#) - 4x Carriage Bolt M10*70mm (16#) - 4x Washer Ø10 (14#) - 4x M10mm Aircraft Nut 2.
- Page 13 STEP 6 1. Plug the 2x Bar Support (8#) into the Left and Right Tall Vertical Frame (4#). 2. Plug the 2x Bar Rest (19#) into the Left and Right Tall Vertical Frame (4#). ASSEMBLY INSTRUCTIONS |...
-
Page 14: Warranty
IV. WARRANTY AUSTRALIAN CONSUMER LAW Many of our products come with a guarantee or warranty from the manufacturer. In addition, they come with guarantees that cannot be excluded under the Australian Consumer Law. You are entitled to a replacement or refund for a major failure and compensation for any other reasonably foreseeable loss or damage. - Page 16 WWW.L IF ESPAN F ITNE S S . COM . A U...