
Summary of Contents for Rangemaster GEO
- Page 1 BOILER FOR 4 IN 1 TAP Installation Instructions & Aftercare Information U110651-02a Instructions for GEO and AGA 4 in 1 tap boiler units...
-
Page 2: Table Of Contents
Contents Before you start... User display and interface Settings Setting the water temperature Using the Product Descaling the Boiler system Filter Draining the Boiler system Troubleshooting & maintenance 10. Specifications 11. Circuit Diagram 12. Certification and Regulations 13. Warranty terms and conditions... -
Page 3: Before You Start
Before you start... Important safety and usage Day to day considerations: considerations: If the product is going to remain unused and unattended for a prolonged period, the boiler WARNING: This appliance can be used by children should be switched off. If the period is extended aged from 8 years and above and persons with beyond a typical holiday then we recommend the reduced physical, sensory or mental capabilities or... - Page 4 Sensible fire safety precautions: Do not store or use petrol or other flammable rags, paper aerosols vapours and liquids in the vicinity of this or any other appliance. The air gaps as described earlier in this guide should be respected and not blocked at any time.
-
Page 5: User Display And Interface
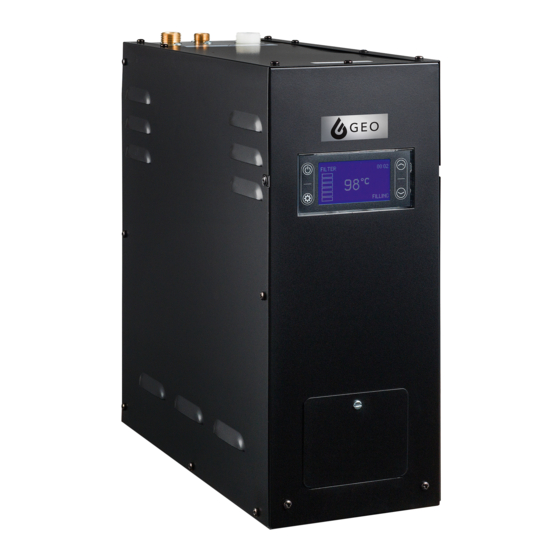
User display and interface Preferred temperature Power button Filter reminder Scroll arrows Time FILTER 08:34 ° OVER TEMP FILLING Menu button Status information Status indicator The product has a simple 4 button interface. The display will indicate the status of the boiler and the estimated remaining filter life so you know when to replace the filter. - Page 6 Product must be descaled now otherwise your warranty at risk, contact service agent on top Descale stage 1 of boiler for descaling solution, only use AGA Rangemaster descaler. Descale stage 2 Descale delayed for 4 days, any resulting service request is now chargeable.
-
Page 7: Settings
Settings Clock Fig. 3.1 By pressing the ‘MENU’ button, the SET CLOCK will be highlighted (Fig. 3.1). SET CLOCK SCREEN SETTINGS Press ‘MENU’ to enter the SET CLOCK menu. The time LANGUAGE will be displayed and the hour values will be flashing ECO MODE (Fig. - Page 8 Note: Whilst in ‘Child Lock’ mode, the boiler will still dispense Fig. 3.4 but the boiler settings cannot be altered. Setting the Eco mode SET CLOCK SCREEN SETTINGS The boiler features 3 levels of energy saving: LANGUAGE ECO MODE ECO MODE (ON) After two hours of inactivity the boiler automatically enters Eco mode (Fig.
-
Page 9: Setting The Water Temperature
Setting the water temperature The current preferred temperature is displayed on the Fig. 4.1 centre of the screen. Once the boiler reaches this temperature you will see a FILTER 08:34 steady ‘READY’ status appear on the screen. ° The default temperature is 98°C but you can set the desired temperature anywhere between 80-98°C to suit your personal OVER TEMP FILLING... -
Page 10: Using The Product
Using the Product Thank you for choosing this product. By reading this guide Fig. 5.1 you will ensure that the product is used safely and will give its best performance. Throughout this guide, symbols are used to highlight key points or safety considerations. Information point or tip. - Page 11 When dispensing hot water always be mindful to Fig. 5.3 keep your hands and arms from being under the spout exit. Even though it is thermally insulated, you should avoid touching the very end of the spout, especially immediately after dispensing hot water. This product has a unique safety system by using the HotFob magnetic key to dispense the near boiling water.
-
Page 12: Descaling The Boiler System
Descaling the Boiler system CAUTION: Harmful if swallowed. Irritating to The filter system provided with this product will help to eyes and skin. KEEP OUT OF REACH OF prevent of the calcification (scaling) of the boiler. However CHILDREN. Avoid contact with skin and eyes. it will be required from time to time that the boiler will need In case of contact with eyes, rinse immediately to be descaled, drained and refilled to ensure the maximum... - Page 13 For AGA Rangemaster descaler sales please contact the service number on the top of the boiler. Each time the drain valve is used, you should always...
-
Page 14: Filter
Filter Checking the filter life Does my filter need replacing? The premium filter used with the product system is designed Your boiler displays a ‘check filter reminder status bar’ and has for three functions: an audible beep when it reaches its estimated end point. This is based on ‘average’... - Page 15 Due to the unique filter formulation and technology, Fig. 7.1 conventional hardness test strips or digital meters cannot accurately show if the ION media (boiler scale protection STATUS 2553 0000 and hardness reduction media) within the filter has been SW:H01 OFFSET 0361 WATER LEVEL -2 NORMAL...
- Page 16 Unpack the new filter and check for any transport the GEO or AGA 4in1 product. If the filter is removed damage, write the replacement date on the filter label or exchanged for an alternate model it may have a...
- Page 17 Cleaning your mixer tap and boiler DO NOT use any proprietary household domestic cleaning product on either the mixer tap or the boiler. The mixer tap and HotFob should only be cleaned regularly with mild dish soap, warm water and a non-abrasive cloth. Once the tap is clean, please ensure you rinse with warm water before drying thoroughly to prevent water marks.
-
Page 18: Draining The Boiler System
Draining the Boiler system It might be necessary from time to time to drain the boiler Fig. 8.1 system during servicing and descaling. The HotFob key can be used to drain most of the water from the tank, but to fully empty the tank, the drain valve (A12) must be used. -
Page 19: Troubleshooting & Maintenance
Troubleshooting & maintenance Servicing and maintenance of this product must With regular filter replacements and scheduled maintenance, be carried out by persons having knowledge and this product will offer you good service. Like any product, practical experience of the appliance, in particular it contains working parts that may require service or as far as safety and hygiene are concerned. - Page 20 Troubleshooting tips: Boiler Issue: Likely fault(s): Action to take: Power off. Check the power and any fuses/ Check the fuses No display visible. are 13A. Hold the power key to turn on the boiler. Fuse blown. Vent connection tee incorrectly added after sink The vent tee (B2) must be on the sink side of any trap.
- Page 21 Taste & clarity issues: Taste can be a very subjective topic. Below are some of the common questions relating to filtered water. The near boiling filtered water has its own separate channel within the mixer tap, whilst the unfiltered cold, filtered cold and hot water share a pathway.
-
Page 22: Specifications
10. Specifications Mixer Tap 4 way mixer tap: Cold (unfiltered) water* Cold (filtered) water* Functionality Hot (domestic) water* Hot (80-98°C) water *via a common pathway Water temperature limited to a maximum of 98°C Removable child safe ‘HotFob’ to dispense hot water Safety features Thermally insulated exterior surface Constant flow rate of hot water, reduced spitting &... - Page 23 Filter cartridge Filter only: 95Ø x 245mm Physical dimensions Filter and head: 100Ø x 315mm Filter weight When empty: 0.96kg Minimum cold water pressure required 2.0 bar Maximum cold water pressure 8 bar Filter mesh rating 5 micron nominal rating Activated carbon block Primary filter contents Ion selective media...
-
Page 24: Circuit Diagram
11. Circuit Diagram Description Boiler unit 1.5m Power lead Boiler mounting bracket Boiler bracket to base unit screw Boiler bracket screw Data connection lead ½” Safety / steam / overflow vent outlet 3/8” Hot water outlet ¾” Filtered water inlet Screw –... - Page 25 Description ½” BSPF x ¼” push fit ¼” tube (drain) 1 ½” x 3” Waste extension piece (for use with one bowl sinks only) 1 ½” x 1 ½” x 22mm Waste tee 22mm Olive Plastic compression nut 22mm copper pipe with elbow, installer fabricated to suit. Plastic compression nut 22mm Olive ½”...
-
Page 26: Certification And Regulations
12. Certification and Regulations European Directives: As a producer and a supplier of appliances we are committed to the protection of the environment and are in the compliance with the WEEE directive. All our electric products are labelled accordingly with the crossed out wheeled bin symbol. -
Page 27: Warranty Terms And Conditions
13. Warranty terms and conditions If you believe your product has developed a fault firstly These installation guidelines have been prepared for isolate the product from the mains power and water your direction and you must exercise due care at all then please contact the service agent (details shown times, We do not accept responsibility for problems of the top of the boiler), do not wait to do this once... - Page 28 Notes...
- Page 29 Notes...
- Page 30 Notes...
- Page 31 Notes...
- Page 32 Clarence Street, Royal Leamington Spa, Warwickshire, CV31 2AD, England. Tel: (+44) 0344 5765597 GEO Email: consumer@agarangemaster.co.uk AGA Email: customerrelations@agarangemaster.co.uk...