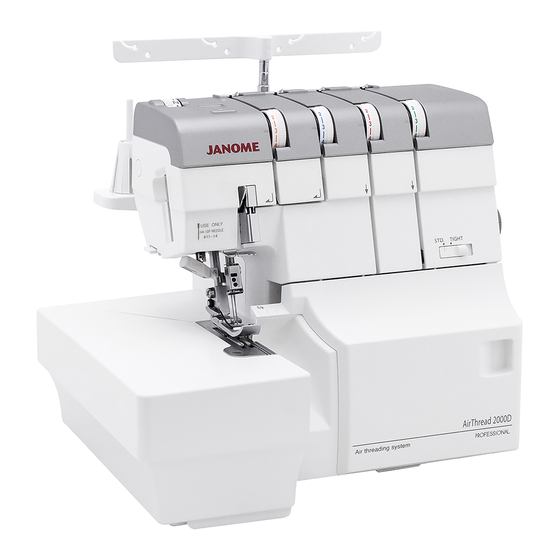
Janome AirThread 2000D Professional Service Bulletin
Hide thumbs
Also See for AirThread 2000D Professional:
- Instruction manual (59 pages) ,
- Instruction book (65 pages)
Table of Contents
Advertisement
Quick Links
Advertisement
Table of Contents

Related Manuals for Janome AirThread 2000D Professional


Summary of Contents for Janome AirThread 2000D Professional
- Page 2 Required Tools and Gauges Phillips Head Screwdriver (Large) Phillips Head Screwdriver (Medium) Phillips Head Screwdriver (Fine Tip) Flat Head Screwdriver (Large) Flat Head Screwdriver (Medium) Needle Clamp Screwdriver (Small)
- Page 3 Required Tools and Gauges Needle Plate Screwdriver (Small) 1.5mm Allen Key 2.0mm Allen Key 2.5mm Allen Key 3.0mm Allen Key 1.5mmHexagon Driver 2.0mm Hexagon Driver 2.5mm Hexagon Driver...
- Page 4 Required Tools and Gauges 3.0mm Hexagon Driver 7.0mm Nut driver 7.0mm Wrench Tweezers Scissors...
- Page 5 Required Tools and Gauges Step Gauge Lower Looper Timing Gauge...
- Page 6 Required Tools and Gauges Needle Bar Gauge Set Upper Looper Timing Gauge...
-
Page 7: Top Cover Removal
Top Cover Removal Loosen the 2 screws that hold the top cover. Gently, start lifting up the top cover. ... - Page 8 Top Cover Removal Release the 6 locking hooks then remove the top cover. ...
-
Page 9: Face Plate Removal
Face Plate Removal Using the tip of the needle, gently remove the cap. Use a phillips screwdriver to loosen and remove the screw. ... - Page 10 Face Plate Removal 4-5mm Slightly lower the needle threader lever about then pull the face plate from the back to release it then remove it. ...
- Page 11 Presser Foot and Looper Cover Guide Removal Loosen the screw then remove the presser foot unit Push the looper cover door to the right to open. ...
- Page 12 Presser Foot and Looper Cover Guide Removal Loosen and remove the 2 screws. Remove the looper cover guide door. ...
-
Page 13: Belt Cover Removal
Belt Cover Removal Using the tip of the needle, gently remove the cap. Loosen and remove the screw. ... - Page 14 Belt Cover Removal Loosen and remove the screw that holds the belt cover to the bottom of the machine. Gently, start releasing the hooks. ...
- Page 15 Belt Cover Removal Hook Hook Hook Hook Once you release the 4 hooks, then remove the belt cover. ...
-
Page 16: Base Cover Removal
Base Cover Removal Do not remove Remove the 3 hinge screws together with the black rubber cushions. Remove the setscrew (circled). DO NOT remove the bottom left rubber cushion. Lift the base cover to clear the rubber cushion then remove the cover. ... - Page 17 Looper Cover Removal Important: Before you remove the looper cover, note that the detecting arm hook is positioned between the 2 C clips. When you install back the cover, please make sure to put it back the same way! Remove the 2 screws.
-
Page 18: Side Cover Removal
Side Cover Removal Remove the 2 screws. Remove the side cover door. ... -
Page 19: Front Cover Removal
Front Cover Removal Remove the screw and the needle plate. Turn the handwheel to bring the upper looper shaft to its lowest point. ... - Page 20 Front Cover Removal Loosen the screw, do not remove it. Loosen the screw, do not remove it. ...
- Page 21 Front Cover Removal Loosen the screw, do not remove it. Loosen the screw, do not remove it. ...
- Page 22 Front Cover Removal Loosen the screw, do not remove it. Loosen the screw, do not remove it. ...
- Page 23 Front Cover Removal Remove the screw. Lift the looper threader lever half way. ...
- Page 24 Front Cover Removal Push the front cover slightly up until it clears the detecting arm hook then slowly pull the cover away from the machine. Push the looper threader lever all way up then remove the front panel. ...
-
Page 25: Rear Cover Removal
Rear Cover Removal Remove the 2 screws. Remove the screw. ... - Page 26 Rear Cover Removal Loosen the screw. Remove the rear cover. ...
- Page 27 Upper Knife and Front Guard Removal Remove the hexagon bolt then remove the upper knife. Remove the 2 screws. ...
- Page 28 Upper Knife and Front Guard Removal Lift the front feed dogs slightly then start pulling the front guard away from the machine. Remove the front guard. ...
-
Page 29: Adjusting Needle Bar Height
Adjusting Needle Bar Height Remove the left needle. Install the needle plate. ... - Page 30 Adjusting Needle Bar Height The distance between the tip of the right needle (HA x 1SP#14) and the surface of the needle plate should be between 11.6mm – 12.2mm when the needle is at the highest position.
- Page 31 Adjusting Needle Bar Height Raise the needle bar to the highest point. Take the AT2000D step gauge and place it under the needle. The tip of the needle should be right on top of the gauge. Hole If an adjustment is needed, first locate the hole on the needle threader shaft.
- Page 32 Adjusting Needle Bar Height Using a 2mm hexagon driver, insert the tip of the driver into the needle threader shaft hole, lower the needle threader shaft to align it with the needle bar screw. Loosen the 2.0mm hexagon screw and move the needle bar up or down to the proper position.
- Page 33 Adjusting Presser Bar Height The distance between the bottom of the of the presser foot and the surface of the needle plate should be between 5.2mm – 5.8mm when the presser foot is up.
- Page 34 Adjusting Presser Bar Height Install the presser foot, push it all way up then tighten the screw. Raise the presser foot, insert the step gauge just under the presser foot pin then lower the presser foot.
- Page 35 Adjusting Presser Bar Height Loosen the 2.5mm hexagon screw and move the presser bar up or down to the proper position. DO NOT rotate the presser bar or the alignment with the needle plate and feed dogs will be off.
- Page 36 Adjusting Main and Sub Feed Dogs Press and hold the release lever to remove the presser foot. The highest position of main and sub feed dog should be between 0.9mm-1.1mm from the surface of the needle plate. ...
- Page 37 Adjusting Sub(Front) Feed Dogs 2.0mm screw 2.0mm adjusting screw If an adjustment is needed, loosen the 2.0mm screw then using a 2.0mm hexagon wrench, turn the 2.0mm adjusting screw Adjusting Main(Rear) Feed Dogs clockwise to raise the feed dog or counterclockwise to lower the feed dog .
- Page 38 Replacing Lower Looper Remove the needle plate. Using a pair of tweezers, gently start pushing down the clear rubber tube until the lower looper pipe and the connecting pipe are disconnected.
- Page 39 Removing and Installing Lower Looper Turn the handwheel toward you to bring the lower looper to the outmost right hand side position. Remove the screw then remove the looper. Install the looper and tighten the screw temporarily. Gently, connect the 2 metal pipes.
- Page 40 Lower Looper Height Place the lower looper gave U groove onto the lower looper shaft. The tip of the looper should be parallel with the guide line. If it is at an incorrect height, loosen the Philips head screw, move the looper up or down to the 65.7mm position.
-
Page 41: Lower Looper Timing
Lower Looper Timing Turn the handwheel to bring the needle bar to its lowest position. Bushing Insert the clamp then insert the spacer, push them up until the spacer is resting against the needle bar bushing. Tighten the wing head thumb screw. - Page 42 Lower Looper Timing Remove the black spacer. Very slowly, turn the handwheel toward you until the clamp is resting against the needle bar bushing. At this point, the tip of the lower looper should be entering the right needle, exactly as shown above. ...
- Page 43 Lower Looper Timing Locate the 7mm hexagon bolt at the bottom of the lower looper arm. To adjust, loosen the 7mm hexagon bolt slightly at the bottom of the lower looper arm, and move the lower looper arm into position. Then tighten the screw.
- Page 44 Lower Looper Timing Locate the 7mm hexagon bolt at the bottom of the lower looper arm. To adjust, loosen the 7mm hexagon bolt slightly at the bottom of the lower looper arm, and move the lower looper arm into position. Then tighten the screw.
- Page 45 Needle Guard Clearance (rear) The clearance between the needles and rear guard should between 0.05-0.25mm. Turn the handwheel to bring the needle bar to it’s lowest point. Loosen the two 2.5mm hexagon screws. Move the needle guard closer or away to obtain the proper clearance. Tighten the 2 screws.
- Page 46 Needle Guard Clearance (rear) The clearance between the needles and rear guard should between 0.05-0.25mm. Turn the handwheel to bring the needle bar to it’s lowest point. Loosen the two 2.5mm hexagon screws. Move the needle guard closer or away to obtain the proper clearance. Tighten the 2 screws.
- Page 47 Needle Guard Clearance (front) 0 - 0.05mm The clearance between the needles and front needle guard should between 0-0.05mm. Install the front needle guard, move it closer or away from the needles to obtain the correct clearance. Hold the front needle ...
- Page 48 Removing and Installing Upper Looper Using a pair of tweezers, gently start pushing down the clear rubber tube until the upper looper pipe and the connecting pipe are disconnected. Using a 2.0mm hexagon wrench, loosen the screw on the upper looper shaft. DO NOT ...
- Page 49 Removing and Installing Upper Looper Gently, pull the upper looper to the left. Remove the looper. Install the upper looper, do not tighten the 2.0mm screw yet. ...
- Page 50 Removing and Installing Upper Looper Gently, connect the 2 metal pipes. Using the tweezers, gently start pushing the clear rubber tube up until the rubber tube is the middle of the 2 metal pipes. Tighten the 2.0mm hexagon screw temporarily, be sure the upper looper does not hit the lower looper.
- Page 51 Adjusting the Position of the Tip of the Upper Looper Turn the handwheel towards you to bring the upper looper to the leftmost position. Insert the Guide line upper looper gauge onto the upper looper shaft Push the gauge all way against the upper looper shaft then slightly push it up until the bulge of the gauge touches the upper looper pin.
- Page 52 Adjusting the Position of the Tip of the Upper Looper Turn the handwheel towards you to bring the upper looper to the leftmost position. Insert the Guide line upper looper gauge onto the upper looper shaft Push the gauge all way against the upper looper shaft then slightly push it up until the bulge of the gauge touches the upper looper pin.
- Page 53 Adjusting Upper Looper Shaft Height Upper looper base 1.2mm Upper shaft guide Turn the handwheel towards you to bring the upper looper shaft to its lowest point. The clearance between the upper looper base and shaft guide should be about 1.2mm. 2.5mm hexagon screws If an adjustment is needed, loosen the 2.5mm hexagon screws and move the upper shaft up or down to obtain the 1.2mm clearance.
- Page 54 Upper Looper Timing When the upper looper is at the leftmost position, the distance between the center of the right needle and the tip of the upper looper should be between 7.8mm – 8.2mm.
- Page 55 Upper Looper Timing If an adjustment is needed, loosen the 2.0mm hexagon screw, slide Upper Looper Clearance the upper looper left or right to obtain the 8.0mm clearance. Hold the looper and tighten the 2.0mm screw. When the upper looper is moving upward, the clearance between the tip of the upper looper and the back of the lower looper should be ...
- Page 56 Upper & Lower Looper Timing Incorrect timing Incorrect timing The Fig. 1 shows the correct distance between the 2 loopers when the lower looper is moving from left to right and the upper looper is moving upward. Fig. 2 and 3 show incorrect timing.
- Page 57 Upper & Lower Looper Timing If an adjustment is needed, loosen the two 2.0mm hexagon screws. If you need to advance the upper looper move the cam away from you, to delay the upper looper move the cam towards you. Tighten the screws.
- Page 58 Adjusting Chaining Finger Position Set the chaining finger lever to “S” position. If an adjustment is needed, loosen the two 1.5mm hexagon screws. Move the chaining finger set plate as needed. Tighten the 2 screws.
- Page 59 Lower Knife Removal/Installation If it becomes necessary to replace the lower knife, use a Phillips screwdriver to remove the 2 screws. Install a new knife then tighten the screws.
- Page 60 Adjusting the Upper Knife Height & Timing When the upper knife is at the lowest position, the front lower corner of the upper knife should be between 1.0mm – 2.0mm below the cutting edge of the lower knife.
- Page 61 Adjusting the Upper Knife Height To adjust the upper knife height, turn the handwheel towards you to bring the knife to its lowest position. Loosen the hexagon bolt, move the knife both directions to the correct positions then tighten the bolt.
- Page 62 Adjusting the Upper Knife Timing When the needle bar is at the highest position, the upper knife should be also at the highest position . If an adjustment is needed, loosen the two 2.0mm screws, rotate the cam to correct it then tighten the screws. ...
- Page 63 Adjusting the Tension Set the tension dials at “3”. If you have a tension gauge, use a #50 weight thread. The following list are the tension values for the four threads. If an adjustment is needed, use a small screwdriver to raise the adjusting plate then turn the dial as shown above.
- Page 64 Adjusting the Tension When serger tension is adjusted correctly, the upper and lower looper threads meet at the edge of the fabric and both needle threads are tight in the fabric. When the left needle tension is loose, you will notice these loops on the bottom of the fabric.
- Page 65 Adjusting the Tension When the right needle tension is loose, you will notice these loops on the bottom of the fabric. To correct loose right needle tension, turn the right needle tension to a higher number. When either upper looper tension is too loose or the lower looper tension is too tight, or both, the upper looper thread is pulled to ...
- Page 66 Removing and Adjusting the Needle Threader Remove the 2 screws. Pull the needle threader unit towards the back to remove. ...
- Page 67 Removing and Adjusting the Needle Threader Using a Phillips screwdriver, remove the small screw. Release the threader shaft by rotating the holding plate then swing it upward.
- Page 68 Removing and Adjusting the Needle Threader Insert the holding plate (1) onto to the black shaft then push upwards into the pin. Shaft While holding the plate onto the shaft, insert the left side of the plate into the threader plate then push the needle threader ...
- Page 69 Removing and Adjusting the Needle Threader Tighten the screw. Install the needle threader unit. ...
- Page 70 Removing and Adjusting the Needle Threader Tighten the 2 screw. Lower the needle threader shaft. Check both needles, if an adjustment is needed, loosen the screw, move the threader plate up-down or left-right, then tighten the screw. Bring the needle threader shaft in the up position.
- Page 71 Removing and Installing the Looper Threader Air Remove the 5 screws. ...
- Page 72 Removing and Installing the Looper Threader Air Grab the looper threader air unit, pull it up then remove it Reinstall the looper threader air, make sure to place the looper thread air base plate behind the cover detecting base...
- Page 73 Removing and Installing the Looper Threader Air Insert and tighten the screw. Insert and tighten the 4 screws. ...
- Page 74 Troubleshooting and Adjusting the Looper Threader Air When threading the upper or lower looper using looper threader air and a #60 thread, a thread of 30mm (1.5”) or longer should come out from the eye of the looper.
- Page 75 Troubleshooting and Adjusting the Looper Threader Air Never drop oil or grease into the upper and lower looper air threading holes because it will clog the pipes. ...
- Page 76 Troubleshooting and Adjusting the Looper Threader Air If the length of the thread from one of both looper is coming out short or fails to come out, it is possible that there is lint or thread stuck in the pipes or the pipes are misaligned.
- Page 77 Troubleshooting and Adjusting the Looper Threader Air DO NOT insert this end Insert this The AT2000D comes with 2 looper threading wires. Open the kit, using one wire, insert the tip of the wire into the looper threading hole. DO NOT insert the closed-end of the wire.
- Page 78 Troubleshooting and Adjusting the Looper Threader Air Slowly, continue to feed the wire through the pipe until the wire comes out from the eye of the looper about 3 inches. DO NOT use thread heavier that #60. Knot the thread into wire hook then pull the wire from looper eye until the thread comes out from ...
- Page 79 Troubleshooting and Adjusting the Looper Threader Air While holding the thread from both ends, pull and release the thread several times until lint has been removed. ...
- Page 80 Troubleshooting and Adjusting the Looper Threader Air Very Important: Whenever you adjust upper or lower looper shaft or must always check remove/reinstall the air thread system, you aligned air pipes to make they are precisely, otherwise the air threader will fail to thread one or both loopers!
- Page 81 Troubleshooting and Adjusting the Looper Threader Air If an adjustment is needed, please loosen the appropriate screws, align the pipes then tighten the screws. ...
- Page 82 Removing Motor and Machine Socket Unit Loosen the 2 screws. Remove the motor belt. ...
- Page 83 Removing Motor and Machine Socket Unit Remove the 2 screws. Remove the 2 large screws. ...
- Page 84 Removing Motor, Machine Socket Unit and C Board Remove the 2 screws. Using a 5.0mm hexagon nut driver, loosen and remove the nuts. Disconnect the motor terminals, remove the motor. ...
- Page 85 Removing Motor, Machine Socket Unit and C Board Remove the 2 screws. Remove the C board cover. ...
- Page 86 Removing Motor, Machine Socket Unit and C Board Remove the screw. Pull the circuit board C away from the top cover. Disconnect the white harness by pulling it up.
- Page 87 Reinstalling Motor, Machine Socket Unit and C Board If it becomes necessary to replace the C board, using a hexagon nut driver remove the 2 nuts from the machine socket unit. Disconnect the C board terminals, then remove the C board. Reconnect the white harness.
- Page 88 Reinstalling Motor, Machine Socket Unit and C Board Reinstall and tighten the screw. Be careful not to pinch the wires. Reinstall the cover. Tighten the screws. ...
- Page 89 Reinstalling Motor, Machine Socket Unit and C Board Reconnect the motor terminals, tighten the nuts. Tighten the 2 screws. ...
- Page 90 Reinstalling Motor, Machine Socket Unit and C Board Reinstall the motor, tighten the 2 large temporarily screws Reinstall the machine socket unit. Tighten the 2 screws. ...
- Page 91 Reinstalling Motor, Machine Socket Unit and C Board Reinstall the motor belt. Loosen the 2 large screws. Adjust the motor belt timing to deflect between 5-6mm when you push it with your finger, see above. Tighten the 2 large screws securely.
- Page 92 Adjusting the Presser Foot Lifter Safety Switch Micro switch contact Presser foot lifter UP When the presser foot lifter is in the UP position, the machine should not run. Micro switch contact Presser foot lifter DOWN If an adjustment is needed, loosen the screw, slightly move the micro switch set plate to the left then tighten the screw.
- Page 93 Adjusting the Presser Front & Side Looper Cover Door Safety Switch Micro switch contact When the front and side looper cover doors are closed, the machine should not run. Micro switch contact If an adjustment is needed, loosen the screw, slightly move the micro switch set plate to the left then tighten the screw.
- Page 94 Removing and Reinstalling the LED Push the locking tab outward to open the LED holder. Open the holder, remove the LED from the holder. ...
- Page 95 Removing and Reinstalling the LED Using a pair of scissors or a cable tie cutter, cut and discard the 2 cable ties. LED connector Remove the LED cord from the rear cable guide. Disconnect the LED connector from the machine socket unit. Reverse the above ...
- Page 96 Rear Cover Replacement Gently, push the rear cover towards the machine. Tighten the screw. ...
- Page 97 Rear Cover Replacement Reinstall and tighten the 2 screws. Tighten the screw. ...
-
Page 98: Front Cover Replacement
Front Cover Replacement Put the take up lever in the middle position. Grab the front cover, stat to reinstall from the top. Bring the rest of the front cover towards the front of the machine until it clears the ... - Page 99 Front Cover Replacement Reinstall and tighten the screw. Reinstall and tighten the screw. ...
- Page 100 Front Cover Replacement Tighten the screw. Tighten the screw. ...
- Page 101 Front Cover Replacement Tighten the screw. ...
- Page 102 Looper Cover Replacement Important: Before you put back the looper cover, make that the detecting arm hook is positioned between the 2 C clips. Install and tighten the 2 screws. ...
-
Page 103: Side Cover Replacement
Side Cover Replacement Place the side cover on the machine. Install and tighten the 2 screws. Check to make sure the side cover is perfectly aligned with the needle plate and rear cover. ... -
Page 104: Base Cover Replacement
Base Cover Replacement Place the base on the machine. Reinstall the 3 hinge screws together with the black rubber cushions. Reinstall the setscrew ... - Page 105 Belt Cover Replacement Hook Hook Hook Hook Reattach the belt cover. Be careful not to break the locking hooks. ...
- Page 106 Belt Cover Replacement Push the belt cover until there is no gap between the belt cover and rear cover. Install and tighten the screw. ...
- Page 107 Belt Cover Replacement Reattach the cap. Lay the machine on its back. Reattach and tighten the screw. ...
- Page 108 Presser Foot and Looper Cover Guide Replacement Reattach the looper cover guide door. Reinstall and tighten the 2 screws. ...
- Page 109 Face Plate Replacement 4-5mm Slightly lower the needle threader lever about then attach the face plate to the machine. ...
-
Page 110: Faceplate Installation
Face Plate Installation Reinstall and tighten the screw. Reattach the cap. ... -
Page 111: Top Cover Replacement
Top Cover Replacement Place the top cover hooks on top of the front panel. ... - Page 112 Top Cover Replacement Gently, lower the top cover. Tighten the 2 screws. ...