Table of Contents
Advertisement
Quick Links
Advertisement
Table of Contents

Related Manuals for Nvidia DGX-1


Summary of Contents for Nvidia DGX-1
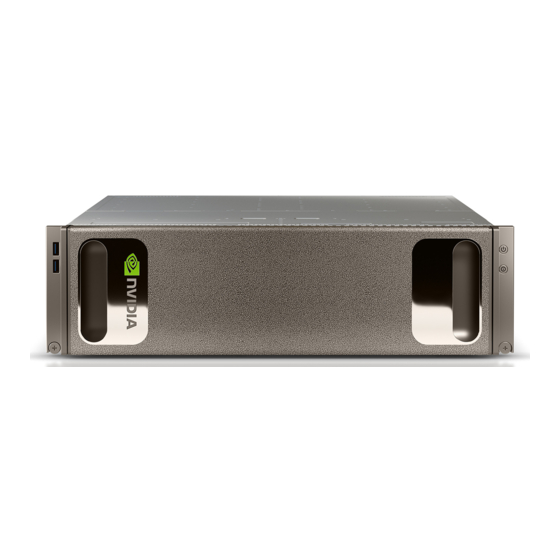
- Page 1 NVIDIA DGX-1 DU-08033-001 _v07 | January 2017 User Guide...
-
Page 2: Table Of Contents
TABLE OF CONTENTS Chapter 1. Introduction to the NVIDIA DGX-1 Deep Learning System......... 1 1.1. Using the DGX-1: Overview................1 1.2. Hardware Specifications................. 2 1.2.1. Components..................2 1.2.2. Mechanical.................... 2 1.2.3. Power....................3 1.2.4. Connections and Controls................3 1.2.5. Rear Panel Power Controls.................4 1.2.6. ... - Page 3 4.2. Restoring the DGX-1 Software Image..............29 4.2.1. Obtaining the DGX-1 Software ISO Image............30 4.2.2. Re-Imaging the System Remotely............... 30 4.2.3. Creating a Bootable USB Flash Drive............33 4.2.3.1. Creating a Bootable USB Flash Drive by Using the dd Command......33 4.2.3.2. Creating a Bootable USB Flash Drive by Using Akeo Rufus......34 4.2.4. Re-Imaging the System From a USB Flash Drive..........
- Page 4 NVIDIA DGX-1 DU-08033-001 _v07 | iv...
-
Page 5: Chapter 1. Introduction To The Nvidia Dgx-1 Deep Learning System
1.1. Using the DGX-1: Overview The NVIDIA DGX-1 is designed to operate in one of two modes - Base OS mode, and Cloud Managed mode. However, Cloud Management is currently not available, but will be available at a future date. Availability will vary by region. -
Page 6: Hardware Specifications
Introduction to the NVIDIA DGX-1 Deep Learning System 1.2. Hardware Specifications 1.2.1. Components Component Description ® ® Base Server Dual Intel Xeon CPU motherboard with x2 9.6 GT/s QPI, 8 Channel ® with 2 DPC DDR4, Intel X99 Chipset, AST2300 BMC GPU Baseboard supporting 8 SXM2 modules (Cube Mesh) and 4 PCIE x16 slots for InfiniBand NICs Chassis with 3+1 1600W Power supply and support for up to 12 2.5 inch... -
Page 7: Power
Introduction to the NVIDIA DGX-1 Deep Learning System 1.2.3. Power Specification for Input Each Power Supply Comments 200-240 V (ac) 3200 W max. 1600 W @ 200-240 V, The DGX-1 contains four load-balancing power supplies, with 3+1 redundancy. 8 A, 50-60 Hz 1.2.4. Connections and Controls... -
Page 8: Rear Panel Power Controls
Introduction to the NVIDIA DGX-1 Deep Learning System Type Qty Description RS232 serial port for internal debugging AC input Power supply inputs Ethernet (RJ45) 10GBASE-T dual port X540 Mezzanine 10/100 BASE-T (GbE) Intelligent Platform Management Interface (IPMI) IPMI (RJ45) port 1.2.5. Rear Panel Power Controls... -
Page 9: Ipmi Port Leds
Introduction to the NVIDIA DGX-1 Deep Learning System Status Description Amber (steady) LAN link Amber (blinking) LAN access (off when there is traffic) (Port 0 Link/Activity) Disconnected Green 10 Gb/s Amber 1 Gb/s (Port 0 Speed) 100 Mb/s Amber (steady) -
Page 10: Hard Disk Indicators
Introduction to the NVIDIA DGX-1 Deep Learning System 1.2.8. Hard Disk Indicators Feature Description Button and release level for removing the HDD Blue (Steady): Drive present Blue (Blinking once/sec): Identification HDD present LED Blue (Blinking twice/sec): Rebuilding Amber (Steady): Warning/failure Off: Slot empty... - Page 11 Introduction to the NVIDIA DGX-1 Deep Learning System Activity Description Green Normal operation Amber (blinking) Power off; Fault Green (blinking) Power on; Standby mode www.nvidia.com NVIDIA DGX-1 DU-08033-001 _v07 | 7...
-
Page 12: Chapter 2. Installation And Setup
DGX-1. 2.1. Registering Your DGX-1 Be sure to register your DGX-1 with NVIDIA as soon as you receive your purchase confirmation email. Registration enables your hardware warranty and, with a subscription to NVIDIA Cloud Service, allows you to set up an NVIDIA Cloud Service account. -
Page 13: Choosing A Setup Location / Site Preparation
Click the Announcements tab, which contains download links and supplemental documentation. ‣ Refer to the DGX-1 Software Release Notes for instructions on how to perform an OTA software update. 2.3. Choosing a Setup Location / Site Preparation Decide on a suitable location for setting up and operating the DGX-1. The location should be clean, dust-free, and well ventilated. -
Page 14: Unpacking The Dgx-1
‣ If port 443 is proxied through a corporate firewall, then WebSocket protocol traffic must be supported. ‣ If you will be using the DGX-1 in Base OS mode, make sure your network can connect to the following: ‣ http://us.archive.ubuntu.com/ubuntu/ ‣... -
Page 15: What's In The Box
• The DGX-1 should be mounted at the bottom of the rack if it is the only unit in the rack. • When mounting the DGX-1 in a partially filled rack, load the rack from the bottom to the top with the heaviest component at the bottom of the rack. -
Page 16: Installing The Rails
DGX-1. If the hole is positioned on the top side, then the rail is on the wrong side of the DGX-1 and the DGX-1 will not fit properly in the rack. -
Page 17: Attaching The Bezel
Installation and Setup When the DGX-1 has been pushed completely into the rack, you should hear the locking tabs "click" into the locked position. Lock the unit in place using the thumb screws located on the front of the unit. -
Page 18: Connecting The Power Cables
With the bezel positioned so that the NVIDIA logo is visible from the front and is on the left hand side, line up the pins near the corners of the DGX-1 with the holes in back of the bezel, then gently press the bezel against the DGX-1. -
Page 19: Connecting The Network Cables
Using an Ethernet cable, connect the IPMI (BMC) port to your LAN for remote access to the base management controllerr (BMC). Vefiy that all network cables are firmly inserted into the DGX-1 and the assocated network switch. 2.10. Setting Up the DGX-1 These instructions describe the setup process that occurs the first time the DGX-1 is powered on after delivery. - Page 20 Create a user account with your name, username, and password. You will need these credentials to log in to the DGX-1 as well as to log in to the BMC remotely. When logging in to the BMC, enter your username for both the User ID as well as the password.
- Page 21 Toggle the space bar to select or deselect the software to install, then select OK to continue. By default, the DGX-1 installs only minimal software packages necessary to ensure system functionality. During installation, you can deselect the OpenSSH package; however, NVIDIA recommends that you keep this package selected, and uninstall it only if required by your IT security policy.
-
Page 22: Configuring A System Proxy
Installation and Setup If the following output appears, then your DGX-1 setup is complete and you do not need to perform the next steps. nv_peer_mem 16384 nvidia 11911168 nv_peer_mem,nvidia_modeset,nvidia_uv mib_core 143360 rdma_cm,ib_cm,ib_sa,iw_cm,nv_peer_mem,mlx4_ib,mlx5_ib,ib_mad,ib_ucm,ib_umad,ib_uverbs,rdma If there is no output to the lsmod command, then build and install the nvidia-peer- memory module. - Page 23 Edit the cache daemon startup file. $ sudo vi /etc/default/cachefilesd Uncomment the "RUN=yes" line in the startup file and then save the file. Configure the cache daemon for the DGX-1. a) Open the cache daemon configuration file. $ sudo vi /etc/cachefilesd.conf b) Edit the contents to match the following, then save the file.
- Page 24 Installation and Setup Verify caching is enabled. cat /proc/fs/nfsfs/volumes Look for the text FSC=yes in the output. Upon rebooting, the NFS should be mounted and cached on the DGX-1. www.nvidia.com NVIDIA DGX-1 DU-08033-001 _v07 | 20...
-
Page 25: Chapter 3. Configuring And Managing The Dgx-1
(BMC) as well as both ethernet ports of the DGX-1. The ports are, from left to right, IPMI (BMC), em2, em1. Connect a display to the DGX-1 VGA connector and a keyboard to any USB port on the DGX-1. Turn the DGX-1 on or reboot. - Page 26 Configuring and Managing the DGX-1 Select the Advanced tab from the top menu, then scroll down to view the two Quanta Dual Port 10G BASE-T Mezzanine items. www.nvidia.com NVIDIA DGX-1 DU-08033-001 _v07 | 22...
- Page 27 Configuring and Managing the DGX-1 The first item shows the MAC address for ethernet port em1, and the second item shows the MAC address for em2. Navigate to and select Server Mgmt from the top menu, then scroll down to and select BMC network configuration.
-
Page 28: Using The Bmc
3.2. Using the BMC The DGX-1 includes a baseboard management controller (BMC) that lets you manage and monitor the DGX-1 independently of the CPU or operating system. You can access the BMC remotely through the Ethernet connection to the IPMI port. -
Page 29: Creating A Unique Bmc Password For Remote Access
3.2.1. Creating a Unique BMC Password for Remote Access When you set up the DGX-1 upon powering it on for the first time, you set up a username and password for the system. These credentials are also used to log in to the BMC remotely, except that the BMC password is the username. -
Page 30: Viewing System Information
Make sure that Text is selected at Format of Download Event Logs. Click Save Event Logs to download the event logs. 3.2.4. Determining Total Power Consumption You can use the BMC dashboard to determine total power consumption of the DGX-1 as follows: Log into the BMC. -
Page 31: Accessing The Dgx-1 Console
If you have opened the Java Viewer (Remote Control->Console Redirection) to view the console window, then you can power cycle, reset, or shutdown the DGX-1 as follows: From the JViewer top menu, click Power and then select from the available options, depending on what you want to do. - Page 32 Configuring and Managing the DGX-1 Select from the available options according to what you want the system to do, then click Perform Action. www.nvidia.com NVIDIA DGX-1 DU-08033-001 _v07 | 28...
-
Page 33: Chapter 4. Maintaining And Servicing Nvidia Dgx-1
4.2. Restoring the DGX-1 Software Image If the DGX-1 software image becomes corrupted or the OS SSD was replaced after a failure, restore the DGX-1 software image to its original factory condition from a pristine copy of the image. -
Page 34: Obtaining The Dgx-1 Software Iso Image
Re-Imaging the System From a USB Flash Drive 4.2.1. Obtaining the DGX-1 Software ISO Image To ensure that you restore the current version of the DGX-1 software image, obtain the correct ISO image file from NVIDIA Support Enterprise Services. Log on to the NVIDIA Enterprise Services (https://nvid.nvidia.com/oracle/) - Page 35 Maintaining and Servicing NVIDIA DGX-1 Set up the ISO image as virtual media. a) From the top menu, click Remote Control and select Console Redirection. b) Click Java Console to open the remote JViewer window. Make sure pop-up blockers are disabled for this site.
- Page 36 Click Yes and then OK at the Power Control dialogs, then wait for the system to power down and then come back online. c) At the boot selection screen, select Install DGX-1 OS and then press [Enter]. www.nvidia.com NVIDIA DGX-1...
-
Page 37: Creating A Bootable Usb Flash Drive
Maintaining and Servicing NVIDIA DGX-1 The DGX-1 will reboot from CDROM0 1.00, and proceed to install the image. This can take approximately 15 minutes. The Mellanox InfiniBand driver installation may take up to 10 minutes. After the installation is completed, the system ejects the virtual CD and then reboots into the OS. -
Page 38: Creating A Bootable Usb Flash Drive By Using Akeo Rufus
You can identify the USB flash drive from its size, which is much smaller than the size of the SSDs in the DGX-1, and from the mount points of any partitions on the drive, which are under /media. In the following example, the device name of the USB flash drive is sde . - Page 39 Select the Create a bootable disk using option and from the dropdown menu, select ISO image. Click the optical drive icon and open the DGX-1 software ISO image. Click Start. Because the image is a hybrid ISO file, you are prompted to select whether to write the image in ISO Image (file copy) mode or DD Image (disk image) mode.
-
Page 40: Re-Imaging The System From A Usb Flash Drive
When the system boots up, select Install DGX-1 OS on the startup screen and then press Enter. The DGX-1 will reboot and proceed to install the image. This can take more than 15 minutes. The Mellanox InfiniBand driver installation may take up to 10 minutes. - Page 41 At the Power Control and Status screen, select the Power Off Server - Orderly Shutdown option, then click Perform Action. You can verify that the DGX-1 is shut down by noting that the all the Power Control and Status options are greyed out except for the Power On Server option.
- Page 42 Maintaining and Servicing NVIDIA DGX-1 d) Be sure all the check boxes under Select Preserve Configuration are cleared. This ensures that the BIOS reverts to its fail-safe default settings for a reliable update. e) Click Upload Firmware to start the process of installing the updated BIOS.
-
Page 43: Updating The Bmc
You can update the BMC remotely using the IPMI port, This can be done while the system is powered on and with applications running. Obtain the BMC image. a) Log on to the Enterprise Support site (https://nvidia-esp.custhelp.com) and click the Announcements tab to locate the DGX-1 software image archive. b) Download the image file. - Page 44 Maintaining and Servicing NVIDIA DGX-1 Be sure to set IPMI to Preserve in order to preserve your BMC login credentials. If you fail to do this, the BMC username/password will be set to qct.admin/ qct.admin. If this happens, then be sure to enter the BMC dashboard and go to Configuration->Users to add a new user account and disable the qct.admin...
-
Page 45: Replacing System And Components
4.5. Replacing System and Components Be sure to familiarize yourself with the NVIDIA Terms & Conditions documents before attempting to perform any modification or repair to the DGX-1. These Terms & Conditions for DGX-1 can be found through the NVIDIA DGX-1 Support (http:// www.nvidia.com/object/dgx1-support.html) -
Page 46: Replacing An Ssd
Be sure to include the bezel when returning the system. 4.5.2. Replacing an SSD Access the SSDs from the front of the DGX-1. You can hot swap the SSDs as follows: If not already removed, remove the bezel by grasping the bezel by the side handles and then pulling the bezel straight off the front of the DGX-1. -
Page 47: Recreating The Raid Array
With the bezel positioned so that the NVIDIA logo is visible from the front and is on the left hand side, line up the pins near the corners of the DGX-1 with the holes in back of the bezel, then gently press the bezel against the DGX-1. The bezel is held in place magnetically. - Page 48 Maintaining and Servicing NVIDIA DGX-1 Select the Advanced tab from the top menu and then Scroll down and select the MegaRAID Configuration Utility. www.nvidia.com NVIDIA DGX-1 DU-08033-001 _v07 | 44...
- Page 49 Maintaining and Servicing NVIDIA DGX-1 The RAID Configuration Main Menu appears. www.nvidia.com NVIDIA DGX-1 DU-08033-001 _v07 | 45...
-
Page 50: Delete The Raid0 Virtual Drive
Maintaining and Servicing NVIDIA DGX-1 If you replaced only one or more of the cache drives, continue to the next section to delete the RAID0 virtual drive. If you replaced the OS drive, follow the instructions in the section Clear the Drive Group Configuration 4.5.3.2. Delete the RAID0 Virtual Drive... - Page 51 Maintaining and Servicing NVIDIA DGX-1 Select Virtual Drive Management. www.nvidia.com NVIDIA DGX-1 DU-08033-001 _v07 | 47...
- Page 52 Maintaining and Servicing NVIDIA DGX-1 Select Virtual Drive1. www.nvidia.com NVIDIA DGX-1 DU-08033-001 _v07 | 48...
- Page 53 Maintaining and Servicing NVIDIA DGX-1 Scroll to Operation, and change [Select operation] to [Delete Virtual Drive]. www.nvidia.com NVIDIA DGX-1 DU-08033-001 _v07 | 49...
- Page 54 Maintaining and Servicing NVIDIA DGX-1 Select Go. www.nvidia.com NVIDIA DGX-1 DU-08033-001 _v07 | 50...
- Page 55 Maintaining and Servicing NVIDIA DGX-1 At the result screen, change Confirm to [Enabled], and then select Yes. www.nvidia.com NVIDIA DGX-1 DU-08033-001 _v07 | 51...
-
Page 56: Clear The Drive Group Configuration
Maintaining and Servicing NVIDIA DGX-1 Follow the instructions in the section Recreate the RAID0 Virtual Drive to recreate the cache SSD virtual drive. 4.5.3.3. Clear the Drive Group Configuration These instructions apply when you have replaced the OS drive. At the Main Menu, under ACTIONS, select Configure, then select Configuration Management. - Page 57 Maintaining and Servicing NVIDIA DGX-1 Select Clear Configuration. www.nvidia.com NVIDIA DGX-1 DU-08033-001 _v07 | 53...
- Page 58 Maintaining and Servicing NVIDIA DGX-1 Select Confirm [Disabled] and then select Enabled at the confirmation popup. www.nvidia.com NVIDIA DGX-1 DU-08033-001 _v07 | 54...
- Page 59 Maintaining and Servicing NVIDIA DGX-1 Select Yes, then select OK at the success screen. www.nvidia.com NVIDIA DGX-1 DU-08033-001 _v07 | 55...
-
Page 60: Recreate The Os Virtual Drive
Maintaining and Servicing NVIDIA DGX-1 Follow the instructions in the sections Recreate the OS Virtual Drive and then Recreate the RAID0 Virtual Drive 4.5.3.4. Recreate the OS Virtual Drive These instructions apply when you have replaced the OS drive. Be sure to first complete... - Page 61 Maintaining and Servicing NVIDIA DGX-1 Select Create Virtual Drive, then select Select Drives at the next screen. Leave all other options at their default settings as shown below. www.nvidia.com NVIDIA DGX-1 DU-08033-001 _v07 | 57...
- Page 62 Maintaining and Servicing NVIDIA DGX-1 The list of drives under CHOOSE UNCONFIGURED DRIVES will initially be empty. To view the available drives, select Select Media Type [HDD], then change to [SSD]. www.nvidia.com NVIDIA DGX-1 DU-08033-001 _v07 | 58...
- Page 63 Maintaining and Servicing NVIDIA DGX-1 Under CHOOSE UNCONFIGURED DRIVES, select the 446 GB drive, then change to [Enabled] at the pop-up dialog. www.nvidia.com NVIDIA DGX-1 DU-08033-001 _v07 | 59...
- Page 64 Maintaining and Servicing NVIDIA DGX-1 Confirm that only the first drive at Drive Port 0 - 3:01:00 displays as [Enabled]. www.nvidia.com NVIDIA DGX-1 DU-08033-001 _v07 | 60...
- Page 65 Maintaining and Servicing NVIDIA DGX-1 Scroll up and select Apply Changes. www.nvidia.com NVIDIA DGX-1 DU-08033-001 _v07 | 61...
- Page 66 Maintaining and Servicing NVIDIA DGX-1 Select OK at the success screen. www.nvidia.com NVIDIA DGX-1 DU-08033-001 _v07 | 62...
- Page 67 Maintaining and Servicing NVIDIA DGX-1 The virtual drive creation page now displays a summary of your selection. The Virtual Drive Size should be approximately 446 GB. Select Save Configuration at the top of the menu. Change the Confirm [Disabled] field to [Enabled] and then select [Yes].
-
Page 68: Recreate The Raid0 Virtual Drive
Maintaining and Servicing NVIDIA DGX-1 Select [OK] at the success screen. You have successfully re-created Virtual Drive 0, where the OS will be installed. Follow the instructions in the section Recreate the RAID0 Virtual Drive 4.5.3.5. Recreate the RAID0 Virtual Drive These instructions apply when you have replaced one or more of the cache SSDs, or you replaced the OS drive and cleared the drive group configuration. - Page 69 Maintaining and Servicing NVIDIA DGX-1 Select Create Virtual Drive. www.nvidia.com NVIDIA DGX-1 DU-08033-001 _v07 | 65...
- Page 70 Maintaining and Servicing NVIDIA DGX-1 Scroll to Select RAID Level and switch to [RAID0], if not already set. www.nvidia.com NVIDIA DGX-1 DU-08033-001 _v07 | 66...
- Page 71 Maintaining and Servicing NVIDIA DGX-1 Scroll to Select Media Type and switch to [SSD]. www.nvidia.com NVIDIA DGX-1 DU-08033-001 _v07 | 67...
- Page 72 Maintaining and Servicing NVIDIA DGX-1 Select Select Drives. www.nvidia.com NVIDIA DGX-1 DU-08033-001 _v07 | 68...
- Page 73 Maintaining and Servicing NVIDIA DGX-1 Switch all unconfigured 1TB drives to [Enabled]. www.nvidia.com NVIDIA DGX-1 DU-08033-001 _v07 | 69...
- Page 74 Maintaining and Servicing NVIDIA DGX-1 Select Apply Changes. www.nvidia.com NVIDIA DGX-1 DU-08033-001 _v07 | 70...
- Page 75 Maintaining and Servicing NVIDIA DGX-1 Change Confirm to [Enabled], then select Yes. Select OK at the success screen. The Create Virtual Drive screen displays a summary of your selection. Verify that the summary matches your selection, then select Save Configuration.
- Page 76 Maintaining and Servicing NVIDIA DGX-1 Make sure Confirm is set to [Enabled], then select Yes to confirm the change. www.nvidia.com NVIDIA DGX-1 DU-08033-001 _v07 | 72...
- Page 77 Maintaining and Servicing NVIDIA DGX-1 Select OK at the success screen. Confirm and exit. a) Select View Drive Group Properties to confirm the configuration. www.nvidia.com NVIDIA DGX-1 DU-08033-001 _v07 | 73...
- Page 78 Maintaining and Servicing NVIDIA DGX-1 b) Verify that your configuration screen shows that you have two virtual drives with the following properties: Virtual Drive 0 of size 446 GB (or very similar) Virtual Drive 1 of size 7 TB (or very similar).
- Page 79 Maintaining and Servicing NVIDIA DGX-1 c) If your Drive Groups match the above, press [F10] to save these settings and reset the system. d) Select Save Changes and Reset, then select Yes at the confirmation prompt. www.nvidia.com NVIDIA DGX-1 DU-08033-001 _v07 | 75...
-
Page 80: Replacing The Power Supplies
4.5.4. Replacing the Power Supplies Access the power supplies from the front of the DGX-1. You can hot swap the power supplies as follows: If not already removed, remove the bezel by grasping the bezel by the side handles and then pulling the bezel straight off the front of the DGX-1. -
Page 81: Replacing The Fan Module
With the bezel positioned so that the NVIDIA logo is visible from the front and is on the left hand side, line up the pins near the corners of the DGX-1 with the holes in back of the bezel, then gently press the bezel against the DGX-1. The bezel is held in place magnetically. -
Page 82: Replacing The Dimms
Turn off the DGX-1 and disconnect all network and power cabling. Remove the motherboard tray. a) Locate the locking levers for the motherboard tray at the rear of the DGX-1. There are two sets of locking levers. The locking levers for the motherboard are the bottom set. - Page 83 Maintaining and Servicing NVIDIA DGX-1 Do not pull the unit by the blue retention clasps; they may break. d) Set the motherboard tray on a clean work surface, and position it so that the locking levers are at the top as you look down on the tray.
- Page 84 Maintaining and Servicing NVIDIA DGX-1 Remove the DIMM. www.nvidia.com NVIDIA DGX-1 DU-08033-001 _v07 | 80...
- Page 85 Maintaining and Servicing NVIDIA DGX-1 a) Press down on the side latches at both ends of the DIMM socket to push them away from the DIMM. This should unseat the DIMM from the socket. b) Pull the DIMM straight up to remove it from the socket.
- Page 86 Maintaining and Servicing NVIDIA DGX-1 a) Make sure the socket latches are open. b) Positon the DIMM over the socket, making sure that the notch on the DIMM lines up with the key in the slot, then press the DIMM down into the socket until the side latches click in place.
-
Page 87: Chapter 5. Safety
Indicates the presence of a hazard that may result in serious personal injury if the WARNING is ignored. Indicates potential hazard if indicated information is ignored. Indicates shock hazards that result in serious injury or death if safety instructions are not followed www.nvidia.com NVIDIA DGX-1 DU-08033-001 _v07 | 83... -
Page 88: Intended Application Uses
‣ Provided with a properly grounded wall outlet. ‣ Provided with sufficient space to access the power supply cord(s), because they serve as the product's main power disconnect. www.nvidia.com NVIDIA DGX-1 DU-08033-001 _v07 | 84... -
Page 89: Equipment Handling Practices
Caution: To avoid electrical shock or fire, check the power cord(s) that will be used with the product as follows: ‣ The power cord must have an electrical rating that is greater than that of the electrical current rating marked on the product. www.nvidia.com NVIDIA DGX-1 DU-08033-001 _v07 | 85... -
Page 90: System Access Warnings
The equipment rack must be anchored to an unmovable support to prevent it from tipping when a server or piece of equipment is extended from it. The equipment rack must be installed according to the rack manufacturer's instructions. www.nvidia.com NVIDIA DGX-1 DU-08033-001 _v07 | 86... -
Page 91: Electrostatic Discharge
After removing a board from its protective wrapper or from the server, place the board component side up on a grounded, static free surface. Use a conductive foam pad if available but not the board wrapper. Do not slide board over any surface. www.nvidia.com NVIDIA DGX-1 DU-08033-001 _v07 | 87... -
Page 92: Other Hazards
NICKEL NVIDIA Bezel: The bezel’s decorative metal foam contains some nickel. The metal foam is not intended for direct and prolonged skin contact. Please use the handles to remove, attach or carry the bezel. While nickel exposure is unlikely to be a problem, you should be aware of the possibility in case you’re susceptible to nickel-related reactions. - Page 93 Safety ‣ Attach the covers to the chassis according to the product instructions. www.nvidia.com NVIDIA DGX-1 DU-08033-001 _v07 | 89...
-
Page 94: Chapter 6. Compliance
Chapter 6. COMPLIANCE The NVIDIA DGX-1 is compliant with the regulations listed in this section. 6.1. United States Federal Communications Commission (FCC) FCC Marking (Class A) This device complies with part 15 of the FCC Rules. Operation is subject to the following... -
Page 95: Canada
RoHS Directive (2011/65/EU) for hazardous substances. ‣ ErP Directive (2009/125/EC) for European Ecodesign. A copy of the Declaration of Conformity to the essential requirements may be obtained directly from NVIDIA GmbH (Floessergasse 2, 81369 Munich, Germany). 6.5. Japan VCCI www.nvidia.com NVIDIA DGX-1... -
Page 96: Australia
Compliance This is a Class A product. In a domestic environment this product may cause radio interference, in which case the user may be required to take corrective actions. VCCI-A 6.6. Australia 6.7. China RoHS Material Content www.nvidia.com NVIDIA DGX-1 DU-08033-001 _v07 | 92... - Page 97 Compliance www.nvidia.com NVIDIA DGX-1 DU-08033-001 _v07 | 93...
-
Page 98: Israel
Compliance 6.8. Israel 6.9. South Korea Class A Equipment (Industrial Broadcasting & Communication Equipment). This equipment Industrial (Class A) electromagnetic wave suitability equipment and seller www.nvidia.com NVIDIA DGX-1 DU-08033-001 _v07 | 94... - Page 99 Compliance or user should take notice of it, and this equipment is to be used in the places except for home. www.nvidia.com NVIDIA DGX-1 DU-08033-001 _v07 | 95...
- Page 100 LIFE CRITICAL APPLICATION). NVIDIA EXPRESSLY DISCLAIMS ANY EXPRESS OR IMPLIED WARRANTY OF FITNESS FOR SUCH HIGH RISK USES. NVIDIA SHALL NOT BE LIABLE TO CUSTOMER OR ANY THIRD PARTY, IN WHOLE OR IN PART, FOR ANY CLAIMS OR DAMAGES ARISING FROM SUCH HIGH RISK USES.