Table of Contents
Advertisement
Available languages
Available languages
Quick Links
Contents
English ................................................................. 1
Deutsch ............................................................ 3
Français ......................................................... 5
Italiano ....................................................... 7
Español ................................................... 9
Русский ............................................. 11
Português ...................................... 13
Türkçe ........................................ 15
한국어..................................... 17
日本語 ................................ 19
简体中文 ......................... 21
繁體中文 ...................... 23
Bahasa Indonesia ...... 25
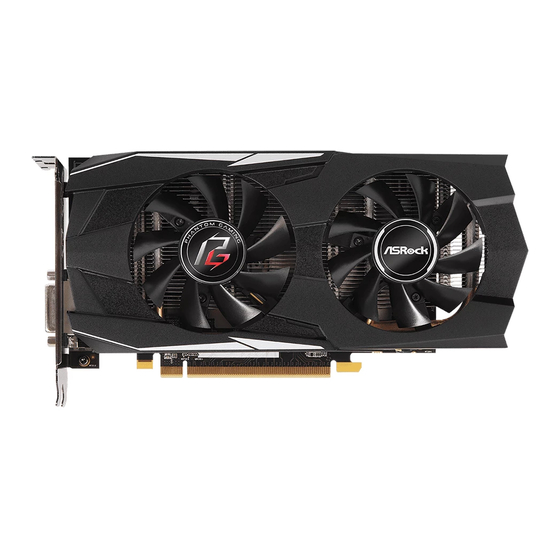
Graphics Card Series
Advertisement
Table of Contents

Subscribe to Our Youtube Channel
Related Manuals for ASROCK RX580


Summary of Contents for ASROCK RX580
- Page 1 Contents English ..............1 Deutsch ............3 Français ............5 Italiano ............7 Español ........... 9 Русский ..........11 Português ........13 Türkçe ........15 한국어........17 日本語 ........ 19 简体中文 ......21 繁體中文 ...... 23 Bahasa Indonesia ..25 Graphics Card Series...
-
Page 2: Hardware Installation
Hardware Installation 1. Turn off your PC and unplug the power cord. 2. Open the case and locate the graphics card slot. 3. Remove the corresponding slot covers on the back of the PC. 4. Insert the card into the slot until it is fully seated. -
Page 3: Driver Installation
7. Close the case. Plug the display cable into the card. DisplayPort HDMI 8. Plug in the power cord and turn on the PC. Driver Installation 1. Insert the support CD into your optical drive. 2. Follow the on-screen instructions to complete driver installation. *The graphics card photos in this document are for reference only, and may be different from the actual product you purchased. - Page 4 Hardwareinstallation 1. Schalten Sie Ihren PC aus und ziehen Sie den Netzstecker. 2. Öffnen Sie das Gehäuse und suchen Sie nach dem Grafikkartensteckplatz. 3. Entfernen Sie die entsprechenden Steck platzabdeckungen an der Rückseite des PC. 4. Stecken Sie die Karte vollständig in den Steckplatz.
- Page 5 7. Schließen Sie das Gehäuse. Stecken Sie das Displaykabel in die Karte. DisplayPort HDMI 8. Schließen Sie den Netzstecker an und schalten Sie den PC ein. Treiberinstallation 1. Legen Sie die Support-CD in Ihr optisches Laufwerk ein. 2. Befolgen Sie die Bildschirmanweisungen zum Abschließen der Treiberinstal lation.
-
Page 6: Installation Du Matériel
Installation du matériel 1. Éteignez votre PC et débranchez le cordon d’alimentation. 2. Ouvrez le châssis et repérez la fente de la carte graphique 3. Retirez le cache de fente correspondants à l’arrière du PC. 4. Insérez la carte dans la fente jusqu’à ce qu’elle s’enclenche parfaitement. -
Page 7: Installation Du Pilote
7. Refermez le châssis. Branchez le câble de l’écran sur la carte. DisplayPort HDMI 8. Rebranchez le câble d’alimentation et allumez le PC. Installation du pilote 1. Insérez le CD d’assistance dans votre lecteur optique. 2. Suivez les instructions qui s’affichent à l’écran pour parachever l’installation. *Les photos de la carte graphique contenues dans ce document sont données à... -
Page 8: Installazione Dell'hardware
Installazione dell'hardware 1. Spegnere il PC e scollegare il cavo di alimen tazione . 2. Aprire il case e individuare l'alloggio della scheda grafica. 3. Rimuovere le coperture corrispondenti sulla parte posteriore del PC. 4. Inserire completamente la scheda nell'allog gio. -
Page 9: Installazione Del Driver
7. Chiudere il case. Collegare il cavo del display alla scheda. DisplayPort HDMI 8. Collegare il cavo d'alimentazione ed accendere il PC. Installazione del driver 1. Inserire il CD di supporto nell'unità ottica. 2. Seguire le istruzioni su schermo per completare l'installazione del driver. * Le fotografie della scheda grafica di questo documento sono solo per riferimento e potrebbero essere diverse dal prodotto effettivamente acquistato. -
Page 10: Instalación Del Hardware
Instalación del hardware 1. Apague su PC y desenchufe el cable de alimentación. 2. Abra la carcasa y localice la ranura de la tarjeta gráfica. 3. Quite las tapas de las ranuras correspondi entes situadas en la parte posterior de su PC. 4. -
Page 11: Instalación Del Controlador
7. Cierre la carcasa. Enchufe el cable de visualización a la tarjeta. DisplayPort HDMI 8. Enchufe el cable de alimentación y encienda su PC. Instalación del controlador 1. Inserte el CD de soporte en la unidad óptica. 2. Siga las instrucciones de la pantalla para completar la instalación del controlador. -
Page 12: Установка Аппаратуры
Установка аппаратуры 1. Выключите питание ПК и отключите шнур питания от электросети. 2. Откройте корпус и найдите разъем для подключения видеокарты. 3. Снимите крышки с соответствующего разъема на задней панели ПК. 4. Вставьте видеокарту в разъем до упора. 5. Прикрепите видеокарту к корпусу винтами. -
Page 13: Установка Драйвера
7. Закройте корпус. Подключите к видеокарте кабель дисплея. DisplayPort HDMI 8. Подключите шнур питания и включите ПК. Установка драйвера 1. Вставьте входящий в комплект поставки компакт-диск в оптический дисковод. 2. Для выполнения установки драйвера следуйте инструкциям на экране. * Изображения видеокарты в данном документе представлены для примера и могут отличаться от... -
Page 14: Instalação Do Hardware
Instalação do Hardware 1. Desligue seu PC e desconecte o cabo de alimentação. 2. Abra a caixa e localize o slot da placa gráfica. 3. Remova as tampas correspondentes do slot atrás do PC. 4. Insira o cartão no slot até ficar totalmente encaixado. - Page 15 7. Feche o gabinete. Ligue o cabo do monitor à placa. DisplayPort HDMI 8. Conecte o cabo de alimentação e ligue o PC. Instalação de driver 1. Insira o CD de suporte na sua unidade óptica. 2. Siga as instruções na tela para concluir a instalação do driver. * As fotos das placas gráficas neste documento são apenas para referência e podem ser diferentes do produto real que você...
- Page 16 Donanım Kurulumu 1. Bilgisayarınızı kapatıp güç kablosunu çıkarın. 2. Kasayı açıp grafik kartı yuvasını bulun. 3. Bilgisayarın arkasında karşılık gelen yuva kapaklarını çıkarın. 4. Kartı, yerine tamamen oturana kadar yuvaya yerleştirin. 5. Kartı vidalarla kasaya sabitleyin. 6. Grafik kartınız bir harici güç kaynağı gerektiri yorsa, güç...
- Page 17 7. Kasayı kapatın. Ekran kablosunu karta takın. DisplayPort HDMI 8. Güç kablosunu takıp bilgisayarı açın. Sürücü Kurulumu 1. Destek CD'sini optik sürücünüze yerleştirin. 2. Sürücü kurulumunu tamamlamak için ekrandaki yönergeleri izleyin. * Bu belgedeki grafik kartı fotoğrafları yalnızca başvuru içindir ve satın aldığınız asıl üründen farklı olabilir.
- Page 18 하드웨어 설치 1. PC를 끄고 전원 코드를 뽑습니다. 2. 케이스를 열어서 그래픽 카드 슬롯을 찾습니다. 3. PC 뒤쪽에 있는 해당 슬롯 커버를 벗깁니다. 4. 카드가 완전히 끼워질 때까지 슬롯으로 카드를 밀어 넣습니다. 5. 나사를 이용해서 카드를 케이스에 고정합니다. 6. 외부 전원이 필요한 그래픽 카드의 경우...
- Page 19 7. 케이스를 닫습니다. 디스플레이 케이블을 카드에 연결합니다. DisplayPort HDMI 8. 전원 코드를 연결한 다음 PC를 켭니다. 드라이버 설치 1. 함께 제공된 CD를 광 드라이브에 끼웁니다. 2. 화면 지시사항에 따라 드라이버 설치를 완료합니다. * 이 문서에 나와있는 그래픽 카드 사진은 참조용이므로 구입한 실제 제품과 다를 수 있습니다.
- Page 20 ハードウェアの取り付け 1. PC の電源を切って、電源コードを取り外し ます。 2. ケースを開けて、グラフィックスカードスロッ トの位置を確認します。 3. PC の背面にある対応するスロットカバーを 取り外します。 4. カードをスロットに完全に収まるまで挿入し ます。 5. ねじでカードをケースに固定します。 6. グラフィックスカードに外部電源が必要な 場合は、電源供給装置をカードに接続し ます。...
- Page 21 7. ケースを閉じます。ディスプレイケーブルをカードに差し込みます。 DisplayPort HDMI 8. 電源コードを差し込んで、PC の電源を入れます。 ドライバのインストール 1. サポート CD を光学ドライブに挿入します。 2. 画面上の指示に従ってドライバのインストールを完了します。 * この文書にあるグラフィックスカードの写真は参照用です。購入した実際の製品とは異なることがあ ります。 * マザーボードによっては、グラフィックスカードを取り外すために、スロット上のラッチを開く必要があ ります。正しい手順についてはマザーボードの文書を参照してください。...
- Page 22 硬件安装 1. 关闭 PC 并拔下电源线插头。 2. 打开机箱并找到显卡插槽。 3. 取下 PC 背面的相应插槽盖板。 4. 将显卡插入插槽中,直至其完全插入 到位。 5. 用螺丝将显卡固定到机箱。 6. 如果显卡需要使用外部电源,请为显卡 连接电源。...
- Page 23 7. 盖上机箱。将显示器线缆插入显卡。 DisplayPort HDMI 8. 插入电源线并启动 PC。 驱动程序安装 1. 将支持 CD 插入光驱。 2. 按照屏幕上的说明完成驱动程序安装步骤。 * 本文档中的显卡图片仅供参考,可能与您实际购买的产品有所不同。 * 您可能需要打开插槽上的闩锁才能取出显卡,具体视您所用主板而定。有关正确操作步骤,请 参见主板文档。...
- Page 24 硬體安裝 1. 關閉電腦電源並拔除電源線。 2. 開啟機箱並找到顯示卡插槽。 3. 取下電腦背面對應的插槽蓋。 4. 將顯示卡插入插槽直到完全卡至定位。 5. 用螺絲固定顯示卡至機箱。 6. 若您的顯示卡需要外部電源,請連接電 源至顯示卡。...
- Page 25 7. 關閉機箱。將顯示器纜線接至顯示卡。 DisplayPort HDMI 8. 將電源線插入並開啟電腦電源。 驅動程式安裝 1. 將支援光碟放入您的光碟機。 2. 請依照畫面上的指示完成驅動程式安裝。 * 本文件中的顯示卡相片僅供參考,您購買的實際產品可能不同。 * 視您的主機板而定,您可能需要開啟插槽上的閂鎖才能取出顯示卡。請參閱主機板說明文件以 了解正確的程序。...
- Page 26 Pemasangan Perangkat Keras 1. Matikan PC, lalu lepaskan kabel daya. 2. Buka rangka, lalu cari slot kartu grafis. 3. Lepaskan penutup slot terkait di bagian belakang PC. 4. Masukkan kartu ke slot hingga terpasang dengan benar. 5. Kencangkan kartu pada rangka dengan sekrup.
- Page 27 7. Tutup rangka. Pasang kabel layar ke kartu. DisplayPort HDMI 8. Pasang kabel daya, lalu hidupkan PC. Penginstalan Driver 1. Masukkan CD dukungan ke drive optik. 2. Ikuti petunjuk di layar untuk menyelesaikan penginstalan driver. * Foto kartu grafis dalam dokumen ini hanya sebagai referensi dan mungkin berbeda dengan produk aslinya yang Anda beli.
-
Page 28: Eu Declaration Of Conformity
EU Declaration of Conformity For the following equipment: Graphics Card (Product Name) RX580 / RX570 / RX560 / RX550 / ASRock (Model Designation / Trade Name) ASRock Incorporation (Manufacturer Name) 2F., No.37, Sec. 2, Jhongyang S. Rd., Beitou District, Taipei City 112, Taiwan (R.O.C.) (Manufacturer Address) EMC —... - Page 29 ASRock EUROPE B.V. (Company Name) Bijsterhuizen 1111 6546 AR Nijmegen The Netherlands (Company Address) Person responsible for making this declaration: (Name, Surname) A.V.P (Position / Title) March 9, 2018 (Date)
- Page 30 Phone/Fax No: +1-909-590-8308/+1-909-590-1026 hereby declares that the product Product Name : Graphics Card Model Number : RX580 / RX570 / RX560 / RX550 Conforms to the following specifications: FCC Part 15, Subpart B, Unintentional Radiators Supplementary Information: This device complies with part 15 of the FCC Rules. Operation is subject to the...
- Page 31 (including damages for loss of profits, loss of business, loss of data, interruption of business and the like), even if ASRock has been advised of the possibility of such damages arising from any defect or error in the documentation or product.
- Page 32 HDMI Licensing LLC in the United States and other countries. Contact Information If you need to contact ASRock or want to know more about ASRock, you’re welcome to visit ASRock’s website at http://www.asrock.com; or you may contact your dealer for further information. For technical questions, please submit a support request form at https://event.asrock.com/tsd.asp...
Need help?
Do you have a question about the RX580 and is the answer not in the manual?
Questions and answers