Table of Contents
Advertisement
Quick Links
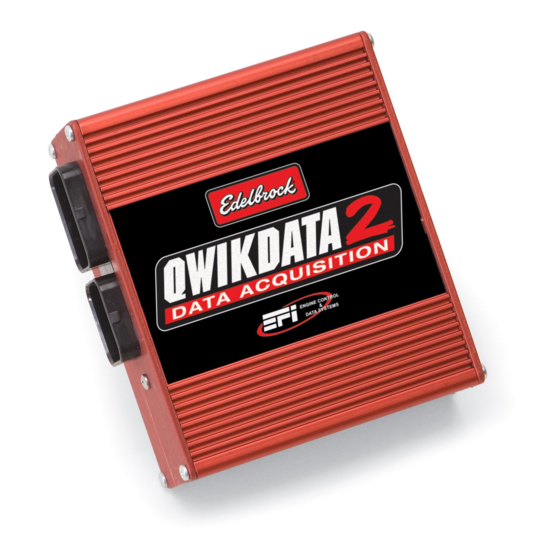
Edelbrock QwikData 2
Quick Start Guide
This QwikData 2 QwikStart guide is a condensed installation manual, outlining the basic setup functions to get your
data acquisition system up and running.
For more detailed information and to better familiarize yourself with the power of QwikData 2 Data Logger System,
please review the QwikData 2 Installation Manual and the Help Menu included in your software.
#63-91270QS
Advertisement
Table of Contents

Summary of Contents for Edelbrock QwikData 2
- Page 1 Edelbrock QwikData 2 Quick Start Guide This QwikData 2 QwikStart guide is a condensed installation manual, outlining the basic setup functions to get your data acquisition system up and running. For more detailed information and to better familiarize yourself with the power of QwikData 2 Data Logger System, please review the QwikData 2 Installation Manual and the Help Menu included in your software.
-
Page 2: Table Of Contents
Contents EDELBROCK QWIKDATA 2 QUICK START MANUAL 1 Step 1. Software Installation ........................... 2 2 USB Drivers ........................... 3 3 Getting Started ........................... 4 CONFIGURATION ................................Step 2. Designate Setup File................................Step 3. Register LCU ................................. Step 4. Set Outing Data ................................. -
Page 3: Step 1. Software Installation
Introducing QwikData 2 Thank you for acquiring QwikData 2. You now have at your fingertips all the tools you'll need to manage your Data Acquisition applications! The QwikData 2 Quick Start manual is a condensed installation manual outlining the basic setup functions to get your system up and running. -
Page 4: Usb Drivers
Step 1. Software Installation USB Drivers The QwikData 2 Power to Win install disk will copy the current device drivers during installation to your "C:\Power to Win" directory. Follow the instructions below to complete the installation of your USB drivers. -
Page 5: Getting Started
NOTE: Many items in the Software Toolbars will be grayed out, these are reserved for functions in future software releases. Follow the preceding steps in this manual to complete your QwikData 2 Data System setup. CONFIGURATION The Configuration module is for managing all of your data logger setups. -
Page 6: Step 2. Designate Setup File
Hide ECU Channels menu option. This option will hide all ECU channels not related to your setup. 1. On the Menu Bar under Logger, select Hide ECU Channels. A check mark will be placed next to the option indicating all ECU channels will be hidden in logger setup. Edelbrock QwikData 2... -
Page 7: Step 3. Register Lcu
· Create recognizable file names like Car description or event name eg: C:\Power to Win\Data\Mustang or C:\Power to Win\Data\Raceway Park · Unused serial number fields should be set to zero. · Data downloaded from an unregistered LCU will default to position one. Edelbrock QwikData 2... -
Page 8: Step 4. Set Outing Data
2. Type in any text Comments for the data set. 3. Click OK to save or Print to print a hard copy. Notes The Setup Sheet is saved and will be downloaded as part of each logger data set. Edelbrock QwikData 2... -
Page 9: Step 5. Creating (Edit) Calibrations
A pressure transducer may have a output signal range of .5 volts to 4.5 volts. The LCU converts this voltage to a Binary representation. QwikData 2 is a 12 bit system with a maximum resolution of 4096 counts(bits). At 0.0 psi the sensor output is .5 volts or 414 bits, at 100 psi the sensor output is 4.40 volts or 3605 bits. -
Page 10: Channel Parameters
· It is recommended that the channel Filter parameter is set to none during calibration. · Graph Scales will be applied to Calibration Window graph and Analysis Channel graph. · Dashboard drop down feature is reserved for future software releases. Edelbrock QwikData 2... -
Page 11: Importing Calibrations
2. In the calibration window menu bar under channel click Select Channel. Fig.1 3. From the Analog Channels window double click the channel you want to calibrate (Fig.2). 4. From the menu bar under file select Import. Fig.2 Edelbrock QwikData 2... - Page 12 · The calibration window will reopen with the selected calibration applied (Fig.4). Fig.4 7. Repeat steps 2 thru 6 for next sensor. 8. To save changes exit Calibration Window or under File on the menu bar select Save Changes . Edelbrock QwikData 2...
-
Page 13: Calibrating In Manual Adc Count
The graphic display is updated as points are added to the calibration grid. If calibration points exceed graph adjust graph scaling in step #7 of Parameters. 6. Repeat step 2 to enter more calibration points if necessary. 7. Enter a Calibration Type. 8. Close to save changes. Edelbrock QwikData 2... -
Page 14: Calibrating From Sensor Output
· You can use the Del key to delete unwanted calibrations points for the selected grid cell. · Use the Edit Value menu to edit existing calibration points. · The first four available channels on the channels list are LCU internal, the connection status will always read Not Connected for these channels. Edelbrock QwikData 2... -
Page 15: Step 6. Digital Channel Input Setup
· Reed Switch Speed Sensor #91116 purchased before Sept.09 require a .33uF capacitor be soldered across the signal and ground wires inside the Switchcraft sensor connector. Refer to Connecting a Reed Switch Speed Sensor in Instrumentation section of QwikData 2 Manual. Edelbrock QwikData 2... -
Page 16: Step 7. Logger Set-Up
Step 7. Logger Set-up Logging Table Enable Conditions OPTION 1: Your QwikData 2 harness is supplied with two leads labeled LOG-SW and SW-GND for a switch to manually start logging(Switch in closed position) and stop logging. Select Switch 3 for manual switch override. -
Page 17: Logging Table Channel Setup
· Hold the Ctrl key and select multiple channels to change more than one channel at a time. · The Channel Logging Rate of LCU Battery also controls the refresh rate of the Comms screen. It is recommended to keep this rate at 50Hz or Higher. Edelbrock QwikData 2... -
Page 18: Usb Communication
2. From your desktop Click the USB Comms Icon . USB Communication program should open and display a blank window. In the status bar at the bottom of the page ON LINE should be displayed indicating the computer and logger are communicating. Edelbrock QwikData 2... -
Page 19: Step 9.Sending A Config To The Lcu
· For details regarding modifying the Comms screen see Editing Windows in the USB Communication section of the QwikData 2 Manual or from Help on your QwikData 2 Software Toolbar. · For details regarding how to Zero Analog channels see Zero Channels in the USB Communication section of the QwikData 2 Manual or from Help on your QwikData 2 Software Toolbar. -
Page 20: Step 10. Downloading Logged Data
After the download is complete your Setup File is automatically re-loaded. Notes · You cannot download the logger while it is still recording data. · If Logger is empty a window indicating LCU has no data to download will display. Edelbrock QwikData 2... -
Page 21: Data Analysis
Notes · Ctrl+V to tile graphs. For a list of all Analysis Icons and Hot Keys see Analysis Icons and Hot Keys in the User Manual or from Help on the toolbar of the QwikData 2 Software. Edelbrock QwikData 2... -
Page 22: Step 11. Add New Outing
· Analysis can be set to automatically open the last downloaded data file. For details see Auto Update in the Data Analysis section of the QwikData 2 Manual or from Help on your QwikData 2 Software Toolbar. · You can use the Replace Outing menu to replace the current outing. -
Page 23: Step 11A. Replace Outing
· Analysis can be set to automatically open the last downloaded data file. For details see Auto Update in the Data Analysis section of the QwikData 2 Manual or from Help on your QwikData 2 Software Toolbar. Edelbrock QwikData 2... -
Page 24: Step 12. Open A Time Plot
Notes · Clicking on a channel in the file folder makes it the new current channel. · Right click over the left axis to open the channel scaling popup menu. Edelbrock QwikData 2... -
Page 25: Step 12A. Open A Distance Plot
· Distance Plot requires wheel speed and distance channel logging. · Clicking on a channel in the file folder makes it the new current channel. · Right click over the left axis to open the channel scaling popup menu. Edelbrock QwikData 2... -
Page 26: Harness Details
QwikData 2 system. To make the installation as easy as possible, the wiring harness provided is completely assembled with connectors that mate to the supplied sensors. Each sensor is connected to the QwikData 2 unit by simply mating the appropriate connectors. -
Page 27: Suggested Harness Routing
Getting Started Suggested Harness Routing Edelbrock QwikData 2... -
Page 28: 91290 Basic Analog Harness Details
Getting Started #91290 Basic Analog Harness Details Edelbrock QwikData 2... - Page 29 Getting Started #91290 Basic Harness Schematic Edelbrock QwikData 2...
- Page 30 CABLE SEAL, METRI-PACK 150 SERIES DELPHI 12048087 TPA, METRI-PACK 150 SERIES DELPHI 12052845 HOUSING, METRI-PACK 150 SERIES DELPHI 12129615 CAVITY PLUG, METRI-PACK 150 SERIES DELPHI 12059168 TPA, METRI-PACK 150 SERIES DELPHI 12052845 EN3 MINI WEATHERTIGHT CONNECTOR SWITCHCRAFT EN3C4FC Edelbrock QwikData 2...
-
Page 31: 91294 Advanced Thermocouple Harness Details
Getting Started #91294 Advanced Thermocouple Harness Details Edelbrock QwikData 2... - Page 32 Getting Started #91294 Advanced Thermocouple Harness Schematic Edelbrock QwikData 2...
- Page 33 HOUSING, METRI-PACK 150 SERIES DELPHI 12129615 TERMINAL, MALE METRI-PACK 150 SERIES DELPHI 12077628 CABLE SEAL, METRI-PACK 150 SERIES DELPHI 12048087 TPA, METRI-PACK 150 SERIES DELPHI 12052845 SUBMINI CONNECTOR ALLOY CODE K OMEGA SMPW-K-F EN3 MINI WEATHERTIGHT CONNECTOR SWITCHCRAFT EN3C4FC Edelbrock QwikData 2...
-
Page 34: 91291 Advanced Analog Harness Details
Getting Started #91291 Advanced Analog Harness Details Edelbrock QwikData 2... - Page 35 Getting Started #91291 Advanced Analog Harness Schematic Edelbrock QwikData 2...
- Page 36 SOCKET TERMINAL, SUPER SEAL 3-1447221-5 HOUSING, METRI-PACK 150 SERIES DELPHI 12129615 TERMINAL, MALE METRI-PACK 150 SERIES DELPHI 12077628 CABLE SEAL, METRI-PACK 150 SERIES DELPHI 12048087 TPA, METRI-PACK 150 SERIES DELPHI 12052845 EN3 MINI WEATHERTIGHT CONNECTOR SWITCHCRAFT EN3C4FC Edelbrock QwikData 2...
-
Page 37: Pre Outing Check-List
12. Manually Start Logger under Syscon option and log sample data to test setup. 13. Stop data logging and Download sample data file. 14. Open Data Analysis program. 15. Open Downloaded Data File and verify logged data. Edelbrock QwikData 2... -
Page 38: Qwikdata 2 Tech Support
Getting Started Qwikdata 2 Tech Support For further information, Technical support, updates and free downloads please see the Edelbrock web site and QwikData 2 Support Forum: Edelbrock Toll-Free Tech Line: 800-416 8628 7am-5pm PST, Monday-Friday Web site: Edelbrock.com - Automotive - Data Acquisition- QwikData 2... -
Page 39: User Notes
Getting Started User Notes Edelbrock QwikData 2... - Page 40 Torrance, California 90503 For more information in print or on CD call: 1-800-FUN-TEAM or go to website Factory Tech Line: 1-800-416-8628 from 7am-5pm PST, Monday-Friday Headquarters: 1-310-781-2222 from 8am-5pm PST, Monday-Friday Tech support: QD@edelbrock.com Brochure #00879 ©2009 Edelbrock Corporation Printed Oct 2009...