Table of Contents
Advertisement
Quick Links
Advertisement
Table of Contents

Related Manuals for Zenith ZICSD373


Summary of Contents for Zenith ZICSD373
- Page 1 ZICSD373 Installation & Instruction Manual...
- Page 2 Please read these instructions first before using your appliance Thank you for choosing a zenith appliance. Please take some time to read this user manual before using your appliance, to ensure you know how to safely operate the controls and functions.
-
Page 3: Table Of Contents
CONTENTS 1 Your refrigerator 4 Before operating Final Check ........18 2 Warnings 5 Using your refrigerator 19 Electrical requirements ....... 5 Temperature control and adjustment...19 Warning! This appliance must be Suggested arrangement of food earthed ..........5 in the fridge/freezer ......20 Energy saving tips ...... -
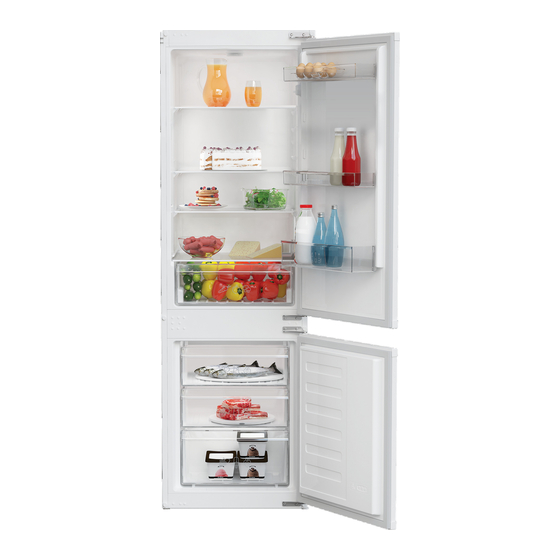
Page 4: Your Refrigerator
Your refrigerator Congratulations on your choice of a zenith quality appliance which has been designed to give you service for many years. 7. Adjustable body shelves 1. Fridge compartment door shelves 2. Bottle Shelf 8. Interior light 3. Deep-freeze compartment 9. -
Page 5: Warnings
• Keep ventilation openings, in the • Do not dispose of the appliance appliance enclosure or in the built-in on a fire. At zenith, the care and structure, clear of obstruction. protection of our environment is an • Do not use mechanical devices ongoing commitment. -
Page 6: Electrical Requirements
1. Connect the green-yellow or green mains lead which can only be obtained (Earth) wire to the terminal in the plug from a zenith authorised service agent. marked ‘E’ or with the symbol coloured green and yellow or green. 2. Connect the blue (Neutral) wire to the terminal in the plug marked ‘N’... -
Page 7: Energy Saving Tips
Energy saving tips Take it to the collection center for the recycling of electrical and electronic 1. Ensure your appliance is installed in a equipment. Please consult your local well ventilated area. 2. Ensure the time between buying authorities to learn about these chilled/frozen food and placing them collection centers. -
Page 8: Installation
Installation WARNING: Do not locate extension Disposing of the packaging sockets or charging transformers / The packing materials may be power supplies or Lithium-Iron battery dangerous for children. Keep the operated products adjacent to the packing materials out of the reach compressor as they could overheat. -
Page 9: Transportation Instructions
4. The appliance must be protected appliance or tamper with the controls. against rain, moisture and other Zenith declines to accept any liability atmospheric influences. should the instructions not be followed. 5. When positioning your appliance take care not to damage your flooring, pipes, wall coverings etc. -
Page 10: Installation Instructions
Replacing the interior light Installation instructions bulb 1. The space in the room where the To change the Bulb/LED used for appliance is installed must not be illumination of your refrigerator, call smaller than 10 cubic meters. your Authorised Service. The lamp(s) Minimum ambient temperature is 5°C, used in this appliance is not suitable if used in colder conditions the freezer... -
Page 11: Reversing The Doors
Reversing the doors Proceed in numerical order. Top Door 1.Unscrew top hinge (1). 2.Carefully remove the top door (2). 3.Unscrew lower hinge (3). 4.Remove plastic plugs (7 & 8). 5.Refit top hinge (1) as lower hinge (16) on the left hand side. 6.Replace top door (17). -
Page 12: Installation Instructions Detailed Step By Step
Installation instructions detailed step by step No wooden back wall 71 mm 40 mm The back wall of the wooden cabinet must be left open completely to kitchen wall in order to allow sufficient air circulation to cool down the condenser unit for energy efficiency. Adjusting the legs If your refrigerator is unbalanced: You can balance your refrigerator by turning the legs of it as illustrated in the figure. - Page 14 Torx Wood Plastic Sheet Wood (PS) (1TW) * Spares included * If the subject parts are not included in the product you have purchased, then it is valid for other models. view 42 mm ≤ 17 Note: Installation step for 2, screws for connecting top plastic part should not be screwed very hard, because of moving the plastic part easily left or right side.
- Page 15 4 mm...
- Page 16 4 2 . (1TW)
- Page 17 (1TW) (1TW) 2.0 mm...
- Page 18 21 mm 4 mm 2 mm 4 mm 2 mm 2 mm...
-
Page 19: Before Operating
Before operating Final Check Before you start using the fridge/ freezer check that: 1. The feet have been adjusted for perfect levelling. 2. The interior is dry and air can circulate freely at the rear of the cabinet. 3. Clean the interior as recommended under “Maintenance and cleaning.”... -
Page 20: Using Your Refrigerator
Using your refrigerator Temperature control and We recommend that you check adjustment the temperature with an accurate thermometer to ensure that the storage compartments are kept to the desired temperature. Remember you must take your reading very quickly since the thermometer temperature will rise very rapidly after you remove it from the freezer. -
Page 21: Suggested Arrangement Of Food In The Fridge/Freezer
Suggested arrangement of The following guidelines and food in the fridge/freezer recommendations are suggested to obtain the best results and storage hygiene. 1. The fridge compartment is for the short term storage of fresh food and drinks. 2. The freezer compartment is rated and suitable for the freezing and storage of pre frozen food. -
Page 22: Storing Frozen Food
10. Place chilled cooked food and Freezing fresh food similar food near the rear of the fridge Please observe the following inner liner where the cold wall is located. instructions to obtain the best results. 11. Shelves, racks, crisper bins, Do not freeze too large a quantity at drawers, flaps, bottle grippers are all any one time. -
Page 23: Defrosting
All food should be wrapped in several Defrosting layers of newspaper and stored in a cool A) fridge compartment place (e.g. fridge or larder). The fridge compartment defrosts Remove all freezer drawers. Containers automatically. full of warm water may be placed The defrosting water runs to the drain carefully in the freezer to speed up the tube via a collection container at the... -
Page 24: Maintenance And Cleaning
Maintenance and cleaning ** Check door seals regularly to ensure ** We recommend that you switch off the appliance at the socket outlet and they are clean and free from food pull out the mains plug before cleaning. particles. ** Never use any sharp abrasive ** Removal of door tray instrument, soap, household cleaner, •... -
Page 25: Do's And Don'ts
Do’s and Don’ts Do- Wrap all food in aluminium foil or Do- Clean your appliance regularly freezer quality polythene bags and (see “Maintenance and cleaning”). make sure any air is excluded. Do- Keep raw meat and poultry below Do- Wrap frozen food when you buy it cooked food and dairy products. -
Page 26: Problem Solving
Problem solving Don’t- Exceed the maximum freezing loads (4 kg in any 24 hours) when If the appliance does not operate when switched on, check whether: freezing fresh food. • The plug is inserted properly in the Don’t- Give children ice-cream and socket and that the power supply is on. - Page 27 Repairs necessary as a direct or indirect result of: Accidental damage, misuse or abuse of a product. An attempted repair of a product by anyone other than a Zenith Approved Engineer (the “Engineer”). Installation or use of a product where such installation or use fails to meet the requirements contained in this guarantee or the product manual.
- Page 28 Optional extras, where available (i.e. extendable feet) are supplied on a chargeable basis only. Does Zenith offer replacements? This is a repair-only guarantee. On occasion the Manufacturer may at its sole discretion, replace your product with a new product instead of carrying...
- Page 29 identical model, but when this is not possible, a model of similar specification will be provided. The Manufacturer will cover the costs and arrange for the delivery of the new product and for the return of the old product. Any costs related to disconnecting the faulty product and installing the replacement product will not be borne by the Manufacturer unless previously agreed to in writing.
-
Page 30: Guarantee
HOW TO OBTAIN SERVICE Please keep your purchase receipt or other proof of purchase in a safe place; you will need to have it should the product require attention under guarantee. It will be useful if you complete the details below, as it will help us assist you when requesting service. - Page 31 Should you experience any difficulty in obtaining service contact the Zenith Customer Helpline on Tel: 0333 207 2028 or email: customerservice@support.zenithappliance.co.uk This guarantee is provided by Beko plc. Beko House, 1 Greenhill Crescent, Watford, Herts, WD18 8QU.
- Page 32 4578337782_AB...