
Related Manuals for Invacare AVIVA RX Series


Summary of Contents for Invacare AVIVA RX Series
- Page 1 Invacare® AVIVA™ RX Series en Power Wheelchair User Manual This manual MUST be given to the user of the product. BEFORE using this product, this manual MUST be read and saved for future reference.
- Page 2 All rights reserved. Republication, duplication or modification in whole or in part is prohibited without prior written permission from Invacare. Trademarks are identified by ™ and ®. All trademarks are owned by or licensed to Invacare Corporation or its subsidiaries unless otherwise noted.
-
Page 3: Table Of Contents
Contents 5 Setup ......... . . 29 5.1 General Setup Information. - Page 4 8.2 Transferring Mobility Device to Vehicle ....43 8.3 Use Mobility Device as Vehicle Seat....44 8.3.1 Anchoring Mobility Device Used as Vehicle Seat .
-
Page 5: General
For more information about the product, for example 1.3 Compliance product safety notices and product recalls, contact your Invacare distributor. See addresses at the end of this Quality is fundamental to the company’s operation, working document. within the disciplines of ISO 13485. -
Page 6: Product-Specific Standards
We are continuously working towards ensuring that the company’s impact on the environment, locally and globally, You should immediately contact an authorised Invacare is reduced to a minimum. provider if the usability of your mobility device is restricted We only use REACH compliant materials and components. -
Page 7: Service Life
The fact that we estimate a service life for this product does not constitute an additional warranty. 1.7 Limitation of Liability Invacare accepts no liability for damage arising from: • Non-compliance with the user manual •... -
Page 8: Safety
Invacare® AVIVA RX Series 2 Safety WARNING! Risk of Death, Serious Injury or Damage Improper routing of cables may cause a tripping 2.1 General Safety Notes entanglement or strangulation hazard that may result in death, serious injury or damage. DANGER! –... - Page 9 Safety WARNING! WARNING! Risk of damage or injury if mobility device is Risk of injury when transferring mobility device accidentally set into motion to a vehicle for transport with the occupant – Switch the mobility device off before you get seated in it in, get out or handle unwieldy objects.
- Page 10 Invacare® AVIVA RX Series WARNING! CAUTION! Risk of falling out of the mobility device Risk of injury due to wrong lifting or dropping – Do not slide forward on the seat, do not lean of heavy components forward between your knees, do not lean –...
-
Page 11: Safety Information On The Electrical System
Textiles and other materials that normally would mobility device that are not expressly certified not burn are easily ignited and burn with great by Invacare for this purpose. Have all electrical intensity in oxygen enriched air. installations done by your authorized Invacare –... - Page 12 Invacare® AVIVA RX Series WARNING! WARNING! Risk of death, serious injury, or damage Risk of death or serious injury Corroded electrical components due to water or Failure to observe these warnings can cause an liquid exposure can result in death, serious injury, electrical short resulting in death, serious injury, or damage.
-
Page 13: Safety Information On Electromagnetic Interference
Safety Risk of damage to the mobility device WARNING! A failure in the electric system can lead to Risk of malfunction due to electromagnetic unusual behavior such as continuous light, no interference light, or noises from the magnetic brakes. – Do not switch on or operate portable –... -
Page 14: Safety Information On Driving And Freewheel Mode
Invacare® AVIVA RX Series 2.4 Safety Information on Driving and Freewheel Mode DANGER! Risk of death, serious injury, or damage Malfunctioning joystick could cause unintended/erratic movement resulting in death, serious injury, or damage – If unintended/erratic movement occurs, stop using the wheelchair immediately and contact a qualified technician. - Page 15 Safety WARNING! WARNING! Risk of injury if the mobility device tips over Risk of injury if the mobility device tips over – Inclines and declines can only be travelled (continued) up to the maximum safe slope (refer to 11 – Never use the mobility device to transport Technical Data, page 60).
- Page 16 Invacare® AVIVA RX Series WARNING! WARNING! Risk of breaking down in adverse weather Risk of injury conditions, i.e. extreme cold, in an isolated area If your mobility device has been fitted with – If you are a user with severely limited mobility,...
-
Page 17: Safety Information With Regard To Care And Maintenance
– DO NOT attempt to carry out maintenance work that is not described in this user manual. Such repair and/or service MUST be performed by a qualified technician. Contact a provider or Invacare technician. 1654649-B... -
Page 18: Safety Information Regarding Changes And Modifications To The Mobility Device
– Only use seating systems that have been approved by Invacare for this mobility device. Electrical and electronic components which have not been approved by Invacare for use with this mobility device can cause fire hazards and lead to electromagnetic damage. -
Page 19: Safety Information On Wheelchairs With A Lifter
A retrofitted backrest which is not approved by this manual and can be carried out by the user Invacare for use with this mobility device may without problems require the correct tools for overload the backrest tube and thus increase the proper work. - Page 20 Invacare® AVIVA RX Series CAUTION! CAUTION! Risk of injury if the wheelchair tips over Damage to wheelchair caused by one-sided – Never exceed the maximum permissible load loading on lifter pillar (see chapter 11 Technical Data, page 60). – One-sided loading occurs if the seat is raised –...
-
Page 21: Product Overview
Product Overview 3.4 Labels on Product 3 Product Overview 3.1 Intended Use This mobility device was designed for persons whose ability to walk is impaired, but who are still in terms of their eyesight and physically and mentally able to operate an electric mobility device. - Page 22 Invacare® AVIVA RX Series If the symbol appears on Identification of the a bright yellow sticker, the position of the coupling anchoring point is suitable lever for driving and push for fixation of the mobility operation (only the right device in a vehicle for use side visible in the picture).
- Page 23 Product Overview Explanation of Symbols on Labels Never drive with two people! Manufacturer Date of manufacture Never drive over uneven surfaces when the lifter is raised! European Conformity Medical device This symbol indicates the “Drive” position of the coupling lever. In this position the motor is engaged and the motor brakes Serial number are operational.
-
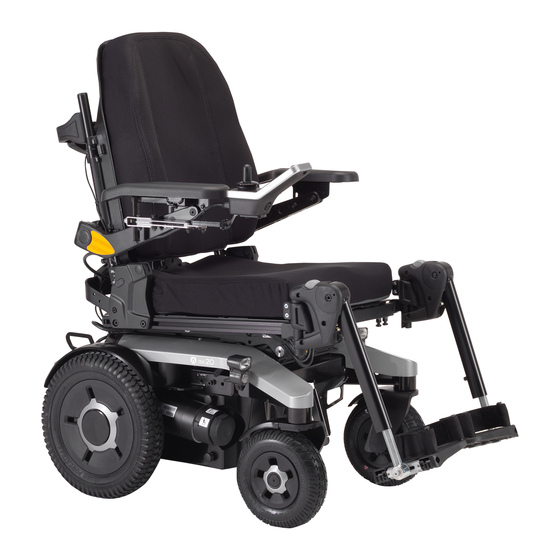
Page 24: Main Parts Of Wheelchair
Invacare® AVIVA RX Series 3.5 Main Parts of Wheelchair This symbol indicates the OFF position of the circuit breaker switch. In this position the battery source is isolated and the mobility device cannot be operated or charged. This symbol indicates the ON position of the circuit breaker switch. -
Page 25: User Inputs
0 °C • If the mobility device is fitted with a chin • Invacare mobility devices are fitted with safety control, it reacts different to forced profile. mechanisms that prevent capacity overload Refer to the manual of the chin control for of the electronic components. -
Page 26: Accessories
Invacare® AVIVA RX Series Belt can be adjusted on both sides. This means that the 4 Accessories buckle can be centrally positioned. Belt with plastic buckle, adjustable both sides 4.1 Posture Belts A posture belt is an option which can either be fixed to the mobility device ex-works or can be retrofitted by your specialist provider. -
Page 27: Adjusting Posture Belt Correctly
You can find more information about maintenance work on belts in the service manual, which is available from Invacare. 4.2 Using Cane Holder If your mobility device is fitted with a cane holder, it can be used for the safe transport of a walking cane, underarm or forearm crutches. - Page 28 Invacare® AVIVA RX Series 1. Open upper hook-and-loop fastener. 2. Place lower end of the walking cane or crutches in container at bottom. 3. Walking cane or crutches can be secured at upper end using hook-and-loop fastener. 1654649-B...
-
Page 29: Setup
Setup 5 Setup 5.1 General Setup Information For more information about setup, see the user manual of the seating system. 1654649-B... -
Page 30: Usage
Invacare® AVIVA RX Series • The posture belt (if installed) is in perfect order. 6 Usage • The rear mirror (if installed) is adjusted so you can look behind at all times without having to bend forward or 6.1 Driving shift your seating position. -
Page 31: Information About Getting In And Out
Usage Depending on which side the remote is installed on, you WARNING! need to disconnect the remote cable before removing the Risk of serious injury or damage armrest. Improper transfer techniques may cause serious injury or damage – Before attempting transfers, consult a healthcare professional to determine proper transfer techniques for the user and type of wheelchair. -
Page 32: Swivelling Nucleus Midline Holder To Side
Invacare® AVIVA RX Series 4. Always engage both motor locks/clutches and free wheel hubs (if fitted) to prevent wheels from moving. 5. Depending on armrest type of your mobility device, detach armrest or swivel it up. 6. Now slide onto your new seat. -
Page 33: Taking Obstacles
Usage 6.5 Taking Obstacles 6.5.3 Correct Way to Take Obstacles 6.5.1 Maximum Obstacle Height The following instructions how to take obstacles also apply for attendants if the mobility device is fitted You can find information about maximum obstacle heights in with an attendant control. -
Page 34: Driving Up And Down Gradients
Invacare® AVIVA RX Series 4. Approach with full speed until curb climber makes CAUTION! contact with obstacle. Impetus will lift both front Risk of tipping over wheels over obstacle. – Only ever drive downhill at a maximum of 2/3 5. Keep at consistent speed until rear wheels have also of the top speed. -
Page 35: Use On Public Roads
– When the motors are disengaged (for push operation whilst freewheeling), the Contact your Invacare provider if you have any questions. electromagnetic motor brakes are deactivated. When the mobility device is parked, the levers 6.8 Pushing the mobility device in freewheel... - Page 36 Invacare® AVIVA RX Series Fig. 6-5 1. Switch off remote. 2. Turn engaging turn knob A clockwise B. Motor is disengaged. 3. Turn engaging turn knob counterclockwise C. Motor is engaged. 1654649-B...
-
Page 37: Controls System
It can however take up to five minutes checking the entire controls system. A specialised until the controls system has cooled down enough for the Invacare provider must perform the replacement. drive to restore full performance again. For more information about the circuit breaker type, If the drive is stalled by an insurmountable obstacle, for see 11 Technical Data, page 60. -
Page 38: Batteries
Invacare® AVIVA RX Series erratically, the circuit breaker can be used to isolate the 7.2.1 General Information on Charging battery source quickly. New batteries should always be fully charged once before It can also be used to turn off the power supply of their first use. -
Page 39: Charging Batteries
WARNING! chargers may be left unattended during charging. All Risk of short circuit and electric shock if the charging devices which are supplied by Invacare comply battery charger has been damaged with these requirements. – Do not use the battery charger if it has been •... -
Page 40: Disconnecting Mobility Device After Charging
Invacare® AVIVA RX Series 7.2.4 Disconnecting Mobility Device After Charging • Pay attention to the Battery Charge Indicator! Charge the batteries when the Battery Charge Indicator shows 1. Once charging is complete, first disconnect battery that battery charge is low. -
Page 41: Transporting Batteries
Controls System • The depth of discharge affects the cycle life. The harder • The batteries reach their end of life when the drive a battery has to work, the shorter is its life expectancy. range is significantly smaller than usual. Contact your Examples: provider or service technician for details. - Page 42 Invacare® AVIVA RX Series Dead or damaged batteries can be given back to your provider or directly to Invacare. 1654649-B...
-
Page 43: Transport
Transport 8 Transport 8.1 General Information on Transport Fig. 8-1 WARNING! Risk of death or serious injury to the mobility 8.2 Transferring Mobility Device to Vehicle device user and potentially any other nearby occupant of the vehicle, if a mobility device WARNING! is secured using a 4-point tie-down system Mobility device is at risk of tipping over if... -
Page 44: Use Mobility Device As Vehicle Seat
Invacare® AVIVA RX Series 8.3 Use Mobility Device as Vehicle Seat WARNING! Risk of injury and damage to mobility device The following section does not apply to models or and vehicle configurations which may not be used as a vehicle Risk of tipping over or uncontrolled movements seat. - Page 45 (UK for example), but may also be obtained from or tables. Invacare as an option in other countries. – If your wheelchair is equipped with an angle adjustable backrest, then it must be placed in This mobility device complies with the requirements of ISO an upright position.
-
Page 46: Anchoring Mobility Device Used As Vehicle Seat
Invacare® AVIVA RX Series Invacare tests with a 4–point tie-down system from BraunAbility® Safety Systems. – Contact BraunAbility for more information on how to obtain such a system for your country and vehicle type. For information concerning the curb weight, refer to 11 Technical Data, page 60. -
Page 47: Securing User In Mobility Device
2. Secure mobility device by tensioning belts in accordance optionally supplied for this mobility device by with tie-down system manufacturer's user manual. Invacare is perfectly suitable for use during transport. 8.3.2 Securing User in Mobility Device – The headrest must be adjusted to the user's ear height. -
Page 48: Transporting Mobility Device Without Occupant
CAUTION! Risk of injury – If you are unable to fasten your mobility device securely in a transport vehicle, Invacare recommends that you do not transport it. Your mobility device may be transported without restrictions, whether by road, rail or by air. Individual transport... -
Page 49: Dahl Docking System
• Before transporting your mobility device, make sure the motors are engaged and that the remote is switched off. Invacare strongly recommends that you additionally disconnect or remove the batteries. Refer to Removing the batteries. •... - Page 50 Invacare® AVIVA RX Series Components of Dahl Docking System Locking in Dahl Docking Station WARNING! Risk of Death, Serious Injury or Damage If the vehicle is moved while the mobility device is not correctly secured in the Dahl Docking station, death, serious injury or damage may occur.
- Page 51 Transport 4. When mobility device is properly secured, warning tone 1. Move mobility device forward to release pressure on ceases, red LED goes out and green LED lights up. locking pin. 5. Buckle up with seat belt of vehicle. 2. Push manual emergency release lever (8) to one side and hold it there, while mobility device moves away.
- Page 52 Invacare® AVIVA RX Series Fig. 8-10 Push emergency release tool and mobility device forward until locking pin has been forced down. 4. Move mobility device away from Dahl Docking station. 1654649-B...
-
Page 53: Maintenance
Invacare. That manual, however, is intended to be used by trained and authorised service technicians, and describes Have your vehicle checked once a year by an tasks which are not intended to be performed by the user. -
Page 54: Weekly
Invacare® AVIVA RX Series 9.2.2 Weekly Item Inspection check If inspection is not passed Armrests/side parts Check that armrests are firmly attached Tighten the screw or clamping lever that holds in their holders and do not wobble. the armrest (see chapter Adjustment Possibility for Remote). -
Page 55: Wheels And Tyres
Use tyre gauge to check pressure. Check weekly that the tyres are inflated to the correct pressure, see chapter 9.2 Inspection Checks, page 53. For recommended tyre pressure see inscription on tyre/rim or contact Invacare. Compare table below for conversion. 1654649-B... -
Page 56: Short-Term Storage
Invacare® AVIVA RX Series 9.4 Short-Term Storage • Even not being used, batteries discharge themselves. Best practice is to disconnect the battery supply from In case a serious fault is detected, a number of safety the power module if storing the mobility device longer mechanisms are built into your mobility device and will than two weeks. -
Page 57: Cleaning Intervals
Maintenance 9.6.2 Cleaning Intervals CAUTION! Risk of electric shock and product damage IMPORTANT! – Switch off the device and disconnect from Regular cleaning and disinfection enhances mains, if applicable. smooth operation, increases the service life and – When cleaning electronic components consider prevents contamination. -
Page 58: Disinfection
Invacare® AVIVA RX Series 1. Remove any installed optional equipment (only optional equipment which does not require tools). 2. Wipe down the individual parts using a cloth or soft brush, ordinary household cleaning agents (pH = 6 - 8) and warm water. -
Page 59: After Use
• Inspection according to service plan. See service in places (landfills) that are not appropriate according to legislation. manual, available from Invacare. • Cleaning and disinfection. Refer to 9 Maintenance, – DO NOT dispose of batteries in normal page 53. -
Page 60: Technical Data
Invacare® AVIVA RX Series 11 Technical Data 11.1 Technical Specifications The technical information provided hereafter applies to a standard configuration or represents maximum achievable values. These can change if accessories are added. The precise changes to these values are detailed in the sections for the respective accessories. - Page 61 Technical Data Charging Device Output Current • • 10 A Output Voltage • 24 V nominal Drive Wheel Tyres Tyre Type • 14 inch puncture–protected, puncture-proof, pneumatic Tyre Pressure The recommended maximum tyre pressure in bar or kpa is marked on the side wall of the tyre or the rim.
- Page 62 Invacare® AVIVA RX Series Driving Characteristics Speed • 3 km/h • 6 km/h • 10 km/h • 12 km/h Min. Braking Distance: Normal Operation • 400 mm (3 km/h) • 1000 mm (6 km/h) • 2100 mm (10 km/h) •...
- Page 63 Technical Data Driving Characteristics Min. Diameter for Turning in • 3200 mm (Ultra Low Maxx) Circles at Max. Speed • 4400 mm (Modulite) Stable While Turning Suddenly Continuous Driving Distance Range in Accordance with ISO 7176-4 Ultra Low Maxx 73.5 Ah batteries •...
- Page 64 Invacare® AVIVA RX Series Turning Diameter • 1506 - 2086 mm (Modulite) • 1975 - 2105 mm (Ultra Low Maxx) Pivot Width • 1300 - 1575 mm Required Width of Angled Corridor • 1100 mm (Ultra Low Maxx) • 930 mm (Modulite) Required Doorway Entry Depth •...
- Page 65 Technical Data Seat Type Dimensions According to ISO 7176–15 Ultra Low Maxx Modulite Stowage Length • 830 - 1006 mm • 565 - 865 mm • 565 - 690 mm Stowage Width • 1101 - 1210 mm • 1000 - 1180 mm Stowage Height •...
- Page 66 Horizontal distance of wheel axle from intersection of loaded seat and backrest reference planes The actual kerb weight depends on the fittings your mobility device has been supplied with. Every Invacare mobility device is weighed when leaving the works. Refer to the nameplate for the kerb weight (including batteries) measured.
-
Page 67: Service
It is confirmed by stamp and signature that all jobs listed in the inspection schedule of the service and repair instructions have been properly performed. The list of the inspection jobs to be performed can be found in the service manual which is available through Invacare. Delivery Inspection... - Page 68 Invacare® AVIVA RX Series Stamp of authorised provider / Date / Signature Stamp of authorised provider / Date / Signature 4th Annual Inspection 5th Annual Inspection Stamp of authorised provider / Date / Signature Stamp of authorised provider / Date / Signature...
- Page 69 Notes...
- Page 70 Notes...
- Page 71 Notes...
- Page 72 Invacare Distributors Australia: Canada: Ireland: New Zealand: Invacare Australia Pty. Ltd. Invacare Canada L.P. Invacare Ireland Ltd, Invacare New Zealand Ltd 1 Lenton Place, North Rocks NSW 570 Matheson Blvd East, Unit 8 Unit 5 Seatown Business Campus 4 Westfield Place, Mt Wellington 1060 2151 CDN Mississauga, On.