Apogee Symphony Desktop User Manual
Hide thumbs
Also See for Symphony Desktop:
- User manual (64 pages) ,
- User manual (28 pages) ,
- User manual (24 pages)
Table of Contents
Advertisement
Advertisement
Table of Contents

Related Manuals for Apogee Symphony Desktop


Summary of Contents for Apogee Symphony Desktop
- Page 1 Symphony Desktop User’s Guide v1.0, August 2020 ...
-
Page 2: Table Of Contents
Check Symphony Desktop Firmware Configure OS to use Symphony Desktop for Audio I/O macOS Windows 10 Apple iOS Configure Your DAW to use Symphony Desktop for Audio I/O Connecting Your Studio Standalone Operation OLED Touchscreen Home Screen Navigating the Touchscreen Interface... - Page 3 Monitor/Output Section Menu Bar Menus Symphony Desktop Control Menu File Menu View Menu Window Menu Help Menu Choose Your Symphony Desktop Workflows Important Workflow Concepts Monitoring Workflows Software Monitoring Direct Monitoring Plugin Processing Workflows Using the Apogee FX Rack Apogee Alloy Mic Preamp Emulation Print FX Monitor FX &...
- Page 4 Apogee Symphony Desktop User’s Guide Direct Monitoring Signal Flow Recording with the Symphony Desktop Control Mixer...
-
Page 5: Overview
Overview Introduction Apogee’s Element 24, 46 and 88 are Thunderbolt audio I/O boxes for Mac. The Element Series takes the best of cutting-edge Apogee gear like Symphony I/O Mk II, Ensemble Thunderbolt and Groove and puts it into simple form factors. With streamlined hardware features and advanced software control, the Element series delivers ultimate recording quality and performance at unprecedented prices. -
Page 6: Apple Logic Pro Integration
Apogee Symphony Desktop User’s Guide Apple Logic Pro Integration Included Plugins... -
Page 7: Navigating This User's Guide
Download and install the Symphony Desktop Control application (and driver if required) on your computer (page xx). ● Connect Symphony Desktop to AC power (required) and to your computer via USB (page xx). ● Check Symphony Desktop firmware and update if necessary (page xx). -
Page 8: In The Box
Mac & Windows: 4GB minimum RAM, 8GB Recommended Register your Product ● Access Apogee’s expert Technical Support for free ● Receive important product update information by email ● Take the Customer Satisfaction Survey for a chance to win Apogee gear! Register Now: w ww.apogeedigital.com/support/register... -
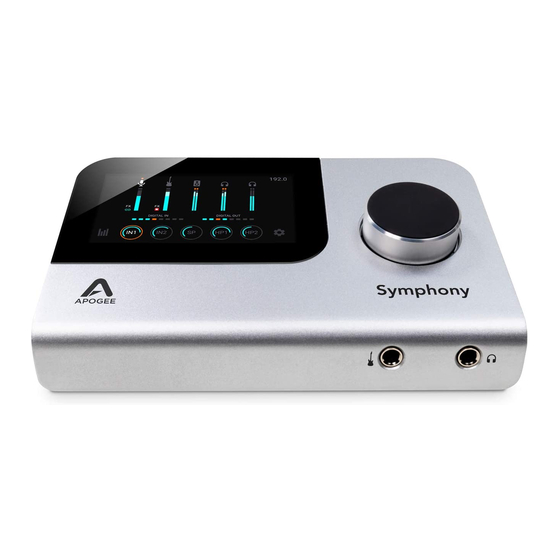
Page 9: Symphony Desktop Panel Tour
Apogee Symphony Desktop User’s Guide Symphony Desktop Panel Tour... -
Page 10: Getting Started
Apogee Symphony Desktop User’s Guide Getting Started Installing Symphony Desktop Software The complete functionality of Symphony Desktop is accessed through the Symphony Desktop Control software application, available for macOS and Windows 10 systems here: www.apogeedigital.com/support/ MacOS The download comes in the form of a .dmg file. Open it to view the contents. Inside you will find three items: ●... -
Page 11: Connecting Symphony Desktop
To remove the connector, rotate it counterclockwise until it stops, then pull straight out. 3. Power up Symphony Desktop by tapping the top panel Control knob Connecting to a Mac or Windows computer When connecting to your Mac, PC or iOS device, be sure to use Symphony Desktop’s USB icon xx port, not the USB Host port. -
Page 12: Check Symphony Desktop Firmware
3. Click Properties, then click the Advanced tab Apple iOS Apple iOS automatically chooses the most recently connected audio interface as the audio I/O device for all applications. Simply connect Symphony Desktop to your iOS device’s Lightning or USB-C port as described on page xx. -
Page 13: Connecting Your Studio
1. Connect microphones and line level audio gear to the rear panel XLR inputs. ● Connect dynamic and condenser mics to XLR inputs, then set Analog Level to Mic from the touchscreen (p.xx) or Symphony Desktop Control (p.xx). When using condenser mics, be sure to engage 48v phantom power. ●... - Page 14 Apogee Symphony Desktop User’s Guide 5. Connect to your Mac, Windows or iOS device to the USB icon xx port. 6. Connect electric guitars and basses to the front panel ¼” input. Once the ¼” connector is inserted, Input 2 Analog Level automatically toggles to Instrument.
-
Page 15: Standalone Operation
Set Symphony I/O MkII Clock source to Optical. Standalone Operation Symphony Desktop may be used standalone (i.e not connected to a computer) with any digital audio device equipped with S/PDIF or ADAT/SMUX optical I/O. To configure for standalone operation, Symphony Desktop must initially be connected to a Mac or Windows computer and the following settings made. -
Page 16: Oled Touchscreen
OLED Touchscreen OLED Touchscreen intro Home Screen The Home screen offers a general overview of Symphony Desktop, including meters for all inputs & outputs, sample rate indicator, and connection status. Five I/O buttons at the bottom of the touchscreen display level settings for Symphony Desktop’s analog inputs and... -
Page 17: Input 1-2 Overview
3. Monitor FX Rack On/Off & Preset Select - Enable Apogee FX Rack processing in the Monitor path (through the Control app direct monitoring mixer), and select a Rack preset. 4. Print FX Rack On/Off & Preset Select - Enable Apogee FX Rack processing in the Record path (to audio software) and select a Rack preset. -
Page 18: Output Overview
Apogee Symphony Desktop User’s Guide Output Overview 1. Level - set the level of Main outputs 1-2; 2. Source Meter - displays the digital level of the Main output source, before D/A conversion; 3. Mute - mute the Main output. -
Page 19: Headphone Output 1-2 Overview
Apogee Symphony Desktop User’s Guide Headphone Output 1-2 Overview 1. Level - displays the level of the headphone output; ● HP1 = front panel output; ● HP2 = rear panel output. 2. Source Meter - displays the digital level of the HP output source, before D/A conversion;... -
Page 20: System Settings 1
In some cases this setting may be overridden by software running on the computer (e.g when a DAW session project is open). 4. Firmware - Check and update Symphony Desktop firmware. 5. Reset - Reset Symphony Desktop to its factory default state. -
Page 21: Symphony Desktop Control Software
The Symphony Desktop Control application provides access to all settings, including System setup, direct monitor mixing, hardware DSP and Monitor controller functionality. Primary Window All features and settings of the Symphony Desktop interface can be controlled from the Primary window. It is broken down into several sections: Tool Bar The Tool Bar is always visible at the top of the Primary window. -
Page 22: System Sidebar
Red - System not ready. Either the hardware is not connected, or the system is not locked to the Clock Source. 2. Sample Rate - Set Symphony Desktop’s sample rate. In some cases this setting may be overridden by software running on the computer (e.g when a DAW session project is open). -
Page 23: Channel Section
5. Print FX On/Off - Toggle on/off Apogee FX Rack plugins on the Print signal path. 6. Load Print FX - Load and modify Apogee FX Rack plugins on the Print signal path. For more detailed information about Apogee FX Rack plugins, see the xx Analog IN Channels 1-2 Analog IN channels represent inputs from microphones, instruments and other analog sound sources. -
Page 24: Optical In Channels
Group - Link the Gain Controls for each Analog In channel. Visible only when Analog Level is set to Mic or Instrument. Gain offsets that exist before grouping channels are preserved. ● Soft Limit - Engage Soft Limit, Apogee’s proprietary analog transient xx ● Polarity Invert - Invert the polarity of the input signal. See xx Optical IN Channels 11. -
Page 25: Optical Output Channels
2. Enable Apogee FX Rack processing in the Monitor path (through the Mixer). 3. Load Monitor FX - Load and modify Apogee FX Rack plugins on the Monitor signal path. For more detailed information about Apogee FX Rack plugins, see xx 4. -
Page 26: Monitor/Output Section
Apogee Symphony Desktop User’s Guide Monitor/Output Section In the Monitor/Output Section, select the signals to be routed to the Main and Headphone outputs, then control their volume. Output Level Meters display the presence of signal at the outputs, useful as a diagnostic tool. -
Page 27: Menu Bar Menus
Apogee Symphony Desktop User’s Guide Menu Bar Menus Symphony Desktop Control Menu About Element Control - Choose this menu item to display version information for all hardware connected and software elements installed on your Mac. Preferences > Auto Launch - Choose this menu item to launch Element Control when an Element Thunderbolt interface is connected to the computer. -
Page 28: Window Menu
Selecting an item in the W indow Menu switches to a view of that selection. Help Menu Use the S earch Field to search for a specific menu item. Element Support Online - Select this menu item to be taken to the Apogee website’s Support page for Element. -
Page 29: Choose Your Symphony Desktop Workflows
User’s Guide Choose Your Symphony Desktop Workflows In the previous sections of this User’s Guide, the individual components of Symphony Desktop have been described in detail. This section describes how these components work together to form a sophisticated and efficient audio production environment. - Page 30 Ideally, your plugins can run both as a native plugin in your DAW and as a hardware plugin in your audio interface’s Direct monitoring mixer. The Apogee FX Rack is one of the very few that can! Print FX - the term “Print FX” or “printing” is used in this guide to specify DSP processing that is permanently applied to the audio file being processed.
-
Page 31: Monitoring Workflows
Apogee Symphony Desktop User’s Guide Monitoring Workflows The two basic monitoring workflows, Software monitoring and Direct monitoring, are described below. Software Monitoring When your system is set up for Software monitoring, the audio that the performer hears is routed through the DAW, including plugins and mixers, and thus incurs the maximum latency of the system, as shown below. -
Page 32: Direct Monitoring
Buffer setting that causes disruptive latency, Direct monitoring lets performers hear themselves through a separate mixer running on hardware DSP and controlled in Symphony Desktop Control software. The Direct mixer avoids the latency-inducing round trip through the DAW. To avoid double monitoring, the DAW must be configured so incoming audio to be recorded is NOT monitored through the DAW - see here xx. -
Page 33: Plugin Processing Workflows
Print FX tab. 5. Apogee FX plugin selection and settings to be inserted in b oth the direct monitoring signal path a nd the DAW playback path are controlled from the Monitor FX tab (see Monitor FX Dualpath Monitoring below). -
Page 34: Apogee Alloy Mic Preamp Emulation
Regardless of where Apogee processing is applied in the signal chain - at the hardware analog inputs, the direct monitor mixer or in your DAW running natively - settings may be controlled from the FX Rack in your DAW. There’s no need to open the FX Rack in Symphony Desktop Control in the vast majority of circumstances. -
Page 35: Print Fx
User’s Guide Print FX With Print FX, you can shape your sound as you record it using up to 6 Apogee FX EQ, compression and saturation plugins running on Symphony Desktop hardware DSP. Print FX processing may be applied to analog and optical inputs. -
Page 36: Monitor Fx & Dualpath Monitoring
Monitor FX running natively in your DAW. Most importantly, the two plugins are control-linked, so settings made in one Apogee FX Rack are mirrored to the other FX Rack. All this happens automatically and transparently when you open the FX Rack in your DAW and link it to a... -
Page 37: Monitor Fx & Software Monitoring
Of course, all Apogee FX plugins may be run directly in your DAW, without opening them in the FX Rack. These plugins are powered natively by your computer’s CPU, so they work even when you’re using Built-In headphone outputs or other audio hardware. -
Page 38: Additional Workflows
Mix Inputs Before Recording You can use the Symphony Desktop Mixer to mix hardware inputs and record the mixed output: 1) use two mics to capture an instrument and record a blend to one DAW track; 2) pan one input to the center of a stereo output for audio apps without panning functionality. -
Page 39: Avid Pro Tools
Click Apply. To configure Logic Pro for Direct or Software Monitoring Workflow: ● Thanks to the unique integration of Symphony Desktop and Logic Pro, it’s effortless to switch individual Logic channels between Direct and Software monitoring. ● In the Logic Pro menu bar, choose Logic Pro > Preferences > Audio in the menu bar, then click the General tab: ●... -
Page 40: Ableton Live
Activate inputs & outputs by clicking the numbered buttons. Once activated, enter your preferred label, i.e. Analog IN 1, Playback 1-2. Additional Notes When using the Apogee FX Rack linked to a hardware input, plugin metering is only displayed during playback, when Ableton channel Monitor is set to Off. Troubleshooting For more information ●... -
Page 41: Specifications
Apogee Symphony Desktop User’s Guide Specifications System Requirements Mac OS: Compatible Software: ● Any Mac Core Audio Compatible application ● Computer: Thunderbolt™ equipped Mac ● Recommended apps: Logic Pro, Pro Tools, (iMac, Mac Mini, Macbook, Macbook Pro, Ableton Live, Garageband, MainStage, Final... - Page 42 Apogee Symphony Desktop User’s Guide 1.34kg 13.5” x 5.5” X 1.75” 35cm x 14cm X 4.5cm Element 88 3.5lbs 1.6kg...
-
Page 43: Warranty Information And Legal Notices
12 months. The term of this warranty begins on the date of sale to the purchaser from an authorized Apogee dealer (proof of purchase in the form of a receipt may be required). -
Page 44: Software Monitoring Signal Flow (All Channels)
Once configured, it’s usually not necessary to open the software or have it running during your session. 1. See here 2. DAW Outputs are routed back to Symphony Desktop hardware outputs by 1) selecting a Playback output in the DAW channel’s Output dropdown list; 2) In Desktop Control, selecting a Playback source in the Main, HP1, HP2 and Optical Source dropdown lists. - Page 45 Apogee Symphony Desktop User’s Guide...
- Page 46 Set your DAW channel output to 1-2 (Playback 1-2); ● Set Symphony Desktop Control Mixer 1, Input 1 to 0 dB, set the Playback 1-2 channel fader to 0dB; set the Mixer 1 Master fader to 0 dB. Mute all other channels.