Advertisement
Quick Links
23801 E. La Palma Ave., Yorba Linda, CA 92887 Ph. 714.692.8180 Fax. 714.692.5016
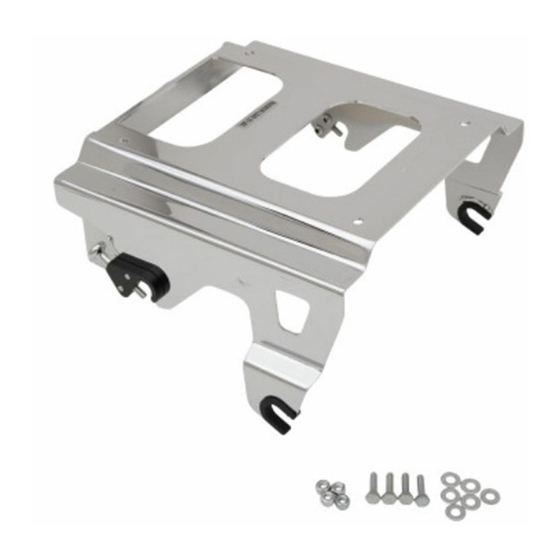
Items Supplied >
1 – DETACHABLE 2-UP TOUR PACK MOUNT
4 – WASHER, FLAT ¼"
4 – NUT, FLANGED HEX NYLOCK ¼" ZINC
Instruction Manual >
Read all instructions, including the instructions for the Tour Pack to be installed, carefully and
completely before installing your new Tour Pack!
NOTE: You must install either a COBRA Mounting Kit (602-2100/602-2101) or a Harley Davidson 4
point Mounting Kit before installing this rack.
Initial installation of Tour Pack to Tour Pack mount:
1.
Empty the Tour Pack to be installed of all of its contents.
Use FIGURE 1 and TABLE 1 for steps #2-5
NOTE: We recommend having someone assist you with the next steps, to prevent scratching the Tour Pack, mount,
or motorcycle.
2.
Insert the four threaded studs of the Tour Pack through the holes of the Tour Pack mount (1).
Install a ¼" I.D. washer (2) and a ¼"-20 nylon locknut (3) onto each of the studs of the Tour Pack underneath the
3.
Tour Pack mount (1), but DO NOT TIGHTEN at this time.
4.
In the slots of the Tour Pack mount (1), slide the Tour Pack forwards or backwards to the desired position.
TORQUE TO 120 in-lbs or 13.5 Nm the four ¼"-20 nylon locknuts(3) installed in step #3.
5.
6.
Consult the instructions for the Tour Pack, check to make sure that all the hardware of the Tour Pack is torqued
to their specified values.
Tour Pack mount attachment to mounting kit procedure:
7.
Once the Tour Pack and mount have been assembled you can attach the Tour Pack to the mounting kit on the
motorcycle. Do so by inserting the front portions of the mount brackets over the front mounting bosses of the
mounting kit. See FIGURE 2. Make sure to insert the mount all the way onto the bosses.
8.
Slowly rotate the mount downward so the rear portion of the brackets slips over the rear mounting kit bushings.
See FIGURE 2.
9.
If you are using a Harley Mounting Kit, you may need to adjust the width of the mounting kit bushings with
spacers in order for them to align with the width of the Tour Pack mount brackets. Please see the instructions
that come with the mounting kit for more details.
10. Also, some Harley Mounting Kits come with oval shaped mounting bushings. These mounting bushings may
need to be rotated around the center axis of the bushing to allow for a secure fit of the detachable latch pin.
Please see the instructions of the mounting kit for more details.
11. Pull backward on both detachable latch knobs and then push downward on the Tour Pack to allow the mount to
sit completely on the mounting kit bushings. Then release the detachable latch knob to fully engage the latch pin
underneath the mounting kit bushing. See FIGURE 2.
* Cobra
recommends you always wear a helmet while riding. Please never operate your motorcycle while under
®
the influence of alcohol and/or drugs. Enjoy the new look of your motorcycle and please ride safely.
DOCUMENT NO. 0017
REV. A
01/20
Application(s) >
HARLEY:
DRESSER
602-2704 / 602-2704B
CONTINUED ON PAGE 2
1
www.cobrausa-vtwin.com
2014 - 2020
Page 1 of 2
Advertisement

Summary of Contents for Cobra 602-2704
- Page 1 Read all instructions, including the instructions for the Tour Pack to be installed, carefully and completely before installing your new Tour Pack! NOTE: You must install either a COBRA Mounting Kit (602-2100/602-2101) or a Harley Davidson 4 point Mounting Kit before installing this rack.
- Page 2 23801 E. La Palma Ave., Yorba Linda, CA 92887 Ph. 714.692.8180 Fax. 714.692.5016 www.cobrausa-vtwin.com Instruction Manual > Page 2 of 2 602-2704 / 602-2704B ARROWS LEADING TO TOUR PACK STUDS (OMITTED FOR VISIBILITY) 11. Always check to make sure both detachable latch pins are fully engaged on the bottom of the mounting kit bushing.
