Table of Contents
Advertisement
Advertisement
Table of Contents

Related Manuals for Nakamichi 700


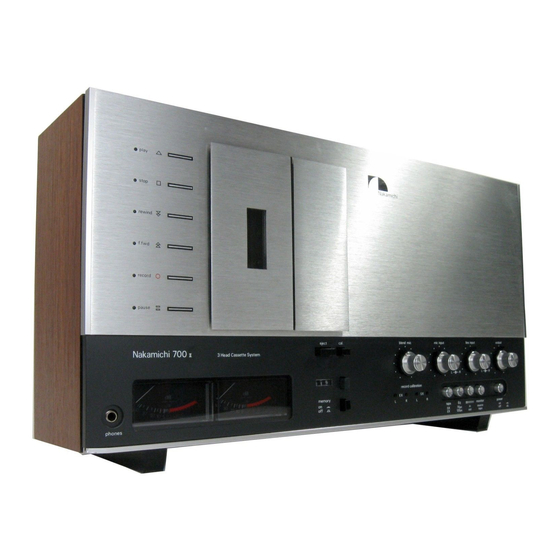
Summary of Contents for Nakamichi 700
- Page 1 Nakamichi 700 3 Head Cassette Deck Operating Instructions...
-
Page 2: Table Of Contents
We thank you very much for your purchase of the Nakamichi 700. This recorder is designed especially for the most critical audiophile and maintains almost same high performance as the Nakamichi 1000. Before using this recorder please read this instruction manual very carefully so that all functions and features will fully be used with the highest performance. -
Page 3: Control Functions
Tape Selector Switch: operative, and capstan remains in motion but Tape runs at the standard speed and when Set to "EX" for Nakamichi EX, EX 11 pinch roller is retracted. the button is pressed, playback of the tapes, and to "SX" for Nakamichi SX tape. - Page 4 Monitor Switch: Line Input Level Controls Alignment Beacon: "Source" Mic Input Level Controls Serves to adjust the azimuth alignment of a The input signals from the sound source can Blend Mic Level Control recording head according to each tape be directly monitored by adjusting the sound Pitch Control Adjustment Lid volume with the LINE OUTPUT controls...
-
Page 5: Connection
Microphone should be of low impedance DIN cable between the DIN Connector type of 600 ohms. socket on the rear panel of the Nakamichi 1. Connect the accompanying pin plug cords Connection for the Microphones with between the Line Output terminals of your 700 and its counter part on the amplifier or music system. -
Page 6: Playback Procedures
"Pitch Control" knob Note It is not necessary to touch the "Stop" The Nakamichi 700 is so designed that Set the Tape Selector Switch to "EX" Button each time you rewind or fast the Lid will not open, even if you push or "SX"... -
Page 7: Before Recording
Demagnetizing As shown in the above Fig, the Nakamichi Anti-Tape Spill Device: 700 is of a 3-head type wherein each of All metal parts that come into contact with The Nakamichi 700 is equipped with the erase, recording and playback heads is... -
Page 8: Level Calibration
Level Calibration Dolby NR Level Calibration The Dolby NR standard level (200 nW/m) of the Nakamichi 700 is set to 0 dB Particularly, when you record with Dolby NR "in", adjust the 0dB signal of the built in 400 Hz test tone to 0dB according to type of... -
Page 9: Recommended Cassette Tapes And Tape Selector Switch
Recommended Cassette Tapes and Tape Selector Switch The tape selector switch on your Nakamichi (approximately 10% higher than normal) cassette deck has been specially designed to compatible with a variety of low-noise/high- simultaneously change both the Bias and output/high-density formulations. The Equalization. -
Page 10: Record Procedures
"on", then the tape will be rewound to the break only one of the tabs, referring to the Nakamichi SX tape and "EX" for other tapes preset point and stop at the touch of the Fig below such as high output, low noise ( E X , EX II ) "rewind"... -
Page 11: Additional Recording And Playback Techniques
Record Mixing and Right, Microphone Inputs Left and microphones L, R with Blend (L + R) The Nakamichi 700 serves also as a small Right, and the Blend Microphones. As microphone, can be conducted. type mixer through 5 different individual... -
Page 12: Peak Level Db Meter
The Nakamichi 700 incorporates true Peak able to accurately indicate sudden musical The moving parts of the Nakamichi 700 Reading Level Meters which cover a wide peaks, it is possible to record with the transport are fitted with oil less bearings It... -
Page 13: Dolby Noise Reduction System
The Dolby Noise Reduction System Your Nakamichi 700 incorporates the Dolby the same circuit from the playback head Noise Reduction System (Under license from (Fig 2), it delivers signals of -40dB for Dolby Laboratories, Inc.), originally reproduction from the stereo amplifier Thus... -
Page 14: Trouble Shooting Chart
Trouble Shooting Chart CONDITION PROBABLE CAUSE REMEDY Tape does not run. Power cord is unplugged. Plug in power cord firmly. Tape is loose inside cassette Wind tape up Cassette lid is not firmly closed. Take out cassette and reset it carefully. RECORD Lamp does not light. -
Page 15: Specifications
Optional Specifications Accessories Power Supply ....100, 117,220, 240V 50/60 Hz Power Consumption ....60W Max. Tape Speed . - Page 16 (even when you change from side A to side B of the same cassette tape) If the left-hand (1000) or upper-hand (700) stays lit, the record head alignment knob (RH) should be turned clockwise slowly If the right hand (1000) or lower-hand(700)