Advertisement
Advertisement

Related Manuals for Frigidaire FEC180WH00


Summary of Contents for Frigidaire FEC180WH00
- Page 1 EVAPORATIVE AIR COOLER FEC180WH00 Owner’s Manual Manual v1.0...
-
Page 2: Table Of Contents
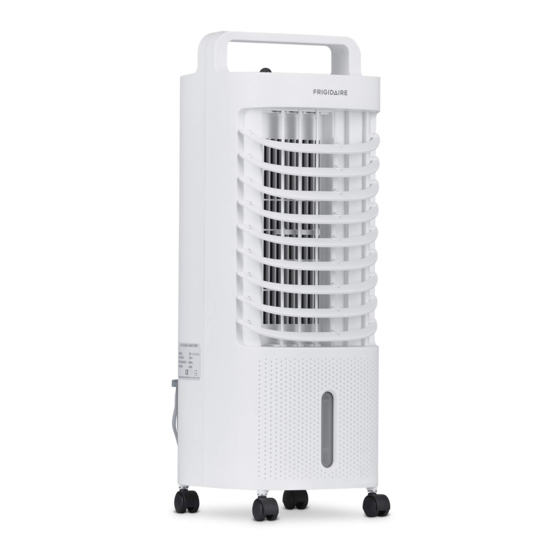
AIR FLOW 8.70”W x 8.90”D x 23.40”H DIMENSIONS 175 CFM WEIGHT 8.20 lbs Frigidaire is a registered trademark of Electrolux Home Products, Inc. All rights reserved. Manufactured under license by: NewAir, LLC 6600 Katella Ave, Cypress, CA 90630 Comments/questions: support@newair.com | 855-963-9247... -
Page 3: Register Your Product Online
REGISTER YOUR PRODUCT ONLINE Register Your Frigidaire Product Online Today! Take advantage of all the benefits product registration has to offer: Service and Support Diagnose troubleshooting and service issues faster and more accurately Recall Notifications Stay up to date on safety notices, system updates, and... -
Page 4: Safety Information & Warnings
SAFETY INFORMATION & WARNINGS In order to avoid the dangers caused by misoperation, please read the instruction manual before using the machine. • This product is for indoor use only. • Only use a qualified power outlet that has been checked to meet the regulatory requirements. - Page 5 • After water has been added to the device, do not tilt or collide it into anything in order to prevent water from splashing during placement or relocation. If the product falls with water in it, immediately pull out the power plug and wait 24 hours before turning it on.
-
Page 6: Product Components
PRODUCT COMPONENTS PARTS LIST Function display window 9. Handle 2. Control panel buttons 10. Rear case 3. Horizontal louver 11. Remote control 4. Vertical louver storage area 5. Vertical louver connecting rod 12. Air filter 6. Horizontal louver connecting 13. Power cord 14. -
Page 7: Features
FEATURES On/off button 2. Three fan speeds: low, medium and high 3. Three fan modes: normal, natural and sleep 4. Two fan directions: manual oscillation of horizontal louver and automatic oscillation of vertical louver 5. Timer functions: 1H, 2H, 4H and 8H 6. -
Page 8: Control And Display Panels
CONTROL & DISPLAY PANELS On/off button Fan speed button (low, medium, high) Mode button Cooling/humidifying button Timer button (1-2-4-8 hours) Left/right oscillation button Diagram of display panel. - Page 9 Diagram for operation panel of remote control. cooling/humidifying on/off timer oscillation mode fan speed...
-
Page 10: Product Installation And Usage
PRODUCT INSTALLATION AND USAGE The product can be used immediately after taken out of the package (no installation is required). FUNCTION BUTTONS After plugged into a power outlet, the unit will beep and enter the standby state (all the function indicators and buttons are off). ON/OFF BUTTON In the standby state, press to turn the unit on. - Page 11 FAN SPEED BUTTON Press the button to adjust the fan speed in the following sequence: low→ medium → high→ low; the corresponding indicator will light up. COOLING / HUMIDIFYING BUTTON Press the button to turn on/off the cooling/humidifying function 2. To prevent damage to the pump due to long-time work, the pump will automatically stops after 10 hours of continuous operation of the cooling/humidifying function.
- Page 12 MODE BUTTON Press the button to switch the fan mode in the following sequence: normal natural sleep normal; the ➔ ➔ ➔ corresponding indicator will light up. Normal mode: The product runs at the fan speed set by the user. The speed options include: high, medium and low.
- Page 13 In sleep mode, the indicator of the fan speed changes when the natural mode switches. For example: when the sleep mode is turned on at medium speed, it will switch to low speed natural wind automatically after 30 minutes. At this point, the medium speed indicator turns off, and the low speed indicator turns on.
- Page 14 FILLING WATER When you use the cooling and humidifying function, please add water to the water tank. Before filling the tank with water, you must first open the knob on the tank lock, remove the tank and slowly fill the tank with water. Once the tank is full, place it in the original position and then re-lock the knob on the tank lock.
- Page 15 REMOTE CONTROL Open the battery cover on the back of the remote control and install a CR2032 3V battery. 2. Aim the remote at the receiver when using. 3. When the battery needs to be replaced, pull it out and away from the remote.
-
Page 16: Cleaning And Maintenance
CLEANING AND MAINTENANCE Please be sure to unplug the power line during cleaning, as it may cause electric shock. If dust accumulates on the outer surface of the unit, please wipe with a damp soft cloth. Use a water and a soap mixture to clean the exterior. - Page 17 CLEANING THE WATER TANK Unplug the power supply and turn the water tank knob horizontally to pull out the water tank. 2. Dip a cloth or rag in detergent and wipe the interior of the water tank, then wash with clean water. AIR DRY FUNCTION When you are ready to store the unit and want to dry the cooling pad and air filter after using the humidifying...
-
Page 18: Limited Manufacturer's Warranty
LIMITED MANUFACTURER’S WARRANTY This appliance is covered by a limited manufacturer’s warranty. For one year from the original date of purchase, the manufacturer will repair or replace any parts of this appliance that prove to be defective in materials and workmanship, provided the appliance has been used under normal operating conditions as intended by the manufacturer.