Table of Contents
Advertisement
Advertisement
Table of Contents

Related Manuals for Canon LEGRIA HF G25


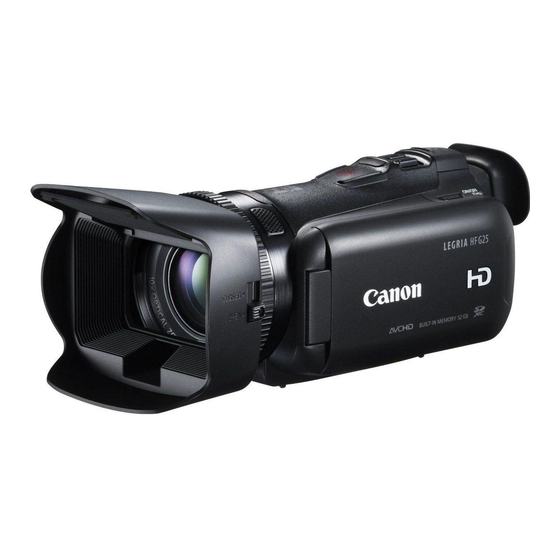
Summary of Contents for Canon LEGRIA HF G25
- Page 1 PUB. DIE-0434-000 HD Camcorder Quick Guide...
- Page 2 For more information about the recycling of this product, please contact your local city office, waste authority, approved scheme or your household waste disposal service or visit www.canon-europe.com/environment. (EEA: Norway, Iceland and Liechtenstein)
- Page 3 • This device incorporates exFAT technology licensed from Microsoft. • “Full HD 1080” refers to Canon camcorders compliant with high-definition video composed of 1,080 vertical pixels (scanning lines). • ANY USE OF THIS PRODUCT OTHER THAN CONSUMER PERSONAL USE IN ANY...
-
Page 4: Package Contents
Package contents • CA-570 Compact Power Adapter (incl. power cord) [1] • BP-808 Battery Pack • WL-D89 Wireless Controller (incl. CR2025 lithium button battery) • Stylus Pen [2] • HTC-100/S High Speed HDMI Cable [3] • STV-250N Stereo Video Cable [4] •... -
Page 5: Table Of Contents
Table of Contents Package contents Onscreen Icons and Displays Charging the Battery Pack Basic Preparations Setting the Date/Time and Language Using a Memory Card Shooting Video and Taking Photos Playing Back Movies and Viewing Photos Playback on a TV Screen Saving and Sharing Your Recordings Abridged Specifications About the Camcorder’s PDF Instruction Manual... - Page 6 Installing the camcorder’s Instruction Manual (PDF file) 1 Turn on the computer. 2 Insert the LEGRIA CD-ROM into the computer’s disc drive. 3 Windows: Open the drive into which you inserted the CD-ROM using Windows Explorer. Mac OS: Use Finder and click the CD-ROM icon. 4 Click/Double-click the Disc_Setup icon 5 In the installer panel, click [Instruction Manual of the Camcorder] and select your language.
-
Page 7: Onscreen Icons And Displays
introduction Onscreen Icons and Displays Recording movies (using Story Creator) 1 Control button [FUNC.] - Open the FUNC. panel 2 Smart AUTO (A 24) 3 Face detection frame 4 Touch & Track frame: Touch a moving subject on the screen to keep it clearly in focus at all times. - Page 8 Onscreen Icons and Displays A f Control button: Last FUNC. panel function used ([Ò Decoration] in this case) Decoration: Add a fun personal touch using stamps, drawings, image mix and more. 103) Recording movies n Manual mode CINEMA mode A g Recording program: Recording programs allow you to change various picture-related settings to your preference, or to use a special scene recording program to apply the camcorder settings most appropriate for a variety of situations.
- Page 9 Onscreen Icons and Displays S a Audio level indicator: Manually adjust the audio recording level. S s x.v.Color: The camcorder uses a color space with an extended gamut to achieve deeper colors, closer to real life. 145) S d While recording/during playback: Scene counter (hours : minutes : seconds) S f Double slot recording S g Remote sensor off...
- Page 10 Onscreen Icons and Displays F a Built-in microphone directionality 70); Directionality of the optional SM-V1 Surround Microphone F s Mini advanced shoe F d External audio input F f Control button - Last FUNC. panel function used ([ZOOM] in this case) F g Aperture value 57, 59) F h Shutter speed...
- Page 11 Onscreen Icons and Displays G h Data code: In addition to the date and time of recording, you can choose to display information related to the camcorder settings like the shutter speed or aperture value used. 82, 143) G j Volume and background music balance controls 88, 111) Viewing photos G k Control button [MENU] - Open the setup menus...
-
Page 12: Charging The Battery Pack
step 1 Charging the Battery Pack The camcorder can be powered with a battery pack or directly using the compact power adapter. When you use the compact power adapter, the power of the battery pack will not be consumed. Charge the battery pack before use. - Page 13 Charging the Battery Pack Charging times Charging the supplied BP-808 Battery Pack will take approximately 2 hours 30 minutes. A fully charged battery pack will allow for the following operations (movies in FXP mode). Typical recording Playback Memory card 1 hr. 5 min. 2 hr.
-
Page 14: Basic Preparations
step 2 Basic Preparations Before you begin, make basic adjustments and learn about a few of the frequently-used parts. See Grip Belt and Straps 23), Adjusting the Position and Brightness of the LCD screen 22) for details. Attaching the lens hood Place the lens hood on the front of the lens so that the groove on the lens hood is aligned with the bottom of the... - Page 15 Basic Preparations Rotating the LCD panel Open the LCD panel and adjust the angle. 1 Rotate it up to 90 degrees down (for example, to record with your hand extended above a crowd). 2 Rotate it up to 180 degrees toward the lens (for example, to record video of yourself).
- Page 16 Basic Preparations Mode switch Select the camcorder’s operating mode for recording movies and photos. N AUTO mode Take it easy and leave all the settings to the camcorder. Press Y to shoot movies or touch [PHOTO] on the screen to take photos. n (Manual) mode [PHOTO] You can use a wide array of...
- Page 17 Basic Preparations Camera/Play button Toggle between camera (recording) mode and playback mode. • Press the button when the camcorder is off to turn it on directly in playback mode. Index selection control button Touch [G] to open the [Index Selection] screen. From that screen you can touch the tabs on top to select the memory you want to play back, and touch one of the control buttons to select which recordings to play back.
-
Page 18: Setting The Date/Time And Language
step 3 Setting the Date/Time and Language When you turn on the camcorder for the first time, you will need to set the date and time before using the camcorder. You can also change the date format and time zone. (For your convenience, you can do so after changing the language to your preference.) See Changing the Time Zone 31) for details. - Page 19 Setting the Date/Time and Language Select the language used for menus and onscreen displays. You can select one of 27 languages to display the camcorder’s menus and onscreen displays. Select the language of your preference using the menu. See Using the Menus 28) for details.
-
Page 20: Using A Memory Card
step 4 Using a Memory Card Use commercially available . SD, / SDHC (SD High Capacity) or 0 SDXC (SD eXtended Capacity) memory cards. Make sure you use a compatible memory card. See Memory Cards Compatible for Use with the Camcorder 32) for memory cards that can be used. - Page 21 Using a Memory Card Selecting the memory to use for recording You can select to record your movies and photos in the built-in memory or on one of the memory cards. The default memory for recording both movies and photos is the built-in memory but you can select the recording memory independently for movies and for photos.
-
Page 22: Shooting Video And Taking Photos
basic recording Shooting Video and Taking Photos mode you can easily record movies and photos. You do not need to worry about any settings or menu options - the camcorder will select the most appropriate settings automatically. Before using an Eye-Fi card be sure to refer to Using an Eye-Fi card 136). - Page 23 Shooting Video and Taking Photos [PHOTO] Flashes in red while shooting video and while a scene or photo is being recorded on the memory. Use the zoom to frame the subject Use the zoom lever, the onscreen zoom controls or the zoom buttons on the wireless controller.
- Page 24 Shooting Video and Taking Photos NOTES • Smart AUTO mode: In mode the camcorder will automatically use the Smart AUTO function so you can get perfect recordings every time. Just point the camcorder and Smart AUTO will automatically select the best settings for your subject and the scene you want to use.
- Page 25 Shooting Video and Taking Photos • In most situations, keep at least 60 cm away from the subject. The minimum focusing distance at full wide angle is 2 cm. Quick Start In a recording mode, you can simply close the LCD panel to set the camcorder in standby mode, which consumes less power and allows the camcorder to use the battery pack longer.
- Page 26 Shooting Video and Taking Photos When you have finished recording Make sure the camcorder has finished writing the scenes or photos on the memory before turning it off. 1 Close the lens barrier. 2 Check that the indicator is off. 3 Press 4 Close the LCD panel.
- Page 27 basic recording Selecting the Quality of Video The camcorder offers 5 recording modes (or levels of video quality). Changing the recording mode will change the recording time available on the memory. Select MXP or FXP mode for better movie quality or LP mode for longer recording times.
-
Page 28: Playing Back Movies And Viewing Photos
basic playback Playing Back Movies and Viewing Photos The basic playback screen is the date index screen. You can change the index screen displayed from the [Index Selection] screen. You can also play back complete stories from the gallery. See Playing Back Video 87), Playing Back Stories from the Gallery 107), Viewing Photos 120) for details. - Page 29 Playing Back Movies and Viewing Photos Touch the desired scene or photo to play back. Movies: The selected scene is played back. Playback continues until the end of the last scene in the index screen. Touch the screen during playback to display the playback controls. Touch anywhere else to hide the playback controls.
- Page 30 Playing Back Movies and Viewing Photos IMPORTANT • You may not be able to play back with another device the movies you recorded on the memory card with this camcorder. In such case, play back the movies on the memory card using this camcorder. •...
-
Page 31: Playback On A Tv Screen
basic playback Playback on a TV Screen Connect your camcorder to a TV to enjoy your recordings with family and friends. Turn off the camcorder and the TV. Connect the camcorder to the TV. Select the most appropriate connection according to the input terminals on your TV. - Page 32 Playback on a TV Screen HDMI connection: All digital, high-definition connection. See Connection Diagrams - Connection 117) for details about additional settings. HTC-100/S High Speed HDMI Cable (supplied) HDMI mini HDMI connector connector (standard) " Component video connection: Analog, high-definition connection. "...
- Page 33 Playback on a TV Screen NOTES • The illustrations are for reference only. The layout of terminals on your TV may be different. • We recommend powering the camcorder using the compact power adapter. • Sound from the built-in speaker will be muted while the STV-250N Stereo Cable is connected to the camcorder.
-
Page 34: Saving And Sharing Your Recordings
external connections Saving and Sharing Your Recordings It is recommended that you periodically save your recordings on a computer. Video-related software: VideoBrowser (Windows only) - Refer to the Startup Guide (supplied leaflet) and Software Guide (PDF file) of the supplied PIXELA’s software for details about installing and using the software. -
Page 35: Abridged Specifications
specifications Abridged Specifications The specifications given here are an abridged version of the full specifications of the camcorder. Be sure to read the full version of the instruction manual for the complete information. See Specifications 175) for details. Recording media - Built-in memory: 32 GB - SD, SDHC (SD High Capacity) or SDXC (SD eXtended Capacity) memory card (not included) - Page 36 Abridged Specifications Battery Pack DANGER! Treat the battery pack with care. • Keep it away from fire (or it might explode). • Do not expose the battery pack to temperature higher than 60 °C. Do not leave it near a heater or inside a car in hot weather. •...
- Page 37 Use of genuine Canon accessories is recommended. This product is designed to achieve excellent performance when used with genuine Canon accessories. Canon shall not be liable for any damage to this product and/or accidents such as fire, etc., caused by the malfunction of non- genuine Canon accessories (e.g., a leakage and/or explosion of a battery pack).
- Page 38 Canon UK Ltd CCI Service Centre, Unit 130 Centennial Park, Borehamwood, Hertfordshire, WD6 3SE, United Kingdom Telephone 0844-369-0100 Canon Australia Pty Ltd Tel: 13-13-83 (within Australia only) (61) 02-9805-2555 www.canon.com.au Canon New Zealand Ltd Tel: 0800-222-666 (within New Zealand only) (64) 09-489-0300 www.canon.co.nz...