
Related Manuals for Detecto APEX APEX-RI


Summary of Contents for Detecto APEX APEX-RI
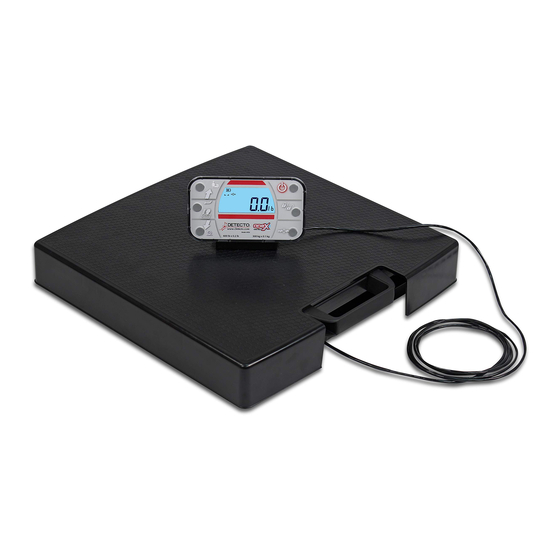
- Page 1 Digital Clinical Scale with Remote Indicator Owner’s Manual 3300-0329-0M Rev B 04/19...
- Page 2 INTRODUCTION Thank you for purchasing our Detecto apex® Digital Clinical Scale with Remote Indicator. It has been manufactured with quality and reliability and has been tested before leaving our factory to ensure accuracy and dependability for years to come. This manual is provided to guide you through installation and operation of your scale. Please read it thoroughly before attempting to install or operate your scale and keep it handy for future reference.
- Page 3 PROPER DISPOSAL When this device reaches the end of its useful life, it must be properly disposed of. It must not be disposed of as unsorted municipal waste. Within the European Union, this device should be returned to the distributor from where it was purchased for proper disposal. This is in accordance with EU Directive 2002/96/EC.
-
Page 4: Table Of Contents
TABLE OF CONTENTS SPECIFICATIONS ........... Page 1 Standard Features . -
Page 5: Specifications
SPECIFICATIONS Models: APEX-RI APEX-RI-BT (Remote Indicator) (Remote Indicator with BLE and Wi-Fi) Capacity: 600 lb x 0.2 lb (300 kg x 0.1 kg) Weighing/Height Units: Pounds/Inch (lb, in) or Kilograms/Centimeters (kg, cm) Platform Size: 17 in W x 17 in D x 2.75 in H (43 cm W x 43 cm D x 7 cm H) apex®... -
Page 6: Site Preparation Requirements
SITE PREPARATION REQUIREMENTS The Detecto apex® Digital Clinical Scale with Remote Indicator is a precision weight indicating instrument. As with any precision instrument, it requires an acceptable environment to operate at peak performance and reliability. This section is provided to assist you in obtaining such an environment. -
Page 7: Unpacking
UNPACKING Carefully remove the Detecto apex® Digital Clinical Scale with Remote Indicator from the shipping carton and inspect it for any damage that may have taken place during shipment. Keep and use the original carton and packing material for return shipment if it should become necessary. -
Page 8: Mounting The Display
6. Referring to Figure No. 5, press down on the side of the cover until a clicking sound occurs indicating the cover is snapped in place. NOTE: If necessary, tap the corners of the cover with the heel of you hand to ensure the cover snaps in place. -
Page 9: Unit Selection
UNIT SELECTION When the scale is powered on for the first time, all digits on the display will turn on, then change to show the software version for a few seconds, and finally prompt for which weighing unit to use, lb, or kg. 1. -
Page 10: Options Connections
OPTIONS CONNECTIONS The output connection to the scale is made on the back of the scale display. The optional AC Power Adapter connection to the scale is located on the left side of the display bracket/stand. AC Power Adapter To power the scale using the optional 12 VDC wall plug-in UL/CSA listed AC power adapter, connect the plug from the adapter into the power jack on the left side of the display bracket/stand, and then plug the power adapter into the proper electrical outlet. -
Page 11: Batteries
BATTERIES The scale can use twelve "AA” size Alkaline, Ni-Cad, or NiMH batteries (not included). You must first obtain and install batteries before operations can begin. Batteries are contained in two battery holders (six batteries in each holder) inside the scale base. Remove the scale platform cover to access the battery holders in the scale base. -
Page 12: Battery Installation/Replacement
Battery Installation/Replacement To install or remove the batteries, the following steps should be followed: 1. Remove the platform cover from the scale base. 2. Referring to Figure No. 9, locate the two battery holders in the scale base. 3. If installing new batteries, proceed to step 4. If replacing the batteries, remove all twelve batteries (six in each holder) from the battery holders, and then proceed to step 4. -
Page 13: Keypad Functions
KEYPAD FUNCTIONS Figure No. 11 DO NOT operate the keys with pointed objects (pencils, pens, etc.). Damage to keys resulting from this practice is NOT covered under warranty. This is the Power key. With the scale off, pressing this key will apply power to the scale and turn on the display. - Page 14 (Up Arrow Key) During operation, the key is used when performing the Body Mass Index (BMI) calculation to increase the height value. NOTE: When entering the height for BMI calculation, pressing and holding the up arrow key key allows you to rapidly increase the height entry.
-
Page 15: Annunciators
ANNUNCIATORS The annunciators are displayed on the Weight screen to show that the scale is in the mode corresponding to the annunciator label or that the status indicated by the label is active. Figure No. 12 The low battery annunciator is located in the upper left corner of the display. It is used to indicate the battery status. - Page 16 3300-0329-0M Rev B 04/19...
-
Page 17: Operation
OPERATION ALWAYS assist the patient in stepping on and off the scale platform to ensure they do not fall. NEVER leave a patient unattended while they are on the scale platform. Failure to maintain control of the patient at all times can result in serious injury to you and/or the patient. - Page 18 3300-0329-0M Rev B 04/19...
-
Page 19: Scale Setup
SCALE SETUP Your apex® Digital Clinical Scale has been pre-configured at the factory and should not require changes for use in most applications. However, if the factory settings do not meet the requirements of your operation, the following describes the setup process for your scale. NOTE: The keys are not to be operated with pointed objects (pencils, pens, fingernails, etc.). - Page 20 CAP (SCALE CAPACITY) The display will show CAP and the current setting. If the value displayed is acceptable, press the key. Otherwise, press the keys to select a new value and then press key to save it and proceed to the next prompt. This is the maximum allowed weight of the scale.
- Page 21 nnOT (MOTION RANGE) The display will show nnOt and the current setting. If the value displayed is acceptable, press the key. Otherwise, press the keys to select a new value, and then press key to save it and proceed to the next prompt. The motion range is the number of divisions of change permitted before indicating unstable (the STABLE annunciator turns off).
- Page 22 If ALLYn (Welch Allyn) was selected for USB, the scale will automatically transmit data to a Welch Allyn CVSM Device when the weight on the scale stabilizes and the (STABLE) annunciator turns on. (Requires device to have an activated license. Must purchase Detecto WACONNECT)
- Page 23 nnth (MONTH) The display will show nntH and the current setting. If the value displayed is acceptable, press the key. Otherwise, press the keys to select a new value, and then press key to save it and proceed to the next prompt. This is the current month setting of the real time clock.
- Page 24 S HT (SENSOR HEIGHT) The display will show S Ht and the current setting. If the value displayed is acceptable, press the key. Otherwise, press the keys to select a new value, and then press key to save it and proceed to the next prompt. This is the height in centimeters from the scale platform to the bottom of the sonar height sensor.
- Page 25 (Gravity Compensation) Gravity compensation accounts for latitudes and elevations that are different from where the scale was calibrated. In order to calculate the value for this parameter, use the gravitational constant of the location where the scale was calibrated divided by the gravitational constant of where the scale will be installed: Gravitational Constant (Calibration location) ---------------------------------------------------------- = value...
-
Page 26: Data Formats
DATA FORMAT Cont (Continuous Output) If Cont (continuous output) was selected, the scale will continuously transmit weight data in SMA format (see below). POLL (Weight-On-Demand) If POLL (Weight-On-Demand) was selected and the scale is connected to a host device (computer) for transmission of weight data to a PC-based EMR (electronic medical record) software program, it will transmit a single set of weight data each time the host device (computer) sends a SMA weight request “W”... -
Page 27: Bluetooth Low Energy (Ble)
Standard Services per Bluetooth SIG Reference adopted specifications at https://www.bluetooth.com/specifications/gatt Device Information Service (0x180A) Characteristics Number Value(s) Attributes Manufacturer 0x2A29 “Detecto” READ Name String Model Number 0x2A24 “Duo-XXXX” where XXXX READ String differentiates different modules Software Revision 0x2A28 “1.X.X”... - Page 28 Weight Scale Service (0x181D) Characteristics Number Value(s) Attributes Weight 0x2A9D <8bit Flag><uint16 weight><uint16 READ Measurement bmi> <uint16 ht> INDICATE Flag bit0: 0 = SI, 1 = Imperial Wt is KG with resolution 0.0005 Ht is meters with resolution 0.001 Imperial: Wt is lbs with resolution 0.01 Ht is inches with resolution 0.1 Weight Scale...
-
Page 29: Bluetooth Interface Standard Protocols
BLUETOOTH INTERFACE STANDARD PROTOCOLS Bluetooth Characteristic – Weight_Measurement: 0x2A9D Widely accepted BLE GATT profiles are used to transmit data to other devices/software that have implemented these profiles. Data is passed via BLE using GATT characteristic “Weight Measurement” (0x2A9D) as defined by Bluetooth SIG. Refer to the data table below about Weight Measurement Characteristics. -
Page 30: Wi-Fi Setup
WI-FI SETUP If BLE is not used, the wireless transmitter inside the apex® remote indicator case can be configured for Wi-Fi. Wi-Fi may be used if raw ASCII data is desired. The following sections will guide you through the setup, and operation of the apex® WiFi. Note that the WI-FI is only available as COM1. -
Page 31: Configure Wireless Network Module
Configure Wireless Network Module Without WiFi credentials, the WiFi module will enter listening mode, in which it functions as a WiFi access point. The SSID of the AP is of the form “Duo-xxxx”, where the “xxxx” varies. Use a WiFi device, such as a Smartphone or laptop to connect to the Duo module. If the connection fails, try moving the scale to another location or cycling power to the scale. -
Page 32: Display Ip Address
Select the network the module should connect to and enter the password for that network. Click on the Connect button and the module should try to connect to that network. This may take several seconds. The module will store these network credentials and connect to this network each time the scale is turned on. -
Page 33: Wi-Fi Operation
WI-FI OPERATION Web Server To see scale data with your WiFi device, open a web browser and go to the IP address for the scale. For example, if the IP address is “192.168.0.102”, enter http://192.168.0.102 and a page like the following should appear. 3300-0329-0M Rev B 04/19... -
Page 34: Tcp/Ip Connection
TCP/IP Connection Continuous output is available by TCP/IP connection to the scale’s IP address at port 10001. For Imperial units, the format of the output is: Sc^^wwwwwUUhi.ibbb.b<CR><LF> Where: ASCII S (53 Hex) status (‘Z’ = center of zero, ‘I’ = overcapacity, ‘U’ = below zero, Space = none of the preceding) ASCII space (20 Hex) wwwww... -
Page 35: Event Counter
EVENT COUNTER Your apex® Digital Clinical Scale has been designed with an Event Counter type of security seal. When selected, the scale will display two numbers representing the Calibration and Configuration counters. Calibration Counter The calibration counter is incremented when a value in the calibration part of setup is changed (CAP, int, dEC, Sr, Unit, FiLt, nnOt, EURO, CAL, GrAu, TYPE). -
Page 36: Error And Operation Messages
ERROR AND OPERATION MESSAGES The apex® scale is equipped with diagnostic software that tests various portions of the scale's circuitry and verifies proper operation. Should a problem be detected, an error or status message will be displayed. The following lists these messages and their meaning. Display Meaning 0... -
Page 37: Care And Cleaning
CARE AND CLEANING NOTE: The scale contains no user-serviceable parts and maintenance should be limited to an occasional cleaning and battery replacement as required. Do not submerge the scale in water, pour, or spray water directly on it to clean. The scale is not waterproof and covering it with water will damage it and void the warranty. -
Page 38: Parts Identification
PARTS IDENTIFICATION Final Assembly Item Qty. Part Number Description 3300-0325-0A BASE WELDMENT W/OUT COLUMN BRACKET 3300-0326-0A WEIGHBRIDGE WELDMENT 3300-0138-1A APEX LOAD CELL 3300-0325-08 APEX PULL HANDLE 6610-1232 6X"AA" BATTERY HOLDER 6680-1043 GROMMET 1/4 ID X 5/8 OD FOR 1/8 TK 6540-1122 0.81DIA RUBBER FOOT 3300-0330-0A... -
Page 39: Display Sub-Assembly
PARTS IDENTIFICATION Display Sub-Assembly Item Qty. Part Number Description 3300-0042-0A PCB ASS’Y 755 CONTROLLER/DISPLAY 3300-0050-08 DISPLAY ENCLOSURE 3300-0052-08 DISPLAY FRONT, APEX 3300-0072-08 APEX BUTTONS 3300-0089-08 UNDERLAY FOAM, APEX 3300-0334-08 UNDERLAY, APEX-RI 3300-0335-08 UNDERLAY, APEX-RI-BT 3300-0336-08 UNDERLAY, APEX-RI-AC 3300-0337-08 UNDERLAY, APEX-RI-BT-AC 3300-0154-08 UNDERLAY BACKING, APEX SCW PAN-HEAD THREAD CUTTINT TYPE 25, #4X1/4,... -
Page 40: Statement Of Limited Warranty
(2) years from date of shipment. Detecto shall be the sole judge of what constitutes a defect. - Page 41 This warranty sets forth the extent of our liability for breach of any warranty or deficiency in connection with the sale or use of the product. Detecto will not be liable for consequential damages of any nature, including but not limited to, loss of profit, delays or expenses, whether based on tort or contract.
- Page 42 Printed in USA 3300-0329-0M Rev B 04/19 3300-0329-0M Rev B 04/19...