Table of Contents
Advertisement
Available languages
Available languages
Quick Links
Advertisement
Table of Contents

Related Manuals for Thrustmaster Enzo Ferrari wireless


Summary of Contents for Thrustmaster Enzo Ferrari wireless
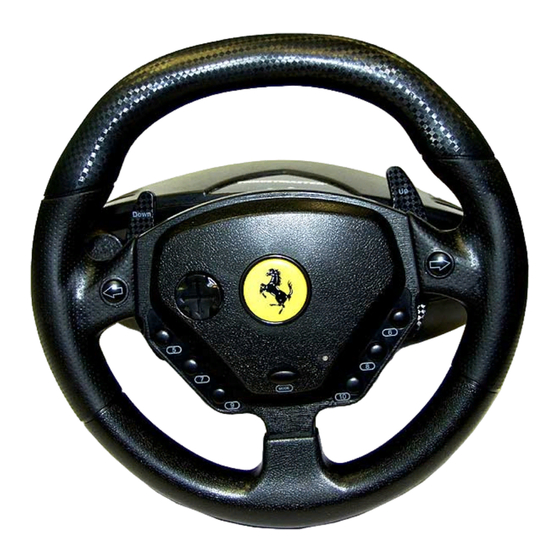
- Page 1 User Manual TECHNICAL FEATURES D-pad Wheel-to-pedal connector 2 progressive analog gas and Wheel-to-pedal connection cable brake levers and action buttons Receiver Pedal For PCs (Windows 98 or higher) equipped with USB ports...
- Page 2 WHEEL SETUP 1. Insert 4 AA (LR6) batteries into the battery compartment located on the underside of the wheel base, making sure to respect the polarity indicated. 2. Slowly slide the removable wings onto both sides of the knee-top piece until firmly fixed into place.
-
Page 3: Usb Installation
WHEEL SETUP Place the wheel on a table or flat surface. 2. TABLE-TOP SETUP: Place the clamp screw into the clamp and then screw the clamping unit into the hole on the underside of the wheel until firmly fixed into place. Be careful not to over-tighten the clamp to avoid damaging either the clamp or the table. - Page 4 To activate this mode on your wireless wheel, you must download the patch named Wheelpatch.exe from the www.thrustmaster.com website (select Support then Download). After installing the patch on your PC , simply press the 9 + 10 button simultaneously on your wheel. The Mode LED will blink red.
-
Page 5: Technical Support
08-51992032 COPYRIGHT © 2004 Guillemot Corporation S.A. All rights reserved. Thrustmaster® is a registered trademark of Guillemot Corporation S.A. Ferrari® is a registered trademark of Ferrari Idea S.p.A. Microsoft® Windows® is a registered trademark of Microsoft Corporation in the United States and/or other countries. All other trademarks and brand names are hereby acknowledged and are property of their respective owners. -
Page 6: Warranty Information
Where authorized by applicable law, the full liability of Guillemot and its subsidiaries (including for indirect damages) is limited to the repair or replacement of the Thrustmaster product. The consumer’s legal rights with respect to legislation applicable to the sale of consumer goods are not affected by this warranty. -
Page 7: Caractéristiques Techniques
Manuel de l’utilisateur CARACTÉRISTIQUES TECHNIQUES Croix multidirectionnelle Connecteur volant-pédalier 2 leviers analogiques pour une Câble de connexion du pédalier accéleration freinage Récepteur progressifs, boutons d’action. Pédalier Pour PC (Windows 98 ou supérieur) équipé de ports USB... -
Page 8: Installation Du Volant
INSTALLATION DU VOLANT 1. Insérez 4 piles AA (LR6) dans le compartiment à piles situé sous la base du volant, en veillant à respecter les polarités indiquées. 2. Faites lentement glisser les parties amovibles sur les deux côtés du support pour genoux jusqu’... -
Page 9: Installation Usb
POSITIONNEMENT DU VOLANT Placez le volant sur une table ou autre surface plane. 2. FIXATION A UNE TABLE : Placez la vis de serrage dans le système de fixation puis vissez l’ensemble dans l’emplacement prévu, sous le volant, jusqu’à ce que ce dernier soit parfaitement stable. Ne serrez pas trop fort la vis car vous risquez d’endommager le système de fixation, la table ou le support. - Page 10 Pour activer ce mode sur votre volant Enzo Wireless, vous devez télécharger le patch intitulé Wheelpatch.exe sur le site Web www.thrustmaster.com (sélectionnez les options Support, puis Download). Après avoir installé le patch sur votre PC, appuyez simplement sur les boutons 9 et 10 de votre volant.
-
Page 11: Support Technique
Lorsque la loi applicable l’autorise, toute responsabilité de Guillemot et ses filiales (y compris pour les dommages indirects) se limite à la réparation ou au remplacement du produit Thrustmaster. Les droits légaux du consommateur au titre de la législation applicable à la vente de biens de consommation ne sont pas affectés par la présente garantie. - Page 12 COPYRIGHT © 2004 Guillemot Corporation S.A. Tous droits réservés. Thrustmaster® et Thrustmapper™ sont des marques et/ou des marques déposées de Guillemot Corporation S.A. Ferrari® est une marque déposée de Ferrari Idea S.p.A. Microsoft® Windows® est une marque déposée de Microsoft Corporation aux États-Unis et/ou dans d’autres pays. Toutes les autres marques déposées et noms commerciaux sont reconnus par les présentes et sont la propriété...
-
Page 13: Technische Features
Benutzerhandbuch TECHNISCHE FEATURES D-Pad Lenkrad-/Pedalanschluss 2 progressive analoge Gas- und Lenkrad-/Pedalanschluss-Kabel Bremshebel und Action Buttons Empfänger Pedale Für PCs (Windows 98oder höher) mit USB-Ports... - Page 14 LENKRAD-SETUP 1. Setzen Sie 4 AA (LR6) in das Batteriefach ein , welches sich unterhalb des Lenkrades befindet, und achten Sie auf die richtige Polarität. 2. Schieben Sie langsam die beiliegenden Flügel auf die Basis des Knee-Top-Adapters bis sie fest sitzen.
- Page 15 LENKRAD-SETUP (Fortsetzung) Stellen Sie das Lenkrad auf eine glatte Oberfläche, z.B. einen Tisch. 2. TISCH-SETUP: Stellen Sie das Lenkrad so an eine Tischkante, dass die Spannvorrichtung unter den Tisch greift, setzen Sie die Spannschraube ein und ziehen Sie alles fest. Nicht zu feste anziehen, da sonst Lenkrad oder Tisch beschädigt werden können.
-
Page 16: Fehlersuche
Sektion des Spielesetups eingestellt werden kann . Der 3-Achsen-Modus bietet meist höhere Fahrgenauigkeit in Spielen. Um diesen Modus mit dem Funklenkrad zu nutzen ,müssen Sie auf der Thrustmaster Supportseite im Internet erst den Wheelpatch.exe (Adresse: www.thrustmaster.com) herunterladen. Nachdem Sie den Patch auf dem PC installiert haben, drücken Sie einfach am Lenkrad die Buttons 9 + 10 gleichzeitig. -
Page 17: Technischer Support
TECHNISCHER SUPPORT Sollten Sie mit Ihrem Produkt ein Problem haben, besuchen Sie bitte die Seite http://ts.thrustmaster.com und klicken Sie auf Technischer Support. Von dort aus können Sie auf verschiedene Instrumente zugreifen (Fragen und Antworten (FAQ), die neuesten Versionen von Treibern und Software), die Ihnen bei der Lösung Ihres Problems helfen könnten. - Page 18 COPYRIGHT © 2004 Guillemot Corporation S.A. Alle Rechte vorbehalten. Thrustmaster® ist ein eingetragenes Warenzeichen der Guillemot Corporation S.A. Ferrari® ist ein eingetragenes Warenzeichen der Ferrari S.p.A. Microsoft® Windows® 98, 2000, Me und XP sind eingetragene Warenzeichen der Microsoft Corporation in den Vereinigten Staaten von Amerika und/oder anderen Ländern.
-
Page 19: Technische Specificaties
Gebruikershandleiding TECHNISCHE SPECIFICATIES D-pad Stuur-naar-pedaal connector 2 progressief reagerende analoge Stuur-naar-pedaal verbindingskabel flippers voor gasgeven en remmen Ontvanger en actieknoppen Pedaal Voor PC's (Windows 98 SE of recenter) met USB-poorten... - Page 20 SETUP VAN STUUR 1. Plaats vier “AA” (LR6) batterijen in het accucompartement aan de onderzijde van de stuurhouder en let op de polariteit van de batterijen. 2. Schuif de afneembare vleugels langzaam op beide zijden van het kniestuk totdat ze stevig op hun plaats zitten.
-
Page 21: Tips Voor Gebruik
SETUP VAN STUUR Zet het stuur op een tafel of een ander vlak oppervlak. 2. SETUP VAN TAFELSTUK: stop de klemschroef in de klem en schroef de klembeugel goed vast in het gat aan de onderzijde van het racestuur. Draai de klemschroef niet te vast aan om beschadiging van de klem of de tafel te voorkomen. - Page 22 Om deze modus te activeren op het Enzo Two-In-One stuur dient de patch genaamd Wheelpatch.exe te worden gedownload van de website www.thrustmaster.com (selecteer Support en vervolgens Download). Druk na het installeren van de patch op de PC tegelijkertijd op de knoppen 9 en 10 op het stuur.
-
Page 23: Garantie Informatie
TECHNICAL SUPPORT Als u problemen hebt met uw product, gaat u naar http://ts.thrustmaster.com en klikt u op Technical Support. Vanaf hier hebt u toegang tot verschillende onderwerpen zoals hulpprogramma’s, de FAQ (veelgestelde vragen) en de meest recente drivers en software die u helpen bij het vinden van oplossingen. Als het probleem zich blijft voordoen, neem dan contact op met de Thrustmaster product technical support service (“Technical Support”):... - Page 24 COPYRIGHT © Guillemot Corporation 2004. Alle rechten voorbehouden. Thrustmaster® is een geregistreerd handelsmerk van Guillemot Corporation S.A. Ferrari® is een geregistreerd handelsmerk van Ferrari S.p.A. Microsoft® Windows® 98, 2000, Me en XP zijn geregistreerde handelsmerken van Microsoft Corporation in de Verenigde Staten en/of andere landen. Alle andere handelsmerken en merknamen zijn hierbij erkend en zijn het eigendom van de desbetreffende eigenaren.
-
Page 25: Caratteristiche Tecniche
Guida d’uso CARATTERISTICHE TECNICHE D-pad Connettore volante-pedale 2 leve progressive analogiche Cavo di connessione volante- per freni e accelerazione pedale progressivi e pulsanti d'azione. Ricevitore Pedale Per PC (Windows 98 o superiore) equipaggiati con porte USB... -
Page 26: Installazione Del Volante
INSTALLAZIONE DEL VOLANTE 1. Inserire 4 batterie AA (LR6) nell'apposito compartimento situato nella parte sottostante la base del volante, rispettando la polarità indicata. 2. Montare le alette rimovibili facendole scivolare lentamente nella loro guida su entrambi i lati dell'appoggio per le ginocchia finchè... -
Page 27: Suggerimenti Per L'uso
INSTALLAZIONE DEL VOLANTE 1. Appoggiare il volante su una superficie piana o su un tavolo. 2. INSTALLAZIONE DA TAVOLO: Inserire la vite di fissaggio nel morsetto e avvitare il morsetto alla base del volante assicurandosi che il volante sia ben fissato. Fare attenzione a non stringere troppo il morsetto per evitare di danneggiarlo o di danneggiare il tavolo. - Page 28 Wheelpatch.exe sito www.thrustmaster.com (scegliere Support e poi Download ). Dopo aver installato la patch, premere i pulsanti 9 + 10 contemporaneamente. Il LED che indica la modalità lampeggia rosso. Giocando a giochi che non supportano la modalità a 3 assi, si deve reimpostare il volante alla modalità...
-
Page 29: Assistenza Tecnica
ASSISTENZA TECNICA Se hai avuto problemi con il tuo prodotto, visita il sito http://ts.thrustmaster.com e clicca su Technical Support. Da lì potrai accedere a vari servizi (domande più frequenti (FAQ), driver e software più recenti) che potranno aiutarti a risolvere il problema riscontrato. - Page 30 COPYRIGHT © Guillemot Corporation 2004. Tutti i diritti riservati. Thrustmaster® è un marchio registrato da Guillemot Corporation S.A. Ferrari® è un marchio registrato da Ferrari S.p.A. Microsoft® Windows® 98, 2000, Me e XP sono marchi registrati di Microsoft Corporation negli Stati Uniti e/o in altri paesi. TouchSense™ e I-FORCE™ sono marchi dalla Immersion Corporation.
-
Page 31: Características Técnicas
Manual del usuario CARACTERÍSTICAS TÉCNICAS D-pad Conector del volante a los pedales 2 botones de acción y palancas Cable de conexión del volante a los analógicos y progresivos de pedales aceleración y freno Receptor Pedales Para PC (Windows 98 o superior) equipados con puertos USB... - Page 32 PREPARACIÓN DEL VOLANTE 1. Inserta 4 pilas AA (LR6) en el compartimiento de las pilas situado en la parte inferior de la base del volante, asegurándote de respetar la polaridad indicada. 2. Desliza lentamente las alas desmontables a ambos lados de la pieza knee-top hasta que queden fijadas con firmeza.
-
Page 33: Consejos De Utilización
PREPARACIÓN DEL VOLANTE Coloca el volante en una mesa o superficie plana. 2. DISPOSICIÓN ENCIMA DE UNA MESA: Coloca el tornillo en el anclaje y después atornilla la unidad de anclaje en el agujero de la parte inferior del volante hasta que quede sujeto con firmeza. Ten cuidado de no apretar demasiado el anclaje para evitar dañar la pieza o la mesa. - Page 34 Para activar este modo en tu volante inalámbrico, debes descargarte el parche llamado Wheelpatch.exe del sitio web www.thrustmaster.com (selecciona Support y después Download). Después de instalar el parche en tu PC, simplemente pulsa los botones 9 + 10 simultáneamente en tu volante. El LED Mode se volverá...
-
Page 35: Soporte Técnico
SOPORTE TÉCNICO Si encuentras un problema con tu producto, visita http://ts.thrustmaster.com y haz clic en Technical Support. Desde allí podrás acceder a distintas utilidades (preguntas frecuentes (Frequently Asked Questions, FAQ), las últimas versiones de controladores y software) que pueden ayudarte a resolver tu problema. Si el problema persiste, puedes contactar con el servicio de soporte técnico de los productos de Thrustmaster (“Soporte Técnico”):... - Page 36 COPYRIGHT © 2004 Guillemot Corporation S.A. Reservados todos los derechos. Reservados todos los derechos. Thrustmaster® es una marca comercial registrada de Guillemot Corporation S.A. Microsoft® Windows® 98, 2000, Me y XP son marcas registradas propiedad de Microsoft Corporation en los Estados Unidos y/o otros países. Todas las demás marcas comerciales y nombres de marca se reconocen aquí...
- Page 37 Guia do Utilizador CARACTERÍSTICAS TÉCNICAS Almofada direccional Conector do volante aos pedais 2 alavancas analógicas progressivas Cabo de ligação do volante aos de aceleração e travagem e botões pedais de acção Receptor Pedais Para os PC (Windows 98 ou superior) equipados com portas USB...
- Page 38 CONFIGURAÇÃO DO VOLANTE 1. Insira quatro pilhas AA (LR6) no compartimento respectivo situado no lado inferior da base do volante, tendo cuidado para respeitar a polaridade indicada. 2. Faça deslizar lentamente as asas removíveis de ambos os lados da peça de adaptação sobre os joelhos até...
-
Page 39: Sugestões De Utilização
CONFIGURAÇÃO DO VOLANTE Coloque o volante numa mesa ou noutra superfície plana. 2. CONFIGURAÇÃO SOBRE A MESA: Coloque o parafuso no grampo respectivo e em seguida aparafuse a unidade de fixação ao orifício situado na parte inferior do volante até que esteja firmemente seguro. - Page 40 Para activar este modo no seu volante sem fios, em primeiro lugar tem de transferir para o disco o patch intitulado Wheelpatch.exe a partir do sítio www.thrustmaster.com (seleccione Support e em seguida Download.) Depois de instalar o patch no seu PC, basta premir simultaneamente os botões 9 + 10 no volante.
-
Page 41: Suporte Técnico
SUPORTE TÉCNICO Se tiver algum problema com o seu produto, por favor visite o sítio http://ts.thrustmaster.com e clique em Technical Support. A partir daqui poderá aceder a vários utilitários (perguntas mais frequentes (FAQ), as mais recentes versões de controladores e software) capazes de ajudá-lo a resolver o seu problema. Se o problema persistir, poderá... -
Page 42: Informação Da Garantia
A Guillemot Corporation S.A. (“Guillemot”) garante ao consumidor, a nível mundial, que este produto Thrustmaster está isento de defeitos de material e de fabrico durante um período de dois (2) anos a partir da data de compra original. No caso de o produto apresentar algum defeito durante o período da garantia, contacte imediatamente o Suporte Técnico, que indicará...