Vanguard VN18A, VN18TA, VP16A, VP16TA, VP26A, VP26TA, VN30A, VN30TA, VP16ITA, VP22ITA Installation Manual
Unvented (vent-free) infrared gas heater
Hide thumbs
Also See for VN18A, VN18TA, VP16A, VP16TA, VP26A, VP26TA, VN30A, VN30TA, VP16ITA, VP22ITA:
- Safety information and installation manual (36 pages) ,
- Safety information and installation manual (28 pages)
Table of Contents
Advertisement
UNVENTED (VENT-FREE) INFRARED GAS HEATER
SAFETY INFORMATION AND INSTALLATION MANUAL
VN18A, VN18TA, VP16A, VP16TA, VP26A, VP26TA
VN30A, VN30TA, VP16ITA, VP22ITA
WARNING: If the information in this manual is not
followed exactly, a fire or explosion may result causing
property damage, personal injury, or loss of life.
— Do not store or use gasoline or other flammable
vapors and liquids in the vicinity of this or any other
appliance.
— WHAT TO DO IF YOU SMELL GAS
•
Do not try to light any appliance.
•
Do not touch any electrical switch; do not use any
phone in your building.
•
Immediately call your gas supplier from a neighbor's
phone. Follow the gas supplier's instructions.
•
If you cannot reach your gas supplier, call the fire
department.
— Installation and service must be performed by a quali-
fied installer, service agency, or the gas supplier.
For more information, visit www.desatech.com
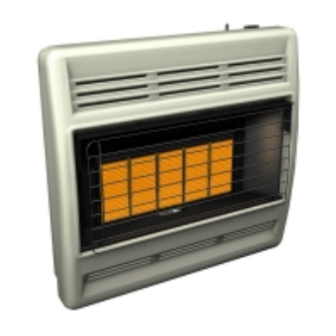
Model VN30A Shown
Save this manual for future reference.
®
Advertisement
Table of Contents

Related Manuals for Vanguard VN18A, VN18TA, VP16A, VP16TA, VP26A, VP26TA, VN30A, VN30TA, VP16ITA, VP22ITA


Summary of Contents for Vanguard VN18A, VN18TA, VP16A, VP16TA, VP26A, VP26TA, VN30A, VN30TA, VP16ITA, VP22ITA
- Page 1 UNVENTED (VENT-FREE) INFRARED GAS HEATER SAFETY INFORMATION AND INSTALLATION MANUAL VN18A, VN18TA, VP16A, VP16TA, VP26A, VP26TA VN30A, VN30TA, VP16ITA, VP22ITA WARNING: If the information in this manual is not followed exactly, a fire or explosion may result causing property damage, personal injury, or loss of life. —...
-
Page 2: Table Of Contents
WARNING: Improper installation, adjustment, altera- tion, service, or maintenance can cause injury or prop- erty damage. Refer to this manual for correct installation and operational procedures. For assistance or addi- tional information consult a qualified installer, service agency, or the gas supplier. WARNING: This is an unvented gas-fired heater. -
Page 3: Safety Information
SAFETY INFORMATION WARNING: This product con- tains and/or generates chemicals known to the State of California to cause cancer or birth defects, or other reproductive harm. IMPORTANT: Read this owner’s manual carefully and completely before trying to assemble, oper- ate, or service this heater. Im- proper use of this heater can cause serious injury or death from burns, fire, explosion, elec-... -
Page 4: Local Codes
SAFETY INFORMATION Continued 5. Always run heater with plaque control knob at the 1, 2, 3, or 4 locked positions. Never set control knob between locked positions. Poor combustion and higher levels of carbon mon- oxide may result. 6. This heater needs fresh, outside air ventila- tion to run properly. -
Page 5: Air For Combustion And Ventilation
AIR FOR COMBUSTION AND VENTILATION WARNING: This heater shall not be installed in a confined space or unusually tight construction unless provisions are provided for adequate combustion and ven- tilation air. Read the following in- structions to insure proper fresh air for this and other fuel-burning appliances in your home. -
Page 6: Air For Combustion
AIR FOR COMBUSTION AND VENTILATION Continued Determine the volume of the space (length x width x height). Length x Width x Height =__________cu. ft. (volume of space) Example: Space size 20 ft. (length) x 16 ft. (width) x 8 ft. (ceiling height) = 2560 cu. ft. (vol- ume of space) If additional ventilation to adjoining room is sup- plied with grills or openings, add the volume of... -
Page 7: Installation
AIR FOR COMBUSTION AND VENTILATION Continued Ventilation Air From Outdoors Provide extra fresh air by using ventilation grills or ducts. You must provide two permanent open- ings: one within 12" of the ceiling and one within 12" of the floor. Connect these items directly to the outdoors or spaces open to the outdoors. - Page 8 INSTALLATION Continued WARNING: Never install the heater • in a bedroom or bathroom • in a recreational vehicle • where curtains, furniture, clothing, or other flammable objects are less than 36 inches from the front, top, or sides of the heater •...
- Page 9 INSTALLATION Continued Methods For Attaching Mounting Bracket To Wall Only use last hole on each end of mounting bracket to attach bracket to wall. These two holes are 14 inches apart from their centers. Attach mounting bracket to wall in one of two ways: 1.
- Page 10 INSTALLATION Continued 2. Fold wall anchor as shown in Figure 9. 3. Insert wall anchor (wings first) into hole. Tap anchor flush to wall. 4. For thin walls (1/2" or less), insert red key into wall anchor. Push red key to “pop” open anchor wings.
- Page 11 INSTALLATION Continued MOUNTING HEATER TO FLOOR Mounting Base Feet to Heater 1. Lay heater cabinet on its back on a table with the heater bottom overhanging the table edge. 2. Align holes in base foot with mounting holes on bottom of cabinet (see Figure 13). 3.
- Page 12 INSTALLATION Continued CAUTION: Use only new, black iron or steel pipe. Inter- nally-tinned copper tubing may be used in certain areas. Check your local codes. Use pipe of large enough diameter to allow proper gas volume to heater. If pipe is too small, undue loss of volume will occur.
- Page 13 INSTALLATION Continued Pressure Testing Gas Supply Piping System Test Pressures In Excess Of 1/2 PSIG (3.5 kPa) 1. Disconnect appliance with its appliance main gas valve (control valve) and equipment shutoff valve from gas supply piping system. Pressures in excess of 1/2 psig will damage heater regulator.
-
Page 14: Operating Heater
OPERATING HEATER NON-THERMOSTAT MODELS FOR YOUR SAFETY READ BEFORE LIGHTING WARNING: If you do not fol- low these instructions exactly, a fire or explosion may result causing property damage, per- sonal injury or loss of life. A. This appliance has a pilot which must be lighted by hand. - Page 15 OPERATING HEATER Continued TO SELECT HEATING LEVEL WARNING: When running heater, set control knob at LOW, MEDIUM, or HIGH locked posi- tions. Never set control knob between locked positions. Poor combustion and higher levels of carbon monoxide may result. CAUTION: Do not try to ad- just heating levels by using the equipment shutoff valve.
- Page 16 OPERATING HEATER Continued LIGHTING INSTRUCTIONS 1. STOP! Read the safety information, page 15, column 2. 2. Make sure equipment shutoff valve is fully open. 3. Turn thermostat control knob clockwise to the OFF position (see Figure 22 Clockwise or 23 for your model). 4.
- Page 17 OPERATING HEATER Continued TO SELECT HEATING LEVEL INFRASTAT MODELS VP16ITA, AND VP22ITA ONLY WARNING: When running heater, set control knob at the 1, 2, 3, or 4 locked positions. Never set control knob between locked positions. Poor combustion and higher levels of carbon monox- ide may result.
-
Page 18: Inspecting Heater
INSPECTING HEATER Check pilot flame pattern and burner flame pat- tern often. PILOT FLAME PATTERN Figure 27 shows a correct pilot flame pattern. Figure 28 shows an incorrect pilot flame pattern. The incor- rect pilot flame is not touching the thermocouple. This will cause the thermocouple to cool. -
Page 19: Cleaning And Maintenance
CLEANING AND MAINTENANCE WARNING: Turn off heater and let cool before cleaning. CAUTION: You must keep control areas, burner, and cir- culating air passageways of heater clean. Inspect these ar- eas of heater before each use. Have heater inspected yearly by a qualified service person. -
Page 20: Troubleshooting
Note: All troubleshooting items are listed in order of operation. WARNING: Turn off and unplug heater and let cool before servic- ing. Only a qualified service person should service and repair heater. CAUTION: Never use a wire, needle, or similar object to clean ODS/pilot. - Page 21 OBSERVED PROBLEM ODS/pilot lights but flame goes out when control knob is re- leased Burner(s) does not light after ODS/pilot is lit Delayed ignition of burner(s) Burner backfiring during com- bustion Burner plaque(s) does not glow Slight smoke or odor during ini- tial operation 113052-01A TROUBLESHOOTING...
- Page 22 WARNING: If you smell gas • Shut off gas supply. • Do not try to light any appliance. • Do not touch any electrical switch; do not use any phone in your building. • Immediately call your gas supplier from a neighbor’s phone. Follow the gas supplier’s instructions.
-
Page 23: Specifications
VP16A, VP16TA Btu (Variable) 6,000/11,000/16,000 6,000/16,000 Type Gas Propane/LP Only Ignition Electronic Pressure Regulator Setting 8" W.C. Inlet Gas Pressure* (in. of water) Maximum 14" Minimum 11" Dimensions, Inches (H x W x D) Heater 24.25 x 18.25 x 7 Carton 26.25 x 21.25 x 9 Weight (pounds) -
Page 24: Illustrated Parts Breakdown And Parts List
ILLUSTRATED PARTS BREAKDOWN CABINET BODY MODELS VP16A, VN18A, VP26A, VN30A, VP16TA, VN18TA, VP26TA, AND VN30TA See Pages 28 through 31 Replacement See Pages may vary from 28 through 31 grill shown Battery Negative www.desatech.com Install Battery According To This Illustration 113052-01A... -
Page 25: Parts List
This list contains replaceable parts used in your heater. When ordering parts, follow the instructions listed under Replacement Parts on page 32 of this manual. PART NUMBER NO. VP16A VP16TA 107672-01 107672-01 107672-01 107672-01 Front Panel 103476-01 103476-01 103476-01 103476-01 Grill Guard 104635-01 104635-01 104635-01 104635-01 Apron 107894-01 107894-01 107894-01 107894-01 Reflector Assembly 111435-01 111435-01 111435-01 111435-01 Electronic Ignitor... - Page 26 ILLUSTRATED PARTS BREAKDOWN CABINET BODY MODELS VP16ITA AND VP22ITA See Page 30 Replacement may vary from grill shown Page 30 Install Battery According To This Illustration Battery Negative www.desatech.com 113052-01A...
- Page 27 This list contains replaceable parts used in your heater. When ordering parts, follow the instructions listed under Replacement Parts on page 32 of this manual. PART NUMBER NO. VP16ITA 107672-01 103476-01 104635-02 107894-01 111435-01 099066-02 098271-11 098462-01 098325-01 098354-04 099415-18 104819-02 098522-24 103255-02...
-
Page 28: Illustrated Parts Breakdown And Parts List
ILLUSTRATED PARTS BREAKDOWN AND PARTS LIST BURNER ASSEMBLY MODELS VP16A AND VN18A This list contains replaceable parts used in your heater. When ordering parts, follow the instructions listed under Replacement Parts on page 32 of this manual. ODS/Pilot PART NUMBER NO. - Page 29 ILLUSTRATED PARTS BREAKDOWN AND PARTS LIST BURNER ASSEMBLY MODELS VP26A AND VN30A This list contains replaceable parts used in your heater. When ordering parts, follow the instructions listed under Replacement Parts on page 32 of this manual. ODS/Pilot PART NUMBER NO.
- Page 30 ILLUSTRATED PARTS BREAKDOWN AND PARTS LIST BURNER ASSEMBLY MODELS VP16ITA AND VP22ITA This list contains replaceable parts used in your heater. When ordering parts, follow the instructions listed under Replacement Parts on page 32 of this manual. Burner Assembly VP22ITA PART NUMBER NO.
- Page 31 ILLUSTRATED PARTS BREAKDOWN AND PARTS LIST BURNER ASSEMBLY MODELS VP16TA, VN18TA, VP26TA, AND VN30TA This list contains replaceable parts used in your heater. When ordering parts, follow the instructions listed under Replacement Parts on page 32 of this manual. Burner Assembly VP16TA, VN18TA PART NUMBER NO.
-
Page 32: Replacement Parts
REPLACEMENT PARTS Note: Use only original replacement parts. This will protect your warranty coverage for parts re- placed under warranty. PARTS UNDER WARRANTY Contact authorized dealers of this product. If they can’t supply original replacement part(s), call DESA Heating Products’ Technical Service De- partment at 1-866-672-6040. -
Page 33: Accessories
ACCESSORIES Purchase these heater accessories from your local dealer. If they can not supply these accessories, either contact your nearest Parts Central (see page 33), or call DESA Heating Products at 1-866-672-6040 for referral information. You can also write to the ad- dress listed on the back page of this manual. - Page 34 NOTES ___________________________________________________________ ___________________________________________________________ ___________________________________________________________ ___________________________________________________________ ___________________________________________________________ ___________________________________________________________ ___________________________________________________________ ___________________________________________________________ ___________________________________________________________ ___________________________________________________________ ___________________________________________________________ ___________________________________________________________ ___________________________________________________________ ___________________________________________________________ ___________________________________________________________ ___________________________________________________________ ___________________________________________________________ ___________________________________________________________ ___________________________________________________________ ___________________________________________________________ ___________________________________________________________ ___________________________________________________________ ___________________________________________________________ ___________________________________________________________ ___________________________________________________________ ___________________________________________________________ ___________________________________________________________ ___________________________________________________________ ___________________________________________________________ ___________________________________________________________ ___________________________________________________________ ___________________________________________________________ ___________________________________________________________ ___________________________________________________________ www.desatech.com 113052-01A...
- Page 35 NOTES ___________________________________________________________ ___________________________________________________________ ___________________________________________________________ ___________________________________________________________ ___________________________________________________________ ___________________________________________________________ ___________________________________________________________ ___________________________________________________________ ___________________________________________________________ ___________________________________________________________ ___________________________________________________________ ___________________________________________________________ ___________________________________________________________ ___________________________________________________________ ___________________________________________________________ ___________________________________________________________ ___________________________________________________________ ___________________________________________________________ ___________________________________________________________ ___________________________________________________________ ___________________________________________________________ ___________________________________________________________ ___________________________________________________________ ___________________________________________________________ ___________________________________________________________ ___________________________________________________________ ___________________________________________________________ ___________________________________________________________ ___________________________________________________________ ___________________________________________________________ ___________________________________________________________ ___________________________________________________________ ___________________________________________________________ ___________________________________________________________ 113052-01A www.desatech.com...
-
Page 36: Warranty Information
WARRANTY INFORMATION Model Serial No. Date Purchased Always specify model and serial numbers when communicating with the factory. We reserve the right to amend these specifications at any time without notice. The only warranty applicable is our standard written warranty. We make no other warranty, expressed or implied. VANGUARD VENT-FREE INFRARED GAS HEATERS DESA Heating Products warrants this product to be free from defects in materials and components for four (4) years from the date of first purchase, provided that the product has been properly installed, operated and main-...