
Related Manuals for Uniden Bearcat UBC 248CLT


Summary of Contents for Uniden Bearcat UBC 248CLT
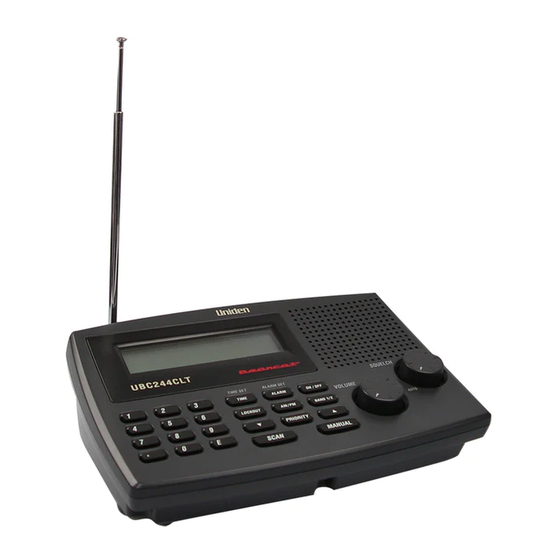
- Page 1 UBC 248CLT 8 BAND, 50 CHANNEL SCANNER with AM/FM RADIO • FULLY PROGRAMMABLE • FULL FREQUENCY LCD READOUT • ALARM CLOCK • AM/FM RADIO • CHANNEL LOCKOUT • PRIORITY CHANNEL • SCAN DELAY • MEMORY BACKUP • FREQUENCY SEARCH Reference Guide...
- Page 2 DO NOT expose this unit to rain or moisture. Changes or modifications to this product not expressly approved by Uniden, or operation of this product in any way other than as detailed by this Reference Guide, could void your authority to operate this product. ®...
-
Page 3: Table Of Contents
TABLE OF CONTENTS Introduction ..........1 About Scanning . -
Page 4: Introduction
INTRODUCTION About Scanning Scanning is easy and fun with the UBC248CLT 50-Channel Base Scanner with AM/FM Radio. What is Scanning? Unlike standard AM or FM radio stations, most 2-way communications do not transmit continuously (see Types of Communication below). The UBC248CLT scans programmed channels at rate of up to 12 channels per second until it locates an active frequency. -
Page 5: Taking Proper Care Of Your Scanner
Many more in the 66-88MHz, 137-174MHz, and 406-512MHz ranges AM/FM radio You must program a frequency into each channel you want to use. Taking Proper Care of Your Scanner Do not use the scanner in high-moisture environments such as the kitchen or bathroom. -
Page 6: Getting Started
GETTING STARTED Installing the UBC248CLT AC 10V USE AC-144U ONLY EXT.SP AC Adapter Model AC-144U 1. Insert the small plug at the end of the AC Adaptor cord into the AC 10V jack on the scanner. 2. Plug the AC Adaptor into any standard 240V AC wall outlet. Do not plug into an outlet controlled by a wall switch;... -
Page 7: Operation
OPERATION Controls and Functions 12 15 19 20 13 16 18 21 22 17 14 1. LCD Display Displays time, channel, frequency, and functions. (Page 6) 2. Numeric Keys Press to program a frequency into each channel for scanning. Also, press for time entries and direct channel access with MANUAL key. And press for channel presets in Radio Mode 3. - Page 8 10. DELAY Key Turns Delay function. When Scan stops on a channel it causes scanner to remain on that channel for 2 seconds before the scanning resumes to wait for a possible reply. 11. ALARM Key Turns the Tone Alarm. Turns the Radio Alarm ON/OFF by pressing the key more than 2 seconds.
- Page 9 23. ALARM Appears when Alarm function is active. Flashes in the snooze function mode. 24. BANK Appears when in Scan Mode, Manual Mode. 25. 1-5 In Scan Mode, displays the bank being scanned. In Manual Mode, displays the bank number associated with the channel. 26.
-
Page 10: Scanning Overview
Scanning Overview The UBC248CLT has 50 memory channels. Each can be programmed to store one frequency within the band of frequency coverage. (For a listing of frequency ranges and bands, see Technical Specifications on page 32.) When you press SCAN, the UBC248CLT scans each programmed frequency for activity (skipping channels that are locked out) at the rate of about 12 channels per second. -
Page 11: Clock Set-Up
CLOCK SET-UP Initial Clock Set-up You may bypass the steps to set the clock. The scanner will function as normal, but the clock and alarm features will not function. 1. When power is initially applied, the display flashes i2:00 P after a short delay. -
Page 12: Using The Scanner
USING THE SCANNER Set the Squelch 1. Turn SQUELCH fully clockwise to the highest setting. 2. Press SCANNER to turn on the scanner. 3. Adjust the VOLUME control until you can hear a steady noise. MIT/ SEARCH HOLD/ SEARCH HOLD/... - Page 13 4. To set the SQUELCH control to AUTO turn fully counter clockwise until control clicks into place. Or, manually set squelch as follows: Think of squelch as a gate. Turn SQUELCH fully counter clockwise. This raises the “Squelch Gate” so high that only very strong signals can get through. HOLD/ Turn SQUELCH fully clockwise until you hear a hiss.
-
Page 14: Programming Tips For Scanner
Programming Tips for Scanner Program one frequency per channel. Channel 1 is the location of the default priority channel. Program the most important frequency, or the one of major interest, into Channel 1. You may also select any other channel to be the priority channel. To quickly program a series of channels, start with the lowest number channel. -
Page 15: Programming Scanner Frequencies
Programming Scanner Frequencies Before you can use your UBC248CLT scanner, you must program the channels. Follow these steps: Example: Program 420.0150 MHz into Channel 12. Press scanner button to switch to scan mode. 1. Press MANUAL to stop scanning. 2. To select the channel (12), press 1, then 2 on the numeric keypad. -
Page 16: Deleting A Scanner Frequency
4. Press E to complete the entry. The channel digits stop flashing. Display shows Deleting a Scanner Frequency If you want to delete a stored frequency, follow these steps: Example: Delete the frequency in Channel 12. 1. Press MANUAL to stop scanning. 2. -
Page 17: About Memory Back-Up
4. The following screen appears. About Memory Back-up Your UBC248CLT has a convenient memory back-up system. In the event of a power failure, the scanner will retain channel information for an indefinite amount of time. Channel information is stored in non-volatile memory. Scanning Mode Press SCAN. -
Page 18: Manual Mode
To restore the bank number, press the number on the keypad. The bank number appears in the display. The bank number associated with channel currently being monitored flashes. Manual Mode Press MANUAL any time to stop scanning. The scanner remains on the displayed channel. Press MANUAL to step up to the next channel. -
Page 19: Direct Channel Access For Scanner
Direct Channel Access for Scanner This feature allows you to instantly access a specific channel you want to monitor. Example: Select Channel 4. 1. Press MANUAL to exit scan mode. 2. Press 4. When you press 4, the display changes to 4, but the scanner still monitors the previous channel. - Page 20 To Set the Priority Channel Your UBC248CLT has one default Priority Channel per bank. Each priority channel is, set at the first channel in the bank. To change the priority channel determine the frequency most important to you and program it into the desired channel location. Example: To set Channel 5 as the priority channel.
-
Page 21: Channel Lockout
Channel Lockout You can lock out a channel so it is not scanned. Channel Lockout does not erase the frequency from the channel. You can lock out up to 50 channels, including the Priority channel. Lockout information is retained in the memory when the scanner is turned off. To Lock out a Channel Example: Suppose you want to lock out Channel 2 because it stops on transmissions you don't want to hear. -
Page 22: Restore All Locked Out Channel
2. Press LOCKOUT again to unlock the displayed channel. L/O no longer appears in the display. Restore All Locked Out Channel To unlock all channels, you must be in the Manual Mode. 1. Press MANUAL. 2. Press and hold LOCKOUT to unlock all channels. -
Page 23: To Set Delay In Scan Mode
To Set Delay in Scan Mode 1. Press SCAN. 2. When your scanner stops on a channel, press DELAY. DLY appears in the display and scanning resume 2 seconds after the transmission ends. To Set Delay in Manual Mode 1. Press MANUAL. 2. -
Page 24: Searching
SEARCHING The UBC248CLT can search bands or range of frequencies you specify to find desired frequencies. This is useful if user does not have a Frequency Directory handy, or if new stations have been added since the Directory was published. Follow the steps below in programming range of frequencies: 1. - Page 25 Locking Out Frequencies in Search During search, you might repeatedly encounter frequencies that you are not interested in. Also, all scanners are subject to receiving internally generated frequencies (called birdies) that stop you scanner’s search when there is no real signal present. In either case, you can lock out such frequencies to make your scanner search more efficiently.
-
Page 26: Additional Features
ADDITIONAL FEATURES LCD Backlight The LCD Backlight comes on when the power is applied. In Scan Mode and Manual Mode, the backlight stays on bright continuously. In the other modes, the backlight stays bright for ten seconds and then switches to dim. Press any key and the display switches back to bright for ten seconds. - Page 27 3. Press to set the desired frequency. The channel number flashes. Continue to press to step through the frequencies in 100kHz steps. Or, press and hold to step through the frequencies more quickly until 92.5000MHz appears in the display. 4. Press E to complete the entry. The channel digits stop flashing.
-
Page 28: Deleting A Stored Radio Frequency
Deleting a Stored Radio Frequency If you want to delete a stored frequency, follow these steps: Example: Delete the frequency in Channel 9. 1. Press RADIO AM/FM to enter into the Radio Mode. 2. To select the channel (9), press 9 on the numeric keypad. -
Page 29: Reset The Clock Time
Reset the Clock Time 1. After the scanner has been turned on, to reset the clock time simply press and hold the TIME SET key. The display digits flash. 2. Enter the time directly by pressing the numeric keys. Enter the time by pressing the keys. -
Page 30: Set The Alarm Time
Set the Alarm Time There are two types of alarm sounds with this scanner., Tone Alarm and Radio Alarm. Both types set the alarm time in the same manner. 1. After the clock time has been entered, press and hold ALARM SET until the time indicated and ALARM indicator flashes in the display. -
Page 31: Set Alarm To Tone Mode
4. Press E to complete the entry. 5. ALARM indicator and time stop flashing, but remain on. 6. The alarm time remains in the display for five seconds, then returns to current mode. Set Alarm to Tone Mode Press ALARM to turn on the alarm function. -
Page 32: Turn The Alarm Off
Turn the Alarm Off Press ALARM to deactivate the alarm function. When the alarm is off, the ALARM indicator and current alarm time are no longer displayed. Only the current time displays. If you would like to listen to the scanner while waking up, turn the scanner on. -
Page 33: Set Alarm To Radio Mode
Set Alarm to Radio Mode Before you set the Radio Alarm, make sure the AM or FM channel is selected and the VOLUME control is set to the desired level. The scanner must be turned off (Clock Mode), to be woken up by the radio alarm. 1. -
Page 34: About The Unit
Do not use excessive amounts of water. Repairs Do not attempt any repair. The scanner contains no serviceable parts. Contact the Uniden Customer Service Center or take it to a qualified repair technician. Birdies All radios are subject to receiving undesired signals or birdies. If your scanner stops during Scan mode and no sound is heard, it may be receiving a birdie. -
Page 35: Troubleshooting
TROUBLESHOOTING If your UBC248CLT is not performing properly, try the following steps. Problem Scanner won’t power up. Poor reception. Scan won’t start. Solution Check the connections at both ends of the AC Adaptor. Turn on the wall switch of your room. You could be using an outlet controlled by the wall switch. - Page 36 Problem Scan won’t stop. Solution Adjust squelch to the threshold (Page 9). Check the antenna connection. Check to see if many of the channels are locked out. If so, the scanner has less chance of finding an active channel. Review each channel’s frequency to see if it is correct and no memory has been lost.
-
Page 37: Technical Specifications
TECHNICAL SPECIFICATIONS Band Coverage: Frequency Coverage: Scanner Radio Sensitivity (nominal) 12dB SINAD: Channels: Scan Rate: Audio Output (nominal): Power Requirements: Antenna: External Jacks: Speaker: Operating Temp: Storage Temp: Size: Weight: Features, specifications, and availability of optional accessories are all subject to change without notice. -
Page 38: One -Year Extended Warranty
(B) Modified, altered or used as part of any conversion kits, subassemblies, or any configurations not sold by Uniden, (C) Improperly installed, (D) Repaired by someone other than an authorised Uniden Repair Agent for a defect or malfunction covered by this warranty, (E) Used in conjunction with any equipment or... - Page 40 THANK YOU F O R P U R C H A S I N G T H I S U N I D E N P R O D U C T ! © 2000 Uniden Corporation UBZZ01299BZ All rights reserved...