
Related Manuals for Troy-Bilt VersaTiller 12168


Summary of Contents for Troy-Bilt VersaTiller 12168
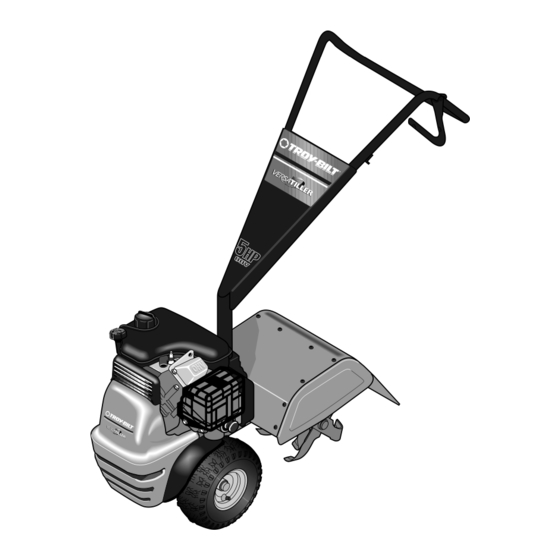
- Page 1 ® Owner’s Manual 5 H.P. • Safety • Assembly • Controls • Operation • Maintenance Model 12168 Form 1905103 (3/98) © 1998 GARDEN WAY INCORPORATED...
-
Page 2: Owner Registration Card
Dear Owner: Thank you for purchasing the TROY-BILT VersaTiller power equipment gives you the deep tilling power that rear-mounted counter-rotating tines provide, and provides the outstanding conven- ience of a front tine cultivator and tiller as well. The optional edger attachment and optional aerator attachment install easily and work very effectively to add even more versatility to your machine. -
Page 3: Table Of Contents
Customer Service and Technical Service If you have questions or problems with the unit, contact your local dealer or call or write to the factory. (When calling or writing the factory, provide the model/serial number of the unit.) Replacement Parts Factory specified replacement parts are available from your... -
Page 4: Section 1: Safety
Section Safety SPARK ARRESTER WARNING TO RESIDENTS OF CALIFORNIA AND SEVERAL OTHER STATES Under California law, and under the laws of several other states, you are not permitted to operate an internal combustion engine using hydrocarbon fuels on any forest, brush, hay, grain, or grass covered land;... - Page 5 d.) Fill fuel tank outdoors using extreme caution. Never add fuel indoors. Use a funnel or spout to prevent spillage. e.) Replace all fuel tank and container caps securely. Operation 1. Do not put hands or feet near or under rotating parts. 2.
-
Page 6: Maintenance And Storage
Section 1: Safety 24. Never operate this equipment if you are fatigued, or under the influ- ence of alcohol, drugs or medicine. 25. Operators shall not tamper with the engine-governor settings; the governor controls the maximum safe operating speed and protects the engine and all moving parts from damage caused by overspeed. -
Page 7: Section 2: Assembly
Section Assembly WARNING TO PREVENT PERSONAL INJURY OR PROPERTY DAMAGE, DO NOT START THE ENGINE UNTIL ALL ASSEMBLY STEPS ARE COMPLETE AND YOU HAVE READ AND UNDERSTAND THE SAFETY AND OPERATING INSTRUCTIONS IN THIS MANUAL. Inspect unit Inspect the unit and carton for damage immediately after delivery. -
Page 8: Add Motor Oil To Engine
Section 2: Assembly Lower Handlebar Section Fig. 2-4 STEP 3: Attach Upper Handlebar Section to Lower Handlebar Section 1. Align the mounting holes in the upper handlebar section (F, Fig. 2-4) with the corresponding mounting holes in the lower handlebar section (G). 2. -
Page 9: Section 3: Features & Controls
Section Features and Controls Fig. 3-1 This section describes the various features and controls on the unit. Refer to the next section, “Operation,” for an explanation of the use of these controls. TILLER FEATURES/CONTROLS Drive Bail Holding the Drive Bail (A, Fig. 3-1) closed against the handlebar engages the tines and wheels (when handlebar is in the rear tine tiller mode) or engages... -
Page 10: Engine Throttle Lever
Section 3: Features and Controls ENGINE FEATURES/CONTROLS WARNING Before operating your machine, be sure you read and understand all safety, controls, and opera- ting instructions in this Owner’s Manual and on the decals on your machine. Failure to follow these instruc- tions can result in serious injury or property damage. -
Page 11: Section 4: Operation
Section Operation (Swinging handlebar 20 direction equals about 1/2 the handlebar width) Fig. 4-1A MAXIMUM RECOMMENDED HANDLEBAR OFFSET IS 20 EITHER REAR TINE TILLER MODE OR FRONT TINE TILLER/CULTIVATOR MODE. Front Tine Cultivator (Swinging handlebar 20 Fig. 4-2A either direction equals about 1/2 the handlebar width) WARNING Before operating your machine,... -
Page 12: Preparation Before Starting
Section 4: Operation Preparation For Starting Make the following checks and adjustments before starting the engine. 1. Check Engine Oil Level. 2. Check the Air Cleaner. It must be securely assembled and clean. 3. Check Safety Guards. All guards and covers must be securely in place. -
Page 13: The Operational Interlock System
DANGER The Operational Interlock System is designed for the operator’s safety. Do not disconnect or attempt to defeat the purpose of the system. If the system malfunctions, immediately contact your local authorized dealer or the TROY- BILT Technical Service Department for assistance. Do not use the equipment unless the Operational Interlock System is functioning properly. - Page 14 Section 4: Operation Use this procedure to convert your equipment from rear tine tiller mode... to front tine tiller/cultivator mode..then back to a rear tine tiller again. To Change from rear tine tiller mode to front tine tiller/cultivator mode: WARNING To avoid serious personal injury or property damage, stop the engine, let all...
-
Page 15: Start And Stop The Engine
To Start and Stop the Engine IMPORTANT: Use the following steps to practice starting and stopping the engine ONLY. Do not attempt to use the equipment as a tiller or cultivator until you have read all operating instructions in this Owner’s Manual. To Start the Engine: 1. -
Page 16: Clearing Debris From Tines
Section 4: Operation Clearing Debris from the Tines WARNING To help avoid personal injury, shut off the engine, let all moving parts stop completely, disconnect the spark plug wire and move the wire away from the plug before attempting to clean the tiller tines. -
Page 17: Optional Attachments
OPTIONAL ATTACHMENTS The Edger Attachment The Edger Attachment allows you to make clean, sharp edges wherever grass meets a walkway, driveway, terrace, patio, or other such surface. It’s an extremely handy landscaping and yard care tool that attaches quickly to your equipment. Simply set up in front tine tiller/cultivator mode (the tine hood must be off, and handlebar positioned over the engine),... -
Page 18: Loading And Unloading The Tiller
Section 4: Operation Loading and Unloading the Tiller WARNING Loading and unloading a tiller in or from a vehicle is potentially hazardous and we don’t recommend that you do so unless absolutely necessary, as this could result in personal injury or property damage. -
Page 19: Section 5: Maintenance
Section Maintenance WARNING Before inspecting, cleaning or servicing the machine, shut off engine, wait for all moving parts to come to a complete stop, disconnect spark plug wire and move wire away from spark plug. Failure to follow these instructions can result in serious personal injury or property damage. -
Page 20: Tiller/Cultivator Maintenance
Section 5: Maintenance TILLER/CULTIVATOR MAINTENANCE WARNING Before inspecting, cleaning or servicing the machine, shut off engine, wait for all moving parts to come to a complete stop, disconnect spark plug wire and move wire away from spark plug. Failure to follow these instructions can result in serious personal injury or property damage. - Page 21 Transmission Gear Oil Maintenance A. Check for Transmission Oil Leaks After the first two (2) hours of brand- new operation, check the transmission for oil leaks. Thereafter, check for leaks every 25 operating hours. Specifically, inspect the following areas for signs of leaks or seepage: 1.
- Page 22 Section 5: Maintenance Tine Maintenance Tine Sets Should Be Inspected Regularly and Replaced When Worn Inspect the tines every 25 hours of operation (or at least a couple of times a year) for wear and general condition. If any tines are broken, or if you notice that tilling and cultivating do not mix the soil as thoroughly as when the tines were new, it’s time to inspect and perhaps...
-
Page 23: Engine Maintenance
ENGINE MAINTENANCE Engine Oil Maintenance Change engine oil after the first two (2) hours of new operation. Thereafter, change the oil every fifty (50) operating hours (or sooner if the work environment is very dirty or dusty). The front cover shield (secured with four screws) must be removed to gain access to the oil drain plug which is located at the base of the engine on the... -
Page 24: Troubleshooting
Before performing any of the procedures in this Troubleshooting Chart, refer to the appropriate information contained in this Manual for the correct safety precautions and operating or maintenance procedures. Contact your local authorized Engine Service Dealer for engine service. Contact your local authorized TROY-BILT tiller dealer or the Factory for service problems with the machine.