
Related Manuals for Ricoh SR5090


Summary of Contents for Ricoh SR5090
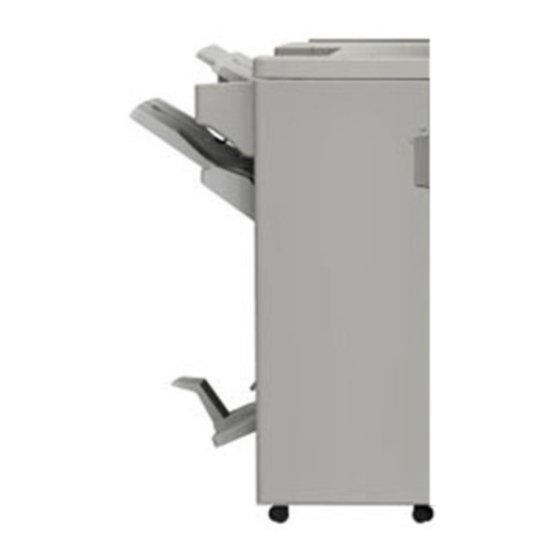
- Page 1 Finisher SR5090, Booklet Finisher SR5100 Machine Code: D3GD, D3GC Field Service Manual Ver 1.0 Latest Release: March, 2019 Initial Release: March, 2019 Copyright (c) 2019 Ricoh Co.,Ltd.
- Page 3 Symbols, Abbreviations This manual uses several symbols and abbreviations. The meaning of those symbols and abbreviations are as follows: Symbol What it means Clip ring Screw Connector Clamp E-ring Flat Flexible Cable Timing Belt Short Edge Feed Long Edge Feed Black Cyan Magenta...
-
Page 5: Table Of Contents
Storing Extra Staple Cartridges ......................7 Detaching and Reattaching the Booklet Tray End Fence By the Customer ........8 Staple Near-End Detection ......................... 8 Specifications............................9 Finisher SR5090 ..........................9 Booklet Finisher SR5100 ........................11 Paper Specifications ......................... 14 Punch Unit PU3090 .......................... 16 Layout .............................. - Page 6 Shift Tray (Upper Tray) ........................57 End Fence ............................57 Boards ..............................61 Controller Board (PCB1) ........................61 Corner Stapling Unit, Trailing Edge Alignment Unit ................64 Corner Stapling Unit ......................... 64 Trailing Edge Alignment Unit ......................68 Main Unit (Motors) ..........................69 Stacking Sponge Roller Lift Motor ....................
-
Page 8: Detailed Descriptions
1.Detailed Descriptions 1. Detailed Descriptions Major Changes from the Previous Machine Improved Stackability of Stapled Sheets New Retraction Mode for the Delivery of Stapled Sheets To improve the stackability of stapled sheets, the trailing edge alignment unit (framed in yellow) now has a mechanism for controlling stapling job delivery. - Page 9 1.Detailed Descriptions [A]: Paper Stacking Holder [B]: Stacking Sponge Roller [C]: Actuator for the Shift Tray Paper Height Sensor (S35) After paper delivery, the stacking sponge roller [A] and actuator [B] move to the return position. During paper delivery, they move to the home position. The stacking sponge roller retracts slightly into the end fence.
-
Page 10: Easier Replacement Of Staple Cartridge
1.Detailed Descriptions with the paper exit roller [E], thus allowing a larger amount to be retracted. New Sensors Two sensors [A] (the front and rear Sub Height Sensors) were added to detect stapled sheets. When sheets stapled at one point (corner stapling) are stacked, the height of the stapled corner is higher and hits the paper guide, edge guide, or the next stapled booklet. -
Page 11: Storing Extra Staple Cartridges
1.Detailed Descriptions Storing Extra Staple Cartridges Thers is now a holder for storing extra cartridges. This staple cartridge holder [A] is affixed to the inside of the finisher's front door. -
Page 12: Detaching And Reattaching The Booklet Tray End Fence By The Customer
1.Detailed Descriptions Detaching and Reattaching the Booklet Tray End Fence By the Customer The screw for securing the end fence [A] has been changed to a coin screw, allowing the customer to detach and reattach the end fence. Staple Near-End Detection For details, see Staple Near-End Detection. -
Page 13: Specifications
1.Detailed Descriptions Specifications Finisher SR5090 Item Specifications Paper size for the A3 SEF, A4 SEF/LEF, A5 SEF/LEF, A6 SEF, B4 JIS SEF, B5 JIS SEF/LEF, Finisher Upper Tray: B6 JIS SEF, 11 x 17 SEF, 8 x 14 SEF, 8... - Page 14 1.Detailed Descriptions Item Specifications Paper weight that can 52.3–300.0 g/m2 (14.0 lb. Bond–165.0 lb. Index) be shifted when delivered to the Finisher Shift Tray: • Stack capacity for the Without Z-fold: • Finisher Shift Tray (80 3,000 sheets: A4 LEF, 8 x 11 LEF •...
-
Page 15: Booklet Finisher Sr5100
1.Detailed Descriptions Item Specifications • 15–65 sheets: 100–23 sets (A4 SEF, 8 × 11 SEF) • 2–14 sheets: 100 sets (A3 SEF, A4 SEF, B4 JIS SEF, B5 JIS SEF/LEF, 11 × 17 SEF, 8 × 14 SEF, 8 × 13 SEF, 8 ×... - Page 16 1.Detailed Descriptions Item Specifications Paper size for the A3 SEF, A4 SEF/LEF, A5 SEF/LEF, B4 JIS SEF, B5 JIS SEF/LEF, B6 SEF, Finisher Shift Tray: 11 x 17 SEF, 8 x 14 SEF, 8 x 13 SEF, 8 x 11 SEF/LEF, 8 x 14 SEF, 8 x 13 SEF, 8 x 13 SEF, 8 x 10 SEF, 7...
- Page 17 1.Detailed Descriptions Item Specifications • Staple capacity (80 Without Z-fold and Mixed Sizes: g/m2, 20 lb. Bond): 65 sheets: A3 SEF, A4 SEF/LEF, B4 JIS SEF, B5 JIS SEF/LEF, 11 x 17 SEF, 8 x 14 SEF, 8 x 13 SEF, 8 x 11 SEF/LEF, 8 x 14 SEF, 8...
-
Page 18: Paper Specifications
1.Detailed Descriptions Item Specifications finishing precision is not guaranteed. • Saddle stitch capacity 20 sheets: 64.0–80.0g/m2 (17.1–21.0 lb. Bond) • (80 g/m2, 20 lb. Bond): 15-19 sheets: 80.1–105.0g/m2 (21.1–28.0 lb. Bond) • Stack capacity after 2–5 sheets: 30 sets • saddle stitching (80 6–10 sheets: 15 sets •... - Page 19 1.Detailed Descriptions Paper Thick [g/m2] Norma Thic Thic Thic Thick Thick Thick Thick Thick Thick (40.0 (52.3 (63.1 (80.1 (105. (163. (220. (256. (300. 1 to 1 to 1 to 1 to 1 to 52.2) 63.0) 80.0) 105.0 163.0 220.0 256.0 300.0 350.0...
-
Page 20: Punch Unit Pu3090
1.Detailed Descriptions Color Translucent Label SA Postcard Transparencies B5 LEF A5 SEF A5 LEF B6 SEF B6 LEF 12”×18” SEF 13”×18” SEF 11”×17” SEF 8 1/2”×14” SEF 8 1/2”×11” SEF ”×11” LEF ”×8 ” SEF ”×8 ” LEF No corner stapling Here is the key for the symbols. - Page 21 1.Detailed Descriptions Punch unit Paper size type holes 2 & 3 holes SEF: A3, B4 JIS, B5 JIS, A5, 11 x 17, 8 x 14, 8 x 11, 5 x 10 , 8 x type: 2 holes 13, 8 x 13, 8 x 13, 8K, 16K, 8 x 14, 8 x 10, 11 x 15, 10 x 14, custom size 2 &...
-
Page 22: Layout
1.Detailed Descriptions Layout General Layout Name Name Punch Units Corner Stapler Side-to-Side Fold Roller Shift Tray Booklet Stapler Proof Tray Booklet Staple Tray... -
Page 23: Electrical Component Layout
1.Detailed Descriptions Electrical Component Layout Part Exit Motor Transport Motor Positioning Roller Motor Controller Board Pre-stack Transport Motor Entrance Transport Motor Horizontal Transport Motor Tray Lift Motor Paper Guide Motor Paper Guide HP Sensor... - Page 24 1.Detailed Descriptions Part Part Shift Motor LED 3 Upper Junction Gate Solenoid LED 2 Lower Junction Gate Motor Horizontal Transport Sensor Proof Tray Full Sensor Switchback Transport Sensor Entrance Sensor Transport Path Paper Sensor LED 1 Proof Tray Exit Sensor LED 4 Lower Junction Gate JP Sensor Front Door Switch...
- Page 25 1.Detailed Descriptions Part Part Jogger Fence HP Sensor Stapler Move HP Sensor Jogger Motor Leading Edge Guide Motor Corner Stapler Movement Motor Leading Edge Guide HP Sensor Feed-out Belt Motor Positioning Roller HP Sensor Staple Tray Paper Sensor Positioning Roller Shift Motor Feed-out Belt HP Sensor Shift Tray Exit Sensor Corner Stapler Unit...
- Page 26 1.Detailed Descriptions Booklet Finisher Part Part Booklet Jogging Pawl Movement Motor Booklet Stapler Unit Shift Roller drive Motor Booklet LED 1 Booklet Jogging Pawl HP Sensor Booklet Guide Plate Sensor Booklet Upper Transport Path Stack Sensor Booklet LED 2 Booklet Jogger Motor Booklet LED 3 Booklet Jogging HP Sensor Booklet LED 4...
- Page 27 1.Detailed Descriptions Part Booklet Tray Full Sensor 1 Booklet Exit Sensor Fold Plate Cam HP Sensor Fold Transport Motor Press Fold Motor Punch Unit (Option) Part Punch Unit Movement Motor Punch Unit HP Sensor Punch Registration HP Sensor Punch Registration Motor Punch Registration Sensor Punchout Hopper Full Sensor Punch HP Sensor...
-
Page 28: Transport Layout
1.Detailed Descriptions Transport Layout Straight Through Path Orange Proof Path Green Pre-stack Path Purple Corner Staple Path Pink Booklet Staple Path Proof Transport Layout (Drive) Name Name Exit Motor Entrance Transport Motor Upper Junction Gate Solenoid Horizontal Transport Motor... -
Page 29: Proof Transport Layout (Sensors)
1.Detailed Descriptions Proof Transport Layout (Sensors) Name Name Proof Tray Full Sensor Horizontal Transport Sensor Proof Tray Exit Sensor Entrance Sensor Shift Transport Layout (Drive) Name Name Shift Motor (shift only) Transport Motor Entrance Transport Motor Exit Motor Horizontal Transport Motor... -
Page 30: Mechanisms
1.Detailed Descriptions Mechanisms Shift Transport To output paper, the shift motor [A] moves the shift roller [B] side-to-side while the shift roller is driven. The shift roller HP sensor [C] is used to control this operation. Pre-Stack (Corner Stapling) • Pre-Stack Capacity: 1 sheet •... -
Page 31: Pre-Stack (Booklet Stapling)
1.Detailed Descriptions transport paper to the pre-stack position. The rotation of the relay transport roller [C] and the pre-stack roller [B] stops, and the pre-stack junction gate [A] moves up (opens). The shift roller [D] also moves up to release the pressure between itself [D] and the relay transport roller [C]. - Page 32 1.Detailed Descriptions The pre-stack junction gate [A] drops (closes) and the relay transport roller [C] rotates in reverse. The pre-stack roller [B] rotates to transport paper to the pre-stack position. The rotation of the relay transport roller [C] and the pre-stack roller [B] stops, and the pre-stack junction gate [A] moves up (opens).
-
Page 33: Shift Tray Movement/ Paper Height Detection/ Tray Full Detection
1.Detailed Descriptions Shift Tray Movement/ Paper Height Detection/ Tray Full Detection Shift Tray Movement The tray lift motor [A] moves the tray up and down. Paper Height Detection The Shift Tray Paper Height Sensor [B] uses an actuator the rise of the tray (without paper). To prevent the tray from rising too high due to a failure to detect the height, there is an upper tray height limit switch (interlock switch) [C] to force the tray shift motor to a stop. - Page 34 1.Detailed Descriptions Sub Height Sensors Two sensors (sub-height sensors [A]) have been added to detect the height of the stapled sheets. When sheets stapled at one point (corner stapling) are stacked, the sensors prevents the sheets from hitting the paper guide, edge guide, or the next stapled booklet as they are stacked up. When one of the sensors detects the sheets, the machine stops the job in progress.
- Page 35 Limit Sensor 4 SEF, LG, SEF, LT SEF, 12"x18" SEF, SRA3,13"x19.2" 488 mm 2,000 Shift Tray Lower A4 LEF, LT LEF sheets Limit Sensor 2 Finisher SR5090 Number of Detected By Paper Size Length Sheets 500 sheets Shift Tray Lower...
- Page 36 1.Detailed Descriptions Condition 2 The feeler is raised. • Booklet Stack Height Sensor 1 (S26) [A] (SP6-123-036 INPUT Check) : OFF • Booklet Stack Height Sensor 2 (S27) [B] (SP6-123-037 INPUT Check) : ON If the feeler remains up for 13 seconds, the machine deems that the stacking limit has been reached. This is meant for the correct detection of tray full for stacking Z-folded paper, or for incorrectly stacked documents.
-
Page 37: Pull-In Roller/ Paper Stack Holder
1.Detailed Descriptions Pull-in Roller/ Paper Stack Holder Components Name Name Paper Stacking Holder Paper Stacking Holder Lift Motor... - Page 38 1.Detailed Descriptions Name Name Paper Stacking Holder HP Sensor Stacking Sponge Roller Cam Stacking Sponge Roller Stacking Sponge Roller HP Sensor Paper Stacking Holder Paper Stacking Holder Cam Upper Tray Height Limit Switch (Interlock Switch) Paper Stacking Holder Motor ) Paper Stacking Holder Cam Stacking Paper stack holding is done in a five-step operation.
- Page 39 1.Detailed Descriptions stacking holder [B] (until job end, the machine repeats Steps 3 and 4). After job end, the paper stacking holder lift motor rotates the stacking sponge roller cam [D] to lift the stacking sponge roller [A] up to its home position. At the same time, the paper stacking holder motor rotates the holder cam [E] to lift the paper stacking holder [B] up to its home position (until the paper stacking holder HP sensor [C] detects the end of the paper stacking holder [B]).
-
Page 40: Corner Stapling
1.Detailed Descriptions Corner Stapling Components Name Name Positioning Roller Shift Motor Drag Roller Positioning Roller Stapler Exit Motor Stapler Move HP Sensor Corner Stapler Movement Motor Positioning Roller HP Sensor... - Page 41 1.Detailed Descriptions Name Name Edge Guide Jogger Fence Upper Tray Exit Sensor Staple Tray Paper Sensor Jogger Fence HP Sensor Leading Edge Guide HP Sensor Jogger Motor Leading Edge Guide Motor Name Name Feed-out Belt (with stack feed-out pawl) Trailing Edge Fence Feed-out Belt Motor Feed-out Belt HP Sensor Edge Guide...
- Page 42 1.Detailed Descriptions into the machine when the last sheet of a job is output (the leading edge guide HP sensor [C] detects the edge guide). Stapler Movement The corner stapler movement motor [A] moves the stapler [C] along the guide rod [B]. After a job finishes, the stapler [C] returns to its HP (the stapler move HP sensor [D] detects the base of the stapler).
- Page 43 1.Detailed Descriptions The positioning roller shift motor [A] moves the positioning roller [D] down at the start of every job. The positioning roller motor [B] rotates the positioning roller [D] to transport paper to the staple tray. The positioning roller motor [B] also rotates the drag roller [C]. The drag roller [C] is a sponge roller that pushes paper against the trailing edge fence, in order to hold paper in the stapling position.
- Page 44 1.Detailed Descriptions • Horizontal Staple [2] • Horizontal Staples at 2 points [3] Feeding-Out The trailing edge fence [B] moves paper to the correct position for output. The stack feed-out pawl [A] that is attached to the stack feed-out belt [C] then pushes the paper out. The feed-out belt motor [D] drives the stack feed-out pawl [A] and the trailing edge fence [B].
-
Page 45: Staple Near-End Detection
The near-end threshold can be changed in SP6-795-001 / SP6-796-001 (Staple N.E. Setting: Near-End Threshold). Depending on the model, the initial value is as follows: • SR5090/SR5100: 800 corner staples and 300 booklet staples • SR3270: 500 staples to be used for both corner and booklet stapling •... -
Page 46: Saddle Stitching (Booklet Stapling)
1.Detailed Descriptions the near-end status is notified to the machine. To correctly count the actual remaining number of staples, instruct the customer to do as follows: • Replace the cartridge after the staples have completely run out (End). • Replace the cartridge with the machine’s power on (so that the device status can be monitored). What if the counter does not match the actual remaining number of staples? •... - Page 47 1.Detailed Descriptions Saddle Stitching with This Finisher Previously, strong pressure had to be applied in order to shape the saddle; this could only be possible if the finisher is big. This finisher uses the method below to make a saddle without having to be large in size.
- Page 48 1.Detailed Descriptions Name Name Booklet Jogging Pawl HP Sensor Booklet Trailing Edge Bottom Fence HP Sensor Booklet Jogging Pawl Movement Motor Booklet Lower Transport Path Stack Sensor Shift Roller drive Motor Bottom Fence Booklet Upper Transport Path Stack Jogger Fence Sensor Booklet Jogger Motor Booklet Stapler...
- Page 49 1.Detailed Descriptions Name Name Booklet Exit Sensor Fold Unit Exit Roller Fold Roller Fold Transport Motor Booklet Staple Transport As paper goes through the booklet staple path, the shift roller unit [A] moves up to its operating position in order to be ready to transport paper. The shift roller lift motor moves the shift roller unit [A]. The shift roller drive motor rotates the shift roller [B] to transport paper to the bottom.
- Page 50 1.Detailed Descriptions Jogger The booklet jogger motor [A] moves the jogger fences [B] in to align the sides of each page. When a job starts, the jogger fences move to the ready position (this depends on the paper size). Bottom Fence Operation / Stapling The stack is pushed by the stack junction gate to the bottom fence [B] in order to align it.
- Page 51 1.Detailed Descriptions Center Folding and Saddle Shaping The fold plate [C] center inserts the stack between the rollers [D]. Next, the side-to-side fold roller unit [E] forms the saddle shape. The press fold motor drives both the fold plate [C] and the side-to-side fold roller unit [E] so that they move together.
- Page 52 1.Detailed Descriptions the center of the stack, using pressure from a large spring. Center folding begins when the fold plate [B] pushes into the center of the stack. The movement of the fold plate cam stops the fold plate [C] and this holds the center of the stack out in the folded position.
- Page 53 1.Detailed Descriptions Saddle Shaping Name Name Guide Plate Fold Transport Roller Guide Plate 2 Side-to-Side Fold Roller Unit The side-to-side fold roller unit in the center moves from [A] to [C]. It moves along a rail when it comes to the center, the upper fold (up) descends, and then pressure from a large spring folds the center of the stack.
- Page 54 1.Detailed Descriptions The press fold motor reverses, and the unit increases pressure on the stack as it moves and applies creasing on the remainder of the saddle shape as it moves from [C] to [A]. When the top of the side-to-side fold unit reaches the side-to-side fold unit HP sensor, the unit ascends to the upper path and releases pressure on the center of the stack.
- Page 55 1.Detailed Descriptions SP6-160-004 (Replacement Mode for Service) It is easier to access the following parts by executing SP-6-160-004. • Positioning Roller [A] The paper exit guide plate moves upwards and the positioning roller pops up in front for easier access. •...
-
Page 56: Replacement And Adjustment
2.Replacement and Adjustment 2. Replacement and Adjustment Covers Rear Upper Cover, Rear Lower Cover Remove the rear upper cover [A]. Remove the rear lower cover [A]. Upper Cover Remove the rear upper cover. (Rear Upper Cover, Rear Lower Cover) - Page 57 2.Replacement and Adjustment Remove the 2 screws and release the 2 hooks. Open the front cover [A] and remove the 2 screws. Remove the upper cover [A]. • When you detach or reattach the upper cover, be sure to check the locations of the hooks on the cover.
-
Page 58: Front Cover
2.Replacement and Adjustment Front Cover Open the front door [A], and then remove the screw fixing the bracket [B]. Remove the front door [A]. Holding the hinge at the upper part of the cover, raise the edge of the upper cover. Pull out the cover from the pin [B] at the bottom. -
Page 59: Paper Guide Cover
2.Replacement and Adjustment Paper Guide Cover Remove the rear upper cover. (Rear Upper Cover, Rear Lower Cover) Push the guides in to the center. Remove the paper guide cover [A]. -
Page 60: Lower Tray
2.Replacement and Adjustment Remove the hook [A] at the right side. Lower Tray Remove the lower tray [A]. Proof Tray Remove the following covers. • Upper cover (Rear Upper Cover, Rear Lower Cover) • Paper guide cover (Paper Guide Cover) -
Page 61: Shift Tray (Upper Tray)
2.Replacement and Adjustment Remove the proof tray [A]. Shift Tray (Upper Tray) Remove the shift tray [A]. End Fence Remove the rear lower cover (Finisher SR5090 only). (Rear Upper Cover, Rear Lower Cover) Remove the paper guide cover. (Paper Guide Cover) Remove the shift tray. - Page 62 2.Replacement and Adjustment Remove the shift tray bracket [A]. Disconnect the connector (CN180) and release the harness. Remove the end fence [A]. When you remove the end fence, be careful with the harness beneath it. Booklet Finisher SR5100...
- Page 63 2.Replacement and Adjustment Finisher SR5090...
- Page 64 2.Replacement and Adjustment Points to Note When Detaching/ Reattaching/ Replacing the End Fence There is a harness routed beneath the end fence. Take note of the following: • If the cable clamp for securing the harness has come off the end fence, reattach it. •...
-
Page 65: Boards
2.Replacement and Adjustment Boards Controller Board (PCB1) Remove the following covers. • Rear upper cover (Rear Upper Cover, Rear Lower Cover) • Rear lower cover (Rear Upper Cover, Rear Lower Cover) Remove the Controller Board [A]. Booklet Finisher SR5100 Finisher SR5090... - Page 66 2.Replacement and Adjustment When Replacing the Controller Board This board has a dip switch. When you reinstall the controller board, follow the procedure below to make dip switch settings. Check the settings of the dip switch [A] on the old main board. Replace the controller board.
- Page 67 2.Replacement and Adjustment Locate the label [A] near the right corner of the board. Enter the SP mode. Change the following SPs using the numbers on the label. • SP6-121-001 NV Adj. Data: Jog Position: Factory Adj. • SP6-121-002 NV Adj. Data: Fold Position: Factory Adj. •...
-
Page 68: Corner Stapling Unit, Trailing Edge Alignment Unit
2.Replacement and Adjustment Corner Stapling Unit, Trailing Edge Alignment Unit Corner Stapling Unit Remove the following covers. • Front left side cover (Front Left Side Cover) • End fence (End Fence) • Rear lower cover (Rear Upper Cover, Rear Lower Cover) Pull out the saddle stitch unit [A], and remove the inner upper cover [B]. - Page 69 2.Replacement and Adjustment Remove the pressure release motor bracket [A] from the rear side of the finisher. Remove the gear [A] and timing pulley [B] from the rear side of the finisher. Remove the pulley [A] from the rear side of the finisher. Remove the six screws from the rear side of the finisher.
- Page 70 2.Replacement and Adjustment Remove the main board, ground wire, connectors, and clamps. Remove the four clamps, and then pull the harness [A] out through the hole [B] on the left side of the finisher. 10. Pull the harness [C] out through the hole [D] on the left side of the finisher. 11.
- Page 71 2.Replacement and Adjustment 12. Lifting the corner stapling unit [A], push up the paper exit guide unit [B]. 13. Remove the bearings on the sides [A] from the cutouts on the metal plate. 14. Remove the corner stapling unit [A]. •...
-
Page 72: Trailing Edge Alignment Unit
2.Replacement and Adjustment Trailing Edge Alignment Unit Remove the corner stapling unit. (Corner Stapling Unit) Remove the trailing edge alignment unit [A]. -
Page 73: Main Unit (Motors)
2.Replacement and Adjustment Main Unit (Motors) Stacking Sponge Roller Lift Motor Remove the trailing edge alignment unit from the corner stapling unit (Trailing Edge Alignment Unit). Remove the stacking sponge roller lift motor [A]. Disconnect the harness [B] from the stacking sponge roller lift motor [A]. Leading Edge Guide Motor Remove the trailing edge alignment unit (Trailing Edge Alignment... -
Page 74: Paper Stacking Holder Motor
2.Replacement and Adjustment Remove the bracket [A]. Remove the leading edge guide motor [A] with its bracket. Remove the leading edge guide motor [A] from the bracket [B]. Paper Stacking Holder Motor Remove the corner stapling unit (Corner Stapling Unit). -
Page 75: Exit Motor
2.Replacement and Adjustment Remove the paper stacking holder motor [A]. Exit Motor Remove the rear upper cover (Rear Upper Cover, Rear Lower Cover). Remove the exit motor [A]. Feed-out Belt Motor Remove the corner stapling unit (Corner Stapling Unit). -
Page 76: Jogger Motor
2.Replacement and Adjustment Remove the feed-out belt motor [A]. Jogger Motor Remove the trailing edge alignment unit (Trailing Edge Alignment Unit). Remove the feed out motor (Feed-out Belt Motor). Remove the jogger motor [A]. -
Page 77: Main Unit (Sensors)
2.Replacement and Adjustment Main Unit (Sensors) • When you release the harness around the shift tray paper sensor [C] for replacing parts such as the sensors on the trailing edge alignment unit, be sure to route the harness as shown in the following figure [A]. -
Page 78: Paper Stacking Holder Hp Sensor
2.Replacement and Adjustment Remove the shift paper height sensor [A]. Paper Stacking Holder HP Sensor Remove the trailing edge alignment unit (Trailing Edge Alignment Unit). Turn over the trailing-edge alignment unit, and then remove the paper stacking holder HP sensor together with the bracket [A]. -
Page 79: Stacking Sponge Roller Hp Sensor
2.Replacement and Adjustment Remove the paper stacking holder HP sensor [A]. Stacking Sponge Roller HP Sensor Remove the corner stapling unit (Corner Stapling Unit). Remove the stacking sponge roller HP sensor together with the bracket [A] from the corner stapling unit [B]. -
Page 80: Staple Tray Paper Sensor (S31)
2.Replacement and Adjustment Staple Tray Paper Sensor (S31) Remove the trailing edge alignment unit (Trailing Edge Alignment Unit). Remove the staple tray paper sensor together with the bracket [A] from the part with the trailing- edge alignment unit ( x 1, x 1). -
Page 81: Leading Edge Guide Hp Sensor
2.Replacement and Adjustment Remove the bracket with the feed-out belt HP sensor [A]. Remove the feed-out belt HP sensor [A] from the bracket. Leading Edge Guide HP Sensor Remove the trailing edge alignment unit (Trailing Edge Alignment Unit). On the part with the corner stapling unit, rotate the belt [A] of the leading-edge guide motor until the leading-edge guide [B] is revealed. -
Page 82: Upper Tray Height Limit Switch
2.Replacement and Adjustment Remove the leading edge guide HP sensor [A]. • When you remove the sensor, be sure to release the hook with a tool such as a ratchet screwdriver. Upper Tray Height Limit Switch Remove the corner stapling unit (Corner Stapling Unit). - Page 83 2.Replacement and Adjustment Remove the brackets [B] from the sub-height sensors [A] beneath the end fence.
-
Page 84: Saddle Stitch Unit (Motors)
2.Replacement and Adjustment Saddle Stitch Unit (Motors) Saddle Stitch Unit Remove the following covers. • Rear Upper Cover (Rear Upper Cover, Rear Lower Cover) • Rear Lower Cover (Rear Upper Cover, Rear Lower Cover) Remove the harnesses and ground wire from the saddle stich unit. Open the front door [A] and pull out the saddle stitch unit [B]. -
Page 85: Press Fold Motor
2.Replacement and Adjustment Remove the screws securing the finisher and saddle stitch unit. Lift up to remove the saddle stitch unit [A]. Press Fold Motor Remove the saddle stitch unit (Saddle Stitch Unit). - Page 86 2.Replacement and Adjustment Remove the fixing bracket [A] on the saddle stitch unit. Remove the screw [A] shown in the photo below. Loosen the screw [B] to loosen the press fold motor belt [C]. Remove the clamps (indicated by red arrows) and connectors (pink arrows) from the press fold motor unit.
- Page 87 2.Replacement and Adjustment Remove the screws on the press fold motor unit [A].
- Page 88 2.Replacement and Adjustment Remove the spacer [A] between the gears, taking care not to touch the bracket. Remove the belt [A]. • Pulling down the bracket [B] securing the belt, remove the belt from the gear. • Remove the belt from the gear, making sure not to touch the bracket [C].
-
Page 89: Booklet Jogger Motor
2.Replacement and Adjustment Remove the press fold motor unit [A]. 10. Remove the spring [B] from the press fold motor bracket [A] ( x 1, spring x 1). 11. Remove the press fold motor [A] ( x 2, x 1). Booklet Jogger Motor Remove the saddle stitch unit (Saddle Stitch... - Page 90 2.Replacement and Adjustment Remove the booklet jogger motor [A] ( x 2).
-
Page 91: Paper Guide Unit
2.Replacement and Adjustment Paper Guide Unit Paper Guide Unit Remove the paper guide cover. (Paper Guide Cover) Disconnect the cover support bracket. Remove the cover support bracket. Loosen (do not remove) the screws on both ends of the paper exit. This will loosen the tray so you can move the tray slightly side-to-side in order to remove the bracket screws more easily. - Page 92 2.Replacement and Adjustment Disconnect the front end of the paper guide unit bracket [B]. At the rear, open the clamps and disconnect the motor and sensor harnesses. Lay the unit [A] on flat clean surface so you can see the paper guide motor [1] and paper guide...
-
Page 93: Paper Guide Hp Sensor
2.Replacement and Adjustment position sensor bracket [2]. Paper Guide HP Sensor Remove the paper guide cover. (Paper Guide Cover) - Page 94 2.Replacement and Adjustment Remove the bracket [A] with the paper guide HP sensor. Open the clamp and disconnect the sensor ( x1, x1). Separate the sensor and bracket ( x3).
-
Page 95: Paper Guide Motor
2.Replacement and Adjustment Paper Guide Motor The paper guide motor is at [A]. Remove the paper guide unit. (Paper Guide Unit) Remove sensor bracket ( x1). Unfasten the motor, and disconnect the belt ( x1). - Page 96 2.Replacement and Adjustment Remove the paper guide motor. • When you re-install the motor, make sure that the connector is pointing to the back of the unit.
-
Page 97: Stapler Unit
2.Replacement and Adjustment Stapler Unit Stapler Unit Remove the rear upper cover. (Rear Upper Cover, Rear Lower Cover) Open the front door and push the stapler [A] to the rear side of the finisher. At the rear side, remove the screw circled in the photo below from the stapler [A]. Push the stapler to the front side of the finisher. - Page 98 2.Replacement and Adjustment • When attaching the stapler unit, make sure that the hook on the back of the cover is inserted to the cutout of the frame firmly. Release the clamp, and then remove the 2 connectors. Remove the stapler unit [A]. Be sure to open the paper guide [B] and its catches on the unit.
- Page 99 2.Replacement and Adjustment...
-
Page 100: Punch Unit
2.Replacement and Adjustment Punch Unit Remove the following covers. • Rear Upper Cover (Rear Upper Cover, Rear Lower Cover) • Rear Lower Cover (Rear Upper Cover, Rear Lower Cover) Remove the side-to-side detection unit [A] ( x 2, x 3, x 2). - Page 101 2.Replacement and Adjustment Remove the punch unit controller board cover [A] ( x2). Pull out the punch unit [A] ( x 2, x 3, x 2).
-
Page 102: Fold Adjustments
2.Replacement and Adjustment Fold Adjustments Adjusting the Alignment of the Flat Fold Rollers Folding strength can be adjusted by adjusting the difference in the vertical alignment between the flat fold rollers. Remove the saddle stitch unit (Saddle Stitch Unit). Remove the fold plate bracket [A] ( x 2) Open the bracket [A] of the flat fold roller. - Page 103 2.Replacement and Adjustment Adjust the position of the flat fold lower roller [A] to adjust the difference in alignment between the upper and lower rollers of the flat fold booklet unit. • By default, the upper and lower rollers of the flat fold booklet unit are not aligned vertically. There is a 3 mm difference [D] between the upper and lower rollers.
-
Page 104: Adjusting The Folding Speed
2.Replacement and Adjustment Difference in Folding Thickness of the The amount of toner on the Alignment Strength booklet fold 3mm (default) Strong Thin Acceptable Weak Thick Good Close the bracket after the adjustment. Reassemble the machine. Adjusting the Folding Speed You can adjust the thickness of the booklet by adjusting the moving speed of the flat fold booklet unit. -
Page 105: Flat Fold Booklet Unit Home Position Adjustment
2.Replacement and Adjustment Flat Fold Booklet Unit Home Position Adjustment Pull out the saddle stitch unit [A]. Remove the timing gear [A] ( x 1). Turn the knob [A] clockwise to move the flat fold roller unit [B] in the direction of the arrow. Move the flat fold roller unit until the edge of the unit [A] is between the guide lines [B] and [C]... - Page 106 2.Replacement and Adjustment inscribed on the bracket. Check that the fold plate [A] has been moved in the direction of the arrow as far as it can go and the bushing [C] on the rear end of the fold plate shaft [B] is aligned with the fold plate positioning cam [D].
- Page 107 2.Replacement and Adjustment Re-attach the timing gear [A] ( x 1). Reassemble the finisher and connect it to the main machine. Turn ON the power of the main machine. After the finisher initialization is complete, check that the flat fold roller unit, fold plate and the cam are positioned as described in Steps 4 and 5.