Table of Contents
Advertisement
Advertisement
Table of Contents

Related Manuals for Zte GRAND X View 3


Summary of Contents for Zte GRAND X View 3
- Page 1 User Manual...
- Page 2 About This Manual Thank you for choosing this ZTE mobile device. In order to keep your device in its Trademarks best condition, please read this manual and keep it for future reference. ZTE and the ZTE logos are trademarks of ZTE Corporation.
-
Page 3: Table Of Contents
Contents Getting Started ..................5 Managing Notifications ..............15 Getting to Know Your Tablet ............5 Managing Shortcut Icons ..............16 Knowing the Keys ................6 Organizing With Folders ..............17 Installing the nano-SIM Card and the microSDXC™ Card (Optional) . 6 Rearranging the Primary Shortcuts .......... - Page 4 Message Options ................28 Features ..................39 Web Browser..................29 Battery ..................39 Opening the Browser ..............30 Display..................40 Using Multiple Browser Windows ........... 30 Sound ................... 40 Downloading Files ................. 30 Storage ..................40 Changing Browser Settings ............30 Security & Location ............... 40 Camera ....................
-
Page 5: Getting Started
Getting Started Getting to Know Your Tablet Stereo Headset jack speaker Light sensor Back Front Indicator camera camera light Power key nano-SIM/ microSDXC card tray Volume Touch screen Stereo Charging/USB Microphone speaker Type-C jack... -
Page 6: Knowing The Keys
WARNING! Knowing the Keys To avoid damage to the device, do not use any other kind of SIM cards, or Function any non-standard nano-SIM card cut from a SIM card. You can get a standard nano-SIM card from your service provider. ... -
Page 7: Charging The Battery
Use only ZTE-approved chargers and USB Type-C cables. The use of unapproved accessories could damage your device or cause the battery to ... -
Page 8: Powering Your Tablet On/Off
Lower the screen brightness. To save battery power, the tablet automatically turns off the screen after a certain period of time when you leave it idle. You will still be able to receive Turn auto sync and Bluetooth off when not in use. messages and notifications while the screen is off. -
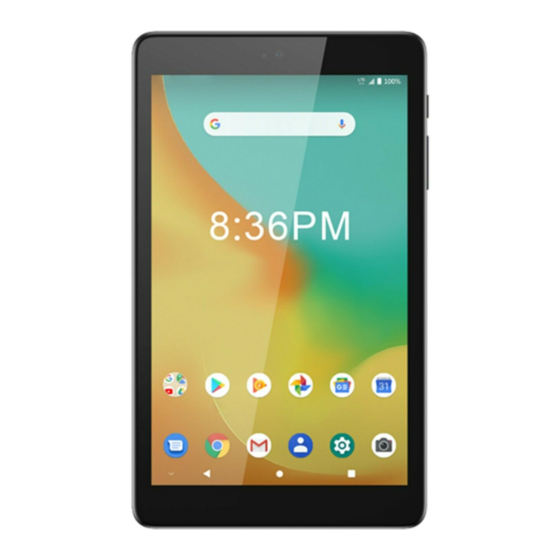
Page 9: Getting To Know The Home Screen
until you have reached the target position. Pinch – In some apps (such as Maps and Photos), you can zoom in and out by placing two fingers on the screen at once and pinching them Status bar together (to zoom out) or spreading them apart (to zoom in). ... - Page 10 extended panels. You can add or remove home screen panels, or adjust their order. To add a new home screen panel: 1. Touch and hold an empty area of the home screen. 2. Swipe the home screen thumbnails and touch 3.
-
Page 11: Personalizing
Personalizing To adjust the time format, touch to turn on Automatic 24-hour Changing the System Language format or Use 24-hour format. 1. From the home screen touch > System > Languages & input > Languages. The first language in the list is the system language. Changing the Notification and Alarm Sounds 2. -
Page 12: Switching To Silent Mode
2. Drag the sliders below Notification volume, Media volume, or Alarm Turn on Do Not Disturb Mode volume to adjust the volume for each type of audio. 1. Swipe down from the top of the screen with two fingers to access the NOTE: Quick Settings. -
Page 13: Changing Screen Brightness
hold an empty place on the home screen and touch WALLPAPERS. 1. From the home screen touch > Security & location > Screen lock. 2. Swipe left or right on the wallpaper panel along the bottom of the 2. Touch None, Swipe, Pattern, PIN, or Password. screen to select a wallpaper, or touch My photos to choose the image ... -
Page 14: Knowing The Basics
Turn On Screen Pinning 1. From the home screen touch > Security & location > Screen pinning. 2. Touch the On/Off switch. 3. Switch on Lock device when unpinning or, if you have set a screen lock, switch on Ask for unlock pattern/PIN/password before unpinning. You will need to draw the pattern or enter the PIN/password to unpin the screen. -
Page 15: Monitoring The Tablet Status
Indicators and Icons Monitoring the Tablet Status Indicator What it means Indicator What it means New text or MMS Open Wi-Fi network The status bar at the top of the screen provides status icons on the right side. message(s) detected Below are some of the icons you may see. -
Page 16: Managing Shortcut Icons
notifications, or touch to expand or collapse certain notifications NOTE: and bundled notifications. You can swipe left or right on the quick settings panel to find all setting tiles. To remove a notification, swipe it left or right. To turn on or off settings quickly: ... -
Page 17: Organizing With Folders
Move Shortcut Icons Rearranging the Primary Shortcuts 1. Touch and hold a shortcut icon on the home screen. The home screen includes a customizable primary shortcuts area at the 2. Drag it to the place you need. bottom visible from all home screens. You can keep at most 6 primary shortcut icons or folders. -
Page 18: Uninstalling An App
Double-tap the Recent apps key to quickly switch to the most recent app. Uninstalling an App 1. Swipe up on the home screen to open the application list. 2. Touch and hold an application icon and drag the icon to at the top of the screen. -
Page 19: Connecting To Mobile Networks
2. Touch to turn off Automatically select network > OK. Connecting to Mobile Networks 3. Wait for the tablet to search for available networks and touch a network in the network list to register manually. Control Mobile Data Use 1. From the home screen touch >... -
Page 20: Connecting To Bluetooth Devices
within a distance of about 30 feet (10 meters). The Bluetooth devices must be notifications. paired before the communication is performed. Add a Wi-Fi Network Change the Device Name You can add a Wi-Fi network if the network does not broadcast its name 1. -
Page 21: Connecting To Your Computer Via Usb
(bluetooth, for instance). You can access them with the Files Manager app. Forget a Bluetooth Device You can make your tablet forget its pairing connection with another Connecting to Your Computer via USB Bluetooth device. To connect to the device again, you need to search it and enter or confirm a passkey again. - Page 22 Set Up the microSDXC Card as Device Storage CAUTION: As part of the device storage, the microSDXC card may have data on it that If your microSDXC card is new or doesn't have content you want to keep, is necessary for some apps to function normally. Therefore, do not remove you can format the card and use it as part of the device storage.
-
Page 23: Sharing Mobile Data Through Tethering
5. If prompted, touch Done. 2. Touch your microSDXC card name below Device storage. NOTE: 3. Touch > Format as portable. Whenever you move data between the internal storage and the microSDXC 4. Touch FORMAT. card, the destination is used to save new apps and personal data (such as 5. -
Page 24: Contacts
Contacts syncing. You can add contacts on your tablet and synchronize them with the contacts in your Google account or other accounts that support contact To see your contacts, touch on the home screen. -
Page 25: Checking Contact Details
3. Check the contacts you want to import. Checking Contact Details 4. Touch 1. From the home screen touch 5. If prompted, select the account the contacts will be imported to. 2. Scroll through the list to view all your contacts. 3. -
Page 26: Searching For A Contact
Share Contacts Join Duplicate Contacts You can merge duplicate contact entries into one entry in the Contacts list. 1. From the home screen touch 2. Touch > Settings > Export > Share all contacts. 1. From the home screen touch 3. -
Page 27: Adding Or Removing Accounts
Configuring Account Sync Adding or Removing Accounts ® You can add multiple Google accounts, Microsoft Exchange ActiveSync Configure Auto Sync Setting accounts, and IMAP/POP3 email accounts. You may also add other kinds of accounts, depending on the apps installed on your tablet. 1. -
Page 28: Opening The Messages Screen
5. Touch You can use Messages to exchange text messages (SMS) and multimedia messages (MMS). NOTES: If you add two or more recipients, the message may be sent as a group Opening the Messages Screen MMS where everyone can reply and see each other’s messages. For group message setting, touch >... -
Page 29: Web Browser
Messages screen to find all archived messages. Touch > Delete to delete the thread. Touch to add the new number in the thread to your contacts. Touch > OK to block the contact or number in the thread, and the thread will be archived. -
Page 30: Opening The Browser
Switch Between Browser Windows Use Chrome to view web pages and search for information. Touch the icon at the top of the screen. The number in the icon Opening the Browser indicates the number of currently active browser windows. Opened web pages will be listed. -
Page 31: Capturing A Photo
Capturing a Photo 1. From the home screen touch 2. Aim the camera at the subject and make any necessary adjustment. PHOTO (auto camera) mode is used by default. Settings Filter 3. Touch the area where you want the camera to focus, or leave the camera Beauty mode to autofocus on the center of the image. -
Page 32: Using Manual Camera Mode
captured. Touch the options that appear near the shutter icon to configure overall exposure, ISO, white balance, and interval for time-lapse Capture picture: Touch the icon to take a picture. pictures. Switch front/back camera: Switch between the back camera and Touch to take the photo. -
Page 33: Video Player
Help: Enable the Help icon on the viewfinder screen, or touch More to Some camera and video options will change in different camera modes. view help details. Resolution: (front and back camera) Set the image size for your photo. ... -
Page 34: Opening The Video Library
Slide horizontally on the video to rewind or fast forward. Opening the Video Library Slide vertically on the right or left part of the screen to adjust volume or Swipe up on the home screen and touch Video to view your video library. brightness, respectively. -
Page 35: Recording A Voice Memo
Touch View tag to check all time tags. You can touch “+” after an empty tag to Recording a Voice Memo add an image or text, touch an image to delete it or replace it with another image, or touch and hold a tag to delete it. 1. -
Page 36: Clock
can then dock the tablet and use it as a nightstand clock. Clock Use Stopwatch and Countdown Swipe up on the home screen and touch Clock. The Clock app allows you to check local time in places around the world, set alarms, and use timers and 1. -
Page 37: Settings
Play Store: Purchase and download apps, games, and more from the bookmarks, browsing history, and more synced with your Google account. Google Play Store. Drive: Store files on Google servers for free after you sign in to your ... -
Page 38: Network & Internet
NOTE: Network & Internet The data usage is measured by your tablet, and the data accounting of your Wi-Fi service provider may differ. Turn Wi-Fi on or off and configure your Wi-Fi connections and feature (see Hotspot & Tethering Connecting to Wi-Fi). -
Page 39: Apps & Notifications
In the Connection preferences menu, you can also touch Printing to use the Emergency Alerts default printing service or other printer plug-ins installed from the Google Touch Emergency alerts to turn on/off alerts, check alert history, or change Play Store or your printer manufacturer for wireless printing, or touch vibration/sound settings. -
Page 40: Display
Display Security & Location Configure the display options, including brightness level, Night Light mode, The Security & location menu allows you to configure the following options. wallpaper, screen sleep time, screen rotation, font size, etc. Google Play Protect: Check your apps and device for harmful behavior. ... -
Page 41: Accounts
Protecting Your Tablet With Screen Pinning). NOTE: You need to sign in to your Google account on the tablet to use all the Accounts Smart Lock features. Location: Manage location services, which help your tablet and apps The Accounts menu lists the accounts you have signed in on the tablet for you to manage them. - Page 42 assistance, speech input and output as well as mouse/trackpad input. If you want users to add more users when the tablet is locked, switch on Add users from lock screen. Anyone can then open the Quick Settings Date & Time panel from the lock screen and touch >...
-
Page 43: Troubleshooting
Troubleshooting Problem Possible causes Possible solution If you encounter problems while using the tablet, or if it performs abnormally, you can refer to the chart below. If your particular problem The temperature of the tablet is Adjust the battery charging cannot be resolved using the information in the chart, contact the dealer below 0°C or higher than 35 °C. - Page 44 Problem Possible causes Possible solution nano-SIM card nano-SIM card malfunction or Take the nano-SIM card to error damage. your service provider for testing. nano-SIM card inserted Insert the nano-SIM card improperly. properly. Debris on the nano-SIM card Use a soft, dry cloth to clean contacts.
-
Page 45: For Your Safety
For Your Safety General Safety Don’t use at gas stations. Turn off when told to on aircraft and at airports. Don’t make or receive phone calls while driving. Never text while Don’t rely on your tablet as a primary device for emergency driving. -
Page 46: Fcc Regulations
1.19 W/kg. Changes or modifications not expressly approved by the party responsible for compliance could void the user’s authority to operate the equipment. While there may be differences between the SAR levels of various devices and at various positions, they all meet the government requirements. IC Notice FCC Regulations This device complies with Industry Canada license-exempt RSS standard(s). -
Page 47: Distractions
Battery Safety You must always turn off your device wherever its use is prohibited. Use of Using ZTE-unapproved or incompatible battery, charger or power your device is subject to safety measures designed to protect users and their adapter may damage your device, shorten its lifespan or cause a fire, environment. - Page 48 Do not change or replace the built-in rechargeable battery in your device To avoid the risk of demagnetization, do not allow electronic devices or by yourself. The battery can only be changed or replaced by ZTE or magnetic media close to your device for a long time.
-
Page 49: Electrical Safety
Repetitive Strain Injuries Electrical Safety To minimize the risk of Repetitive Strain Injury (RSI) when texting or playing Accessories games with your device: Do not grip the device too tightly. Use only approved accessories. Do not connect with incompatible products or accessories. -
Page 50: Radio Frequency Interference
Only use the battery for the device for which it is specified. medical devices, such as pacemakers and hearing aids. Please consult your doctor and the device manufacturers to determine if the operation of your Only use the battery with a charging system that has been qualified with device may interfere with the operation of your medical devices. -
Page 51: Explosive Environments
Areas with potentially explosive atmospheres include fueling areas, below Interference in Vehicles decks on boats, fuel or chemical transfer or storage facilities, areas where Please note that because of possible interference to electronic equipment, the air contains chemicals or particles, such as grain, dust, or metal some vehicle manufacturers forbid the use of mobile devices in their powders.