Table of Contents

Related Manuals for Monogram ZMB9032


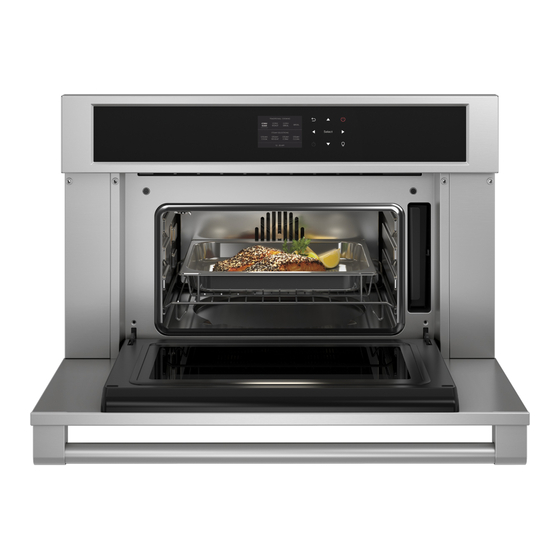
Summary of Contents for Monogram ZMB9032
- Page 1 INSTALLATION INSTRUCTIONS Built-In Steam Oven ZMB9032, ZMB9031 Para consultar una version en español de este manual de instrucciones, visite nuestro sitio de internet monogram.com. MONOGRAM.COM...
-
Page 2: Table Of Contents
Step 8, Slide Oven into Opening ......12 Step 9, Install Mounting Screws ......12 Step 10, Replacing the Oven Door ......13 Step 11, Final Installation Checklist ......13 MODELS AVAILABLE Pro Models: ZMB9031 - Stainless Steel Min Models: ZMB9032 - Stainless Steel 31-2000693 Rev. 0... -
Page 3: Installation Instructions
Installation Instructions MATERIALS YOU MAY NEED DESIGN INFORMATION Junction Box STEAM OVEN INSTALLATIONS The steam oven may be installed in a cabinet alone Wire Nuts or above a warming drawer, single wall oven, or Strain Relief Clamp for 1/2” Conduit below another steam oven or speedcook oven. - Page 4 Installation Instructions 2 A CUTOUT FOR STEAM OVENS IN WALL CABINET NOTE: If the cabinet does not have a front frame and the sides are less than 3/4” (1.9 cm) thick, shim both sides equally to establish the cutout width. Junction Box Location (see detail below)
- Page 5 Installation Instructions 2 B CUTOUT FOR STEAM OVENS - UNDER COUNTER NOTE: These ovens are only approved to be installed under the specific models as labeled on the unit. Gas or Electric Cooktops May Be Installed Over This Oven. See Cooktop Installation Instructions for Cutout Size.
- Page 6 Installation Instructions 2 C CUTOUT FOR STEAM OVEN 2 D CUTOUT FOR STEAM OVEN OVER A WARMING DRAWER OVER A WALL OVEN NOTE: Install the steam oven only with specific models listed on the label located on the outside of combined installation of a built-in steam oven and a the oven.
- Page 7 Installation Instructions 2 E CUTOUT FOR STEAM OVEN 2 F CUTOUT FOR STEAM OVEN OVER A WALL OVEN AND UNDER ANOTHER BUILT-IN STEAM WARMING DRAWER OVEN/ BUILT-IN SPEEDCOOK OVEN Construct 23-1/2 Construct solid Solid Bottom 30” bottom - Min. 23-1/2” Min.
- Page 8 Installation Instructions 2 G CUTOUT FOR STEAM OVEN 2 H FLUSHMOUNT BESIDE ANOTHER BUILT-IN STEAM INSTALLATION PREPARATION OVEN/BUILT-IN SPEEDCOOK OVEN: (Cont.) Install onto the cabinet floor between the side 23-1/2 cleats, push it all the way back against cabinet wall and make sure its front face aligns with the front faces of the side cleats (1-1/2”...
-
Page 9: Step 3, Door Removal
Installation Instructions 4 ELECTRICAL REQUIREMENTS 3 DOOR REMOVAL NOTE: Door removal is not a requirement WARNING This appliance must be properly for installation of the product but is an added grounded. convenience. WARNING To remove the door: To prevent fire or shock, do not use A. -
Page 10: Step 5, Make Electrical Connections
To check availability or wiring. The insulation of these 3 leads is rated for temperatures much higher than the temperature rating order parts, visit monogram.com. of the household wiring. The current-carrying capacity of the conductor is governed by the wire gauge and the temperature rating of the insulation around the wire. -
Page 11: Step 6, Three-Conductor Branch
Installation Instructions 6 THREE-CONDUCTOR BRANCH 7 FOUR-CONDUCTOR BRANCH CIRCUIT CONNECTION CIRCUIT CONNECTION NOTE: If residence leads are aluminum conductors, NOTE: If residence leads are aluminum conductors, see WARNING in Section 4, Electrical Requirements. see WARNING in Section 5, Electrical Requirements. When connecting to a three-conductor branch circuit, if When connecting to a four-conductor branch circuit, if local codes permit:... -
Page 12: Step 8, Slide Oven Into Opening
Installation Instructions 8 SLIDE OVEN INTO OPENING 9 INSTALL MOUNTING SCREWS A. Loop (do not tie) a 36” (91 cm) string around the WARNING conduit before the oven is slid into place. This will Mounting screws must be used. keep the conduit from falling behind the oven. Failure to do so could result in the oven falling out of the cabinet, causing serious injury. -
Page 13: Step 10, Replacing The Oven Door
Installation Instructions 11 FINAL INSTALLATION 10 REPLACING THE OVEN DOOR CHECKLIST NOTE: The oven door is heavy. You may need help lifting the door high enough to slide it into the hinge slots. Do not lift the door by the handle. (RESET) or the circuit fuses are replaced. - Page 14 NOTE: While performing installations described in this book, safety glasses or goggles should be worn. NOTE: Product improvement is a continuing endeavor at Monogram Appliances. Therefore, materials, appearance and specifications are subject to change without notice. 31-2000693 Rev. 0 01-20 GEA...
- Page 15 INSTRUCCIONES DE INSTALACIÓN Horno a Vapor Incorporado ZMB9032, ZMB9031 MONOGRAM.COM...
- Page 16 “enchufe y receptáculo”. ZMB9031 - Acero Inoxidable PARA SU SEGURIDAD: Café Min Models: ZMB9032 - Acero Inoxidable ADVERTENCIA Antes de comenzar la instalación, desconecte la energía del panel de servicio y bloquee los medios de desconexión para evitar el accionamiento de la energía de manera accidental.
- Page 17 Instrucciones de Instalación MATERIALES QUE PUEDE NECESITAR INFORMACIÓN DE DISE Caja de conexiones INSTALACIONES DEL HORNO A VAPOR Tapones de alambre El horno a vapor se podrá instalar en un gabinete de forma Abrazadera de alivio de tensión para conducto de 1/2” individual o sobre el cajón de calentamiento, en el horno de pared simple, o debajo de otro horno de vapor o un horno 36”...
- Page 18 Instrucciones de Instalación ESPACIOS LIBRES PARA HORNO A VAPOR EN GABINETES DE PARED NOTA: Si el gabinete no cuenta con un armazón frontal y los lados son menores a un grosor de 3/4” (1,9 cm), coloque cuñas uniformemente sobre ambos lados para establecer al ancho de la abertura. Ubicanción de la caja de conexiones...
- Page 19 Instrucciones de Instalación ESPACIO LIBRE PARA HORNOS A VAPOR – DEBAJO DE LA MESADA NOTE: These ovens are only approved to be installed under the specific models as labeled on the unit. Pueden instalarse estufas a gas o eléctricas sobre este horno. Ver las instrucciones de instalación de la estufa para el tamaño de la abertura.
- Page 20 Instrucciones de Instalación ESPACIO LIBRE PARA ESPACIO LIBRE PARA HORNOS A VAPOR SOBRE UN HORNOS A VAPOR SOBRE UN HORNO CAJÓN DE CALENTAMIENTO DE PARED NOTA: Instale el horno a vapor sólo con los modelos específicos que figuran en la lista de la etiqueta que se combinada de un horno a vapor incorporado y un horno encuentra en la parte exterior del horno.
- Page 21 Instrucciones de Instalación ESPACIO LIBRE PARA ESPACIO LIBRE PARA EL HORNOS A VAPOR SOBRE UN HORNO HORNO DEBAJO DE OTRO HORNO A DE PARED Y UN CAJÓN DE VAPOR INCORPORADO/ HORNO CALENTAMIENTO SPEEDCOOK INCORPORADO Construya una Base Sólida de Construya 30”...
- Page 22 Instrucciones de Instalación ESPACIO LIBRE PARA EL PREPARACIÓN PARA LA HORNO A VAPOR JUNTO A OTRO INSTALACIÓN CON MONTAJE HORNO A VAPOR INCORPORADO/ NIVELADO (Cont.) HORNO SPEEDCOOK INCORPORADO: Realice la instalación sobre el piso del gabinete entre los dos ristreles laterales, empuje completamente hacia atrás contra la pared del gabinete y asegúrese de que su cara frontal 23-1/2 se alinee con las caras frontales de los ristreles laterales...
- Page 23 Instrucciones de Instalación REQUISITOS ELÉCTRICOS REMOCIÓN DE LA PUERTA NOTA: La remoción de la puerta no es un requerimiento ADVERTENCIA Este aparato debe contar con una de la instalación del producto, pero es una comodidad adecuada conexión a tierra. adicional. Para quitar la puerta: ADVERTENCIA Para prevenir un incendio o...
- Page 24 Para verificar la a temperaturas mucho más elevadas que la clasificación del disponibilidad o solicitar piezas, visite monogram.com. cableado doméstico. La capacidad de transmitir corriente del conductor está determinada por el calibre del cable y la clasificación de temperatura de la aislación alrededor del cable.
- Page 25 Instrucciones de Instalación CONEXIÓN DE CIRCUITO CONEXIÓN DE CIRCUITO DERIVADO DE TRES DERIVADO DE CUATRO CONDUCTORES CONDUCTORES NOTA: Si los cables domésticos son conductores de NOTA: Si los cables del hogar poseen conductores de aluminio, ver la ADVERTENCIA de la sección 5, Requisitos aluminio, ver la ADVERTENCIA de la sección 5, Requisitos eléctricos.
- Page 26 Instrucciones de Instalación 9 INSTALE LOS TORNILLOS DE DESLICE EL HORNO DENTRO DE LA ABERTURA MONTAJE A. Enrosque (no ate) un hilo de 36” (91 cm) alrededor del ADVERTENCIA conducto antes de deslizar el horno en su lugar. Esto no Se deberán usar los tornillos de permitirá...
- Page 27 Instrucciones de Instalación LISTA DE CONTROL FINAL DE LA REEMPLAZO DE LA PUERTA INSTALACIÓN TÉRMICA DEL HORNO NOTA: La puerta del horno es pesada. Puede necesitar cerrado (RESET) o que los fusibles del circuito se hayan ayuda para levantar la puerta lo suficiente como para reemplazado.
- Page 28 NOTA: Al realizar las instalaciones descriptas en este libro, se deberán usar anteojos o gafas de seguridad. NOTA: Monogram Appliances se esfuerza de forma constante para mejorar sus productos. Por lo tanto, los materiales, el aspecto y las especificaciones están sujetos a cambios sin aviso previo 49-2000693 Rev.